Table of Contents
Advertisement
Quick Links
Download this manual
See also:
User Manual
Advertisement
Table of Contents

Subscribe to Our Youtube Channel
Summary of Contents for Adaptec AUA-1420
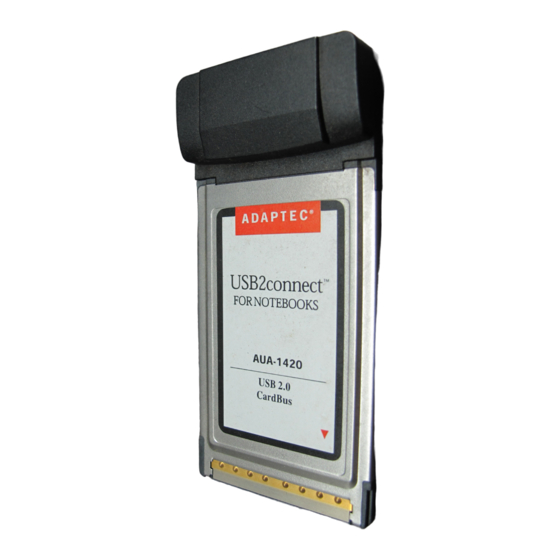
- Page 1 AUA-1420 USB2connect for Notebooks Adapter Installation Guide...
-
Page 2: Taking Inventory
This Installation Guide describes how to install the Adaptec AUA-1420 USB2connect for Notebooks adapter and its associated drivers in a notebook computer. Taking Inventory Your USB2connect for Notebooks kit includes the USB2connect for Notebooks adapter and the USB2connect for Notebooks CD, which... - Page 3 Installation for Windows Notebooks With your notebook computer on, insert the USB2connect for Notebooks adapter in the CardBus slot. CardBus slot USB2connect for Notebooks adapter Insert the USB2connect for Notebooks CD. Proceed with instructions appropriate to your operating system: Windows XP on page 3 Windows 2000 on page Windows Me on page Windows 98 SE on page...
-
Page 4: Windows Xp
Windows XP Continue here after performing steps outlined on Start Windows XP. Windows XP will automatically discover the new hardware and start the Found New Hardware Wizard to walk you through the device driver installation. Select Install from a list or specific location (Advanced), then select Next. - Page 5 Select Don’t search, I will choose the driver to install, then click Next. Click Next again. Click Have Disk.
- Page 6 Insert the Adaptec USB2connect CD into the CD-ROM drive. Type the drive letter for your CD-ROM drive in the files from box, as shown below, and click OK. Note: Your CD-ROM drive may have a different drive letter than the one shown in the example above.
-
Page 7: Windows 2000
Windows 2000 Continue here after performing steps outlined on When the Found New Hardware Wizard begins, click Next, accepting the recommendations and defaults presented by the wizard. On the Locate Driver Files window, uncheck all options except CD-ROM drives, and click Next. page... - Page 8 On the Driver Files Search Results window, ensure that Install one of the other drivers is not checked, and click Next. When Windows is finished copying drivers, click Finish. Restart your computer if prompted to do so. Note: For instructions on removing the USB2connect for Notebooks adapter from a Windows 2000 notebook, see the USB2connect for Notebooks User’s Guide on the CD.
-
Page 9: Windows Me
Windows Me Continue here after performing steps outlined on When the Add New Hardware Wizard opens, click Next. If you see a message that the PCI Universal Serial Bus driver was not located, select Automatic search for a better driver (Recommended). Then, click Next. -
Page 10: Windows 98 Se
Windows 98 SE Windows 98 SE requires two device driver installations using the Add New Hardware Wizard because the operating system has no embedded USB drivers. During driver installation, you may need to use the Windows 98 SE CD. Continue here after performing steps outlined on The Found New Hardware Wizard opens. - Page 11 In the next screen, select The updated driver (Recommended) and click Next. You may see a message that Windows is searching for the driver. Click Next. If prompted to do so, insert your Windows 98 CD in your CD-ROM drive and click OK. If you see the Copying Files screen, provide the appropriate pathname for the CD-ROM drive.
- Page 12 Installation for Macintosh Notebooks With the PowerBook on, insert the USB2connect for Notebooks CD. Double-click the Start Installation Here installer file on the CD. Read the directions carefully and follow all installation instructions. After the installation is complete, restart the PowerBook. Once the system has restarted, insert the USB2connect for Notebooks adapter in the CardBus slot of your PowerBook.
- Page 13 Adaptec, Inc. 691 South Milpitas Boulevard Milpitas, CA 95035 USA © 2001-2002 Adaptec, Inc. All rights reserved. Adaptec and the Adaptec logo are trademarks of Adaptec, Inc. which may be registered in some jurisdictions. Part Number: 513014-06, Ver. AB LB 03/02...


Need help?
Do you have a question about the AUA-1420 and is the answer not in the manual?
Questions and answers