Metrohm 917 Manual
Coulometer
Hide thumbs
Also See for 917:
- Tutorial (67 pages) ,
- Manual - short instructions (35 pages) ,
- Manual - short instructions (45 pages)
Table of Contents
Advertisement
Advertisement
Table of Contents

Related Manuals for Metrohm 917


Summary of Contents for Metrohm 917
- Page 1 917 Coulometer Manual 8.917.8004EN / 2020-03-11...
- Page 3 Metrohm AG CH-9100 Herisau Switzerland Phone +41 71 353 85 85 Fax +41 71 353 89 01 info@metrohm.com www.metrohm.com 917 Coulometer Program version 5.917.0021 Manual 8.917.8004EN / 2020-03-11...
- Page 4 Technical Communication Metrohm AG CH-9100 Herisau techcom@metrohm.com This documentation is protected by copyright. All rights reserved. This documentation has been prepared with great care. However, errors can never be entirely ruled out. Please send comments regarding possible errors to the address above.
-
Page 5: Table Of Contents
Connecting MSB devices ............ 21 4.5.1 Connecting a dosing device ........... 22 4.5.2 Connecting an additional stirrer or titration stand ....23 4.5.3 Connecting a Remote Box ............. 23 Connecting USB devices ............. 24 4.6.1 General ................. 24 ■■■■■■■■ 917 Coulometer... - Page 6 Measured value display ............54 Acoustic signals ..............54 8 Reagents Editing reagent data ............55 Reagent monitoring ............56 9 Sensors Adding a new sensor ............60 Editing the sensor data ............60 Monitoring the working life ..........61 ■■■■■■■■ 917 Coulometer...
- Page 7 10.3.2 PC/LIMS report ..............67 10.3.3 Shared memory ..............68 10.3.4 TCP/IP settings ............... 70 10.4 Metrohm control instruments ........... 71 10.4.1 Properties – Measuring input ..........72 10.4.2 Properties – MSB connector ........... 73 10.4.3 Properties – Peripheral devices ..........74 10.5 Printer ..................
- Page 8 Note ..................140 15.5.6 Saving a determination automatically ........140 16 Electronic signatures 16.1 Signing methods/determinations electronically .... 143 16.2 Deleting electronic signatures ......... 144 17 Control 18 Favorites 18.1 Creating favorites ............. 150 18.1.1 Editing favorites ..............150 ■■■■■■■■ 917 Coulometer...
- Page 9 23.6 Saving a determination ............ 184 23.7 Curves ................185 23.8 Recalculation and reevaluation ........187 24 Statistics 24.1 Displaying details for a result .......... 190 24.2 Deleting statistical data ........... 191 24.3 Adding a determination to a determination series ..191 ■■■■■■■■ 917 Coulometer...
- Page 10 28.2.2 Titration parameters ............232 28.2.3 Stop conditions ..............233 28.2.4 Conditioning ............... 233 28.2.5 Cell ..................235 28.2.6 Sensor ................. 236 28.2.7 Stirrer .................. 237 28.3 Measurements (MEAS) ............. 238 28.3.1 Measuring parameters ............238 ■■■■■■■■ VIII 917 Coulometer...
- Page 11 29 Operation and maintenance 29.1 System initialization ............287 29.2 Maintenance ..............288 30 Troubleshooting 30.1 Editing methods ............... 289 30.2 Sample table ..............289 30.3 Results/Statistics ............... 289 30.4 Printing ................290 30.5 Manual control ..............290 ■■■■■■■■ 917 Coulometer...
- Page 12 32.2 Measuring inputs .............. 316 32.2.1 Generator electrode ............. 316 32.2.2 Indicator electrode .............. 316 32.2.3 Temperature sensor ............. 316 32.2.4 Determination range ............317 32.2.5 Resolution ................317 32.2.6 Reproducibility ..............317 32.3 Internal stirrer ..............317 ■■■■■■■■ 917 Coulometer...
- Page 13 32.4 Pump ................. 317 32.5 Interfaces and connectors ..........318 32.6 Power supply ..............318 32.7 Declarations of Conformity ..........318 32.8 Ambient temperature ............319 32.9 Reference conditions ............319 32.10 Dimensions ................ 319 33 Accessories Index ■■■■■■■■ 917 Coulometer...
- Page 14 Evaluation of minimum and maximum ........... 245 Figure 18 Rotational speed depending on the stirring rate ......296 Figure 19 Connectors of the Remote Box ............297 Figure 20 Pin assignment of remote socket and plug ........297 ■■■■■■■■ 917 Coulometer...
-
Page 15: Introduction
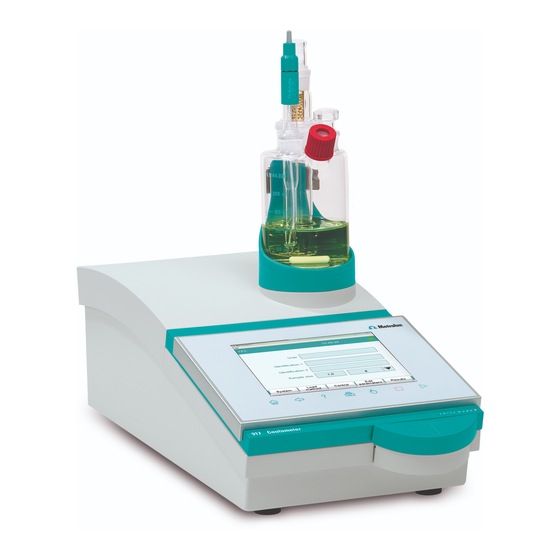
The upper side of the housing offers space for the titration cell. Thanks to its compact construction, you can use the 917 Coulometer in a small space as a stand-alone titrator. -
Page 16: Connectors
For connecting tubing for replacing reagent using the built-in pump. 1.1.3 Intended use The 917 Coulometer is designed for usage as a titrator in analytical labora- tories. Its main application field is coulometric Karl Fischer titration. This instrument is suitable for processing chemicals and flammable sam- ples. -
Page 17: Symbols And Conventions
WARNING This symbol draws attention to a possible biological hazard. CAUTION This symbol draws attention to possible damage to instruments or instrument parts. NOTE This symbol highlights additional information and tips. ■■■■■■■■ 917 Coulometer... -
Page 18: Safety Instructions
The electrical safety when working with the instrument is ensured as part of the international standard IEC 61010. WARNING Only personnel qualified by Metrohm are authorized to carry out service work on electronic components. WARNING Never open the housing of the instrument. The instrument could be damaged by this. -
Page 19: Tubing And Capillary Connections
Set up the instrument in a well-ventilated location (e.g. fume cup- ■ board). Keep all sources of flame far from the workplace. ■ Clean up spilled liquids and solids immediately. ■ Follow the safety instructions of the chemical manufacturer. ■ ■■■■■■■■ 917 Coulometer... -
Page 20: Recycling And Disposal
The correct disposal of your old instrument will help to prevent negative effects on the environment and public health. More details about the disposal of your old instrument can be obtained from your local authorities, from waste disposal companies or from your local dealer. ■■■■■■■■ 917 Coulometer... -
Page 21: Overview Of The Instrument
Fixed key [STOP] 10 Fixed key [START] Cancels the running determination. Starts a determination. 11 Magnetic stirrer For placing the titration vessel holder. ■■■■■■■■ 917 Coulometer... -
Page 22: Rear Of The Instrument
For connecting temperature sensors (Pt1000 or NTC). Two B sockets, 2 mm. MSB connector (MSB 1 and MSB 2) Generator electrode connector (Gen.) Metrohm Serial Bus. For connecting external For connecting the generator electrode. dosing devices, stirrers or a Remote Box. Mini DIN, 8-pin. -
Page 23: Installation
Place the instrument in a location of the laboratory which is suitable for operation, free of vibrations, protected from corrosive atmosphere, and contamination by chemicals. The instrument should be protected against excessive temperature fluctua- tions and direct sunlight. ■■■■■■■■ 917 Coulometer... -
Page 24: Setting Up The Titration Cell For Coulometry
2 Insert the 6.1464.320 titration cell into the titration vessel holder. 4.2.2 Preparing the titration cell Filling the adsorber tube Before setting up the titration cell, the 6.1403.030 adsorber tube has to be filled with 6.2811.000 molecular sieve. Proceed as follows: ■■■■■■■■ 917 Coulometer... -
Page 25: Figure 4 Filling The Adsorber Tube
4 Seal the adsorber tube with the appropriate cover. NOTICE Note that the molecular sieve must be replaced at regular intervals. Each time you refill the adsorber tube with molecular sieve, you can, for example, write the date directly on the adsorber tube. ■■■■■■■■ 917 Coulometer... -
Page 26: Figure 5 Equipping The Titration Cell
Take care to ensure that the edges of the ground-joint sleeves are cut to size cleanly and that there are no fringes. The ground-joint sleeves must not protrude at the lower edge of the ground-joint opening. 3 Insert the 6.1403.030 adsorber tube into the generator electrode. ■■■■■■■■ 917 Coulometer... - Page 27 6.2738.000 funnel. The level of the anolyte should be roughly 1 to 2 mm above the level of the catholyte. 3 Close the remaining ground-joint opening on the right with the 6.1437.000 ground-joint stopper (with ground-joint sleeve attached). ■■■■■■■■ 917 Coulometer...
-
Page 28: Mounting The Addition And Aspiration Tube
6 Connect the tubing for the aspiration of the titration cell at the lower connector of the addition and aspiration tube (6). Details regarding how to connect the addition tubing and the aspiration tubing can be found in the tutorial for the 917 Coulometer. ■■■■■■■■ 917 Coulometer... -
Page 29: Connecting The Coulometer To The Power Supply
4 Installation Connecting the coulometer to the power supply Connecting the power supply unit The 917 Coulometer has an external power supply unit for a 24 V power supply (DC). This is connected to the power socket of the coulometer. WARNING An incorrect supply voltage can damage the instrument. -
Page 30: Connecting Sensors
Mark the screw heads of the cables accordingly. 4.4.1 Connecting generator electrodes Screwing the electrode cable to the generator electrode 1 Unscrew the protective cap from the generator electrode. ■■■■■■■■ 917 Coulometer... -
Page 31: Figure 8 Unscrewing The Protective Cap From The Generator Electrode
2 Tighten the 6.2104.120 electrode cable to the generator electrode. 6.2104.120 Figure 9 Screwing the electrode cable to the generator electrode Connecting the electrode cable to the coulometer 1 Plug the electrode plug into the Gen. socket of the coulometer. ■■■■■■■■ 917 Coulometer... -
Page 32: Connecting Indicator Electrodes
Screwing the electrode cable to the indicator electrode 1 Unscrew the protective cap from the indicator electrode. Figure 11 Unscrewing the protective cap from the indicator elec- trode 2 Tighten the 6.2104.020 electrode cable to the indicator electrode. ■■■■■■■■ 917 Coulometer... -
Page 33: Figure 12 Screwing The Electrode Cable To The Indicator Electrode
4 Installation 6.2104.020 Figure 12 Screwing the electrode cable to the indicator electrode Connecting the electrode cable to the coulometer 1 Plug the electrode plug into the Ind. socket of the coulometer. Figure 13 Connecting an indicator electrode ■■■■■■■■ 917 Coulometer... -
Page 34: Connecting A Temperature Sensor
1 Insert the plugs of the temperature sensor into the Temp. sockets of the coulometer. NOTICE Always insert the red plug into the red socket. This is the only way that shielding against electrical interference can be ensured. ■■■■■■■■ 917 Coulometer... -
Page 35: Connecting Msb Devices
Connecting MSB devices In order to connect MSB devices, e.g. dosing devices or Remote Box, the Coulometer has two connectors to what is referred to as the Metrohm Serial Bus (MSB). Various peripheral devices can be connected in sequence (daisy chain) at a single MSB connector (8-pin Mini DIN socket) and be controlled simultaneously by the Coulometer. -
Page 36: Connecting A Dosing Device
MSB connections can be extended with the 6.2151.010 cable. The maxi- mum connection length permitted is 6 m. 4.5.1 Connecting a dosing device You can connect two dosing devices to the Coulometer. The types of dosing devices that are supported are: 800 Dosino ■ 805 Dosimat ■ ■■■■■■■■ 917 Coulometer... -
Page 37: Connecting An Additional Stirrer Or Titration Stand
Instruments that are controlled via remote lines and/or that send control signals via remote lines can be connected via the 6.2148.010 Remote Box. In addition to Metrohm, other instrument manufacturers also use similar connectors that make it possible to connect different instruments together. -
Page 38: Connecting Usb Devices
Connecting USB devices 4.6.1 General The 917 Coulometer has a USB connector (Type A socket) for peripheral devices with USB interface. If you wish to connect more than one device to the USB, you can use a commercially available USB hub. -
Page 39: Connecting A Balance
ME 46278 foot switch Ohaus Voyager, Explorer, Analyti- Cable AS017-09 from Ohaus cal Plus Precisa balances with RS-232-C 6.2125.080 + 6.2125.010 interface Sartorius MP8, MC, LA, Genius, 6.2134.060 Cubis Shimadzu BX, BW 6.2125.080 + 6.2125.010 ■■■■■■■■ 917 Coulometer... -
Page 40: Connecting A Pc Keyboard
The barcode reader is used as an aid for text and numerical input. You can connect a barcode reader with USB interface. Connect the barcode reader as follows: 1 Connect the USB plug of the barcode reader with the USB connector of the Coulometer (Type A). ■■■■■■■■ 917 Coulometer... -
Page 41: Connecting The Coulometer To A Network
6 Exit the programming mode. Connecting the Coulometer to a network The 917 Coulometer has a network connection (Ethernet). This can be used to integrate your Coulometer in your network. You can, for example, store data on a PC within the network or print reports on a network printer. -
Page 42: Titrations
Pt electrode. This produ- ces a voltage difference between the Pt wires, which significantly declines when lowest amounts of free iodine are present. This circumstance is used for detecting the endpoint of the titration. ■■■■■■■■ 917 Coulometer... -
Page 43: Bromine Index Determination (Brc)
No titer needs to be determined as the bromine index determination is an absolute determination. The bromine index is usually indicated in mg bromine per 100 g sample. ■■■■■■■■ 917 Coulometer... -
Page 44: Operation
Press the power switch on the left-hand side of the back panel of ■ the 917 Coulometer. The 917 Coulometer is initialized. A system test is performed. This process takes some time. NOTICE If a buret unit is connected, then a request appears to carry out the Prepare function: All tubings and the cylinder are rinsed with the Prepare function. -
Page 45: Fundamentals Of Operation
You can always return to the main dialog by touching [ In order to activate an element on the 917 Coulometer user interface, just touch the screen with your fingertip, finger nail, the eraser of a pencil or a stylus (special tool for operating instruments with touch-sensitive screens). -
Page 46: Display Elements And Controls
In the other dialogs, the title bar shows the headings of the next upper level and of the displayed dialog. This is an aid for orientation during navi- gation through the user dialog. Table 2 Screen elements Buttons open a new dialog when they are tap- ped. ■■■■■■■■ 917 Coulometer... -
Page 47: Status Display
The instrument is in normal status. The working medium is being conditioned. Conditioning has been paused. The working medium is conditioned. A method has been started. A method has been paused. An action has been started in manual control. ■■■■■■■■ 917 Coulometer... -
Page 48: Entering Text And Numbers
[A…Z]. The upper-case letters are displayed again by tapping. [0…9] Numbers and mathematical characters are dis- played. [Special charac- Special characters are displayed. You can use the ters] button [More] to navigate through all available characters. ■■■■■■■■ 917 Coulometer... - Page 49 (see chapter 31.6, page 300). You can select the result variable by touching [R1]. NOTICE A commercially available USB keyboard can be connected to make it easier for text and numerical input. The key assignment is described in chapter 10.8, page 82. ■■■■■■■■ 917 Coulometer...
-
Page 50: System Settings
English and German, additional languages can be selected. Proceed as follows to select the dialog language: 1 Opening the system settings In the main dialog, tap on [System]. ■ Tap on [System settings]. ■ The System / System settings dialog is displayed. ■■■■■■■■ 917 Coulometer... -
Page 51: Setting The Date, Time And Local Time
Enter the current time in the format hh:mm:ss (24-hour format) ■ and confirm with [OK]. The arrow keys [⇦] and [⇨] are used to move the cursor to the left or to the right by one character. The input is saved and the editor is closed. ■■■■■■■■ 917 Coulometer... -
Page 52: System-Specific Dialog Options
Expert dialog | Routine dialog Expert dialog All functions that are supported by the system are available. Routine dialog The user dialog can be limited for routine operations. Only selected functions are available (see Configuring the routine dialog, page 40). ■■■■■■■■ 917 Coulometer... - Page 53 Operation without login function: ■ In the main dialog, enter User = Metrohm. Operation with login function: ■ A user who works with expert dialog must log in.
- Page 54 Proceed as follows to modify the configuration for the routine dialog: 1 Opening the dialog Tap on the [Routine dialog] button. The list of all buttons in the main dialog, in the manual control, etc. is displayed: ■■■■■■■■ 917 Coulometer...
-
Page 55: User Administration
Keep the access rights for a user with administrator rights in a safe place so that they are accessible in an emergency. ■■■■■■■■ 917 Coulometer... - Page 56 Create an identification profile for the selected user on a storage medium (see chapter 7.3.2, page 46). [New] Adding a new user to the list (see chapter 7.3.1, page 43). [Delete] Delete the selected user from the list. ■■■■■■■■ 917 Coulometer...
-
Page 57: Editing The User Configuration
Each file always contains the name of the user who created it and the name of the last user to edit it. Entry 24 characters maximum Default value empty Full name Complete name of the user. Entry 24 characters maximum Default value empty ■■■■■■■■ 917 Coulometer... - Page 58 Assign the permission to use and sign methods (see ""Edit user / Signature method" dialog", page 44). [Signature determ.] Assign the permission to use and sign determinations (see ""Edit user / Signature determination" dialog", page 45). "Edit user / Signature method" dialog User: Edit ▶ Signature method ■■■■■■■■ 917 Coulometer...
- Page 59 "Edit user / Signature determination" dialog User: Edit ▶ Signature determ. Authorizations for signing determinations can be defined in this dialog. These settings are only effective if you are working with the login function enabled and password protection. ■■■■■■■■ 917 Coulometer...
-
Page 60: Creating An Identification Profile
Before you create the identification profile, check whether the desired rou- tine dialog settings are active. 1 Plug in a storage medium Plug in the USB storage medium. 2 Select a user In the user list, select the user for whom the profile is to be created. ■■■■■■■■ 917 Coulometer... -
Page 61: Defining Login Options
This means that you must make sure that you have first defined all the users and created the identification profiles before you activate the login function. ■■■■■■■■ 917 Coulometer... - Page 62 If this option is activated, then only the same user may log in again after he or she has logged out. Users with administrator rights can, however, log in at any time. [Audit Trail] Define the settings for recording an Audit Trail (see chapter 7.3.7, page 52). ■■■■■■■■ 917 Coulometer...
-
Page 63: Password Options
If the user has logged in incorrectly this many times, then it will automati- cally be deactivated. It can only be reactivated by a user with administra- tor rights. Input range 2 - 5 Selection Default value ■■■■■■■■ 917 Coulometer... - Page 64 Use the function Restore to reload the data from the backup into your system (see chapter 11.3.1, page 92). Deactivate the options User list and System settings / User admin.. 4 Switch on the Coulometer Switch the Coulometer back on again after a few seconds. ■■■■■■■■ 917 Coulometer...
-
Page 65: Modification Options
▶ Reasons In the dialog Login options / Reasons, you can create a selection list containing reasons from which a selection can be made when signing and modifying methods and determinations. Some reasons have already been provided. ■■■■■■■■ 917 Coulometer... -
Page 66: Audit Trail
AuditTrailViewer can be found in the Appendix (chapter 31.7, page 301). If necessary, you can delete all of the entries in the Audit Trail with [Delete Audit Trail]. Do not fail to create a backup before doing so, however. ■■■■■■■■ 917 Coulometer... - Page 67 System log on | off (Default value: off) If this option is activated, then the program start and the displayed mes- sages of the following types will be recorded: : General warning messages ■ : Error messages ■ ■■■■■■■■ 917 Coulometer...
-
Page 68: Measured Value Display
Each time a button is touched on the touch screen, this will be con- firmed by an acoustic signal. External data input ■ An acoustic signal will provide confirmation each time data is received from external devices (e.g. balance, barcode reader). ■■■■■■■■ 917 Coulometer... -
Page 69: Reagents
Add a new reagent to the list, see following chapter. [Delete] Delete the selected reagent from the list. [Edit] Edit the data of the selected reagent, see following chapter. Editing reagent data Main dialog: System ▶ Reagents ▶ New / Edit ■■■■■■■■ 917 Coulometer... -
Page 70: Reagent Monitoring
The conditions for the monitoring of the reagent are defined in the dialog Edit reagent / Reagent monitoring. If one of the following values is reached, then the reagent must be replaced. The values are checked in the following cases: at the start of the determination. ■ ■■■■■■■■ 917 Coulometer... - Page 71 Display the status overview of the current values of the reagent monitor- ing. [Reagent replacement] Edit the parameters for the reagent exchange. "Reagent monitoring / Status" dialog The current reagent monitoring values are displayed in this dialog. [Reset] Reset the values to zero. ■■■■■■■■ 917 Coulometer...
- Page 72 Shared directory in the network. Method This parameter can only be edited with Reagent replacement = auto. Method used for emptying the titration cell. NOTICE Make sure that the memory is accessible. Entry 32 characters maximum Selection Selection of stored methods ■■■■■■■■ 917 Coulometer...
-
Page 73: Sensors
■ etc. ■ [New] Adding a new sensor to the list (see chapter 9.1, page 60). [Delete] Delete the selected sensor from the list. [Edit] Editing the data of the selected sensor (see chapter 9.2, page 60). ■■■■■■■■ 917 Coulometer... -
Page 74: Adding A New Sensor
Edit. Sensor The designation of the sensor is used for unambiguous identification. 24 characters maximum Entry Order number Order number of the sensor. Entry 24 characters maximum Default value empty Serial number Serial number of the sensor. ■■■■■■■■ 917 Coulometer... -
Page 75: Monitoring The Working Life
Default value 999 days Expiry date If you define an expiry date, then the Working life will be tracked auto- matically. Format: YYYY:MM:DD Action Selection of the action which is carried out when the time interval has expired. ■■■■■■■■ 917 Coulometer... - Page 76 A message is displayed. You can select whether you want to continue with the determination or cancel the run. Document message In the determination data it will be documented, that the time interval has been expired. Cancel determination The determination is stopped. ■■■■■■■■ 917 Coulometer...
-
Page 77: Device Manager
The instrument list gives the name and type of every instrument. The Ti- Touch titrator is a component of the 917 Coulometer and therefore per- manently entered as control instrument in the device manager. Peripheral devices (dosing devices, stirrers, etc.) connected to the MSB connector are... -
Page 78: Adding A New Device
The description of the individual instruments can be found in the follow- ing specific chapters: Coulometer (see chapter 10.3, page 65) ■ Metrohm control instruments (see chapter 10.4, page 71) ■ Printer (see chapter 10.5, page 74) ■ Balance (see chapter 10.6, page 79) ■... -
Page 79: Coulometer
■■■■■■■■■■■■■■■■■■■■■■ 10 Device manager 10.3 Coulometer Instrument list: 917 Coulometer ▶ Edit Device name This designation is used for identification purposes when selecting control devices (command, manual control). Entry 24 characters maximum Comment Entry 24 characters maximum Switch off display If this time interval has expired without the Coulometer having been oper- ated, then the display will be switched off. -
Page 80: E-Mail
Configuring e-mail dispatch Proceed as follows so that messages can be sent as e-mails: 1 Activating the option In the instrument properties of the 917 Coulometer, tap on the ■ [E-mail] button. In the Edit device / E-mail dialog, activate the Send the fol- ■... -
Page 81: Pc/Lims Report
Mail server Address of the mail server for outgoing mail, e.g. mail.metrohm.ch. You can find the address of the mail server either in your e-mail program set- tings or obtain it from your IT department. -
Page 82: Shared Memory
ASCII code (e.g. Russian, Chinese, Korean, etc.). 10.3.3 Shared memory 917 Coulometer: Edit ▶ Shared memory If you have your Coulometer connected to your network, then you can specify in this dialog a shared memory location on a PC within your net- work for the purpose of saving data (methods, determinations, etc.). - Page 83 Leave the field empty if the computer is not located within a domain. Entry max. 32 characters Default value empty User User name of the user authorized to access the shared memory location. max. 32 characters Entry empty Default value Password Password of the user configured on the computer. ■■■■■■■■ 917 Coulometer...
-
Page 84: Tcp/Ip Settings
10.3.4 TCP/IP settings 917 Coulometer: Edit ▶ TCP/IP settings If you have connected your Coulometer to your network, then you have to define the network-relevant settings in this dialog. The Coulometer requires an IP address so that it is identifiable on the network. The Coul- ometer can acquire the IP address either dynamically from a DHCP server or you can enter the address directly. -
Page 85: Metrohm Control Instruments
Unambiguous designation of the device within the network. This parame- ter cannot be edited. 10.4 Metrohm control instruments The following Metrohm devices can be used as control instruments: Ti-Touch Titrator (permanently entered as control instrument in the ■ device manager) The following specifications apply for all of the control instruments men- tioned above. -
Page 86: Properties - Measuring Input
■■■■■■■■■■■■■■■■■■■■■■ 10.4 Metrohm control instruments 10.4.1 Properties – Measuring input Instrument list: Control instrument ▶ Edit ▶ Measuring input 1 ▶ Properties In this dialog, you define the type of temperature sensor you have con- nected to the selected measuring input. -
Page 87: Properties - Msb Connector
1000 - 99999 ohm Input range 30000 ohm Default value The default value applies to Metrohm sensors with an NTC sensor. B value This parameter can only be edited with Type = NTC. Material constant of the NTC sensor. B values of NTC sensors are fre- quently based on different reference temperatures (usually 25 °C and... -
Page 88: Properties - Peripheral Devices
Properties – Peripheral devices Instrument list: Control instrument ▶ Edit ▶ Peripheral device ▶ Properties The following data is displayed for the connected dosing devices and stir- rers: Type ■ Serial number ■ 10.5 Printer Instrument list: Printer ▶ Edit ■■■■■■■■ 917 Coulometer... - Page 89 360 dpi (or a multiple thereof, e.g. an Epson), then the text will be printed out somewhat smaller than with printers with a resolution of 300 dpi (or a multiple thereof, e.g. a Canon or HP). ■■■■■■■■ 917 Coulometer...
-
Page 90: Pdf Settings
| off (Default value: on) If this option is activated, then the PDF file can be printed. Change the document allowed on | off (Default value: off) If this option is activated, then the PDF file can be edited. ■■■■■■■■ 917 Coulometer... -
Page 91: Network Printer
Please note that the Share name of a network printer often does not match the name of the printer. The share name can be found on the Release tab in the Properties dialog of the released network printer. Entry max. 32 characters Default value empty ■■■■■■■■ 917 Coulometer... -
Page 92: More Options
| off (Default value: on) If this option is activated, then you can continue to work while the printer is printing. If this option is deactivated, then the Coulometer will be blocked while the printout is being produced. ■■■■■■■■ 917 Coulometer... -
Page 93: Balance
RS-232 interface to which the balance is connected. The interface param- eters are adjusted in the Edit device / Port parameters dialog (see chapter 10.7, page 80). COM 1 | COM 2 Selection COM 1 Default value COM 2 The interface is disabled. ■■■■■■■■ 917 Coulometer... -
Page 94: Usb/Rs-232 Adapter
NOTICE If you make changes to parameter settings in this dialog, then you must switch the Coulometer off and back on in order for the changes to take effect. ■■■■■■■■ 917 Coulometer... - Page 95 | odd | none Default value none Stop bits Number of stop bits. Selection 1 | 2 Default value Handshake Type of data transfer protocol. NOTICE In case of communication problems, try the software handshake (Soft- ware (XON/XOFF)). ■■■■■■■■ 917 Coulometer...
-
Page 96: Pc Keyboard
Default value English US To enter texts and numbers with the PC keyboard, the appropriate text and number input dialog must be opened on the Coulometer. Only the following keys on the PC keyboard have a function: ■■■■■■■■ 917 Coulometer... - Page 97 The cursor is moved to the left or [←] [→] to the right by one character. [F1] [F2] [F3] [F4] [F5] [F6] [F7] NOTICE The lettering of the USB keyboard may differ from above lettering, depending on the country-specific keyboard used. ■■■■■■■■ 917 Coulometer...
-
Page 98: Barcode Reader
Entry 24 characters maximum Barcode input target Selection of the input field for the character string read in by the barcode reader. Selection Active input field | Method | Identification 1 | Identification 2 | Sample size ■■■■■■■■ 917 Coulometer... - Page 99 Specify the country-specific keyboard layout for the emulation of the PC keyboard. This setting must match the setting on the barcode reader (see documentation for the barcode reader). Selection English US | German DE | French FR | Spanish ES | German CH Default value English US ■■■■■■■■ 917 Coulometer...
-
Page 100: File Manager
PC, although unlike your PC, only one level is possible. NOTICE The file names must be unique for each memory location, i.e. you can- not save two files with the same name, even if they are in different groups. ■■■■■■■■ 917 Coulometer... - Page 101 Display the list of all the files in the selected memory location. [Show files] Display the list of all the files in the selected group. [Rename] Rename the selected file (see chapter 11.1.2, page 88). [Properties] Display the file properties (see chapter 11.1.3, page 89). ■■■■■■■■ 917 Coulometer...
-
Page 102: Copying A File
Tap on the input field File name. ■ The text editor opens. Enter a new file name (max. 32 characters) and confirm with ■ [OK]. Tap on [OK]. ■ The file is saved under the new name. ■■■■■■■■ 917 Coulometer... -
Page 103: File Properties
The version number will be increased by one each time the file is saved. Size ■ File size. Program version ■ Program version of the software with which the file was last saved. ■■■■■■■■ 917 Coulometer... -
Page 104: External Storage Medium
Storage capacity ■ Total capacity of the storage medium. Used memory ■ Storage capacity used on the storage medium. Free memory ■ Free storage capacity on the storage medium. ■■■■■■■■ 917 Coulometer... -
Page 105: Figure 16 Directory Structure On The External Storage Medium
PDF file. Profiles The identification profile is stored in this direc- tory. The directory will be created the first time an identification profile is generated. SwUpdates Files for software updates must be saved in this directory. ■■■■■■■■ 917 Coulometer... -
Page 106: Creating Backups / Restoring Data
(see the following). Deselect the data sets which are not to be restored. ■ Tap on [Load data]. ■ The selected data blocks are restored. 3 Complete the restoration Switch the Coulometer off and on again. ■ ■■■■■■■■ 917 Coulometer... - Page 107 Current routine dialog settings (see Dialog options / Routine dia- log). Sample racks ■ The sample racks present in the properties of the USB sample pro- cessor. Own subsequences ■ All subsequences created and stored by the user. ■■■■■■■■ 917 Coulometer...
-
Page 108: Glp Manager
Further information about quality management and validation is also given in the documentation series Quality Management with Metrohm and Application Bulletin AB 255 (Validation of Metrohm Karl Fischer titra- tors in accordance with GLP/ISO 9001). The table shows the last time that each test was carried out and when the next test is to be carried out. -
Page 109: Automatic System Test
If a result is shown in red, then an error occurred when the respective test was carried out. Switch the Coulometer off and back on again. If the error still occurs pleased notify Metrohm Service. Print report at system start... -
Page 110: Glp Tests For Measurement And Titration
Define the test method, the test results, etc. (see "Dialogs "GLP ■ tests HW/SW / GLP test "Measurement"" and "GLP tests HW/SW / GLP test "Titration""", page 97). 3 Define the hardware used Tap on [Hardware]. ■ ■■■■■■■■ 917 Coulometer... -
Page 111: Parameter Description
Selection of configured users Test date Date on which the GLP was carried out. Format: YYYY:MM:DD Test result Result of the test. Selection Test OK | Test not OK Default value Test OK Comment 24 characters maximum Entry ■■■■■■■■ 917 Coulometer... - Page 112 Display message | Document message | Cancel determination Default value Display message For all three options it is documented in the deter- mination data (see dialog More determination data / Messages), that the time interval has been expired. ■■■■■■■■ 917 Coulometer...
- Page 113 Selection of the MSB connector to which the dosing device is connected. The selection does not depend on the number of MSB connectors of the control instrument. Selection 1 | 2 | 3 | 4 Default value ■■■■■■■■ 917 Coulometer...
-
Page 114: System Validation
The dialog GLP manager / System validation appears again. 4 Enter statistical data Tap on [Test statistics]. ■ Enter the statistical data for the last system validation (see ""Sys- ■ tem validation / Test statistics" dialog", page 103). Tap on the fixed key [ ■ ■■■■■■■■ 917 Coulometer... -
Page 115: Parameter Description
Enter a brief description, e.g. a summary of the SOP (standard operating procedure) according to which the system validation has been carried out. [Validation interval] Defining the time interval for the system validation (see "Dialog "System validation / Validation interval"", page 102). ■■■■■■■■ 917 Coulometer... - Page 116 Display message | Document message | Cancel determination Default value Display message For all three options it is documented in the deter- mination data (see dialog More determination data / Messages), that the time interval has been expired. ■■■■■■■■ 917 Coulometer...
- Page 117 0.00000 - 100.00000 % Default value empty % d rel Systematic deviation of the results. Input range 0.00000 - 100.00000 % Default value empty % a sys Systematic error. Input range 0.00000 - 9999999999.00000 Default value empty ■■■■■■■■ 917 Coulometer...
-
Page 118: System Monitoring
Main dialog: System ▶ GLP manager ▶ Monitoring ▶ Service inter- In the dialog GLP manager / Service interval, you can define the time interval for the maintenance of the system by the Metrohm Service department. The service interval is checked each time the system is started. - Page 119 Next backup will be tracked automatically. Input range 1 - 999 days Default value 999 days Next backup If you specify a date for the next backup, then the Backup interval will be tracked automatically. Format: YYYY:MM:DD ■■■■■■■■ 917 Coulometer...
-
Page 120: Common Variables
The designation and the value (including the unit) are displayed for every common variable in the list. [Delete] Delete the selected common variable from the list. [Edit] Edit the data of the selected common variable, see following chapter. ■■■■■■■■ 917 Coulometer... -
Page 121: Editing Common Variables
% | mol/L | mmol/L | g/L | mg/L | mg/mL | mg/100 g | ppm | g | mg | µg | mL | µL | mg/ piece | °C | µg/min | mL/min | µL/min Default value ■■■■■■■■ 917 Coulometer... -
Page 122: Properties Of Common Variables
Method status (only for automatic assignment from the determina- ■ tion run) Determination status (only for automatic assignment from the ■ determination run) Last assignment ■ Date and time of the last assignment. User ■ User who assigned the value to the common variable. ■■■■■■■■ 917 Coulometer... -
Page 123: Monitoring Validity
(see dialog More determination data / Messages), that the time interval has been expired. Display message A message is displayed. You can select whether you want to continue with the determination or cancel the run. ■■■■■■■■ 917 Coulometer... -
Page 124: Assigning A Result Automatically To A Common Varia- Ble
[Edit]. The editing dialog of the result is displayed. 2 Define result options Tap on the [Result options] button. ■ Activate the parameter Save as common variable. ■ Define Variable = CV01…CV25. ■ ■■■■■■■■ 917 Coulometer... - Page 125 ■■■■■■■■■■■■■■■■■■■■■■ 13 Common variables 3 Saving the settings Tap on the fixed keys [ ] or [ In the future, the calculated result will be assigned to the selected common variable (result name, value and unit). ■■■■■■■■ 917 Coulometer...
-
Page 126: Templates
You can create the following templates in the dialog Templates / Sam- ple data: Sample identifications (see chapter 14.1.1, page 113) ■ List with sample identifications. If you must enter the sample identifica- tion before starting a determination, then you can select the entries contained in this list. ■■■■■■■■ 917 Coulometer... -
Page 127: Sample Identification List
If this parameter is activated, then the sample identification will be reques- ted automatically at the start of a determination. 14.1.1 Sample identification list Main dialog: System ▶ Templates ▶ Sample data ▶ Sample identifi- cation list ■■■■■■■■ 917 Coulometer... -
Page 128: Sample Assignment Table
Add a new sample identification to the list. [Delete] Delete the selected sample identification from the list. [Edit] Change the designation of the selected sample identification. 14.1.2 Sample assignment table Main dialog: System ▶ Templates ▶ Sample data ▶ Sample assign- ment table ■■■■■■■■ 917 Coulometer... - Page 129 Method that is loaded when a sample with the above-specified identifica- tion is processed. You can also enter a method that does not yet exist in the selected memory. When a determination is started there is a check whether the method is available. ■■■■■■■■ 917 Coulometer...
-
Page 130: Custom Result Templates
[New] Add a new result template to the list, see following chapter. [Delete] Delete the selected result template from the list. [Edit] Edit the data of the selected result template, see following chapter. ■■■■■■■■ 917 Coulometer... -
Page 131: Editing Result Templates
Enter a note on the calculation. This note is displayed when loading the result template. [Result options] Defining additional settings for the calculation. "Edit result template / Result options" dialog In the dialog Edit result template / Result options, settings for how to process the calculated result are defined. ■■■■■■■■ 917 Coulometer... - Page 132 In all cases, only the single value will be saved, even if the statistics function is enabled. Variable Selection of the common variable to which the result is being assigned. Selection CV01 … CV25 ■■■■■■■■ 917 Coulometer...
- Page 133 The result is cut to the number of decimal places defined. Full precision The result is used with full accuracy (floating point number either in "single precision" (32 bit) or in "double precision" (64 bit), according to the standard IEEE 754). ■■■■■■■■ 917 Coulometer...
-
Page 134: Input Lines
Devices which only transmit a brief impulse cannot be controlled in parallel. Ready1 *******1 queries the "Ready" condition of Device 1. Ready2 **1***** queries the "Ready" condition of Device 2. ■■■■■■■■ 917 Coulometer... -
Page 135: Editing The Input Signal
*******1 line 0 is expected to be active. NOTICE We recommend masking lines that are of no interest or for which no defined condition can be predicted with an asterisk (*). Entry Bit pattern of exactly 8 characters Default value ******** ■■■■■■■■ 917 Coulometer... -
Page 136: Output Lines
Meter Mode I *********0100* switches the 780/781 pH/Ion meter to voltametric measurement with polarization current and starts the measurement. Meter Mode pH *********0001* switches the 780/781 pH/Ion meter to pH mea- surement and starts the measurement. ■■■■■■■■ 917 Coulometer... - Page 137 In the case of the 780/781 pH/Ion meter, a result report is triggered. [New] Add a new output signal to the list, see following chapter. [Delete] Delete the selected output signal from the list. [Edit] Edit the data of the selected output signal, see following chapter. ■■■■■■■■ 917 Coulometer...
-
Page 138: Editing The Output Signal
We recommend masking lines that are of no interest or for which no defined condition can be predicted with an asterisk (*). Bit pattern of exactly 14 characters Entry ************** Default value Pulse length Duration of the sent pulses. Input range 100 - 1000 ms Default value 200 ms ■■■■■■■■ 917 Coulometer... -
Page 139: Report Header
Applying the custom logo You can create a graphics file of your own and use it as a logo in the report header in place of the Metrohm logo. NOTICE Observe the size of the graphics object. The maximum size of your graphics file is 64 kB. - Page 140 ■■■■■■■■■■■■■■■■■■■■■■ 14.5 Report header 2 Copying the file to an external storage medium Copy the file "CustomImage.jpg" to the directory "917". ■ If this structure is not maintained, the file will not be found because the software directly accesses the "917" directory.
-
Page 141: Methods
Select the desired template and tap on [Load template]. ■ The method is now loaded. New method is displayed in the main dialog in the title line. If a new method has been created, then the individual parameters can be modified with [Edit parameters]. ■■■■■■■■ 917 Coulometer... -
Page 142: Saving A Method
2 Modifying/applying the method name Tap on [Save method]. ■ A method name will be suggested for new methods. If the method has already been saved once, then the method name will be displayed. Applying the name: ■■■■■■■■ 917 Coulometer... -
Page 143: Loading A Method
86). If only one group is available, then the method table will be displayed directly. Select the group with the desired method. ■ Tap on [Show files]. ■ The method table with the stored methods opens: 2 Selecting the method Select the desired method. ■ ■■■■■■■■ 917 Coulometer... -
Page 144: Editing A Method
[Save method] Save the current method (see chapter 15.2, page 128). [Method options] Define various settings which refer to the entire method, e.g. statistics, automatic saving of determinations, settings for sample data, etc. (see chapter 15.5, page 132). ■■■■■■■■ 917 Coulometer... -
Page 145: Inserting A Command
1 Open the command overview In the main dialog, tap on [Edit parameters]. ■ Tap on the [Insert command] button. ■ This dialog contains all of the commands which can be inserted into a method run, organized into thematic groups. ■■■■■■■■ 917 Coulometer... -
Page 146: Method Options
Define a fixed sample size ■ etc. ■ Statistics on | off (Default value: off) If this parameter is activated, then statistics calculations will be carried out for all of the defined results. The prerequisite here, however, is that a vari- ■■■■■■■■ 917 Coulometer... -
Page 147: Start Options
Method check at start on | off (Default value: on) If this option is activated, then the following tests are carried out at the method start. Are the required control and peripheral devices connected? ■ ■■■■■■■■ 917 Coulometer... -
Page 148: Stop Options
A line set active is not being reset automatically, not even at the end of the determination. Entering the bit pattern: 0 = line inactive ■ 1 = line active ■ * = retain line status ■ ■■■■■■■■ 917 Coulometer... -
Page 149: Sample Data
Activate this parameter if the same sample amount is always to be used for all determinations. If this is case, then you can define the sample size here. It will be displayed in the main dialog, but it can no longer be changed there. ■■■■■■■■ 917 Coulometer... - Page 150 The following settings should be made: Change the designation for the input field of the first sample identifica- ■ tion. Hide the input field for the second sample identification. ■ Define a fixed sample size. ■ ■■■■■■■■ 917 Coulometer...
- Page 151 ■ upon automatic sample data query via the command REQUEST. ■ when the determination is being recalculated. ■ An entry is made in the message list automatically when these limits are infringed (see chapter 23.2, page 176). ■■■■■■■■ 917 Coulometer...
-
Page 152: Method Properties
15.5.4 Method properties Main dialog: Edit parameters ▶ Method options ▶ Properties Detailed information concerning the method is displayed in the Method options / Properties dialog and the methods can be signed electroni- cally here: ■■■■■■■■ 917 Coulometer... - Page 153 User who signed the method at level 1. Reviewed on ■ Date and time at which the method has been signed at level 1. Reason ■ Reason for the signing of the method. Comment ■ Comment for the signing of the method. ■■■■■■■■ 917 Coulometer...
-
Page 154: Note
PC/LIMS report is to be created. Save determination automatically on | off (Default value: off) If this parameter is activated, then the determination will be saved auto- matically. ■■■■■■■■ 917 Coulometer... - Page 155 This is only an internal write protection feature and is independ- ent of the write protection of the operating system on your computer. This write protection feature protects the saved determination data against accidental modifications or modifications by unauthorized per- sons. ■■■■■■■■ 917 Coulometer...
- Page 156 File name-Date-Time.txt. If the value of the parameter File name contains one or more of the following characters, then these will be automatically converted in the file name into the char- acter "_": / \ : * ? " < > |. ■■■■■■■■ 917 Coulometer...
-
Page 157: Electronic Signatures
Release (signature level 2) If the method has been signed three times at level 1 or already once at level 2 then only level 2 can be selected. User Identification of the user who signs. Password Password of the user. ■■■■■■■■ 917 Coulometer... -
Page 158: Deleting Electronic Signatures
(see chapter 7.3.6, page 51). Selection Selection of configured reasons Comment Entry 24 characters maximum [Delete signature] Delete all the signatures for the method or the determination. The method is assigned the status saved. ■■■■■■■■ 917 Coulometer... -
Page 159: Control
This setting here will be adjusted automatically to match the one in the method options. Sample table on | off (Default value: off) If this option is activated, the sample data for a sample series can be entered in a table (see chapter 20, page 156). ■■■■■■■■ 917 Coulometer... - Page 160 This way, a method or a sample table can be started with one single mouse click. [Delete table] Delete the sample table completely. [Reset autostart] Reset the value of the autostart counter to zero. ■■■■■■■■ 917 Coulometer...
- Page 161 4 Load the last determination of the sample series Reload the previously saved last determination. ■ The determination, the method used for it and the current statistical data are loaded. The option Statistics is activated again and the ■■■■■■■■ 917 Coulometer...
- Page 162 ■■■■■■■■■■■■■■■■■■■■■■ value of the statistics counter corresponds to that in effect before the interruption. 5 Continuing the sample series Carry out the remaining determinations in the sample series. ■ ■■■■■■■■ 917 Coulometer...
-
Page 163: Favorites
– in the dialog Control for the user who is logged in. Operation without login function: ■ If you are working without the login function, common favorites can be created. These favorites are available for all users. Common favor- ites are created in the Control dialog. ■■■■■■■■ 917 Coulometer... -
Page 164: Creating Favorites
[New] Add a new favorite to the list, see following chapter. [Delete] Delete the selected favorite from the list. [Edit] Edit the properties of the selected favorite, see following chapter. 18.1.1 Editing favorites ■■■■■■■■ 917 Coulometer... - Page 165 (see chapter 10.3.3, page 68). Method / Sample table Method or sample table of the favorite. Selection of stored methods/sample tables Selection [More options] Parameterize the autostart function, see following chapter. More options The autostart function is parameterized under [More options]. ■■■■■■■■ 917 Coulometer...
- Page 166 This option can only be edited when Autostart is activated. Number of automatic starts. Input range 1 - 9999 Default value Selection Table Table The number of automatic starts corresponds to the number of samples in the sample table. ■■■■■■■■ 917 Coulometer...
-
Page 167: Sample Data
Sample identification. The sample identification can be used in calculations as the variable CI1. If you have defined a sample identification list (see chapter 14.1.1, page 113) then the entries can be selected here. Entry 24 characters maximum Default value empty ■■■■■■■■ 917 Coulometer... -
Page 168: Requesting Sample Data At The Start Of The Determination
Requesting sample data at the start of the determi- nation The sample data can be automatically requested immediately after the start of the determination in order to ensure that the sample data entry is not forgotten. This automatic inquiry is requisite for reweighing. ■■■■■■■■ 917 Coulometer... - Page 169 If a fixed sample size has been defined in the method (see chapter 15.5.3, page 135), then it will be displayed at the time of the entry but it will not be editable. ■■■■■■■■ 917 Coulometer...
-
Page 170: Sample Table
1 Opening the control dialog In the main dialog, tap on [Control]. ■ The control dialog is displayed: 2 Activating the sample table Activate the Sample table option. ■ Tap on the fixed key [ ■ The main dialog is displayed: ■■■■■■■■ 917 Coulometer... - Page 171 (see "Saving a sample table", page 158). [Properties] Edit the properties of the sample table (see chapter 20.3, page 161). [Insert line] Insert a new line above the line selected. [Delete] Delete the selected line from the sample table. ■■■■■■■■ 917 Coulometer...
- Page 172 Entering a new name: Tap on the input field File name. ■ The text editor opens. Enter a new file name (max. 32 characters) and confirm with ■ [OK]. Tap on [Save]. ■ The sample table is saved. ■■■■■■■■ 917 Coulometer...
-
Page 173: Editing Sample Data
The list with the saved sample table is opened. 2 Select the sample table Select the desired sample table. ■ 3 Loading a sample table Tap on [Load]. ■ The sample table is now loaded. 20.2 Editing sample data ■■■■■■■■ 917 Coulometer... - Page 174 6 characters maximum Selection g | mg | µg | mL | µL | pieces Default value Unit defined in method: The unit defined in the method is ignored. The unit entered in the sample table is used. ■■■■■■■■ 917 Coulometer...
-
Page 175: Properties
Default value Internal memory Shared memory Shared directory in the network. Display in table Selection of the columns to be displayed in the sample table. Method | Identification 1 | Identification 2 Selection Identification 1 Default value ■■■■■■■■ 917 Coulometer... - Page 176 Identification 2 ■ Sample size ■ "Properties / Editing options" dialog Sample table: Properties ▶ Editing options In this dialog, you can define the settings so that the input of the sample data becomes simpler and faster. ■■■■■■■■ 917 Coulometer...
- Page 177 Identification 1 ■ Identification 2 ■ Sample size ■ Dialog "Properties / Identifications" Sample table: Properties ▶ Identifications In the dialog Properties / Identifications, you can alter the designations for the sample identifications in accordance with specific methods. ■■■■■■■■ 917 Coulometer...
-
Page 178: Determination Run
Tap on the input field Sample size in the dialog. ■ The number editor opens. Enter the sample size and confirm with [OK]. ■ The KF titration is already executed in the background during the entry of the sample size. ■■■■■■■■ 917 Coulometer... -
Page 179: Performing A Sample Series
If this is the case, then the assigned method will be loaded automatically and the actual determination will be started. If a different method has been entered in the sample table, then it will be ignored. ■■■■■■■■ 917 Coulometer... -
Page 180: Canceling Determinations Manually
145), the entire series will be canceled. NOTICE If you do not wish to cancel the entire determination, but only the cur- rent command, use the function [Cancel command] in the live display. The subsequent method commands are carried out normally. ■■■■■■■■ 917 Coulometer... -
Page 181: Live Modifications
3 Display the live dialog Tap on [Live display]. ■ The live dialog is displayed once again. NOTICE Make sure that the input dialogs are closed before the determination is ended. Otherwise the determination will have to be recalculated. ■■■■■■■■ 917 Coulometer... -
Page 182: Editing The Sample Table While A Determination Is Running
In addition to the sample data, the method can also be modified, except in cases where the determination is running. 4 Display the live dialog Tap on the fixed key [ ■ The main dialog is displayed. Tap on [Live display]. ■ ■■■■■■■■ 917 Coulometer... -
Page 183: Live Display
Curve & meas. values The measured values are displayed to the right next to the curve. Measured values Only the measured values are displayed. Curve & sample data The sample data is displayed to the right next to the curve. ■■■■■■■■ 917 Coulometer... -
Page 184: Live Parameters
[Edit command] is enabled only for those commands for which the live parameters can be edited. All of the functions except for the method properties can be edited with [Method options]. Select the desired method command. ■ Tap on [Edit command]. ■ ■■■■■■■■ 917 Coulometer... - Page 185 2 Edit the method parameters Change the desired parameters accordingly. ■ 3 Display the live dialog Tap on the fixed key [ ■ The main dialog is displayed. Tap on [Live display]. ■ The live dialog is displayed once again. ■■■■■■■■ 917 Coulometer...
-
Page 186: Results And More Determination Data
Open result table (see chapter 25, page 193). The result table is a table in which the results for several determinations can be saved. [Statistics] Display the statistical overview of a determination series (see chapter 24, page 188). ■■■■■■■■ 917 Coulometer... -
Page 187: More Determination Data
Results / More deter- mination data dialog. [Load/ Save] Load saved determinations(see chapter 23.5, page 179) and save current determination (see chapter 23.6, page 184). [Properties] Display the properties of the current determination (see chapter 23.4, page 177). ■■■■■■■■ 917 Coulometer... -
Page 188: Details
Display details for each endpoint found (see "Endpoint details", page 175). [Measuring point list] Display measuring point list of titrations and measurements (see "Measur- ing point list", page 174). Measuring point list Results dialog: More data ▶ View data ▶ Measuring point list ■■■■■■■■ 917 Coulometer... - Page 189 Results dialog: More data ▶ View data ▶ Endpoint details Results dialog: Curve ▶ Display curve ▶ Endpoint details Detailed information concerning each equivalence point or endpoint determined is displayed in the View data / Endpoint details dialog. ■■■■■■■■ 917 Coulometer...
-
Page 190: Messages
The common variables can be modified retroactively. The values dis- played here are used for the recalculation of a loaded determination. The list of common variables in the System / Common variables dia- log is not changed as a result. ■■■■■■■■ 917 Coulometer... -
Page 191: Determination Properties
– Regular without errors The determination was automatically ended at the end of the method. – Manual stop The determination has been canceled with the fixed key [ – Error The determination has been canceled due to an error. ■■■■■■■■ 917 Coulometer... - Page 192 2: Released by ■ User who signed the determination at level 2. Released on ■ Date and time at which the determination was signed at level 2. Reason ■ Reason for the signing of the determination. ■■■■■■■■ 917 Coulometer...
-
Page 193: Loading A Determination
The selection of file groups is displayed (see chapter 11.1, page 86). If only one group is available, then the determination list will be displayed directly. Select the group with the desired determination. ■ Tap on [Show files]. ■ The determination list with the stored determination opens: ■■■■■■■■ 917 Coulometer... -
Page 194: Determination List
(see "Properties", page 181). In addition, you can define search fil- ters to aid you in finding the desired determinations (see "Filter criteria", page 182). ■■■■■■■■ 917 Coulometer... - Page 195 Selection of what is to be displayed in the first column. Identification 1 | Identification 2 | Determ. Selection time | Result name | Method | Sample size | User Identification 1 Default value Column 2 Selection of what is to be displayed in the second column. ■■■■■■■■ 917 Coulometer...
- Page 196 User Sort alphabetically according to the user who carried out the determi- nation. Sort sequence Selection ascending | descending Default value descending [Filter] Specify the filter criteria for the list. Filter criteria Determination list: Properties ▶ Filter ■■■■■■■■ 917 Coulometer...
- Page 197 In the field is equal to, select or enter the method name according to which filtering is to be carried out. Sample size In the input fields Value from … to, specify the value range according to which filtering is to be carried out. ■■■■■■■■ 917 Coulometer...
-
Page 198: Saving A Determination
Determination properties ■ Statistics (if carried out) ■ Method with which the determination was carried out ■ Common variables (values and properties of all common variables at ■ the time of the determination) ■■■■■■■■ 917 Coulometer... -
Page 199: Curves
Define the settings for the curve display (see "Curve options", page 185). The settings are saved separately for each titration/measuring mode and apply not only for the live display but also for the curve display in the results dialog. Curve options Results dialog: Curve ▶ Curve options ■■■■■■■■ 917 Coulometer... - Page 200 | off (Default value: on) If this parameter is activated, grid lines are shown. Display measuring points on | off (Default value: off) If this parameter is activated, the curve is shown with the single measured values. ■■■■■■■■ 917 Coulometer...
-
Page 201: Recalculation And Reevaluation
If a result is assigned to a common variable, then the common varia- ble which is currently valid in the system will not be overwritten until after a query has been confirmed. The recalculated results of loaded determinations are not saved in the result table. ■■■■■■■■ 917 Coulometer... -
Page 202: Statistics
Activate the Statistics option. ■ Under Number of determinations, enter the desired number of ■ determinations. The results for which statistical calculations are performed are defined in the calculation command CALC (see "Variable for mean value", page 118). ■■■■■■■■ 917 Coulometer... - Page 203 Add a further determination to the determination series (see chapter 24.3, page 191). [Details] Display the statistics results for the selected result and the single results from all determinations, see next chapter. NOTICE If you recalculate a determination, the statistics for this determination are also recalculated. ■■■■■■■■ 917 Coulometer...
-
Page 204: Displaying Details For A Result
All of the entries of this line are marked with an asterisk (*), the statistics will be recalculated automatically. [Result on/off] Remove the selected result from the statistics. The result is marked with an asterisk (*), the statistics will be recalculated automatically. ■■■■■■■■ 917 Coulometer... -
Page 205: Deleting Statistical Data
The number of determinations by which the set statistics counter has been increased is shown above the list in brackets. This modification is also dis- played in the main dialog and in the statistics report. ■■■■■■■■ 917 Coulometer... - Page 206 ■■■■■■■■■■■■■■■■■■■■■■ 24.3 Adding a determination to a determination series NOTICE The number of samples defined in the method options does not, how- ever, change as a result. ■■■■■■■■ 917 Coulometer...
-
Page 207: Result Table
Load a saved result table (see chapter 25.3, page 198) or save the current result table (see chapter 25.2, page 198). [Properties] Configure the display of the columns and define filter criteria. [Delete all] Delete the result table completely. ■■■■■■■■ 917 Coulometer... -
Page 208: Properties
Column 1 Selection of what is to be displayed in the first column. Selection Identification 1 | Identification 2 | Determ. time | Result name | Method | Sample size | User Identification 1 Default value ■■■■■■■■ 917 Coulometer... - Page 209 If the result table contains the quantity of lines defined here, then no fur- ther results can be saved. If this is the case, save the result table and cre- ate a new one. Input range 10 - 200 Default value [Filter] Specify the filter criteria for the list. ■■■■■■■■ 917 Coulometer...
- Page 210 In the input field is equal to, select or enter the second sample identi- fication according to which filtering is to be carried out. Date In the input fields Date from … to, specify the period of time accord- ing to which filtering is to be carried out. ■■■■■■■■ 917 Coulometer...
- Page 211 Coulometer. Start a new sample series on | off (Default value: off) If this option is activated, then the result table will be deleted when you start a new sample series (with activated autostart function!). ■■■■■■■■ 917 Coulometer...
-
Page 212: Saving The Result Table
The list with the saved result tables opens. 2 Selecting the result table Select the desired result table. ■ 3 Loading the result table Tap on [Load]. ■ The result table is now loaded and will be displayed immediately. ■■■■■■■■ 917 Coulometer... -
Page 213: Printing
] is tapped on. [Report options] Defining the general settings for the report output. [Clear spooler] Delete all outstanding printing orders. [More reports] Open the list of available reports. More reports Fixed key [ ]: More reports ■■■■■■■■ 917 Coulometer... - Page 214 [Method reports] Opening the list of reports for the current method. NOTICE If you are using a CUSTOM NEOS printer, you cannot print method reports. [Send] Create a PC/LIMS report. [Edit] Edit the settings of the selected report. ■■■■■■■■ 917 Coulometer...
-
Page 215: General Report Options
| once | on each page Default value No signature line will be printed. once The signature line will only be printed on the last page. on each page The signature line will be printed on every page. ■■■■■■■■ 917 Coulometer... -
Page 216: Settings Of The Individual Reports
Definition of the time at which the report is to be printed (with each determination, at the end of a sample series or at the end of the sam- ple table). Used devices ■ Variables ■ Monitoring ■ ■■■■■■■■ 917 Coulometer... -
Page 217: List Of All Printable Reports
# Detailed statistical overview. The sample data and all indi- vidual results are printed out for each determination. The number of determinations, the mean value, and the abso- lute and relative standard deviations are printed out for each result. PC/LIMS ■■■■■■■■ 917 Coulometer... - Page 218 Non default parameters Method properties, all method parameters which no longer have any default settings. More reports ▶ System reports System settings System settings Settings for acoustic signals and accuracy of the measured value display. ■■■■■■■■ 917 Coulometer...
- Page 219 Local Common variable list List with the common variables available at the time of the determination, together with their most important data (name, value, status), context-sensitive only from the dia- log "More determination data / Local common variables". ■■■■■■■■ 917 Coulometer...
- Page 220 (calculation formula, result options, note). Result template details Details of the selected result template, context-sensitive only from the editing dialog. Input/Output lines List with all of the defined input and output lines at the remote interface (name, bit pattern). ■■■■■■■■ 917 Coulometer...
-
Page 221: Manual Control
Preparing the exchange unit or dosing unit ■ Emptying the dosing unit ■ Filling the dosing cylinder of the exchange unit/dosing unit ■ Dosing a specified volume ■ Dosing continuously ■ [Stir] Controlling the stirrer manually (see chapter 27.4, page 217). ■■■■■■■■ 917 Coulometer... -
Page 222: Opening And Closing The Manual Control
If the function can be carried out by several devices, a dialog to select the device will appear first; otherwise the dialog for the selected function will appear immediately. Closing the manual control Tap on the fixed key [ ■ ■■■■■■■■ 917 Coulometer... -
Page 223: Measuring
System ▶ Sensors. Select the measuring input at which the sensor is connected. ■ 2 Select a measuring mode Select the desired measuring mode. ■ Only those measuring modes are displayed which are advisable for the selected sensor. ■■■■■■■■ 917 Coulometer... -
Page 224: Parameter Description
Ipol | Upol | T Ipol voltametric measurement with selectable polarization current Upol amperometric measurement with selectable polarization voltage temperature measurement Temperature Temperature entered manually. If a temperature sensor is connected, then the temperature will be measured continuously. ■■■■■■■■ 917 Coulometer... -
Page 225: Dosing
Selecting the dosing function If only one dosing device is connected, then the properties of this dosing device will be shown directly. This information varies according to the type of dosing device: ■■■■■■■■ 917 Coulometer... -
Page 226: Continuous Dosing
The dosing and filling rates should be decreased for viscous liq- ■ uids. The maximum dosing and filling rates depend on the cylinder ■ volume (see chapter 31, page 294). Enter the dosing rate. ■ Enter the filling rate. ■ 2 Start dosing Tap on [Dose]. ■ ■■■■■■■■ 917 Coulometer... - Page 227 1.5 s). Filling rate Rate at which the dosing cylinder is filled. Input range 0.01 - 166.00 mL/min Selection maximum Default value maximum maximum The maximum filling rate depends on the cylinder volume (see chapter 31, page 294). ■■■■■■■■ 917 Coulometer...
-
Page 228: Dosing Fixed Volumes
Otherwise: Tap on [Fill]. ■ The dosing cylinder is filled. The displayed volume value will be reset to 0.0000 mL. Parameter description Volume Volume which is dosed. Input range 0.00000 - 99999.9 mL Default value 0.10000 mL ■■■■■■■■ 917 Coulometer... -
Page 229: Preparing
(dosing unit only). If the titrant is not selected, default parameters will be used (see Chapter 31.1.2, page 294 and Chap- ter 31.2.2, page 295). The following two figures show the live display of an exchange unit and a dosing unit: ■■■■■■■■ 917 Coulometer... -
Page 230: Emptying
3 Execute the function [Prepare]. The last traces of the reagent in the cylinder and tubings are removed with the solvent. 4 Execute the function [Empty] again. 5 Attach the dosing unit to the bottle with the new reagent. ■■■■■■■■ 917 Coulometer... -
Page 231: Stirring
Each time one of the buttons is tapped, the stirring rate is reduced or increased by one level. 2 Switching on the stirrer Tap on [Start]. ■ The stirrer is started. 3 Switching off the stirrer Tap on [Stop]. ■ The stirrer is stopped. ■■■■■■■■ 917 Coulometer... -
Page 232: Remote
With the function [Remote], you can define manual output signals to the remote interface of a connected Remote Box. It is not possible to define input signals; the current status of the input lines is, however, displayed. ■■■■■■■■ 917 Coulometer... - Page 233 If you wish to set pulses with other lengths, you have to define a cor- responding template. Bit pattern containing exactly 14 characters Entry or a max. of 24 characters for the name of the template Default value 00000000000001 Selection Selection of the templates defined [Set] Set a defined output signal. ■■■■■■■■ 917 Coulometer...
-
Page 234: Parameter
For all standard titrations. The parameters have been optimized for the most frequent applications. fast For uncritical samples with high water content. user The individual titration parameters can be modified. The settings of the individual titration rates are listed in table 9, page 221. ■■■■■■■■ 917 Coulometer... - Page 235 Table 9 Default values of the predefined titration rates for KFC Titration rate slow optimal fast Dynamics 120.0 mV 70.0 mV 30.0 mV Max. rate 1000.0 µg/min maximum maximum Min. rate 0.3 µg/min 15.0 µg/min 30.0 µg/min ■■■■■■■■ 917 Coulometer...
- Page 236 This parameter can only be edited with Stop criterion = rel. drift. The titration is stopped when the endpoint and the sum of the drift at the start of the titration and the relative stop drift have been reached. ■■■■■■■■ 917 Coulometer...
-
Page 237: Titration Parameters
The conditions for canceling the titration are defined under [Stop condi- tions], if this does not occur automatically. This could be the case when the endpoint set is not reached or if the stop criterion (see "Stop crite- rion", page 222) is not fulfilled. ■■■■■■■■ 917 Coulometer... -
Page 238: Conditioning
The value of the current drift is automatically applied at the start of the titration. manual If the drift is known throughout a longer period of time, this can be entered manually. No drift correction takes place. ■■■■■■■■ 917 Coulometer... - Page 239 Waiting time, during which the measured drift has to be smaller than the start drift defined until Conditioning OK is displayed. The start drift is defined in the dialog Edit command / Conditioning. Input range 0 - 999999 s Default value ■■■■■■■■ 917 Coulometer...
-
Page 240: Cell
Generator electrode without diaphragm. with diaphragm Generator electrode with diaphragm. Generator current Polarization current at the generator electrode. Selection 100 mA | 200 mA | 400 mA | auto 400 mA Default value, when Generator electrode = without diaphragm. ■■■■■■■■ 917 Coulometer... -
Page 241: Sensor
For polarizable electrodes and the generator electrode, an electrode check can be carried out. The following will be tested: Polarizable electrodes ■ – Is the electrode connected? – Is there a short circuit? The electrode check is carried out when this command is started. ■■■■■■■■ 917 Coulometer... -
Page 242: Stirrer
The algebraic sign of the stirring rate changes the direction in which the stirring is done. When the stirrer is viewed from above, this means: "+": counterclockwise rotation ■ ■■■■■■■■ 917 Coulometer... -
Page 243: Bromine Index Determination (Brc)
For all standard titrations. The parameters have been optimized for the most frequent applications. fast For uncritical samples with fast bromine addition. user The individual titration parameters can be modified. The settings of the individual titration rates are listed in table 10, page 230. ■■■■■■■■ 917 Coulometer... - Page 244 Default values for the predefined titration rates for BRC Titration rate slow optimal fast Dynamics 400.0 mV 400.0 mV 400.0 mV Max. rate 500.0 µg/min 1000.0 µg/min 2000.0 µg/min Min. rate 15.0 µg/min 25.0 µg/min 50.0 µg/min ■■■■■■■■ 917 Coulometer...
- Page 245 This parameter can only be edited with Stop criterion = time or drift & time. When the endpoint has been reached, the specified time is allowed to elapse after the last dosing and the titration is then stopped. 0 - 999 s Input range 40 s Default value ■■■■■■■■ 917 Coulometer...
-
Page 246: Titration Parameters
25.0 °C Time interval MP Time interval for entering a measuring point in the measuring point list. The measuring point list is limited to 1000 measuring points. Input range 0.1 - 999999.0 s Default value 2.0 s ■■■■■■■■ 917 Coulometer... -
Page 247: Stop Conditions
For this, the drift is multiplied with the drift correction time and this value is then subtracted from the endpoint amount. The drift correction time is the time interval between the end of conditioning and the end of the determination. Selection auto | manual | off Default value ■■■■■■■■ 917 Coulometer... - Page 248 Default value Delay reconditioning on | off (Default value: off) If this parameter is activated, the conditioning will not start before all the method commands have been processed. Otherwise, the conditioning will immediately start after the titration command. ■■■■■■■■ 917 Coulometer...
-
Page 249: Cell
Selection of the reagent from the list of reagents. The selection depends on the titration mode. Reagents are defined under System ▶ Reagents. Selection Selection of configured reagents | off Default value The reagent monitoring is not active. ■■■■■■■■ 917 Coulometer... -
Page 250: Sensor
– Is the resistance of the sample solution very high? The electrode check is carried out continuously during the execution of this command. Temp. measurement Type of temperature measurement. Selection continuous | automatic | off Default value automatic ■■■■■■■■ 917 Coulometer... -
Page 251: Stirrer
■ Input range –15 - 15 Default value Switch off automatically on | off (Default value: on) If this parameter is activated, the stirrer will be switched off automatically at the end of the titration, measurement, etc. ■■■■■■■■ 917 Coulometer... -
Page 252: Measurements (Meas)
Input range 0.01 - 99.90 µA/min Default value 10.00 µA/min Selection Measured value acceptance will take place after the maximum waiting time has elapsed. Measuring mode T: Input range 0.1 - 999.0 °C/min Default value 0.5 °C/min Selection ■■■■■■■■ 917 Coulometer... - Page 253 . Measuring mode Ipol: Input range –2000.0 - 2000.0 mV Selection Default value Measuring mode Upol: Input range –200.00 - 200.00 µA Selection Default value Measuring mode T: Input range –20.0 - 150.0 °C Selection Default value ■■■■■■■■ 917 Coulometer...
-
Page 254: Sensor
Selection of configured sensors Selection I(pol) The polarization current is the current that is applied to a polarizable elec- trode during voltametric measurement. This parameter is available only with I(pol) determinations. ■■■■■■■■ 917 Coulometer... - Page 255 Otherwise, the temperature entered manually will be used (see dialog of the titration and measuring parameters). The temperature will not be measured. The temperature entered man- ually is used (see dialog of the titration and measuring parameters). ■■■■■■■■ 917 Coulometer...
-
Page 256: Stirrer
■ –15 - 15 Input range Default value Switch off automatically on | off (Default value: on) If this parameter is activated, the stirrer will be switched off automatically at the end of the titration, measurement, etc. ■■■■■■■■ 917 Coulometer... -
Page 257: Evaluations (Eval)
EVAL RATE (average dosing rate) ■ Additional evaluations for measurements The following additional evaluations are possible: EVAL FIX-EP (fixed endpoints) ■ Measured quantities: – Measured value – Time EVAL MIN/MAX (minimum/maximum) ■ EVAL BREAK (break points) ■ ■■■■■■■■ 917 Coulometer... -
Page 258: Fixed Endpoint Evaluation (Eval Fix-Ep)
Selection Default value Measured value (measuring mode T): Input range –20.0 - 150.0 °C Selection Default value Time: Input range 0.0 - 999999.9 s Selection Default value Volume: Input range 0.00000 - 9,999.99 mL Selection Default value ■■■■■■■■ 917 Coulometer... -
Page 259: Minimum And Maximum Evaluation (Eval Min/Max)
Use a lower threshold value if the minimum or maximum is not found. Measuring mode Ipol: Input range 1.0 - 2,000.0 Default value 25.0 With titrations the unit is mV/mL, with measure- ments mV/s. ■■■■■■■■ 917 Coulometer... -
Page 260: Rate Evaluation (Eval Rate)
Edit the settings of the selected window. Lower limit Time for the lower limit. Input range 0 - 999999 s Default value Upper limit Time for the upper limit. Input range 0 - 999999 s Default value 999999 s ■■■■■■■■ 917 Coulometer... -
Page 261: Calculations
The result name is specified in the list for each calculation. [New] Define a new calculation or load an existing template, see following chap- ter. [Delete] Delete the selected calculation from the list. [Edit] Edit the data of the selected calculation (see chapter 28.5.1.2, page 250). ■■■■■■■■ 917 Coulometer... - Page 262 In the Sequence / Edit command dialog, tap on the [New] ■ button. The list of Metrohm result templates is displayed: Select the desired Metrohm result template and tap on [Load ■ template]. Tap on [Custom templates] and select a template you gener- ated yourself.
- Page 263 3 Enter the numerical values of the wildcards Tap on [Next]. ■ The list of wildcards is displayed: Enter the numerical values of the wildcards. ■ Tap on [Next]. ■ The editing dialog of the new calculation is displayed: ■■■■■■■■ 917 Coulometer...
- Page 264 % | mol/L | mmol/L | g/L | mg/L | mg/mL | mg/100 g | ppm | g | mg | µg | mL | µL | mg/ piece | °C | µg/min | mL/min | µL/min Default value ■■■■■■■■ 917 Coulometer...
- Page 265 | off (Default value: off) Enabling and disabling the monitoring function. Lower limit When the monitored quantity falls below this value, the action defined in the following is triggered. Input range 0 - 9999999999 Default value ■■■■■■■■ 917 Coulometer...
- Page 266 The result is then also available in other meth- ods for calculations. In all cases, only the single value will be saved, even if the statistics function is enabled. Variable Selection of the common variable to which the result is being assigned. ■■■■■■■■ 917 Coulometer...
-
Page 267: Calculations (Calc Live)
The current volume or measured value, respectively, is used for this purpose. This is helpful, e.g. for Karl Fischer titrations, in order to be able to track the water content directly during the titration. ■■■■■■■■ 917 Coulometer... - Page 268 % | mol/L | mmol/L | g/L | mg/L | mg/mL | mg/100 g | ppm | g | mg | µg | mL | µL | mg/ piece | °C | µg/min | mL/min | µL/min Default value [Note] Entering a note on the calculation. ■■■■■■■■ 917 Coulometer...
-
Page 269: Formula Editor
The variables can be selected from lists. This is advisable in order to avoid spelling mistakes. The formula editor is equipped with an automatic syntax check, which is activated when apply- ing the formula. The standard rules of priority apply for the calculation operations. ■■■■■■■■ 917 Coulometer... - Page 270 If the method contains more than one data-generating command (titra- tion, measurement etc.) before the calculation command, then you will have to indicate the command identification in front of the variable: Variable Description Titration or measuring command Calculation command Evaluation command ■■■■■■■■ 917 Coulometer...
- Page 271 You will find a detailed description of all of the variables in chapter 28.5.3.3, page 258. 28.5.3.2 Mathematical functions The following mathematical functions can be utilized in a calculation for- mula: Function Description Power function Example: 4^2 = 16 ■■■■■■■■ 917 Coulometer...
- Page 272 The sample identifications can be used in calculations only if numerical values are entered. Duration of the entire determination Titrants TITER Titer of the titrant selected in the titration command CONC Concentration of the titrant selected in the titration command Titrations, measurements, calibrations ■■■■■■■■ 917 Coulometer...
- Page 273 Final charge, i.e. total charge in mAs at the end of the titration End measured value End temperature Number of measuring points in measuring point list Stop type Format = Text Currently dosed volume of the ongoing determination Current measured value of the ongoing determination ■■■■■■■■ 917 Coulometer...
- Page 274 Mean rate in time slot # (# = 1 - 9) RDS# Standard deviation for RD# (# = 1 - 9) RDC# Correlation coefficient for RD# (# = 1 - 9) Mean rate for whole range Standard deviation for RM ■■■■■■■■ 917 Coulometer...
-
Page 275: Reports (Report)
The following reports can be inserted, among others: Result report ■ Calculation report ■ Parameter report ■ System reports (system settings, sensor list, GLP data etc.) ■ Method reports (method run, method parameters etc.) ■ ■■■■■■■■ 917 Coulometer... -
Page 276: General Report Options
You can also define your own report header, which is printed in addi- tion to this report header (System ▶ Templates ▶ Report header). Selection off | once | on each page Default value on each page The report header will not be printed. ■■■■■■■■ 917 Coulometer... -
Page 277: Settings Of The Individual Reports
Statistics overview ■ Definition of the time at which the report is to be printed (with each determination or only at the end of a sample series). ■■■■■■■■ 917 Coulometer... -
Page 278: List Of Reports
Sample data Sample table List of all determinations in the sample table with the respective sample data, as entered in the sample table. Result table ■■■■■■■■ 917 Coulometer... - Page 279 All of the sensor data for all of the sensors (name, working life, etc.). Device manager Device list List of all devices configured in the system. All device properties Properties of all the devices configured in the system. GLP manager GLP data All data stored in the GLP manager. ■■■■■■■■ 917 Coulometer...
-
Page 280: Dosing And Liquid Handling
The PREP command is used to rinse and fill air bubble-free the cylinder and tubings of the exchange or dosing unit. You should carry out this function before the first determination or once a day. Control device Selection Selection of configured control devices ■■■■■■■■ 917 Coulometer... -
Page 281: Emptying A Dosing Unit (Empty)
Port 1 | Port 2 | Port 3 | Port 4 Default value Port 1 28.7.2 Emptying a dosing unit (EMPTY) The EMPTY command is used to empty the cylinder and tubings of the dosing unit. Control device Selection Selection of configured control devices ■■■■■■■■ 917 Coulometer... -
Page 282: Dosing A Specified Volume (Add)
Selection Port 1 | Port 2 | Port 3 | Port 4 Default value Port 4 28.7.3 Dosing a specified volume (ADD) You can dose a specified volume with the command ADD. ■■■■■■■■ 917 Coulometer... - Page 283 This ensures that the correct data (titer, etc.) is always used for the calculation. Titrants are defined under System ▶ Titrants. You can also enter a name which is not contained in the titrant list. When a ■■■■■■■■ 917 Coulometer...
- Page 284 For buret units without integrated data chip, the cylinder volume and the type of dosing drive are checked. For the selected titrant, only the time interval for the GLP test of the buret unit is checked at the start of the determination. ■■■■■■■■ 917 Coulometer...
- Page 285 = cylinder volume in mL of the buret unit of the first dosing device Example: Dosing device 1: volume = 20 mL, filling rate = 50 mL/min Dosing device 2: volume = 50 mL Filling rate 2 ≥ 50 mL/min · 50 mL / 20 mL ≥ 125 mL/min ■■■■■■■■ 917 Coulometer...
- Page 286 The algebraic sign of the stirring rate changes the direction in which the stirring is done. When the stirrer is viewed from above, this means: "+": counterclockwise rotation ■ "–": clockwise rotation ■ Input range –15 - 15 Default value ■■■■■■■■ 917 Coulometer...
-
Page 287: Liquid Handling (Lqh)
Port 4. The valve disc is then rotated to Port 2 and the dosing drive can be removed from the dosing unit. Change port The stopcock is moved to the given port, but no piston movement takes place. ■■■■■■■■ 917 Coulometer... - Page 288 Default value 1.00000 mL Flow rate This parameter can only be edited with Function = Dose, Fill, Aspirate, Eject, Exchange position and End volume. Rate at which it is dosed or filled. 0.01 - 166.00 mL/min Input range ■■■■■■■■ 917 Coulometer...
- Page 289 GLP test of the buret unit are checked at the start of the determination. Selection Selection of configured titrants | not defined Default value not defined not defined No check takes place. ■■■■■■■■ 917 Coulometer...
-
Page 290: Communication
0 = line inactive ■ 1 = line active ■ * = retain line status ■ The input lines are always numbered from right to left, i.e. with the signal *******1 line 0 is expected to be active. ■■■■■■■■ 917 Coulometer... -
Page 291: Setting Remote Lines (Ctrl)
In the determination data it will be documented, that the time interval has been expired. Cancel determination The determination is stopped. 28.8.2 Setting remote lines (CTRL) The command CTRL can be used to define output signals at the remote interface. Control device Selection Selection of configured control devices ■■■■■■■■ 917 Coulometer... - Page 292 (*). Entry Bit patterns containing exactly 14 characters or a max. of 24 characters for the name of the template ************** Default value Selection of the templates defined Selection ■■■■■■■■ 917 Coulometer...
-
Page 293: Scanning The Rs-232 Interface (Scan Rs)
Display message A message is displayed. You can select whether you want to continue with the determination or cancel the run. Document message In the determination data it will be documented, that the time interval has been expired. ■■■■■■■■ 917 Coulometer... -
Page 294: Defining Rs-232 Commands (Control Rs)
[Load/ Save] Loading a saved subsequence or saving the current subsequence. [Subseq. options] Defining various settings which correspond to the entire subsequence. [Insert command] Insert a new method command. It is inserted before the selected com- mand. ■■■■■■■■ 917 Coulometer... - Page 295 This means that they are available for all methods and only have to be created once. Loading a subsequence [Own subseq.] Opening the list of own subsequences. [Load] Loading the selected subsequence. Saving a subsequence Custom-made subsequences are saved in the internal memory. ■■■■■■■■ 917 Coulometer...
- Page 296 Polytron high-fre- quency homogenizer before the conditioning as well as to set its stir- ring rate. Use the command CONTROL RS for this. Cycles Number of directly consecutive repetitions of the subsequence. ■■■■■■■■ 917 Coulometer...
-
Page 297: Miscellaneous Commands
Default value The stirrer is switched on. The stirrer runs until it is explicitly switched off. If the determination is canceled with the key [ ], the stirrer is also switched off. The stirrer is switched off. ■■■■■■■■ 917 Coulometer... -
Page 298: Pausing The Method Run (Wait)
If this parameter is activated, the text message defined in the following is displayed during the waiting time. Message text This parameter can only be edited when Message is activated. Text which is displayed during the waiting time. Entry max. 28 characters Default value empty ■■■■■■■■ 917 Coulometer... -
Page 299: Scan Data (Request)
| off (Default value: on) If this parameter is activated, then the run will be paused during the request. If this parameter is deactivated, then the method continues in the background until the following measurement or titration has been com- pleted. ■■■■■■■■ 917 Coulometer... -
Page 300: Defining An Acoustic Signal (Beep)
The method run will cancel as soon as the END command is reached. This is a good idea if you wish to test only the first part of a method. No parameters can be edited for this command. ■■■■■■■■ 917 Coulometer... -
Page 301: Operation And Maintenance
3 Confirm system initialization Confirm the message with [Yes]. ■ A second safety prompt is displayed. Confirm this message with [Yes] as well. ■ Initialization is started. After the initialization has been completed, the 917 Coulometer is started automatically. ■■■■■■■■ 917 Coulometer... -
Page 302: Maintenance
Maintenance The electronic and mechanical functional groups of Metrohm instruments can and should be checked by specialist personnel from Metrohm as part of a regular preventive maintenance schedule. Please ask your local Metrohm representative regarding the precise terms and conditions involved in concluding a corresponding maintenance agreement. -
Page 303: Troubleshooting
Statistics (see chapter 15.5, page 132). No statistics variable has In the result options (command CALC), define been assigned to the cal- a variable for the mean value (see "Variable for culation. mean value", page 118). ■■■■■■■■ 917 Coulometer... -
Page 304: Printing
1. Switch off the 917 Coulometer. manual control is either not connected or 2. Connect the hardware correctly. disabled. incorrectly connected. 3. Switch the 917 Coulometer back on. The required hardware is Wait until the determination is finished. being used in the ongoing determination. ■■■■■■■■... -
Page 305: Titration Stand With Pump
The reagent is exhausted Replace the reagent. ■ or contaminated. The catholyte is old or The catholyte must be replaced at least ■ once per week. moist. Dry the catholyte with KF one-component ■ reagent. ■■■■■■■■ 917 Coulometer... - Page 306 Set the parameter Dynamics lower and ■ are set incorrectly. the parameter Max. rate higher. The result is too The titration cell is not yet Shake the titration cell and wait until the ■ high. correctly conditioned. drift is stable. ■■■■■■■■ 917 Coulometer...
- Page 307 Homogenize the sample if possible. ■ spread widely. nous. Possibly use a larger sample size. ■ The sample addition is diffi- Observe the instructions in . ■ cult to reproduce. The drift fluctuates. Ensure stable drift. ■ ■■■■■■■■ 917 Coulometer...
-
Page 308: Appendix
The cylinder is filled at the maximum filling rate through Port 2. ■ The following dimensions apply for the tubings: ■ – Tubing at Port 1: length = 40.0 cm, diameter = 2 mm – Tubing at Port 2: length = 25.0 cm, diameter = 2 mm ■■■■■■■■ 917 Coulometer... -
Page 309: Exchange Unit
(depends on the product version) can be calculated with the following for- mula: Rotational speed/min (r/min) = 125 · Stirring rate Example: Configured stirring rate: 8 Rotational speed in revolutions per minutes = 125 · 8 = 1,000 ■■■■■■■■ 917 Coulometer... -
Page 310: Balance
Designation for the field with the method name: METHOD ■ Designation for the field with sample identification 1: ID1 ■ Designation for the field with sample identification 2: ID2 ■ ■■■■■■■■ 917 Coulometer... -
Page 311: Remote Interface
Figure 20 Pin assignment of remote socket and plug The above figure of the pin assignment of a Metrohm remote interface applies not only for the Remote Box, but also for all Metrohm devices with 25-pin D-Sub remote connector. Inputs +5 V approx. - Page 312 Input 5 Input 6 Input 7 Output 0 Ready Output 1 Conditioning OK Output 2 Determination Output 3 Output 4 Output 5 Error Output 6 Output 7 Warning Output 8 Output 9 Output 10 Output 11 Output 12 ■■■■■■■■ 917 Coulometer...
- Page 313 The instrument is ready to receive a start signal. Conditioning OK Determination The instrument performs a data-generating determination. End of Determination. Error The line is set for error message display. Warning The line is set for warning message display. ■■■■■■■■ 917 Coulometer...
-
Page 314: Result Variables As Parameter Setting
Enter the calculation formula, e.g. R1 = C00*3. ■ 2 Define a result variable as parameter setting In the titration command, enter the variable R1 as the start vol- ■ ume. The selection of the result variables is displayed in the number editor. ■■■■■■■■ 917 Coulometer... -
Page 315: Using Audittrailviewer
1 Double-click on the file SetupAuditTrailViewer 1.2.exe. The dialog Welcome to the AuditTrailViewer Setup Wizard is displayed. 2 Click on [Next >]. The License Agreement dialog is displayed. 3 Click on [I Agree] to accept the contractual conditions. ■■■■■■■■ 917 Coulometer... -
Page 316: Opening The Audit Trail
31.7.2 Opening the Audit Trail Create a backup of the data and of the settings of your Coulometer (see chapter 11.3, page 92). 1 Open the backup on your PC. Open the file log.madt with the AuditTrailViewer. ■■■■■■■■ 917 Coulometer... -
Page 317: Contents Of The Audit Trail
Contents of the Audit Trail In the following you will find a description of the dialog window and of the menu bar of the AuditTrailViewer. Table 14 Dialog window Column Contents Each entry is numbered in sequence. ■■■■■■■■ 917 Coulometer... -
Page 318: Filtering The Audit Trail
The entries in the Audit Trail can be filtered. You can set the following fil- ter criteria: Date ■ User ■ Category ■ Action ■ Proceed as follows: 1 Click in a cell that contains the desired filter criterion (e.g. Category = Method). ■■■■■■■■ 917 Coulometer... -
Page 319: Exporting The Audit Trail
System ▶ Diagnosis The electronic and mechanical functional groups of Metrohm instruments can and should be checked by specialist personnel from Metrohm as part of a regular maintenance schedule. Please ask your local Metrohm repre- sentative regarding the precise terms and conditions involved in conclud- ing a corresponding maintenance agreement. -
Page 320: Lcd Test
Other colors and patterns will be displayed one after the other. Repeat step 2 until the System / Diagnosis dialog is displayed ■ again. Contact your Metrohm representative in the event of faults or ■ irregularities. 31.8.2 Formatting an external storage medium System ▶... -
Page 321: Removing An External Storage Medium
5 Repeat this process as long as the cross hair continues to be reposi- tioned on the screen. A message in English will appear. ■■■■■■■■ 917 Coulometer... -
Page 322: Testing The Touch Screen
A calibration is not possible with this test. If the Touch screen does not work correctly anymore, it will need to be replaced. For that please con- tact your Metrohm representative. NOTICE You can use the [ ] fixed key to stop the test at any time. -
Page 323: Software Update
The files are instrument-specific. The file names are structured as follows: Control software for 917 Coulometer: ■ 5XXXyyyy.BIN 5XXXyyyy.MBIN – XXX = instrument type (i.e. "917" for the 917 Coulometer) – yyyy = program version Language files Language files may have the following content: one or more additional dialog languages ■... - Page 324 ■■■■■■■■■■■■■■■■■■■■■■ 31.8 Diagnosis 5XXXyZZZML.BIN ■ 5XXXyZZZML.MBIN – XXX = instrument type (i.e. "917" for the 917 Coulometer) – y = version number of the language package – ZZZ = program version 31.8.6.1 Carrying out a software update CAUTION Make sure that the power supply is guaranteed during the entire update process.
- Page 325 Tool.exe" file to the external storage medium. Make sure that the file is stored at the top level of the external storage medium. This also applies to the "917" folder. If this structure is not maintained, then the files will not be found, because the directories are accessed directly during the update process.
-
Page 326: Service
Tap on the [Start] button (NOT on the [ ] fixed key). ■ If Result = No errors is displayed, then the update has been suc- cessful. Switch the 917 Coulometer off and then back on again. ■ 31.8.7 Service System ▶ Diagnosis ▶ Service Access to the service functions is password-protected and only accessible to Metrohm service technicians. - Page 327 A complete recalculation of the statistics using a pocket calculator or PC calculation programs may exhibit deviations. This can be explained by the different binary numerical formats used by these computers. ■■■■■■■■ 917 Coulometer...
- Page 328 The above losses of accuracy by rounding off in the range of significant places are only relevant theoretically. Most of the time they are lower by several orders of magnitude than – as an example – the uncertainties resulting from weighing out the sample. ■■■■■■■■ 917 Coulometer...
-
Page 329: Technical Specifications
– Acetone – Chloroform – Formamide – Sulfuric acid c(H ) = 2 mol/L – Hydrochloric acid c(HCl) = 2 mol/L – Caustic soda c(NaOH) = 2 mol/L – Composite 5 – 1-butanol – 1-hexanol – Decanol ■■■■■■■■ 917 Coulometer... -
Page 330: Measuring Inputs
Pt1000 ±0.2 °C (Applies for measuring range –20 - +150 °C; ±1 digit; without sensor error, under reference conditions) ±0.6 °C (Applies for measuring range +10 - +40 °C; ±1 digit; without sensor error, under reference conditions) ■■■■■■■■ 917 Coulometer... -
Page 331: Determination Range
Change in rota- ±(115 - 125) rpm tional speed per step Power consump- < 4 W tion Lock Electronic overload protection 32.4 Pump > 600 mL/min (at 25 °C; standard accessories) Aspirate > 400 mL/min (at 25°C; standard accessories) ■■■■■■■■ 917 Coulometer... -
Page 332: Interfaces And Connectors
Up-to-date information on the EU conformity and the requirements for electromagnetic compatibility for your product can be found on the Inter- net under https://www.metrohm.com/en-us/products-overview/. Using the article number, you can download the Declaration of conform- ity for ... under the documents of the product. -
Page 333: Ambient Temperature
193 mm Width Height without titra- 145 mm tion vessel holder Height with titration 230 mm vessel holder Depth 448 mm Weight (including 6020 g power supply unit) Material Housing Poly(butylene terephthalate) (PBT) Base Steel, stainless, coated ■■■■■■■■ 917 Coulometer... -
Page 334: Accessories
Downloading the accessories list 1 Enter https://www.metrohm.com/ into your Internet browser. 2 Enter the article number (e.g. 917) into the search field. The search result is displayed. 3 Click on the product. Detailed information regarding the product is shown on various tabs. -
Page 335: Index
KFC ........220 BEEP ......... 286 System-specific ....38 Control Remote Box ....65 BRC ........229 Directory structure ....91 CONTROL RS ......280 CALC ........ 247 Display ........7 Coulometer ......65 CALC LIVE ......253 ■■■■■■■■ 917 Coulometer... - Page 336 File manager ......86 Stop options ..... 134 Live display ......169 Filling ........216 Troubleshooting ....289 Live modifications ....167 Filling rate Metrohm Serial Bus ....8 Live parameters ...... 170 Maximum ....294, 295 ■■■■■■■■ 917 Coulometer...
- Page 337 ■■■■■■■■■■■■■■■■■■■■■■ Index Metrohm Serial Bus MSB, see also PC keyboard Report header ......125 "MSB" ........21 Connect ......26 REQUEST ........ 285 Minimum evaluation ....245 PC/LIMS report Resolution Miscellaneous commands ..283 Save ........67 Measured value display ..54 Molecular sieve Send .........
- Page 338 Stop options ......134 Working life Titration curve ......185 SUBSEQ ........280 Sensor ........ 61 Titration mode Subsequence ......280 Write protection BRC ........1 Load ......... 281 External memory ....90 KFC ........1 Note ......... 283 ■■■■■■■■ 917 Coulometer...
Need help?
Do you have a question about the 917 and is the answer not in the manual?
Questions and answers