Table of Contents
Advertisement
Quick Links
L5Q INSTALLATION AND
CONFIGURATION GUIDE
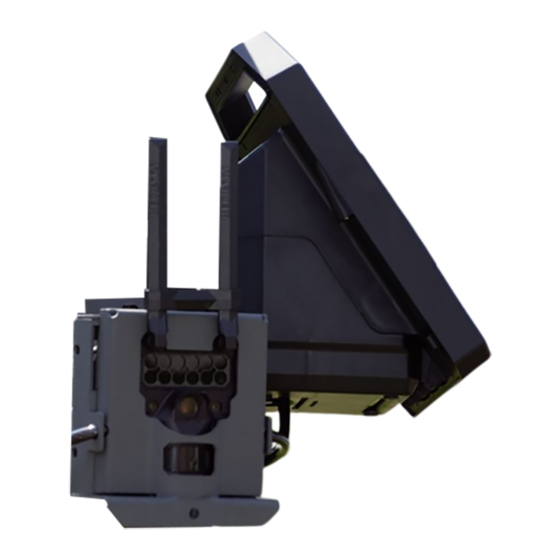
This guide describes how to assemble, mount, configure, and aim the L 5Q Camera . Correct camera placement
and configuration is crucial to a successful deployment. The L5Q LPR (License Plate Recognition) camera is
designed to perform license plate collection for low speed (<45 MPH) and low volume residential traffic (3500
Avg. Annual Daily Traffic).
Please review this document in its entirety before beginning installation. For help with installing the L5Q
Camera, questions about the L5Q LPR Camera kit, or using the Reconyx Connect app, please refer to the
Contacts section at the end of this document for support contact information.
© 2020, Motorola Solutions. All rights reserved. MOTOROLA, MOTO, MOTOROLA SOLUTIONS, and the Stylized M Logo are trademarks or registered
trademarks of Motorola Trademark Holdings, LLC and are used under license. All other trademarks are the property of their respective owners.
1
Advertisement
Table of Contents

Related Manuals for Motorola solutions L5Q


Summary of Contents for Motorola solutions L5Q
- Page 1 © 2020, Motorola Solutions. All rights reserved. MOTOROLA, MOTO, MOTOROLA SOLUTIONS, and the Stylized M Logo are trademarks or registered trademarks of Motorola Trademark Holdings, LLC and are used under license. All other trademarks are the property of their respective owners.
- Page 2 ● 70 ft. T ape Measure and C halk or P aint (for marking aiming location) © 2020, Motorola Solutions. All rights reserved. MOTOROLA, MOTO, MOTOROLA SOLUTIONS, and the Stylized M Logo are trademarks or registered ...
- Page 3 NOTE: T he camera WILL NOT FIT inside the enclosure if the bolt threads protrude past the locking nut! © 2020, Motorola Solutions. All rights reserved. MOTOROLA, MOTO, MOTOROLA SOLUTIONS, and the Stylized M Logo are trademarks or registered ...
- Page 4 Replace and tighten the bolt on the rear of the solar panel. © 2020, Motorola Solutions. All rights reserved. MOTOROLA, MOTO, MOTOROLA SOLUTIONS, and the Stylized M Logo are trademarks or registered ...
- Page 5 Insert two H ose Clamps through the slots in the S olar Panel Mounting Bracket . © 2020, Motorola Solutions. All rights reserved. MOTOROLA, MOTO, MOTOROLA SOLUTIONS, and the Stylized M Logo are trademarks or registered ...
- Page 6 Wrap the excess cable length on the back of the S olar Panel as shown in the video. © 2020, Motorola Solutions. All rights reserved. MOTOROLA, MOTO, MOTOROLA SOLUTIONS, and the Stylized M Logo are trademarks or registered ...
- Page 7 Reinsert the ball on the rear portion of the S ecurity Enclosure into the S ecurity Enclosure Mounting Bracket and tighten the ball lock to secure it. © 2020, Motorola Solutions. All rights reserved. MOTOROLA, MOTO, MOTOROLA SOLUTIONS, and the Stylized M Logo are trademarks or registered ...
- Page 8 TM Cable Lock and remove the key. © 2020, Motorola Solutions. All rights reserved. MOTOROLA, MOTO, MOTOROLA SOLUTIONS, and the Stylized M Logo are trademarks or registered trademarks of Motorola Trademark Holdings, LLC and are used under license. All other trademarks are the property of their respective owners.
- Page 9 License Plates in the image frame is addressed in the Reconyx app in the W indowing tab. © 2020, Motorola Solutions. All rights reserved. MOTOROLA, MOTO, MOTOROLA SOLUTIONS, and the Stylized M Logo are trademarks or registered ...
- Page 10 NOTE: T apping the A im Mode button wakes up the camera and places it into aim mode. Images will continue to populate for 2 minutes at a rate of approximately 6 seconds between each image. © 2020, Motorola Solutions. All rights reserved. MOTOROLA, MOTO, MOTOROLA SOLUTIONS, and the Stylized M Logo are trademarks or registered ...
- Page 11 Retighten the ball lock to secure the camera in place. NOTE: The windowing configuration below will be used to center the aiming within the image frame. © 2020, Motorola Solutions. All rights reserved. MOTOROLA, MOTO, MOTOROLA SOLUTIONS, and the Stylized M Logo are trademarks or registered ...
- Page 12 © 2020, Motorola Solutions. All rights reserved. MOTOROLA, MOTO, MOTOROLA SOLUTIONS, and the Stylized M Logo are trademarks or registered trademarks of Motorola Trademark Holdings, LLC and are used under license. All other trademarks are the property of their respective owners.
- Page 13 © 2020, Motorola Solutions. All rights reserved. MOTOROLA, MOTO, MOTOROLA SOLUTIONS, and the Stylized M Logo are trademarks or registered trademarks of Motorola Trademark Holdings, LLC and are used under license. All other trademarks are the property of their respective owners.
- Page 14 Total Event Time = 0.2s + (( N umber of Pics - 1) * ( T ime Between Pics ) ) + Q uiet Period © 2020, Motorola Solutions. All rights reserved. MOTOROLA, MOTO, MOTOROLA SOLUTIONS, and the Stylized M Logo are trademarks or registered ...
- Page 15 Tap the Ellipsis icon in the top right of the screen. Tap the F ilter menu item. © 2020, Motorola Solutions. All rights reserved. MOTOROLA, MOTO, MOTOROLA SOLUTIONS, and the Stylized M Logo are trademarks or registered ...
- Page 16 CONTACTS SUPPORT vigilantsupport@motorolasolutions.com © 2020, Motorola Solutions. All rights reserved. MOTOROLA, MOTO, MOTOROLA SOLUTIONS, and the Stylized M Logo are trademarks or registered trademarks of Motorola Trademark Holdings, LLC and are used under license. All other trademarks are the property of their respective owners.
Need help?
Do you have a question about the L5Q and is the answer not in the manual?
Questions and answers