Motorola solutions VB400 Quick Start Manual
Body-worn camera
Hide thumbs
Also See for VB400:
- Technical specifications (7 pages) ,
- Quick start manual (12 pages) ,
- Setup manual (15 pages)
Table of Contents
Advertisement
Advertisement
Table of Contents

Subscribe to Our Youtube Channel
Related Manuals for Motorola solutions VB400


Summary of Contents for Motorola solutions VB400
- Page 1 VB400 BODY-WORN CAMERA QUICKSTART GUIDE QUICKSTART GUIDE | VB400...
-
Page 2: Table Of Contents
TABLE OF CONTENTS INTRODUCTION HOW TO CHARGE YOUR VB400 CHARGING WITH A 1-PORT DOCK CHARGING WITH A 14-PORT DOCK BATTERY STATUS LED CONFIGURING YOUR VB400 IDENTIFYING AN RFID ASSIGNED VB400 USING YOUR VB400 TO START / STOP RECORDING WEARING YOUR VB400... -
Page 3: Introduction
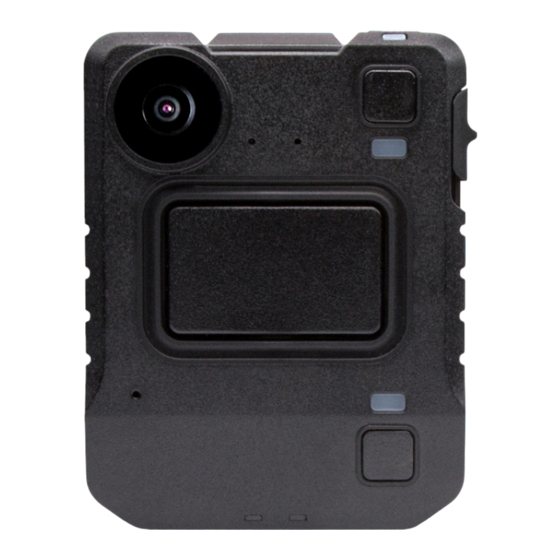
INTRODUCTION Thank you for choosing the VB400 Body-worn camera. This simple guide will lead you through the set up and use of your VB400. Function Lens Button A Function Button B Dual Microphone Slider Front Function Button Buzzer Speaker Function... -
Page 4: How To Charge Your Vb400
HOW TO CHARGE YOUR VB400 Upon receiving your VB400, it is recommended that you fully charge the device before usage. When charging using a 1-Port Dock or 14-Port Dock, insert the camera into the slots as shown below, ensuring the camera clicks securely in place. -
Page 5: Charging With A 1-Port Dock
Once fully charged, the same LED will turn solid green. If the LED is not lit, the device is not charging. Your VB400 will be fully charged within 8 hours from a flat battery. QUICKSTART GUIDE | VB400... -
Page 6: Charging With A 14-Port Dock
Once fully charged, the same LED will turn solid green. If the LED is not lit, the device is not charging. Your VB400 will be fully charged within 8 hours from a flat battery. QUICKSTART GUIDE | VB400... -
Page 7: Battery Status Led
BATTERY STATUS LED To quickly understand the current battery status of your VB400, press the bottom button on the front face of the camera and refer to the bottom LED. COLOR KEY: LED: OK Green LED: Low Orange/Yellow LED: Critical... -
Page 8: Configuring Your Vb400
PLEASE NOTE: If you try to use your VB400 before it has been assigned, the bottom LED on the front face of the camera will start to flash red and you will hear an alarm tone. You will not be able to use your camera until it has been assigned. -
Page 9: Identifying An Rfid Assigned Vb400
Once your device is configured, your system administrator may wish camera users to utilize an RFID system for camera assignment. For further information on assigning VB400s using an RFID reader, please refer to the VideoManager User Guide. Having presented your RFID card, your docked, assigned VB400 will identify itself with a solid red LED as shown. RFID... -
Page 10: Using Your Vb400
USING YOUR VB400 The VB400 series of cameras are intuitive and simple to use. TO START / STOP RECORDING (CONFIGURABLE) Users can activate recording by pressing on the single front button located in the center of the camera as shown. Recording is stopped by pressing and holding the front button. - Page 11 Stop Recording initiated is indicated by the two upper LEDs turning from red to off, accompanied by a longer, high pitched bleep. PLEASE NOTE: All buttons are configurable. Please consult with your administrator if you have any issues. Power Down Button (Configurable) No LED QUICKSTART GUIDE | VB400...
-
Page 12: Wearing Your Vb400
WEARING YOUR VB400 The VB400 body-worn camera should always remain upright when capturing footage. QUICKSTART GUIDE | VB400... -
Page 13: Accessories
ACCESSORIES Designed for optimum performance and comfort in a wide range of situations, the VB400 comes with a variety of fixing types to suit every uniform and body shape. For more information on our range of body-worn cameras, please visit: www.motorolasolutions.com/bwc... -
Page 14: Regulatory Information
This is because the device is designed to operate at multiple power levels so as to use only the poser required to reach the network. In general, the closer you are to a wireless base station antenna, the lower the power output. While there may be differences between the SAR levels of various devices and at various positions, they all meet the government requirement. QUICKSTART GUIDE | VB400... - Page 15 User has the choice to give his product to a competent recycling organization or to the retailer when he buys a new electrical or electronic equipment. QUICKSTART GUIDE | VB400...
- Page 16 Availability is subject to individual country law and regulations. All specifications shown are typical unless otherwise stated and are subject to change without notice. MOTOROLA, MOTO, MOTOROLA SOLUTIONS and the Stylized M Logo are trademarks or registered trademarks of Motorola Trademark Holdings, LLC and are used under license. All other trademarks are the property of their respective owners.
Need help?
Do you have a question about the VB400 and is the answer not in the manual?
Questions and answers