Table of Contents
Advertisement
Advertisement
Table of Contents

Related Manuals for inbody BPBIO320


Summary of Contents for inbody BPBIO320
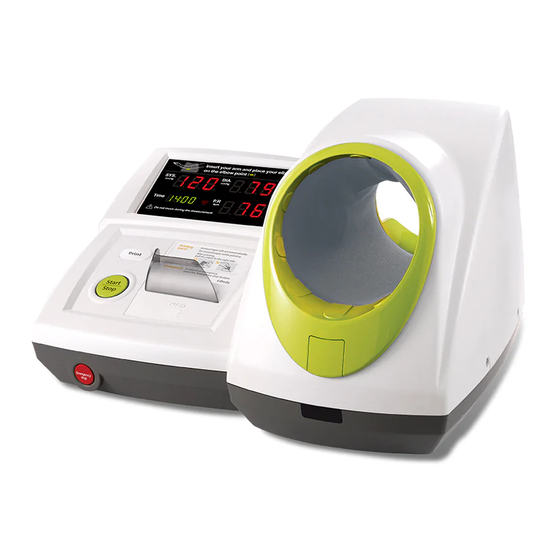
- Page 1 User’s Manual...
- Page 2 ©2019 InBody Co., Ltd. All rights reserved. Reproduction, adaptation, or translation of this manual is prohibited without prior written consent from InBody Co., Ltd. under the copyright laws. This manual may be printed incorrectly and subject to change without notice. InBody Co., Ltd.
-
Page 3: Table Of Contents
User’s Manual Contents I. BPBIO320/320n Installation A. Product Components B. Operating Environment C. Installation Instructions D. Loading and Reloading Printer Paper (BPBIO320 only) E. Replacing Cuff Cover F. Setup G. Connecting to InBody H. Connecting to Coin Device(InCoin) I. Precautions for Maintenance II. -
Page 4: Bpbio320/320N Installation
Chair for BPBIO320/320n Coin device(InCoin) B. Operating Environment Please make sure the environment is adequate for the BPBIO320/320n installation. This equipment is designed for indoor use. If installing the equipment outdoors, the following requirements must be fulfilled: Temperature range 10 to 40ºC (50 to 104ºF) -
Page 5: Installation Instructions
C. Installation Instructions 1. Open the BPBIO320/320n box, and remove the air cushion (small size). Unfold the air cushion (large size) and take out the BPBIO320/320n from the box, and then remove the protective box. Take off the protective vinyl out of the BPBIO320/320n, and remove the packing material. - Page 6 2. Place the equipment on a solid table that can withstand the weight of the BPBIO320/320n (approx. 9kg). If desk for the BPBIO320/320n is available, align the grooves on the bottom of the BPBIO320/320n with the grooves on the desk and secure them with two fixing screws.
- Page 7 Do not disassemble the equipment arbitrarily. This may cause electric shock, injury, product malfunction, and/ • or inaccurate results. Unauthorized disassembly will void the manufacturer’s warranty. Do not let the BPBIO320/320n touch with other electronic devices when on. This may cause electric shock. • Caution Plugging the device into an ungrounded outlet may cause malfunction or electric shock.
- Page 8 8. Adjust the volume by turning the volume knob on the rear of the BPBIO320/320n.
-
Page 9: Loading And Reloading Printer Paper (Bpbio320 Only)
Paper cut with scissors Ripped paper 2) Open the cover by pressing ‘PUSH’ while the BPBIO320/320n is turned on. 3) If the device is being used for the first time, remove the protective paper located inside. * The protective paper (thermal printing paper) is in the printer groove. Pull upward to remove it. - Page 10 6) Remove the cut paper, and close the printer paper cover. 2. Reloading Printer Paper 1) Open the cover by pressing ‘PUSH’ mark on the bottom center of it while the BPBIO320/320n is turned 2) Press button to remove the remaining paper.
-
Page 11: Replacing Cuff Cover
The cuff cover of the BPBIO320/320n should be replaced periodically for sanitary purposes. Follow the guide below to replace the cuff cover. 1. Remove the front cover of the BPBIO320/320n by pushing downward. Loosen the screw with a screwdriver. Screws Front Cover 2. - Page 12 5. Secure the new cuff cover onto the grooves on the front and rear of the BPBIO320/320n. 6. Attach the previously removed front and rear rings on the BPBIO320/320n and secure them with screws. Rear ring Front ring 7. Close the front cover of the BPBIO320/320n.
-
Page 13: Setup
F. Setup Setup consists of sound settings, motion sensor settings, elbow sensor settings, Result Sheet printing, time stamps and cautionary comments. Note Contents of results sheet output are only applicable to BPBIO320. • 1. Settings 1) When button and button are pressed and held at the same time for 2 seconds while on the home screen, the first screen of the Setup, 'Sound Setting' is displayed. - Page 14 The following is an example showing how to change a ‘3-line manual output’ Result Sheet setting. While on the home screen, press and hold button and button at the same time for 2 seconds. Press button to move to screen. ▼...
- Page 15 The caution comment is not printed on the (BPBIO320 only) results sheet. * Outputting results sheet setting ( ) and Outputting caution comment setting ( ) are applicable only to BPBIO320, so they do not appear at BPBIO320n.
- Page 16 3. Blood Pressure Evaluation 1) While on the home screen, press and hold button and UP (▲) button at the same time for more than 2 seconds. 2) When 111 is displayed in the systolic blood pressure column, diastolic blood pressure column, and pulse column as shown below, the blood pressure evaluation has been disabled.
- Page 17 4. Displaying test counts 1) While on the home screen, hold the DOWN (▼) button for more than 2 seconds. Test counts for the day will be displayed in the diastolic blood pressure column. Test counts for the day and total test counts are printed.
-
Page 18: Connecting To Inbody
1. Turn off the BPBIO320/320n. 2. Connect the serial cable to the RS232C (9-pin serial) connection terminal located on the back of the BPBIO320/320n. Connect the other end of the serial cable to the serial connection terminal on the InBody device. -
Page 19: Connecting To Coin Device(Incoin)
1. Prepare the enclosed RS232C cable from the coin device. 2. Connect the cable to the rear of the coin device and the RS232C connector on the rear of the BPBIO320/320n. 9-pin serial port 3. Connection between BPBIO320/320n and coin device is complete. -
Page 20: Precautions For Maintenance
• The BPBIO320/320n calibrates automatically when it is turned on. But it may be necessary for a specialist to inspect the device once every two years to maintain its performance and safety. If an error message appears during the self-... -
Page 21: Blood Pressure Test
• User should not talk or move during the test. • The BPBIO320/320n uses the right arm. Test results may be inaccurate if the left arm is used. • B. Test Instructions 1. Adjust the height of the chair so that the inserted upper arm and the heart are horizontal. - Page 22 • of the BPBIO320/320n. The cuff will release quickly. If the air is not released after the button is pressed, turn off the BPBIO320/320n. • Start/Stop button Emergency stop button 6. The cuff is automatically released after completing the test. Wait for the cuff to fully loosen and pull out your arm.
- Page 23 * Example of Result Sheet 3-line automatic 3-line + graph output automatic output TIME TIME SYS DIA SYS DIA 2017 2017 06 19:12 06 19:12 2017 2017 06 19:12 06 19:12 2017 2017 06 19:12 06 19:12 2017 2017 06 19:12 06 19:12 17/12/06 09:09 17/12/06 09:09...
-
Page 24: Test Posture
Sit as as close as possible to the BPBIO320/320n * Be sure to place the elbow in the elbow groove before starting the test. * Remove thick clothes. Do not roll up sleeves. -
Page 25: Transportation And Storage
III. Transportation and Storage A. Cautions during Transportation To transport the BPBIO320/320n safely, two people should keep the equipment parallel to the ground. Caution Keep the equipment horizontal while transporting. •... -
Page 26: Repacking Instructions
Protective box Package protective vinyl 3. Place the large air cushion on the bottom of the packing box and place the BPBIO320/320n on it. Cover with the small air cushion and seal the box with tape. Air cushion (large size) -
Page 27: Faq
The error messages can be displayed on the screen if they occur during the test. Please provide the error code to Product Support. B. Regarding the Equipment If problems cannot be resolved with the information below, please contact InBody. Problem Cause Corrective measures Plug the power cable into a grounded 3-prong outlet. - Page 28 • Be sure to turn off the power when replacing the fuse. • The correct rated fuse must be used. (250V, 2.5AL) Turn on the volume knob on the rear of the BPBIO320/320n. The volume knob on the rear of the blood pressure monitor may be turned off.
- Page 29 Make sure the central cover is properly closed. closed completely. Caution Repair and inspection can only be done by InBody personnel. For repair or inspection, please contact InBody. • Note Please record error messages that appear. It may be useful for Product Support.
-
Page 30: Regarding The Test
The user may have tested without sufficient rest. Take the test after resting at • least 5 minutes. Do not talk or move during the test. • * Blood pressure may vary throught the day. InBody recommends testing at different times of the day. - Page 31 Question Answer When should blood pressure Blood pressure may vary throughout the day, as shown below. • • be measured? Blood pressure classification of World Health Organization Number of Blood pressure patients values (people) Time zone in incidence of myocardial infarction N=703 Fluctuation of blood pressure during the day N=5 (Normal Blood Pressure)
-
Page 32: Others
Others * The BPBIO320/320n was manufactured by the quality control procedures of InBody Co., Ltd. InBody Co., Ltd. complies with ISO9001 and ISO13485 which are international quality management systems. * This equipment complies with IEC60601-1, the international safety standard for electronic medical equipment. This equipment also complies with IEC60601-1-2, the international standard for electromagnetic compatibility. -
Page 33: Safety Information
B. Safety Information Warning If this equipment has been altered, it must be inspected to ensure that it can be used safely. • Results can only be interpreted by experienced healthcare professionals. It cannot be used for diagnosis, • medication, or other treatments performed at the consumer’s discretion without a doctor ̓ s prescription. Caution Excessively high or low temperatures, humidity and pressure may affect the operation of the equipment and •... -
Page 34: Specifications
D. Specifications Test Instructions Oscillometric Test range Pressure: 0-300 mmHg Pulse: 30-240 bpm Degree of Precision Pressure: ±2 mmHg Pulse: ±1.5% Test result Systolic blood pressure, diastolic blood pressure, Average blood pressure, Pulse pressure, Heart rate, PRP (Pressure rate product) Test Time Approx. -
Page 35: Emc Information (Declaration)
E. EMC Information (Declaration) The BPBIO320/320n is intended for use in the electromagnetic environment specified below. The customer or the user of the BPBIO320/320n should assure that it is used in such an environment. Electromagnetic emissions Emissions test Compliance Electromagnetic environment The BPBIO320/320n uses RF energy only for its internal function. - Page 36 To assess the electromagnetic environment due to fixed RF transmitters, an electromagnetic site survey should be completed. If the measured field strength in the location in which the BPBIO320/320n is used exceeds the applicable RF compliance level, the BPBIO320/320n should be monitored to verify normal operation. If abnormal performance is observed, additional measures may be necessary, such as re-orienting or relocating the BPBIO320/320n.
- Page 40 ©2019 InBody Co., Ltd. All rights reserved. BM-ENG-82-F-190710...
Need help?
Do you have a question about the BPBIO320 and is the answer not in the manual?
Questions and answers