Table of Contents
Advertisement
Advertisement
Table of Contents

Related Manuals for inbody 230


Summary of Contents for inbody 230
- Page 1 InBody230 User s Manual...
- Page 2 1996- Co., Ltd. All rights reserved. No part of this manual should be reproduced, stored in any retrieval system, or transmitted by any means (electronic, mechanical, photocopied, recorded, etc.) without written permission from , Inc. (hereinafter ). No Patient liability is assumed with respect to the use of the information contained herein.
-
Page 3: How To Use This Manual
How to use this manual. The user’s manual explains the functions of the InBody230. Follow the instructions below for effective use this manual. 1.Please read all the instructions in this manual thoroughly before operation. 2.Fully utilize the aid materials, such as pictures and drawings, to obtain a clear understanding. 3.Before calling for assistance, please refer to Chapter 4: ”Problems &... -
Page 4: Safety Information
Safety Information Never use this equipment in combination with the following medical electronic devices. - Medical electronic implants, such as pacemakers - Electronic life support systems, such as an artificial heart/lung - Portable electronic medical devices, such as an electrocardiograph Do not operate within 3.5 feet from shockwave or microwave therapy equipment. - Page 5 It may cause serious damage to the electronic components. 5.Install or locate equipment only in accordance with the provided installation instructions. 6.This equipment should be serviced only by qualified personnel. Contact or examination, repair or adjustment. 7.Do not touch the ports on the backside of the InBody.
- Page 6 This equipment may cause the above mentioned medical electronic devices to malfunction. This equipment may cause harmful interference to other devices in the vicinity if not installed and used in accordance with the installations. 1. Potential electromagnetic or other interference between medical equipments and other devices being operated together in the same environmental may expert an adverse influence on functioning of the medical equipment.
- Page 7 3. Do not to touch signal input, signal output or other connectors, and the patient simultaneously. However, there is no guarantee that the interference will not occur for a particular installation. The InBody230 has been designed, manufactured, and inspected under the full quality assurance system of...
-
Page 8: Indicators & Safety Symbols
Indicators & Safety Symbols A. Indicators LCD Contrast Control 9 pin Serial Port, Female (RS-232C) USB Port B. Safety Symbols Dangerous High Voltage Danger /Warning /Caution /Note BF Type Equipment Adapter Power On Power Off... -
Page 9: Introducing The Inbody230 -Body Composition Analyzer
InBody series. Based on the experience and technology over the last 10 years, has released the body composition analyzer, the InBody230. -
Page 10: Table Of Contents
Contents How to use this manual Safety Information Indicators & Safety Symbols Introducing the InBody230 –Body Composition Analyzer Chapter 1 Installation & Maintenance 1. Contents of the box 2. Exterior & Functions 3. Installation Instructions 1-10 4. Transportation 1-14 5. Repacking 1-15 6. -
Page 11: Chapter 1 Installation & Maintenance
Chapter1 Installation and Maintenance 1. Contents of the Box 2. Exterior & Functions 3. Installation Instructions 4. Transportation 5. Repacking 6. Maintenance... -
Page 12: Contents Of The Box
1. Contents of the Box When opening the box, check to make sure of all the following items are included. A. Product Units InBody230 InBody230 Quick Installation Guide InBody230 Poster 1 EA User’s Manual CD Adapter (12V, 3.5A) 1EA Power Cord (AC 250V 10A 1.8m) 1EA Result Sheet Box 1Box (optional) Thermal Printer 1EA (optional) SD400 (optional) - Page 13 1) Package Box Box size: 480(W) 940(L) 340(H); mm 1 EA 2) Packing Pad Top Pad 1EA Bottom Pad 1EA To prevent physical shock, use InBody's packing material when shipping or transporting the equipment. Refer to this Chapter, Section 4: "Transportation."...
-
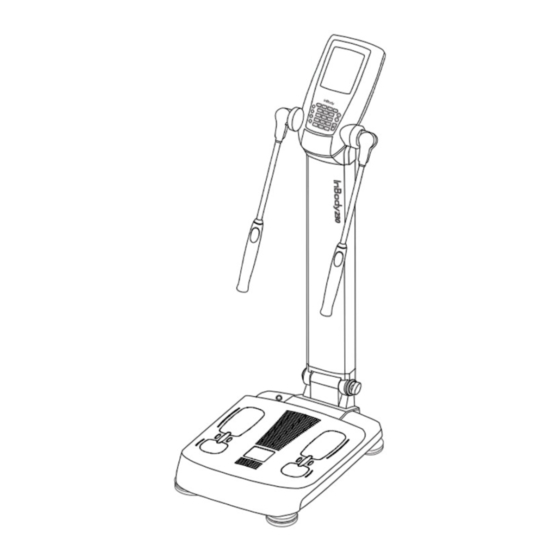
Page 14: Exterior & Functions
2. Exterior & Functions Individual part identification and functions with schematic sketches are provided below. Please inspect each component of the InBody230 before installation to ensure there are no scratches or damage. A. Operation Part B. Upper Part C. Lower Part D. - Page 15 Chapter 1 Installation and Maintenance A. Operation Part (1) LCD Monitor (320 240 color STN LCD) This displays the analysis procedure, messages and results. (2) Key Pad (23 buttons) The keypad is divisible into input buttons and function buttons. These are used to input data required for body composition analysis, to set up the operating environment and to print out test results.
- Page 16 (4) Body Stand C. Lower Part (1) Front Sole Electrode Activated by placing the fore-foot directly on the front sole electrode. This allows the current to flow through the body. (2) Rear Sole Electrode Activated by placing the heel of the foot directly on the rear sole electrode. (3) Base Frame The loadcell, which measures body weight, is underneath the Base Frame.
- Page 17 Chapter 1 Installation and Maintenance (6) Level Indicator Used to level the InBody230 by means of a view glass and bubble alignment. <Un-leveled State> <Leveled State> (7) Level Screws There are 4 leveling screws that support the equipment. Leveling screws are designed to be turned by hand, so you can easily adjust the balance of the equipment.
- Page 18 D. Rear Part (1) Back Cover Only qualified personnel are allowed to remove the back cover. Back Cover <Warning sticker> Do not dismantle the equipment or open the back cover. Internal parts are not for customer use and it may cause electric shock. If the equipment is dismantled, the warranty is void, and service costs will be charged.
- Page 19 Chapter 1 Installation and Maintenance (2) Control & Connection Unit Connects to peripherals such as a PC or a printer for data transmission. Power Switch Power the InBody230 on/off. LCD Bright Control Used to adjust LCD brightness. Turn left to brighten and turn right to darken.
- Page 20 <Darker> <Brighter> Power Input Port Used to connect the power adapter. 9pin Serial Port, Female (RS232C) Used to connect optional devices such as thermal printer or blood pressure monitor. Using SD400(Serial Distributor) provided by , the maximum of 4 devices can be connected at once.
-
Page 21: Installation Instructions
9-10 Chapter 1 Installation and Maintenance 3. Installation Instructions A. Workplace Requirements (1) Location: Indoor only. Any outdoor area where the equipment is to be located should meet all the environmental requirements. (2) Operation environment: 50 ~ 104 (10 ~ 40 ), 30 ~ 75% RH (3) Optimum pressure: 70 ~ 106kPa (4) Adapter: Power Input 100-240V, 50/60Hz, 1.2A Power Output DC 12V, 3.5A B. - Page 22 C. Unpacking & Assembling (1) Unpack the box and remove the top pad. (2) Place the equipment horizontal to the ground. (3) Erect the stand of the equipment carefully until it stands upright. Tighten the joint screw to the right pushing it as below.
- Page 23 11-12 Chapter 1 Installation and Maintenance (4) Raise the head part upward. (5) Level the InBody230 using the leveling screws and level indicator. Four leveling screws and located under the lower section. The level indicator is located at the upper-left of the joint frame. Level Indicator <Un-leveled state>...
- Page 24 Be careful not to hurt your fingers on the edge of the base frame when handling the screws. D. Powering (1) Connect the adapter cable to the power input port. (2) When the system switch is turned on, there is a signal sound and the InBody230 logo is displayed on the LCD.
-
Page 25: Transportation
13-14 Chapter 1 Installation and Maintenance 4. Transportation If it must be transported, be extra careful to ensure safe handling. The following are some tips for safety transporting the InBody230: (1) Before transporting the InBody230, turn off the power switch and unplug the adapter. (2) Be careful not to damage the hand module. -
Page 26: Repacking
5. Repacking Be sure to turn off the power switch and unplug the power cable before repacking. Be careful to avoid severe physical shock, jarring or other damage while repacking, especially with regard to the arms and foot electrodes. (1) Turn off the power switch. Remove all cables connected to the InBody230. - Page 27 15-16 Chapter 1 Installation and Maintenance (3) Step onto the foot board and slowly fold the head part with hand electrodes until it reaches to the back of the equipment. (4) Loosen the joint screw to the left and fold the head and stand towards the foot board.
- Page 28 For the InBody box users (5) Put the equipment in the box. Place the pads in position as illustrated below. (6) Seal the box with a tape For the InBody bag users (5) Put the equipment in the bag as illustrated below.
-
Page 29: Maintenance
17-18 Chapter 1 Installation and Maintenance 6. Maintenance (1) After usage wipe electrodes with a wet tissue (also known as weet naps, surface wipes, anti-bacterial tissues, etc.). Wet tissues can be purchased at any local store. (2) Handle the arms with care. Never apply excessive stress near the hand electrode joint. -
Page 30: Chapter 2 Management & Results Description
Chapter 2 Management & Results Description 1. Cautions Before Measurement 2. Exterior and Function of Keypad 3. Power Connection & Getting Started 4. Initial Screen 5. Personal Profile 6. Proper Posture 7. How to Operate the Equipment 8. Results... -
Page 31: Cautions Before Measurement
1. Cautions Before Measurement To observe changes of the human body through body composition analysis, it is crucial to perform the analysis each time under the same conditions, temperature, posture, etc. Bear in mind, the following factors affect the result of body composition analysis, and as a result, affect the reproducibility of analysis. -
Page 32: Exterior And Function Of Keypad
Chapter 2 Management & Results Description 2. Exterior and Function of Keypad Keypad is located below the display screen. It can be distinguished into 2 categories by their functions. A. Input Button (1) Number Button (0~9) / Alphabet Button (A~Z) The input buttons are used to enter numeric and character data such as the patient’s age, height and I.D. - Page 33 B. Function Button (6) Direction Button The direction buttons consist of up, down, left and right buttons. (7) SETUP Button Used to update or modify the user environment. (8) MODE Button MODE button is used to set “Quick Setup” for the unit, results sheet, etc. at the initial screen.
-
Page 34: Power Connection & Getting Started
Chapter 2 Management & Results Description 3. Power Connection & Getting Started (1) Connect the adapter cable to the power input port. (2) When system switch is turned on, the screen is displayed as illustrated below and starts warming-up by itself. The warming-up lasts for about 15 seconds. (3) During warming-up, InBody230 processes the self-testing, zero point setup for the scale, and adjustment of the internal circuit. -
Page 35: Initial Screen
4. Initial Screen The initial screen of InBody230 consists of various items for both examinee and user’s convenience. It can be distinguished into 4 categories as shown below. (1) Personal Information Window This is for I.D., age, height, gender and weight. (2) Information Window This area will display the process and completion of the measurement providing helpful and specific information for the examinees and the users. -
Page 36: Personal Profile
Chapter 2 Management & Results Description 5. Personal Profile Age, height, weight and gender are essential information for body composition analysis. InBody230 analyzes the measurement results based on the input data. To reduce errors and acquire more reliable results, input examinee data after reading the following carefully. (1) I.D. - Page 37 (5) Weight (permitted range: 10kg ~ 250kg / 22 lbs. ~ 551 lbs.) The measured weight is automatically added to the weight column. You can change the units by pressing Unit in the lower menu bar. When the unit is changed the weight will change automatically.
-
Page 38: Proper Posture
Chapter 2 Management & Results Description 6. Proper Posture Proper posture is essential to achieve reliable results and high reproducibility. To minimize errors and improve reliability, keep the following in mind. A. How to hold the hand electrodes (1) Make parallel, flat contact with four fingers on the surface of the electrode. (2) Place thumb on the electrode pad on the top surface of the handle. - Page 39 <Right posture> <Wrong posture> Do not allow pants to disturb contact between the heels and the electrodes. If the foot is exceptionally small, place it between the electrodes, ensuring that it makes contacts with both sets of electrodes. Measurements may not be possible due to hardened skin on the palm or sole. In this case, wipe the palm and sole with a wet tissue before measuring.
- Page 40 9-10 Chapter 2 Management & Results Description (1) Avoid direct contact between the arms and the body at the armpit and between the legs at the crotch. It is recommended to stretch your arms about 15 degrees off the body during the analysis. (2) The examinee should remain relaxed and avoid straining or moving the body during the analysis.
-
Page 41: How To Operate The Equipment
7. How to Operate the Equipment The following procedure is based on the initial setting of the InBody230. If a examinee steps down from in the InBody230 during measurement the procedure is automatically cancelled. (1) Confirm the InBody230 is ready for measurement. If it is ready, the following screen is displayed. - Page 42 11-12 Chapter 2 Management & Results Description (4) The examinee data screen will be displayed. Input I.D., age, height, gender and weight using buttons on keypad and press ENTER button. Then entered values will be added on the personal information window. (5) A examinee must assume the proper posture.
- Page 43 If the entered data is out of the acceptable data range, the Error Message will pop up on the monitor. Enter the examinee’s data again. Refer to Section 5: ersonal Profile” for the acceptable range of each data. Measurement may not take place if the palm or sole are too dry or have hardened skin. In this case, wipe the palm and sole with a wet tissue before measuring.
- Page 44 13-14 Chapter 2 Management & Results Description (7) When the measurement is finished, the completion message appears in the information window with a signal sound. (8) Return each hand electrode back to its original position, and step down from the base frame. Do not turn the arm bar by force.
-
Page 45: Results
8. Results A. Result Screen During measurement, the InBody230 display information of a examinee’s body composition on the LCD. The results are shown on the LCD while a examinee is standing on the machine. As soon as the examinee steps down, it goes back to the initial screen, and the InBody230 is ready for measurement again. - Page 46 15-16 Chapter 2 Management & Results Description Thermal Printer A thermal printer provided by be used with InBody230. Refer to Chapter 5. Consumables” for the instruction. (2) Result sheet Form Result sheet for all ages(USB Printer) The result sheet is consumable. Use A4 standard size paper or the printed result sheet which provides.
- Page 47 Thermal Printer The roll paper is consumable. Use the roll paper which provides. Please contact or an authorized distributor to place the purchase order.
- Page 48 17-18 Chapter 2 Management & Results Description Result sheet for child (USB Printer)
- Page 49 C. Output Items (Result sheet for all ages) The following are the explanations for each item. About 23 items are analyzed on the result sheet. (1) Personal Information The examinee’s name / ID, age, height, gender, date & time are displayed here. (2) Body Composition The measured values of the examinee’s body composition are displayed here.
- Page 50 19-20 Chapter 2 Management & Results Description Skeletal Muscle Mass (kg) Distinctively, skeletal muscle mass, which generally indicates the lean body mass of each arm and leg, can be controlled by exercise and dietary habits. Compare the bar graphs lengths of skeletal muscle mass with body fat mass. If the bar of skeletal muscle mass is relatively shorter and under the standard value, lean body mass lacks in the body, while the opposite case is proper.
- Page 51 BMI (Body Mass Index, kg/m Body Mass Index is a convenient way of assessing the degree of obesity. Body composition and Lean Body Mass are not considered. BMI is determined using only the weight and height. The InBody230 identifies a standard BMI of 22 for males and 21.5 for females.
- Page 52 21-22 Chapter 2 Management & Results Description Percent Body Fat (%) Percent Body Fat indicates the percentage of body fat to body weight. The standard percent body fat is 15% for men and 23% for women, while the standard range of body fat for men is 10-20% of the standard weight and 18%-28% of the standard weight for women.
- Page 53 (4) Segmental Lean Segmental Lean’ shows that the level of segmental muscle mass in consideration of an examinee’s weight. Description of picture is followed as below. (5) Segmental Fat ‘Segmental Fat’ shows segmental fat mass, percent body fat and its overall evaluation.
- Page 54 23-24 Chapter 2 Management & Results Description (6) Muscle-Fat Control Muscle Control (kg) The amount of muscle to be controlled. The (+) and (-) signs are an increase or decrease in the amount of control. Fat Control (kg) The amount of fat to be controlled. The (+) and (-) signs are an increase or decrease in the amount of control.
- Page 55 (8) Exercise Planner The InBody230 can not only make a recommendation on the type of exercises you should do but also can assess the weight loss effect of the recommended exercises. Select exercises to carry out with reference to the list of exercises on the results. Based on the rate of calorie consumption for the exercise, gauge your calorie consumption per week.
- Page 56 It would be good to explain what roles proteins, minerals, fattiness play in our body and what problems might occur when these are lacking or too abundant. The body composition analysis of InBody is based on the 4-compartment model.
- Page 57 Body Fat (kg) Fat free mass is the sum of body water, protein and mineral. Thus, InBody uses the following formula to get the amount of body fat.
- Page 58 (5) Is my body growing well? With the DSM-BIA(Direct Segmental Multi- frequency Bioelectrical Impedance Analysis) measurement method, the InBody measures lean mass of each body parts. Therefore, based on the segmental lean mass, it is possible to find out whether the examinee’s body parts are strong or not and well balanced or not.
- Page 59 Am I well balanced? The Body Balance function verifies that the muscles in each part of the body - Balance between right arm are developed in a balanced manner, and left arm examining differences between the muscles in both arms to evaluate the - Balance between right leg upper body balance, in both legs to and left leg...
- Page 60 29-30 Chapter 2 Management & Results Description (7) What is my ideal weight? For growing children, it is not a good idea to blindly lose weight to achieve an ideal weight. It would be advisable to maintain ideal body components while monitoring muscle mass and the amount of body fat.
- Page 61 (9) What is my growth score? Growth score is a unique score of InBody that shows test results in recognizable scores so as to help understand the growth stage of children by taking into account physique and body components.
-
Page 62: Chapter 3 Setup Establishment
Chapter 3 Setup Establishment 1. How to Modify Settings 2. Setup Menu 3. Quick Setup... -
Page 63: How To Modify Settings
1. How to Modify Settings The setup allows you to customize several functions through modification. The below setup screen appears as pressing the SETUP button on the keypad at the initial screen. The setup of the InBody230 consists of 5 items; Region, Printer, Result, Others and Interface. -
Page 64: Setup Menu
Chapter 3 Setup Establishment 2. Setup Menu A. Region Set the date, time, display mode, unit, ethic background and language. (1) Set Date Set the date using upper, lower buttons( , ). Use left, right buttons( , ) or ENTER button to move to year, month and date. (2) Set Time Set the current time using upper, lower buttons( , ). - Page 65 (3)Test Print You can check the printing coordinates by printing out a sample. Press PRINT . (4) Thermal Printer Enable : If the thermal printer is selected from E.Interface, it would be indicated as “Enable”. For a test print, move the cursor to Enable and press Print button. Disable : It appears when the thermal printer is not in use.
- Page 66 Chapter 3 Setup Establishment (7) Pediatric Mode Enable : Select when you want to print the result sheet for child. The age to distinguish between adult and children can be set up by choosing the number next to ‘Enable’. For instance, if you set up the age 18, anyone less than 18 years old will have a report for child.
- Page 67 E. Interface Sets the connection of external device to InBody230. (1) Lookin Body Select to use Lookin’Body (Enable, Disable) (2) COM1(Serial) Select the external device to be connected with 9 pin serial port. Disable : Do not use 9 pin serial port. SD400 : Select when you use SD400.
-
Page 68: Quick Setup
Chapter 3 Setup Establishment 3. Quick Setup A. How to modify the quick setup When you press MODE button, the quick setup screen will appear as below. Use left, right buttons( ) to move into the category that needs the quick setup and use lower, upper buttons( ) to move into the sub-category that wished to be changed. -
Page 69: Chapter 4 Problems & Solutions
Chapter 4 Problems & Solutions 1. Error Messages 2. Troubleshooting 3. Frequently Asked Question (FAQs) 4. Customer Service Information... -
Page 70: Error Message
1. Error Messages The InBody230 display an error message to alert the operator of problems and to recommend the correct action. A. Remove any objects on the footboard When pressure or weight is applied to the base frame during self-calibration, this message appears. -
Page 71: Troubleshooting
Chapter 4 Problems $ Soulutiont 2. Troubleshooting This section lays out the order of steps you have to take in case of malfunction, with the assumption that you have some basic knowledge about how to operate the equipment. If you still have the problem after taking the following steps, contact A. - Page 72 <Darker> <Brighter> C. The measured weight value seems very low, or shows a negative value. (Normally the measured weight is not very different from what the examinee believes his or her actual weight to be). Cause 1 The weight sensor (loadcell) calibration was performed wrong during the self- calibration.
- Page 73 Chapter 4 Problems $ Soulutiont Cause 1 Occur when the paper tray is empty. Actuion1 Check if there is an indicator light or message on the printer. If the tray is empty then refill it with results paper. Be sure to place the paper properly in the tray (proper direction and surface orientation).
-
Page 74: Frequently Asked Question (Faqs)
3. Frequently Asked Question (FAQs) Even if no problems arise from the equipment, users may still have many questions especially regarding clinical procedures. Below, just a few of the more common questions are listed with answers. If additional questions or more clarification is desired, please contact us by E-mail. - Page 75 WHR value saves the user from measuring the circumferences of each body part with tape measures. Most of all, it guarantees high reproducibility of measurement. WHR is one of the values that only InBody provides among impedance equipments.
-
Page 76: Customer Service Information
Corporate agents of the InBody230 and addresses are listed below. Contact us for assistance or more information about the InBody230. InBody Co., Ltd. [HEAD OFFICE] InBody Bldg., 54, Nonhyeon-ro 2-gil, Gangnam-gu, Seoul 135-960 KOREA TEL: +82-2-501-3939 FAX: +82-2-578-2716 Website: http://www.inbody.com E-mail: info@inbody.com... -
Page 77: Chapter5 Consumables
Chapter5 Consumables 1. Consumables 2. Options... -
Page 78: Consumables
1. Consumables A. Result Sheet When using the InBody230 with a printer, it is strongly recommended to use the result sheet supplied by . If more result sheets are needed, please contact Result sheet Size : 210mm 297mm(A4 type) Number of Sheets : 500 / 1box Printed Condition : 4 colors Manufacturer : Co., Ltd... -
Page 79: Options
Chapter 5 Consumables 2. Options provides optional devices to make the operation of InBody230 more efficient and convenient. For more information, contact the head office or authorized distributors A. Printer Printers using PCL3 or above would be compatible. If you have a printer using PCL3 or above but is not listed on the compatible printer list provided by , please contact us to check compatibility. - Page 80 C. Thermal Printer The only thermal printer provided by can be used. Thermal printer should be connected to the serial port and it can be also used together with a regular printer. Please contact to a local distributor of for further information. D.
-
Page 81: Appendix
Appendix 1. More about the InBody230 2. Classifications 3. Specifications 4. Worldwide Patents 5. Manufactures Warranty... -
Page 82: More About The Inbody230
1. More About the InBody230 A. How does BIA work? The Bioelectrical Impedance Analysis (BIA) method is based on the fact that the human body consists of conductors, and non-conductors. Generally 50~70% of the human body consists of water which functions as a conductor, whereas body fat functions as a non-conductor. - Page 83 But, InBody with the technology of segmental analysis can exactly figure out difference by gender, aging, disease and ethnic without any empirical estimation. Based on the fact that fat free mass (FFM) consists of about 73.3% of body fluid, it can be concluded that the distribution of body...
-
Page 84: Classifications
C. Outputs Weight Total Body Water, Fat Free Mass, Body Fat Mass, Skeletal Muscle Mass, BMI, Percent Body Fat, Waist-Hip Ratio(WHR) Basal Metabolic Rate(BMR) Fat Control, Muscle Control, Segmental Percent Body Fat(Right arm, Left arm, Trunk, Right leg, Left Leg), Segmental Body Fat(Right arm, Left arm, Trunk, Right leg, Left Leg), Segmental Lean Mass(Right arm, Left arm, Trunk, Right leg, Left Leg) Impedance of Each Segments &... -
Page 85: Specifications
Appendix 3. Specifications 10 Impedance Measurements by Using 2 Different Bioelectrical Bioelectrical Impedance(BIA) Frequencies (20 100 ) at Each of 5 Segments Impedance(Z) Measurement Items (Right Arm, Left Arm, Trunk, Right Leg, Left Leg) Electrode Method Tetrapolar 8-Point Tactile Electrode System Direct Segmental Multi-frequency Bioelectrical Impedance Analysis Method Measurement Method ;DSM-BIA Method... -
Page 86: Worldwide Patents
4.Worldwide Patents 1998. 02 U.S. patent Apparatus and method for analyzing body composition based on bioelectrical impedance analysis (US 5,720,296) 2000. 08 Canadian patent Apparatus and method for analyzing body composition using a new electrode system based on bioelectrical impedance analysis (CN 2,225,184) 2001. -
Page 87: Manufactures Warranty
Appendix 5. Manufacturer s Warranty Product: Serial Number: Purchase Date: Institute Name: , l i t i s n i . : l i guarantees that the product has been approved through qualified test procedures under severe conditions. 2. The one year manufactures warranty begins on the date of purchase. 3. - Page 88 1996- Co., Ltd. All rights reserved.
Need help?
Do you have a question about the 230 and is the answer not in the manual?
Questions and answers