Table of Contents
Advertisement
Available languages
Available languages
Quick Links
BSM270/BSM270B
User's Manual
사용자 매뉴얼
BSM270/BSM270B User Manual for Measurement Guide and Setup
Thank you for purchasing the BSM270/BSM270B. This user's manual describes all the features
of the BSM270/BSM270B. Please read before use and keep it in a safe place. By following the
manual instructions, you will be able to use the BSM270/BSM270B more safely and effectively.
BSM270/BSM270B 자세 안내 및 설치 사용자 설명서
BSM270/BSM270B를 구입해 주셔서 감사합니다. 본 사용자설명서는 BSM270/BSM270B의 모든 기능을 상세하고 알기 쉽게
설명하고 있습니다. BSM270/BSM270B의 안전한 사용을 위해서 사용 전에 꼭 읽어 보신 후 항상 볼 수 있는 장소에 보관하세요.
본 내용을 숙지 하시고 따르시면, 더욱 안전하고 효과적으로 BSM270/BSM270B를 이용 하실 수 있습니다.
Advertisement
Table of Contents

Subscribe to Our Youtube Channel
Related Manuals for inbody BSM270


Summary of Contents for inbody BSM270
- Page 1 BSM270/BSM270B를 구입해 주셔서 감사합니다. 본 사용자설명서는 BSM270/BSM270B의 모든 기능을 상세하고 알기 쉽게 설명하고 있습니다. BSM270/BSM270B의 안전한 사용을 위해서 사용 전에 꼭 읽어 보신 후 항상 볼 수 있는 장소에 보관하세요. 본 내용을 숙지 하시고 따르시면, 더욱 안전하고 효과적으로 BSM270/BSM270B를 이용 하실 수 있습니다.
- Page 2 NOTE DANGER 주의 참 조 주 의 참 고 주 의 안전 주의 사항 및 규정을 준수하지 않으면 사용자가 부상을 당하거나 재산상의 손해를 입을 수 있습니다. 참고 사용자의 이해를 돕기 위한 설명입니다. ©2021 InBody Co., Ltd. All rights reserved. IM-M2-E-210614...
-
Page 4: Table Of Contents
BSM270/BSM270B User's Manual Table of Contents I. Installation A. Product configuration B. Installation environment C. How to install D. settings E. Maintenance precautions II. Measurement A. Precautions before measurement B. Measurement method C. Measuring posture III. Transport and storage A. How to repackage B. - Page 5 사용자 매뉴얼 목차 I. 설치 A. 제품 구성 B. 설치 환경 C. 설치 방법 D. 설정 E. 관리 시 주의 사항 II. 측정 A. 측정 전 주의사항 B. 측정 방법 C. 측정 자세 III. 운송 및 보관 A. 재포장 방법 B.
- Page 7 BSM270/BSM270B User’s Manual English...
-
Page 8: Product Configuration
BSM270 BSM270 사용자 매뉴얼 사용자 매뉴얼... -
Page 9: Installation Environment
NOTE DANGER 참 조 주 의 참 고 주 의 NOTE DANGER 참 조 주 의 참 고 주 의 NOTE DANGER 참 조 주 의 참 고 주 의 NOTE DANGER 참 조 주 의 참 고 주 의... - Page 10 2. After opening the stand box, remove the packing material and take out the stand. 3. After removing the unit, put the packing material back into the stand box. 4. Fold in the bottom flaps of the stand box as shown in the figure below. Buffer material Bottom flaps of the stand box 5. Place the stand on the stand box so that the protruding screw head is positioned to the right. Stand NOTE DANGER...
- Page 11 7. Hold the base securely and push the stand into the groove of the base. Rubber finishing material TION NOTE DANGER CAUTION 참 조 주 의 참 고 주 의 ˙ If the rubber finishing material is inserted with the stand, the measured value may be inaccurate. Be careful when you insert it.
- Page 12 Beware of switch damage TION NOTE DANGER CAUTION 참 조 주 의 참 고 주 의 ˙ If the head bar is not tilted during the insertion, the product may be damaged and may not function. Please be careful during this step. ˙...
- Page 13 There are no serviceable parts inside. InBody Co., Ltd. is not responsible for any damage caused by this action. • Do not allow the BSM270/BSM270B unit to come into contact with other electronic devices while connected to the power source. It may cause electrical shock.
- Page 14 ˙ Prenez note que le poids peut varier lorsque la mesure est effectuée à une altitude de 2000m ou plus. 15. Turn on the power of the BSM270/BSM270B unit as shown in the image under step 14. 16. After the head operates once, the home screen changes to the screen shown below and to standby mode for measuring.
-
Page 15: Settings
D. Settings 1. How to set up In setup, you can set the measurement mode, offset, unit, head bar position, display orientation, automatic height measurement, display time, weight measurement time, and equipment level check. Up and down button Enter button 1) Press the Enter button on the base for more than three seconds, and the setting screen appears as shown in the upper right. - Page 16 (Unit) Select the units used for measurement. You can choose between kg/cm and lb/in. (Head Position) Set the head bar position. You may choose between When you change the settings, - - - - displays and returns to after completion. : Select for heights taller than 1m 60cm (5' 3.0").
- Page 17 (Level Test) The current level is represented by a small square position. If it is not level, use the height adjustment base screw located under the base to make it level. NOTE ˙ If the small square direction is skewed because it is not level, you can level the machine by raising the screw in the opposite direction.
-
Page 18: Maintenance Precautions
˙ Ne démontez pas l'appareil. Démonter l’appareil de façon arbitraire pourrait provoquer un mauvais fonctionnement, des défaillances, ou des électrocutions. L’appareil ne contient aucune pièce pouvant être réparée Le cas échéant, InBody Co., Ltée n’est en aucun cas responsable de tout dommage qui pourrait se produire. ˙ Débranchez l’appareil lors d’un entreposage prolongé. -
Page 19: Measurement
II. Measurement 여기에 텍스트 입력 A. Precautions before measurement NOTE DANGER CAUTION 참 조 주 의 참 고 주 의 ˙ Be careful not to get your fingers caught between the measuring part and the stand. ˙ Children or people with reduced mobility can be tested with the help of a manager or assistant. ˙... - Page 20 <When Bluetooth communication <When Bluetooth communication is not in use> is in use> * The BSM270B unit can be connected to an InBody unit using built-in Bluetooth communication. The connection method can be found in the applicable InBody User's Manual.
-
Page 21: Measuring Posture
C. Measuring posture For accurate measurement results, it is necessary to maintain correct posture during measurement. Position yourself so that the back of your head touches the stand. Pull in your chin, stomach, and chest, and face forward Stand with your back on the stand. Let your arms Slightly lean your rear against the stand. -
Page 22: Transport And Storage
Before repacking the equipment, be sure to turn off the power and remove the adapter. Be careful not to damage the head bar and cables during the repacking process. 1. Prepare the original BSM270/BSM270B base box for repacking. 2. Paste two paper boxes on both ends of the packing box as shown below. -
Page 25: Transport And Storage Environment
16. Push the stand into the stand box. 17. Close the packing box and seal it with tape. B. Transport and storage environment The following environment must be met to safely transport or store the BSM270/BSM270B unit. Proper temperature -10 ~ 70 ℃ (14 ~ 158℉) -
Page 26: Troubleshooting
IV. Troubleshooting Below, you will find troubleshooting information about the BSM270/BSM270B. If you have problems using your BSM270/BSM270B unit or have questions about your height measurements, first check the troubleshooting information below. If you still have questions after checking the following information, please contact InBody Customer Support. - Page 27 Issue Potential Solution The measured height Check if the equipment is installed on a flat and vibration-free floor. • • The measuring posture must be as instructed. For detailed information on value is abnormal. • the measurement posture, refer to 'II. Height Measurement, C. Measurement Posture, of this User's Manual.
-
Page 28: Other
5. When using an outlet with multiple terminals, use an outlet or extension cable with sufficient power capacity. 6. Do not allow the BSM270/BSM270B unit to come into contact with other electronic devices while connected to the power source. It may cause electrical shock. - Page 29 3. Installation Veillez à installer l’unité BSM270/BSM270B sur un plancher stable et libre de toute vibration. Si elle était installée sur un plancher irrégulier, la lecture pourrait être erronée ou elle pourrait tomber.
- Page 30 Move it physically away. Connect to power sources not used by peripheral devices. • If the problem is not resolved after taking the above steps, please contact InBody Co., Ltd. • 2. As excessively high or low temperature, humidity, and pressure may affect the operation of the equipment and cause malfunction, use within the range specified in the product specifications.
-
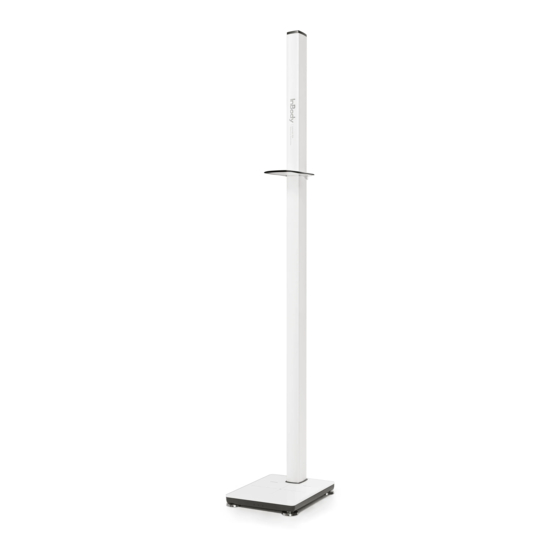
Page 31: Appearance And Function
B. Appearance and function The name and function of each part of the BSM270/BSM270B unit are as follows. * Before installation, please make sure that there is no damage to any part. 1. The head bar ❶ Head bar: Used to measure height. - Page 32 3. Base Stand insert: Where the stand is inserted and assembled to the base. ❶ ❷ Base: What the person stands on when measuring height. Base adjustment screws: Used to level the machine. ❸ LCD screen: Displays height and weight measurements on the screen. ❹...
-
Page 33: Indication Requirements
C. Indication requirements Safety symbols WARNING / AVERTISSEMENT, CAUTION / ATTENTION NOTE / REMARQUE Other symbols Manufacturer European Conformity Manufacturing number DC power 1177 1177 1177... -
Page 34: Product Specifications
D. Product specifications Product purpose A device that can automatically measure height and weight Measurement items Height, Weight, BMI Measured height 900~2000mm Height measurement ± 1mm error range Measured weight 10~200kg (22~440lb) Outcome indication Measurement outcome is displayed on the LCD screen Zero-point Zero adjustments are performed during the warm-up time of 3~15 seconds for weight measurements... - Page 37 BSM270/BSM270B 사용자 매뉴얼 한국어...
-
Page 38: 제품 구성
I. 설치 A. 제품 구성 BSM270/BSM270B의 제품 구성은 다음과 같습니다. 각 부품이 모두 있는지 확인하세요. * 설치 전에 각 부분별로 균열 등의 이상이 없는지 확인해 주세요. ❶ 발판 1EA ❷ 스탠드 1EA ❸ 헤드바 1EA ❹ 헤드 고정 나사 2EA ❺... -
Page 39: 설치 환경
주 의 ˙ 추후 장비를 재포장하려면 제공된 포장물을 보관해야 합니다. 기타 폐기물은 관련 법규에 따라 처리해 주세요. ˙ BSM270/BSM270B을 평탄하고 진동이 없는 바닥에 설치하세요. 바닥이 고르지 않은 장소에 설치할 경우 측정 중 넘어지거나 측정 결과가 부정확할 수 있습니다. ˙ BSM270/BSM270B을 세척제로 닦지 마세요. 액체류 세척제가 BSM270/BSM270B 내부로 흘러 들어가면 부식이... - Page 40 5. 돌출된 나사 머리가 오른쪽에 위치하도록 스탠드를 스탠드 박스에 올려주세요. 스탠드 TION NOTE DANGER 주의 참 조 주 의 참 고 주 의 ˙ 케이블 연결이 제대로 되어 있는지 확인하세요. 6. 발판을 1곳 남은 스탠드 박스 마감 부위에 올리고 발판의 케이블을 스탠드에 연결하세요. 7.
- Page 41 9. 발판 스탠드 삽입부 뒤편 4개의 고정 나사 홈에 고정 와셔를 포함한 발판 고정 나사 4개를 삽입하세요. 10. 육각렌치를 사용하여 발판 고정 나사를 시계방향으로 돌려 아주 단단하게 고정시키세요. 11. 발판과 스탠드가 단단히 고정된 것을 확인한 후, 고정된 발판과 스탠드를 세워주세요. 12.
- Page 42 • 장비를 임의로 분해하지 마세요. 전기적 충격 또는 상해, 장비의 고장 및 부정확한 결과를 야기할 수 있으며 이 후에는 제조사의 보증 서비스를 받을 수 없습니다. • 전원이 연결된 BSM270/BSM270B과 다른 전자 기기를 접촉 시키지 마세요. 전기적인 충격이 발생할 수 있습니다. UTION NOTE DANGER 주의...
- Page 43 15. 14번의 사진을 참고하여 BSM270/BSM270B의 전원을 켜세요. 16. 헤드가 1회 동작 후 발판 화면에 아래와 같은 화면으로 전환되며 측정 대기 상태가 됩니다. <Bluetooth 통신을 이용하지 않을 경우> <Bluetooth 통신을 이용할 경우> D. 설정 1. SETUP 방법 SETUP에서는 측정 모드, 오프셋, 단위, 헤드바 위치, 디스플레이 방향, 신장 자동측정 여부, 디스플레이 시간, 체중...
- Page 44 2. SETUP 메뉴 (Mode) 체중측정 또는 신장 측정의 단독 사용 여부에 따라 Mode를 선택할 수 있습니다. ❶ : 체중과 신장을 모두 측정할 경우에 선택합니다. ❷ : 체중만 측정할 경우에 선택합니다. ❸ : 신장만 측정할 경우에 선택합니다. 참고 ˙ 공장 출하 시 초기 모드는 ‘ ’...
- Page 45 (Display Sec) 디스플레이 유지 시간을 설정합니다. (조정 범위 : 5 ~ 60초) (Speed) 체중 측정 시 안정화 시간을 설정합니다. ❶ : 움직임의 변화가 없었을 시 체중 측정할 경우 선택합니다. ❷ : 움직임의 변화가 있어도 2초 후 체중 측정할 경우 선택합니다. (Level Test) 현재...
-
Page 46: 관리 시 주의 사항
E. 관리 시 주의 사항 NOTE DANGER 주의 참 조 주 의 참 고 주 의 ˙ 제품을 임의로 분해하지 마십시오. 조작부를 임의로 분해하면 오작동이나 고장의 원인이 될 수 있습니다. 내부에는 사용자가 조작할 수 있는 부분이 없으며, 전기적 충격이 발생할 수 있습니다. 이로 인해 발생한 손해는 ㈜인바디가... -
Page 47: 측정 전 주의사항
측정 A. 측정 전 주의 사항 NOTE DANGER 주의 참 조 주 의 참 고 주 의 ˙ 측정부와 스탠드 사이에 손가락이 끼지 않도록 유의하세요. ˙ 어린이나 거동이 불편한 사람은 관리자 또는 보조자의 도움을 받아 검사할 수 있습니다. ˙ 장비가 흔들릴 경우 조절용 받침 나사를 이용하여 수평을 유지시키세요. B. - Page 48 3. 신장만 측정하기 신장 측정 방법은 ‘ (자동 측정)’ 과 ‘ (수동 측정)’ 이 있습니다. 환경설정 에서 ‘ (자동 측정)’ 로 설정되어 있는 경우 신장 측정이 자동으로 시작됩니다. ‘ (수동 측정)’ 로 설정된 경우 ‘Enter’ 버튼을 눌러 신장 측정을 시작합니다. <Bluetooth 통신을...
-
Page 49: 측정 자세
C. 측정 자세 정확한 측정 결과를 위해서는 측정 시 올바른 자세를 유지해야 합니다. 머리 뒷부분이 스탠드에 닿도록 위치시켜 주세요. 턱, 배와 가슴을 당기고 시선은 정면을 향하게 합니다 스탠드를 등지고 서주세요. 팔을 자연스럽게 내려주세요. 엉덩이를 스탠드에 살짝 기대세요. 다리를 구부리지 않고 쭉 폅니다. 발뒤꿈치가... -
Page 50: 운송 및 보관
장비를 재포장하기 전에 반드시 전원을 끄고 어댑터 등을 제거하였는지 확인하세요. 제품을 재포장하는 과정에서 헤드바와 케이블이 손상되지 않도록 주의하세요. 1. 보관해두었던 BSM270/BSM270B 발판 포장박스를 준비하세요. 2. 아래와 같이 종이 박스 2개를 포장박스 양 끝 단에 붙여 놓으세요. 3. 장비 전원 스위치를 반드시 내려 주세요. -
Page 53: 운송 및 보관 환경
15. 스탠드 양 끝과 중간에 PE 패드를 끼워주세요. 16. 보관해 두었던 스탠드 박스에 스탠드를 밀어 넣어주세요. 17. 포장박스를 덮고 테이프로 동봉하세요. B. 운송 및 보관 환경 BSM270/BSM270B을 안전하게 운송 또는 보관하려면 아래의 기준을 충족해야 합니다. 적정온도 -10 ~ 70℃ 상대습도... -
Page 54: 자주 묻는 질문 및 답변
IV. 자주 묻는 질문 및 답변 BSM270/BSM270B에 대해 자주 묻는 질문 및 답변은 아래와 같습니다. BSM270/BSM270B 장비 사용 도중 문제가 발생했거나 신장 측정에 문의사항이 있을 경우 아래 질문 및 답변을 확인하세요. 아래를 확인한 후에도 문제가 해결되지 않을 경우 ㈜인바디 고객센터로 연락하세요. - Page 55 질문 답변 ˙ 측정된 신장값이 이상합니다. ˙ 장비가 평탄하고 진동이 없는 바닥에 설치되어 있는지 확인하세요. ˙ 측정 자세를 정확하게 지켜야 합니다. 측정 자세에 대한 자세한 설명은 본 사용자 매뉴얼의 ‘ II. 신장 측정 ’ 의 ‘ C. 측정 자세 ’ 를 참고하세요. ˙...
-
Page 56: 안전을 위한 정보 및 주의사항
V. 기타 * BSM270/BSM270B은 ㈜인바디의 품질보증시스템에 의해 설계, 제조, 검사되었습니다. ㈜인바디는 국제 품질관리 시스템인 ISO9001을 준수합니다. A. 안전을 위한 정보 및 주의사항 NOTE DANGER 경고 참 조 주 의 참 고 주 의 1. 물리적으로 장애가 있는 사람이나 어린이가 혼자 측정을 시도하지 못하도록 해야 합니다. 그러나 관리자 또는 보조자의... - Page 57 2. 지나치게 높거나 낮은 온도, 습도 및 압력은 장비의 작동에 영향을 줄 수 있으며 오작동의 원인이 되므로 제품의 사양에 제시된 가용 범위 안에서 사용하세요. 3. BSM270/BSM270B을 이동할 때에는 반드시 구입 시에 제공된 포장재질을 사용하여 주시고 설치, 해체하거나 사용 시에 심한 물리적 충격이 가해지지 않도록 하세요.
-
Page 58: 외관 및 기능
B. 외관 및 기능 BSM270/BSM270B 각 부분의 명칭과 기능은 다음과 같습니다. * 설치 전에 각 부분별로 균열 등의 이상이 없는지 확인해 주세요. 1. 헤드부 ❶ 헤드바: 신장 측정 시 사용합니다. ❶ 2. 스탠드 ❶ 스탠드: 장비 기둥을 구성하는 부분입니다. ❶... - Page 59 3. 발판부 ❶ 스탠드 삽입부: 스탠드가 삽입되어 발판과 조립되는 위치입니다. ❷ 발판: 신장 측정 시 측정자가 올라가는 곳입니다. ❸ 발판 조절 나사: 장비가 좌우/앞뒤로 흔들리지 않도록 수평을 맞출 때 사용됩니다. ❹ LCD 화면: 신장, 체중 측정값 등을 화면으로 보여줍니다. ❺ ▲, ▼...
-
Page 60: 표시사항
1177 1177 1177... -
Page 61: 제품 사양
D. 제품 사양 제품 목적 자동으로 신장과 체중을 측정할 수 있는 기기 측정 항목 신장, 체중, BMI 측정 신장 900 ~ 2000mm 신장 측정 오차 범위 ± 1mm 측정 체중 10 ~ 200kg 결과 표시 측정 결과를 LCD 화면에 표시 영점... - Page 64 ©2021 InBody Co., Ltd. All rights reserved. IM-M2-E-210614...
Need help?
Do you have a question about the BSM270 and is the answer not in the manual?
Questions and answers