
Subscribe to Our Youtube Channel
Related Manuals for Avaya BM12


Summary of Contents for Avaya BM12
- Page 1 Avaya one-X™ Deskphone BM12 Button Module User Guide 16-603623 Issue 1 August 2010...
- Page 2 End User. “Designated Processor” means a single stand-alone computing device. “Server” means a Designated Processor that Avaya provides a telephone number for you to use to report problems or to ask hosts a software application to be accessed by multiple users. “Software”...
- Page 3 on, the user is encouraged to try to correct the interference by one of the following measures: • Reorient or relocate the receiving antenna. • Increase the separation between the equipment and receiver. • Connect the equipment into an outlet on a circuit different from that to which the receiver is connected.
- Page 5 Contents Introduction to the BM12 Button Module ....Paging .........
- Page 6 Contents 6 Avaya one-X™ Deskphone BM12 Button Module User Guide...
- Page 7 Introduction to the BM12 Button Module The BM12 Button Module extends the number of call appearances and feature buttons on your telephone. It provides 24 additional lines for incoming calls, outgoing calls, and calling features using two pages of 12 call appearances/features each. Typical uses are: to provide additional lines for calls bridged from one or more other extensions, ●...
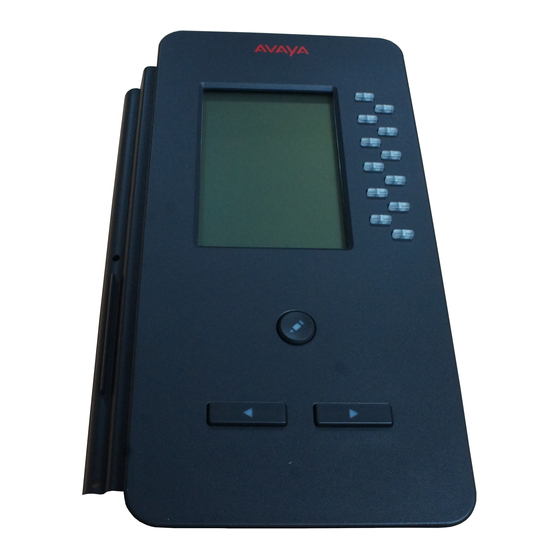
- Page 8 Figure 1: The BM12 Button Module Figure notes: 1. Line buttons with On/Off LEDs (for call appearances and features) 2. Display Screen 3. Quick Edit Button 4. Next 12/Previous 12 Page buttons (with LEDs) sbm24 8 Avaya one-X™ Deskphone BM12 Button Module User Guide...
- Page 9 Paging Paging The BM12 provides up to 24 call appearances or features, using two pages with 12 call appearances and/or features per page. To move from the first page of 12 to the next, press the Right Arrow page button on the bottom of the module. To move to the previous page of 12, press the Left Arrow page button.
- Page 10 If you want to clear the current label text first, press Clear then enter the new label. 5. Press Save or OK. Personalizing a button label using a touch-based IP Deskphone 1. Press the button module’s Edit button. 10 Avaya one-X™ Deskphone BM12 Button Module User Guide...
- Page 11 Personal Settings 2. With the Phone screen displayed, use the deskphone’s list of call appearances and features to locate the label you want to change, then touch that label to select it. 3. Touch Edit. 4. Edit the label using the on-screen keyboard. A label can be up to 13 characters. For information about using the onscreen keyboard, see your deskphone user guide.
- Page 12 Adjusting the Button Module Contrast The button module supports up to 15 levels of contrast. Be sure to use the appropriate procedure for the type of deskphone model you have. 12 Avaya one-X™ Deskphone BM12 Button Module User Guide...
- Page 13 Personal Settings Adjusting the contrast using a button-based IP Deskphone 1. Press Home. 2. Press Select or OK. 3. Scroll to Screen & Sound Options and press Select or OK. 4. Scroll to Contrast and press Change or OK. 5. If only one button module is attached, scroll to and select Module 1. If there is more than one button module attached, select the module by number.
- Page 14 Introduction to the BM12 Button Module 14 Avaya one-X™ Deskphone BM12 Button Module User Guide...
Need help?
Do you have a question about the BM12 and is the answer not in the manual?
Questions and answers