
Related Manuals for Optimum OptiDrill DQ 14


Summary of Contents for Optimum OptiDrill DQ 14
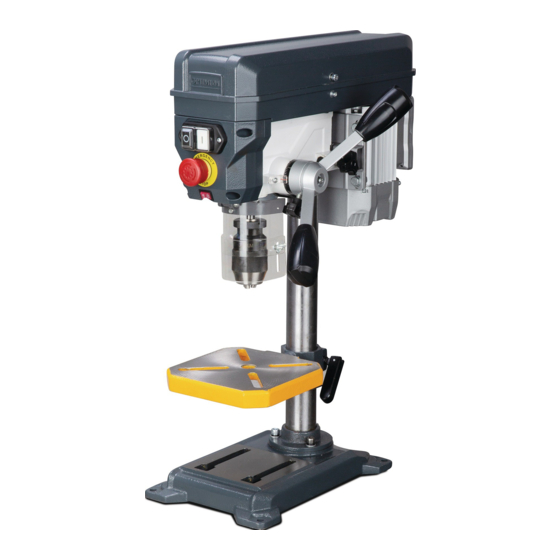
- Page 1 Operating Manual Version 1.0.1 Bench drill DQ 14 Part no. 3191040 DQ 18 Part no. 3191042 DQ 22 Part no. 3191044 3191045 DQ 14 DQ 22 DQ 18...
-
Page 2: Table Of Contents
Table of contents Safety Safety instructions (warning notes)........................ 5 1.1.1 Classification of hazards ........................5 1.1.2 Other pictograms..........................6 Intended use ..............................7 Reasonably foreseeable misuses........................7 1.3.1 Avoiding misuse ..........................7 Possible dangers posed by the bench drill ....................8 Qualification .............................. - Page 3 4.6.1 Table rotation - DQ22 ........................26 Speed variation ............................27 4.7.1 DQ 14 and DQ 18 ...........................27 4.7.2 DQ 22 .............................28 Before starting work .............................28 During work ..............................28 4.10 Disassembly, assembly of drill chucks and drill bits ..................29 4.10.1 DQ14 ..............................29 4.10.2 DQ18 and DQ22 ..........................29 4.10.3 Fitting the drill chuck ........................30 4.11...
- Page 4 Dear customer, Thank you very much for purchasing a product made by OPTIMUM. OPTIMUM metal working machines offer a maximum of quality, technically optimum solutions and convince by an outstanding price performance ratio. Continuous enhancements and product innovations guarantee state-of-the-art products and safety at any time.
-
Page 5: Safety
Always keep this documentation close to the drilling machine. INFORMATION If you are unable to rectify an issue using these operating instructions, please contact us for advice: Optimum Maschinen Germany GmbH Dr.-Robert-Pfleger-Str. 26 D-96103 Hallstadt email: info@optimum-maschinen.de Safety instructions (warning notes) 1.1.1... -
Page 6: Other Pictograms
Symbol Alarm expression Definition / consequence Practical tips and other important or useful information and notes. No dangerous or harmful consequences for people or objects. Information In case of specific dangers, we replace the pictogram with general danger with a warning of injury to hands, hazardous rotating parts. -
Page 7: Intended Use
We explicitly point out that any construction, technical or process engineering changes that have not been approved by Optimum Maschinen Germany GmbH will render the warranty null and void It is also part of intended use that the maximum values for the drilling machine are complied with and the operating manual is observed. -
Page 8: Possible Dangers Posed By The Bench Drill
Clamp the workpiece in the machine vice. Make sure that the workpiece is firmly clamped in the machine vice and that the machine vice is firmly clamped onto the drill table. Use cooling and lubricating agents to increase the durability of the tool and to improve the surface quality. -
Page 9: Qualification
Qualification 1.5.1 Target group private users The machine can be used in the private domain. The acumen of people in the private sector with training in metal working was taken into consideration for creating this operation manual. Vocational training or further instruction in a metal working profession is a prerequisite for safe operation of the machine. -
Page 10: Personal Protective Equipment
It is your responsibility! If a safety device has been activated or has failed, the bench drill must only be used if you the cause of the fault has been eliminated, have verified that there is no danger to personnel or objects. WARNING! If you bypass, remove or override a safety device in any other way, you are endangering yourself and other persons working with the bench drill. -
Page 11: Emergency Stop Switch
are legible (clean them, if necessary) are complete (replace if necessary). INFORMATION Organise the checks according to the following table; General check Equipment check Guards Mounted, firmly bolted and not damaged Signs, Installed and legible Markers Date: Checked by (signature): Functional check Equipment check... -
Page 12: Prohibition, Warning And Mandatory Signs
INFORMATION The machine cannot be started, if the protective cover is not closed. 1.12.3 Prohibition, warning and mandatory signs INFORMATION All warning signs must be legible. They must be checked regularly. 1.13 Personal protective equipment For some works you need personnel protective equipment as protective equipment. These are ... -
Page 13: Disconnecting And Securing The Bench Drill
1.15.1 Disconnecting and securing the bench drill Disconnect the mains plug before starting maintenance and repairs. All machine parts as well as all dangerous voltages are switched off. Excepted are only the positions which are marked with the adjoining pictogram. Attach a warning sign to the machine. - Page 14 Technical specification The following information represents the dimensions and indications of weight and the manu- facturer‘s approved machine data. DQ 14 DQ 18 DQ 22 230V~50 Hz (~60Hz) Electrical connection 230V~50 Hz (~60Hz) 230V~50 Hz (~60Hz) 400V~50 Hz (~60Hz) Spindle drive motor power 350 W 450 W 550 W...
-
Page 15: Technical Specification Emissions
DQ 14 DQ 18 DQ 22 Environmental conditions 25 - 80 % Relative humidity Operating equipment, toothed rack and oiler Acid-free lubricating oil Operating equipment,, toothing on the spindle Assembly grease for clearance fits, e.g. Staburag NBU 30 PTM Emissions CAUTION! Depending on the overall noise exposure and the basic threshold values, machine operators must wear appropriate hearing protection. -
Page 16: Dimensions Dq14
Dimensions DQ14 C-C ( 1 : 5 ) DQ14 | DQ18 | DQ22 Technical specification Translation of original instruction Version 1.0.1 - 2020-09-07... -
Page 17: Dimensions Dq18
Dimensions DQ18 Technical specification DQ14 | DQ18 | DQ22 Version 1.0.1 - 2020-09-07 Translation of original instruction... -
Page 18: Dimensions Dq22
Dimensions DQ22 DQ14 | DQ18 | DQ22 Technical specification Translation of original instruction Version 1.0.1 - 2020-09-07... -
Page 19: Delivery, Interdepartmental Transport And Unpacking
Delivery, interdepartmental transport and unpacking CAUTION! Injuries caused by parts falling over or off a forklift, pallet truck or transport vehicle. Only use means of transport that can carry the total weight and are suitable for it. Notes on transport, installation and unpacking Improper transport of individual devices and minor machines, unsecured devices and minor machines stacked on top of each other or next to each other in packed or already unpacked condition is accident-prone and can cause damage or malfunctions for which we do not grant... -
Page 20: Standard Scope Of Delivery
3.3.1 Standard scope of delivery Bench drill DQ 14 - Drill chuck B16 for drills 0 to 13mm Bench drill DQ 18 - Drill chuck B16 for drills 0 to 15.9mm - Morse taper MT2 / B16 Bench drill DQ 22 - Drill chuck B16 for drills 0 to 16mm - Morse taper MT2 / B16 Installation requirements... -
Page 21: First Commissioning
OPTIMUM. Only use tool holders in the intended admissible speed range. Tool holders may only be modified in compliance with the recommendation of OPTIMUM or of the manufacturer of the clamping devices. WARNING! There is a danger to persons and equipment, if the first commissioning of the drilling machine is carried out by inexperienced personnel. -
Page 22: Warming Up The Machine
3.5.1 Warming up the machine ATTENTION! If the drilling machine and in particular the drilling spindle is immediately operated at maximum load when it is cold it may result in damages. If the machine is cold, e.g. directly after having transported the machine, it should be warmed up at a spindle speed of only 500 1/min for the first 30 minutes. -
Page 23: Operation
Operation Control and indicating elements 4.1.1 DQ14 | DQ18 DQ18 DQ14 Img. 4-1: DQ14 | DQ 18 Pos. Designation Pos. Designation Push button "Off" Push button "On" Emergency-stop switch Machine illumination Clamping lever drilling table Scale of drill depth stop Drill chuck protection, drill chuck Protective cover of V-belt housing V-belt tension clamping screw right... -
Page 24: Dq22
4.1.2 DQ22 Img. 4-2: DQ22 - 230V Pos. Designation Pos. Designation Push button "Off" Push button "On" Emergency-stop switch Machine illumination Clamping lever drilling table Scale of drill depth stop Drill chuck protection, drill chuck Protective cover of V-belt housing V-belt tension clamping screw left Lever for spindle sleeve feed Drilling table... -
Page 25: Control Panel
4.1.3 Control panel Push button ON The push button "ON" switches on the rotation of the drilling spindle. Push button Off The "push button OFF“ switches the rotation of the drilling spindle off. Machine light switch Switches the machine light on or off. Rotary direction switch Switches the rotational direction of spindle on DQ22 - 400V machine. -
Page 26: Drill Depth Stop
Drill depth stop Loosen the clamping screw and turn the scale ring to the desired drilling depth. Scale Tighten the clamping screw again. The spindle can only be lowered to the set Clamping screw value. Img. 4-3: Scale of drill depth stop Table Inclination CAUTION! The further the drilling table is tilted to the left or right, the lower the carrying capacity... -
Page 27: Speed Variation
Speed variation CAUTION! Preventive safety measure. Disconnect the machine from the power supply. ATTENTION! Watch for the proper tension of V-belts. Too heavy or too low tension of the belt can cause damage. The belts are correctly tensioned, when it can be by pressing with the fingers for about 1 ... -
Page 28: Before Starting Work
4.7.2 DQ 22 Pay attention to the correct position of the different lengths of the V-belts! The slightly shorter V-belt belongs to the spindle pulley. Loosen clamping screw (3) on both sides. Release the V-belt tension with the lever (5). ... -
Page 29: Disassembly, Assembly Of Drill Chucks And Drill Bits
4.10 Disassembly, assembly of drill chucks and drill bits CAUTION! Preventive safety measure. Disconnect the machine from the electrical supply. ATTENTION! The tool and/or the drill chuck will fall down. Hold the tool or the drill chuck while drifting it out. -
Page 30: Fitting The Drill Chuck
4.10.3 Fitting the drill chuck Only a clean and smooth surface allows a correct and tight fitting connection. On the bench drill DQ14, the drill chuck is pressed onto the taper B16. On the DQ18 and DQ22 bench drills, the drill chuck is secured against rotation in the drill spin- dle by a positive-locking connection (driver). -
Page 31: Determining The Cutting Speed And The Speed
Determining the cutting speed and the speed Table cutting speeds / infeed Material table Recommended infeed f in mm/revolution Recommended Material to be processed cutting speed Drill bit diameter d in mm Vc in m/min 2...3 >3...6 >6...12 >12...25 >25...50 Unalloyed construction steels 30 - 35 0.05... - Page 32 in m/ Drill bit Ø Speed n in rpm 1062 1274 1415 1769 2123 2477 2831 3539 4246 5662 7077 1146 1274 1592 1911 2229 2548 3185 3822 5096 6369 1042 1158 1448 1737 2027 2316 2895 3474 4632 5790 1062 1327 1592...
-
Page 33: Maintenance
Maintenance In this chapter you will find important information about Inspection, Maintenance and Repair. ATTENTION! Properly performed regular maintenance is an essential prerequisite for operational safety, failure-free operation, long service life of the machine and ... -
Page 34: Inspection And Maintenance
WARNING! Before starting the machine you must be sure that no dangers generated for persons, the machine is not damaged. Inspection and maintenance The type and level of wear depends to a large extent on the individual usage and operating conditions. - Page 35 Interval Where? What? How? Check whether the V-belts have become porous and worn. XPZ 887 Every 6 months One V-belt Img. 6-2: DQ14 | DQ18 Check whether the V-belts have become porous and worn. V10X610 V10X605 Every 6 months Two V-belt...
- Page 36 Interval Where? What? How? CAUTION! The spiral spring can unwind. Parts can fly towards you. Loosen the nut. Under no circumstances remove the nut com- pletely from the thread! Hold the spring housing with one hand, while using the other hand to slowly remove the housing.
- Page 37 Interval Where? What? How? Any unusual rattling noises can be eliminated by regreasing. The sleeve (1) moves downwards or upwards with the toothed spin- dle (2) in the fixed driven sleeve (3) during drill feed. The noises are caused by the necessary clearance between the two tooth- ings of the sleeve and spindle.
-
Page 38: Repair
If repairs are carried out by qualified technical personnel, they must follow the indications given in these operating instructions. Optimum Maschinen Germany GmbH accepts no liability nor does it guarantee against damage and operating malfunctions resulting from failure to observe these operating instructions. -
Page 39: Ersatzteile - Spare Parts
Ersatzteile - Spare parts Ersatzteilbestellung - Ordering spare parts Bitte geben Sie folgendes an - Please indicate the following : Seriennummer - Serial No. Maschinenbezeichnung - Machines name Herstellungsdatum - Date of manufacture Artikelnummer - Article no. Die Artikelnummer befindet sich in der Ersatzteilliste. -
Page 40: Dq14 - Bohrkopf - Drill Head
7.3.1 DQ14 - Bohrkopf - Drill head Abb. 7-1: DQ14 - Bohrkopf - Drill head DE | EN DQ14 | DQ18 | DQ22 Originalbetriebsanleitung Version 1.0.1 - 2020-09-07... - Page 41 DQ14 - Ersatzteilliste Bohrkopf - Spare part list drill head Menge Grösse Artikelnummer Pos. Bezeichnung Designation Qty. Size Item no. Zylinderstift Cylindrical pin 03191040101 Rückholfeder Return spring 03191040102 Gehäuse Housing 03191040103 Riemenscheibe Belt pulley 03191040104 Mitnehmer Carrier 03191040105 Kugellager Ball bearing 6203 0406203R Gewindestift...
-
Page 42: Dq14 - Säule - Column
Ring Ring 031910401101 Gehäuse Housing 031910401102 Motor Engine 031910401108 Abdeckung Cover 031910401115 Gehäuse Housing 031910401116 Abdeckung Cover 031910401118 230V Steckdosen Typ F Netzstecker Power plug ( Deutschland ) Lüfter 031910401123 Bolzen Bolt 031910401126 Motorplatte Motor plate 031910401127 Sprengring Retaining ring Scheibe Washer Sechskantmutter... -
Page 43: Dq14 - Schaltplan - Wiring Diagram
DQ14 - Ersatzteilliste Säule- Spare part list column Menge Grösse Artikelnummer Pos. Bezeichnung Designation Qty. Size Item no. Säule Column Skalenring Scale ring 03191040201 Spannbolzen Clamping bolt 03191040202 Spannhebel Clamping lever 03191040203 Schraube Screw M12x25 Scheibe Washer Schraube Screw 03191040206 Bohrtisch Drilling table 03191040207... -
Page 44: Dq18 - Bohrkopf - Drill Head
7.4.1 DQ18 - Bohrkopf - Drill head Abb. 7-3: DQ18 - Bohrkopf - Drill head DE | EN DQ14 | DQ18 | DQ22 Originalbetriebsanleitung Version 1.0.1 - 2020-09-07... - Page 45 DQ18 - Ersatzteilliste Bohrkopf - Drill head spare part list Menge Grösse Artikelnummer Pos. Bezeichnung Designation Qty. Size Item no. Ring Ring 03191042101 Klemmmutter Clamping nut 03191042102 Gehäuse Housing 03191042103 Riemenabdeckung Belt cover 03191042104 Riemenabdeckung Belt cover 03191042105 Scharnier Hinge 03191042106 Schraube Screw...
-
Page 46: Dq18 - Säule - Column
Abdeckung Cover 031910421101 Motorabdeckung Motor cover 031910421102 230V Steckdosen Typ Netzstecker Power plug F ( Deutschland ) Keilriemen V-belts XPZ 887 031910421121 Gehäuse Housing 031910421122 Schalter Switch Y50-18 031910421123 Abdeckung Cover 031910421124 Ein-Aus-Taster On-Off button DZ-KJD16_AF0 031910421137 Kugellager Ball bearing 6004 0406004 Sicherungsring... - Page 47 DQ18 - Ersatzteilliste Säule - Column spare part list Menge Grösse Artikelnummer Pos. Bezeichnung Designation Qty. Size Item no. Machine Foot 03191042101 Säule Column 03191042102 Halter Holder 03191042103 Zahnstange Rack 03191042104 Ring Ring 03191042105 Gewindestift Grub screw M8x10 Zahnrad Gear wheel 03191042107 Schneckenwelle Worm shaft...
-
Page 48: Dq18 - Schaltplan - Wiring Diagram
DQ18 - Schaltplan - Wiring diagram 230V ~ 50Hz (60Hz) "1" 1〜 "0" DE | EN DQ14 | DQ18 | DQ22 Originalbetriebsanleitung Version 1.0.1 - 2020-09-07... -
Page 49: Dq22 - Bohrkopf - Drill Head
DQ22 - Bohrkopf - Drill head Abb. 7-5: DQ22 - Bohrkopf - Drill head DQ14 | DQ18 | DQ22 DE | EN Version 1.0.1 - 2020-09-07 Originalbetriebsanleitung... - Page 50 DQ22 - Ersatzteilliste Bohrkopf - Drill head spare part list Menge Grösse Artikelnummer Pos. Bezeichnung Designation Qty. Size Item no. Ring Ring 03191044101 Ring Ring 03191044102 Gehäuse Housing 03191044103 Lampenabdeckung Lamp cover 03191044104 Platte Plate 03191044107 LED Lampe LED light 03191044108 Platte Plate...
- Page 51 Klemmkasten Terminal box 400V motor only 03191045122 Abdeckung Cover 230V motor only 03191044123 Abdeckung Cover 400V motor only 03191045123 230V Steckdosen Typ F ( Anschlussstecker Connection plug Deutschland ) Anschlussstecker Connection plug CEE three-phase plug Sicherungsgehäuse Fuse box 03191044131 Feinsicherung träge Fine-wire fuse slow 5A (DQ22 - 230V only) Gewindestift...
-
Page 52: Dq22 - Säule - Column
7.6.1 DQ22 - Säule - Column Abb. 7-6: DQ22 - Säule - Column DQ22 - Ersatzteilliste Säule - Column spare part list Menge Grösse Artikelnummer Pos. Bezeichnung Designation Qty. Size Item no. Träger Supporters 03191045201 Führung Guide 03191045202 Schneckenrad Worm wheel 03191045203 Ring Ring... -
Page 53: Dq22 - Schaltplan - Wiring Diagram - 230V
Bolzen Bolt 03191045217 Klemmhebel Clamping lever 03191045218 Schraube Screw M4x16 Anzeige Display 03191045220 Schraube Screw M5x12 Scheibe Washer Gewindestift Grub screw M6x10 Gewindestift Grub screw M8x10 Bohrtisch Drilling table 03191045226 Scheibe Washer Schraube Screw 03191045229 Schraube Screw M10x35 DQ22 - Schaltplan - Wiring diagram - 230V 230V ~ 50Hz (60Hz) 1〜... -
Page 54: Dq22 - Schaltplan - Wiring Diagram - 400V
DQ22 - Schaltplan - Wiring diagram - 400V 400V ~ 50Hz (60Hz) DE | EN DQ14 | DQ18 | DQ22 Originalbetriebsanleitung Version 1.0.1 - 2020-09-07... -
Page 55: Malfunctions
Malfunctions Cause/ Malfunction Solution possible effects Noise during work. • Tool blunt or incorrectly clamped. • Use new tool and check tension (fixed setting of the bit, drill chuck and taper mandril) • Grease at the toothing of the spin- •... -
Page 56: Appendix 9.1 Copyright
Besides the legal liability claims for defects of the customer towards the seller, the manufac- turer of the product, OPTIMUM GmbH, Robert-Pfleger-Straße 26, D-96103 Hallstadt, does not grant any further warranties unless they are listed below or were promised as part of a single contractual provision. -
Page 57: Storage
- Non reproducible software errors Any services, which OPTIMUM GmbH or one of its agents performs in order to fulfil any additional warranty are neither an acceptance of the defects nor an acceptance of its obli- gation to compensate. Such services neither delay nor interrupt the warranty period. -
Page 58: Decommissioning
9.5.1 Decommissioning CAUTION! Used devices need to be decommissioned in a professional way in order to avoid later misuses and endangerment of the environment or persons. Unplug the power cord. Cut the connection cable. Remove all operating materials from the used device which are harmful to the envi- ronment. -
Page 59: Disposal Via Municipal Collection Facilities
Modified settings Any experiences with the geared drill which might be important for other users Recurring malfunctions Optimum Maschinen Germany GmbH Dr.-Robert-Pfleger-Str. 26 D-96103 Hallstadt Fax +49 (0) 951 - 96 555 - 888 email: info@optimum-maschinen.de Appendix DQ14 | DQ18 | DQ22 Version 1.0.1 - 2020-09-07... -
Page 60: Erwartete Genauigkeit - Expected Accuracy
Erwartete Genauigkeit - Expected accuracy Der Abschlussbericht der Genauigkeit liegt der Maschine nicht bei. The final accuracy report is not enclosed with the machine. Messwert Toleranz Testobjekt Zeichnung Measured Tolerance value Object of testing Drawing [ mm ] [ mm ] Ebenheit der Arbeits- fläche der Grundplatte 0.3 / 300... - Page 61 Messwert Toleranz Testobjekt Zeichnung Measured Tolerance value Object of testing Drawing [ mm ] [ mm ] a) 0.3 / 200 In der vertikalen Ebene Rechtwinkligkeit der In the Spindeldrehachse zur Tischfläche vertical plane b) 0.3 / 200 Perpendicularity of the In der spindle rotation axis to vertikalen Ebene...
- Page 62 EC Declaration of Conformity according to Machinery Directive 2006/42/EC Annex II 1.A The manufacturer / distributor Optimum Maschinen Germany GmbH Dr.-Robert-Pfleger-Str. 26 D96103 Hallstadt hereby declares that the following product Product designation: Bench drill Type designation: DQ 14 | DQ 18 fulfills all the relevant provisions of the directive specified above and the additionally applied directives (in the following) - including the changes which applied at the time of the declaration.
- Page 63 EC Declaration of Conformity according to Machinery Directive 2006/42/EC Annex II 1.A The manufacturer / distributor Optimum Maschinen Germany GmbH Dr.-Robert-Pfleger-Str. 26 D96103 Hallstadt hereby declares that the following product Product designation: Bench drill Type designation: DQ 22 fulfills all the relevant provisions of the directive specified above and the additionally applied directives (in the following) - including the changes which applied at the time of the declaration.
- Page 64 Index Accident report ............. 13 Classification of hazards ........5 Control and indicating elements ......23 Control panel ............24 Copyright .............. 56 Customer service ..........38 Customer service technician ........ 38 Dimensions DQ14 ............... 16 DQ18 ............... 17 DQ22 ............... 18 Disposal ...............
Need help?
Do you have a question about the OptiDrill DQ 14 and is the answer not in the manual?
Questions and answers