Advertisement
Note: When installing CEM130 on CEB94011, please add stand-off and secure
with nut. Then, use the screws to secure the heatsink plate to the
CEM130.
Standoff
Quick Start
The basic procedures required to power on CEM130:
(1). Make sure the power is OFF before connecting the CEM130.
(2). Check to ensure the onboard switch SW1-1 and SW1-2 are set to
default (OFF position).
(3). Firmly install DDR4 SO-DIMM in SDIMM1 (on bottom side of the
board)/DIMM1 (on top side of the board) until fully seated. For single
memory channel configuration, install memory module in channel 0
(SDIMM1) DDR4 SO-DIMM socket. For dual memory channel
configuration, install memory modules of the same size, chip width,
density and rank in both channel 0 (SDIMM1) and channel 1 (DIMM1)
DDR4 SO-DIMM sockets.
(4). Attach heatsink to the CEM130, refer to section Installing Thermal
Solution.
(5). Install the CEM130 onto the suggested COM Express
CEB94011
.
(6). Properly install all necessary peripheral devices such as hard disk,
display, keyboard and etc. to the baseboard.
(7). Firmly attach power supply to the baseboard power connector.
(8). Turn on the system power.
(9). Press power button on the baseboard to start CEM130.
4
NUT
TM
baseboard,
9418D130000E
©
Copyright 2020 Axiomtek Co., Ltd.
Version A1 February 2020
Printed in Taiwan
CEM130 Quick Installation Guide
Checklist
CEM130 Board x1
Note: Please contact your local vendors if any damaged or missing items. DO
NOT apply power to the board if there is any damaged component.
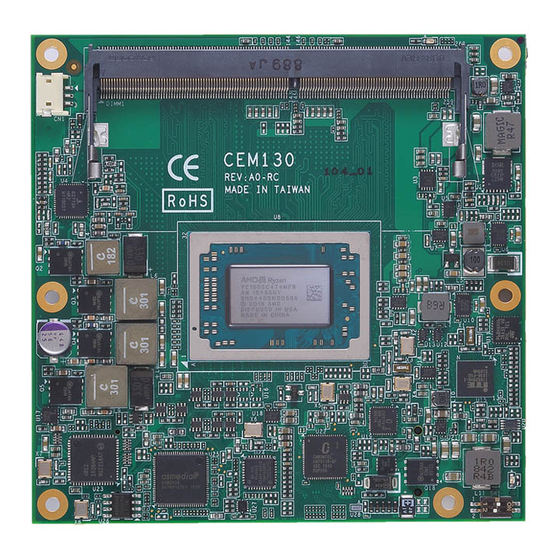
Module Layout
Top View
9418D130000E
©
Copyright 2020 Axiomtek Co., Ltd.
Version A1 February 2020
Printed in Taiwan
1
Advertisement
Table of Contents

Related Manuals for AXIOMTEK CEM130


Summary of Contents for AXIOMTEK CEM130
- Page 1 Note: When installing CEM130 on CEB94011, please add stand-off and secure CEM130 Quick Installation Guide with nut. Then, use the screws to secure the heatsink plate to the CEM130. Checklist CEM130 Board x1 Note: Please contact your local vendors if any damaged or missing items. DO NOT apply power to the board if there is any damaged component.
- Page 2 Use the appropriate screws to secure the Switch Settings heatsink plate to the CEM130. Be careful not to over-tighten the screws. Before applying power to the CEM130, please make sure onboard switches are in factory default positions.
Need help?
Do you have a question about the CEM130 and is the answer not in the manual?
Questions and answers