Table of Contents
Advertisement
Quick Links
INSTRUCTION MANUAL
40" (101CM)
TOWED DETHATCHER
MODEL NO: THTD -- PRODUCT NO: 1938118001
EN - ORIGINAL INSTRUCTIONS
ASSEMBLY REQUIRED
SAVE THESE INSTRUCTIONS
SPARES & SUPPORT: 01793 333212
FOR YOUR SAFETY
Please read & understand this manual, paying attention to the safety instructions, before use.
Incorrect use of the product could put the operator or machine in danger.
Whilst every effort has been made to ensure the accuracy of information contained in this manual, our
policy of continuous improvement determines the right to make modifications without prior warning.
Images used are for illustration purposes only
23/10/2019 v3
Advertisement
Table of Contents

Subscribe to Our Youtube Channel
Related Manuals for The Handy 1938118001


Summary of Contents for The Handy 1938118001
- Page 1 INSTRUCTION MANUAL 40” (101CM) TOWED DETHATCHER MODEL NO: THTD -- PRODUCT NO: 1938118001 EN - ORIGINAL INSTRUCTIONS ASSEMBLY REQUIRED SAVE THESE INSTRUCTIONS SPARES & SUPPORT: 01793 333212 FOR YOUR SAFETY Please read & understand this manual, paying attention to the safety instructions, before use.
- Page 2 Copyright Notice Copyright © Handy Distribution Permission is granted to reproduce this publication for personal & educational use only. Commercial copying, redistribution, hiring or lending is prohibited. No part of this publication may be stored in a retrieval system or transmitted in any other form or means without written permission from Handy Distribution.
-
Page 3: Table Of Contents
CONTENTS SPECIFICATIONS IMPORTANT INFORMATION GENERAL SAFETY INSTRUCTIONS COMPONENTS ASSEMBLY OPERATION & ADJUSTMENT MAINTENANCE PARTS DIAGRAM & LIST WARRANTY NOTES ASSEMBLY IS REQUIRED This product requires assembly before use. See the “Assembly” section for instructions. Please check that all parts required for the assembly of this spreader are included. If for any reason you believe a part for the assembly is missing or damaged, please contact us. -
Page 4: Specifications
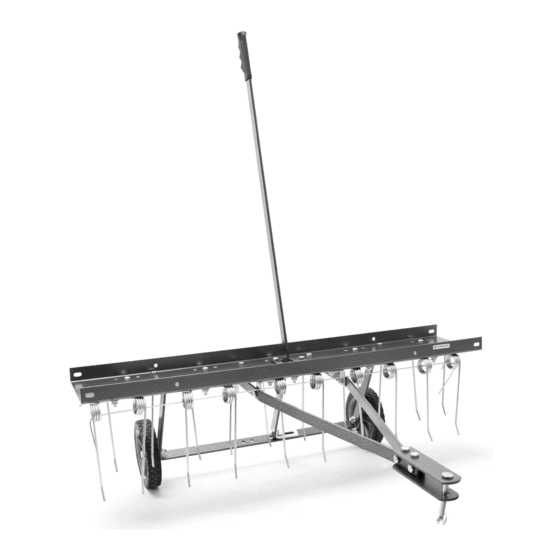
SPECIFICATION The manufacturer reserves the right to change the product specification and livery according to continued product improvements. Model THTD Product Number 1938118001 Weight 14kg Working Width 40” (101cm) Spring Loaded Steel Tines 10 x 100mm IMPORTANT INFORMATION INTENDED USE The product is intended for domestic gardens. - Page 5 to a creek or a ditch. Do not tow this equipment SAFETY SYMBOLS on a highway or any other public thoroughfare. Always begin with the transmission in first (low) gear & the engine at low speed. Gradually increase the speed as conditions permit. The vehicle Read &...
-
Page 6: Components
COMPONENTS Before assembling the dethatcher, lay out all of the components as shown below: pages. Tine Shield (40’’) Lift Plate Spring Tines x10 Hitch Brackets Lift Handle Hitch Mount Arms Axle Bracket Spring Alignment Wires Wheels Shoulder Bolt Hex Nut M8 Hex Bolt M8x50 Hex Lock Nut M8 Hex Bolt M8x30... -
Page 7: Assembly
ASSEMBLY STEP 1 Assemble the lift plate to the top of the tine shield using four M8x20 hex bolts and M8 hex lock nuts as shown in Figure 1. Tighten M8X20 HEX BOLT LIFT PLATE M8 HEX LOCK NUT FIGURE 1 STEP 2 Turn the tine shield upside down. - Page 8 STEP 5 Fasten the hitch mount arms to the outside of the angle brackets at the front of the tine shield. Use two M8x20 hex bolts and M8 hex lock nuts. Tighten and then loosen the nuts slightly. See Figure 3. STEP 6 Fasten the hitch mount arms to the outside of the hitch arm mount brackets at the rear of the tine shield.
- Page 9 STEP 10 Tighten the bolts and nuts assembled in step 8. Tighten the bolts and nuts assembled in step 7. Tighten the bolts and nuts assembled in step 3. Tighten the bolts and nuts assembled in step 4. Tighten and then loosen slightly the bolts and nuts assembled in step 5. Tighten the bolts and nuts assembled in step 6.
- Page 10 STEP 13 Fasten the ten spring tines to the square holes in the bottom of the tine shield. Use a M8x25 carriage bolt, Ф8 big flat washer, Ø8 lock washer and M8 hex nut for each spring tine. Tighten. See Figure 7. NOTE: Spring tines must sit between dimples.
- Page 11 STEP 17 Position the hitch arm mount bracket so that some resistance is felt through the lift handle when it is locked in the up position. Tighten the nuts. See Figure 9. GRIP LIFT HANDLE M8X25 CARRIAGE BOLT M8X20 HEX BOLT M8 HEX LOCK NUT...
-
Page 12: Operation & Adjustment
OPERATION / ADJUSTMENT DANGER The product must only be put into operation if no defects are found. It is crucial that defective parts are replaced before the product is used again. Check the safety equipment and the safe condition of the product: Check all parts to make sure that they fit tightly. Check whether there are any visible defects: broken parts, cracks, etc. -
Page 13: Maintenance
MAINTENANCE LUBRICATE Maintenance spray or multi-purpose grease can be applied to the wheel axle prior to long-term storage. CLEANING After each use thoroughly wash the machine with a stiff brush. STORING Before storing, ensure that the machine is clean and dry. Store in a dry or protected area and coat exposed metal with light oil when not in use. -
Page 14: Parts Diagram & List
PARTS DIAGRAM & LIST Part No. Description QTY No. Part No. Description TH153-1 Hitch Arm Mount Bracket 13 TH153-13 Hex Lock Nut M10 TH153-2GM Hitch Bracket 14 TH153-14 Flat Washer TH153-3 Spring Tine 15 TH153-15 Hex Bolt M8x20 TH153-4 Spring Alignment Wire 16 TH153-16 Lock Washer TH153-5... - Page 15 GJ HANDY & CO LTD USER WARRANTY POLICY Users Statement of Warranty Each new machine is warranted against defective material or assembly of material under normal usage. The warranty applies to the original purchaser and covers faulty parts and the labour involved in replacing and repairing those parts, which are of original manufacture.
- Page 16 Disclaimer a) This warranty is only a remedy for defect of products. GJ Handy & Co Ltd will never warranty in terms of the merchantability or the fitness for a particular purpose. b) No person is authorised to make any warranties, representations or promises, expressed or implied, on behalf of GJ Handy &...
-
Page 17: Notes
NOTES _____________________________________________ _____________________________________________ _____________________________________________ _____________________________________________ _____________________________________________ _____________________________________________ _____________________________________________ _____________________________________________ _____________________________________________ _____________________________________________ _____________________________________________ _____________________________________________ _____________________________________________ _____________________________________________ _____________________________________________ _____________________________________________ _____________________________________________ _____________________________________________ _____________________________________________ _____________________________________________ _____________________________________________ _____________________________________________ _____________________________________________ _____________________________________________ _____________________________________________ _____________________________________________ _____________________________________________... - Page 18 NOTES _____________________________________________ _____________________________________________ _____________________________________________ _____________________________________________ _____________________________________________ _____________________________________________ _____________________________________________ _____________________________________________ _____________________________________________ _____________________________________________ _____________________________________________ _____________________________________________ _____________________________________________ _____________________________________________ _____________________________________________ _____________________________________________ _____________________________________________ _____________________________________________ _____________________________________________ _____________________________________________ _____________________________________________ _____________________________________________ _____________________________________________ _____________________________________________ _____________________________________________ _____________________________________________ _____________________________________________...
-
Page 20: Tel: 01793 333212
For spares or support of your handy product, please contact us: Tel: 01793 333212 Email: customerservice@handydistribution.co.uk (Mon – Fri 8.00am to 5.30pm excl. Bank Holidays) To see our range of garden machinery & equipment visit: www.thehandy.co.uk Making gardening easier & affordable since 1938 Distributed by Handy Distribution, Murdock Road, Dorcan, Swindon, SN3 5HY...
Need help?
Do you have a question about the 1938118001 and is the answer not in the manual?
Questions and answers