Table of Contents
Advertisement
Quick Links
Advertisement
Table of Contents

Related Manuals for Eaton SEFELEC 1500M


Summary of Contents for Eaton SEFELEC 1500M
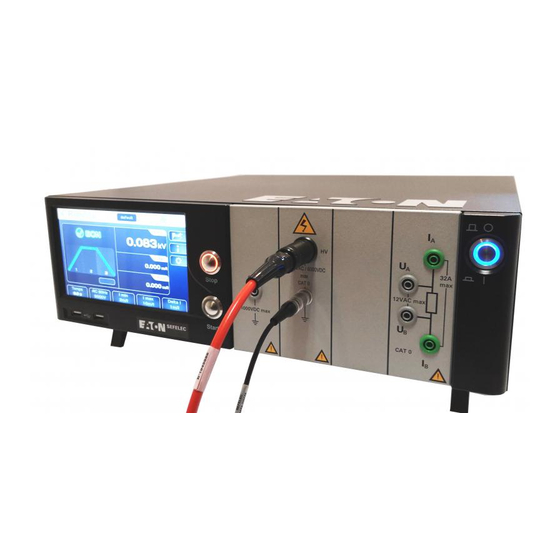
- Page 1 User Manual SEFELEC 1500M PENT6570 version 1.06 - January 2020...
-
Page 2: Table Of Contents
CONTENTS Introduction ................................7 1.1. Warranty ................................ 8 1.2. Pictograms used ............................. 9 1.3. Warning and safety instructions ........................11 1.4. Declaration of Conformity ..........................12 1.5. Qualification of the personnel ........................12 1.6. Exclusion of liability ............................12 1.7. After-sales service ............................ - Page 3 4.3. Precautions for use ............................21 Commissioning ..............................22 5.1. Content when delivered ..........................22 5.2. Setting up the various connectors and cords ....................22 5.3. Turning ON the device ..........................23 Configuration of the device ..........................27 6.1. Language selection ............................28 6.2.
- Page 4 Configuring the current measurement ........................ 67 9.1. Setting the measurement time ........................69 9.2. Setting the measurement voltage ........................ 71 9.3. Using external power supply with the picoammeter ................... 72 9.4. Setting the comparison thresholds ......................75 9.5. Selecting the filtering mode ......................... 77 9.6.
- Page 5 12.3. Connections ............................116 12.4. Definition of the input-output signals ....................117 Measurement-Discharge cycle ......................120 12.5. IEEE488-2 (GPIB) interface ..........................125 13.1. Syntax rules ............................126 Supported IEEE-488-1 functions ....................... 126 13.2. List of IEEE488 commands ........................ 126 13.3. ETHERNET Interface..........................
- Page 6 14.5.3. NETWORK MASK ......................... 137 14.5.4. Communication port and protocol ....................137 Syntax rules ........................... 137 14.5.5. List of ETHERNET commands ....................138 14.5.6. 14.5.7. Commands ............................. 138 Error message ..........................138 14.5.8. Malfunction ............................. 139 14.5.9. RS232C interface ............................140 15.1.
- Page 7 17.1. Description of the rear panel ......................... 153 17.1.1. Safety connector C5 ......................... 154 Maintenance and calibration ......................... 155 18.1. General ..............................155 18.2. Equipment returns ..........................155 18.3. Maintenance ............................155 EULA: END USER LICENSE AGREEMENT ......................157 EU Declaration of conformity ......................... 162 SEFELEC1500M Instructions V1.06...
-
Page 8: Introduction
1. INTRODUCTION General points These instructions present the SEFELEC1500M device, designed for taking measurements of high-value electrical resistance, as well as its electrical and mechanical specifications. In addition, the information required for usage in accordance with the rules in effect for safe op- eration, commissioning and maintenance of devices is provided. -
Page 9: Warranty
1.1. WARRANTY EATON guarantees that this device is free from any defect in the construction and packaging thereof. EATON also guarantees that in the framework of correct use, the device will comply with the characteristics mentioned in this document. If within the year following its first delivery, the device does not comply with its specifications, it will be repaired free of charge at our location in Lognes. -
Page 10: Pictograms Used
1.2. PICTOGRAMS USED Warnings are used in these instructions with symbols that must be complied with in order to guarantee safe operation of the devices. The warnings and symbols used are: Indicates imminent danger. Death or very serious injury may occur, if suitable safety measures are not tak- DANGER Indicates imminent danger. - Page 11 The following symbols may appear on the devices: Warning (See accompanying documents). Direct current. Warning, risk of electric shock. Direct current and alternat- ing current. falls under a WEEE recycling procedure Alternating current. Earth terminal. SEFELEC1500M Instructions V1.06...
-
Page 12: Warning And Safety Instructions
1.3. WARNING AND SAFETY INSTRUCTIONS The SEFELEC1500M Megohmmeter & Pico-ammeter is designed to take measurements of high-value resistances and of low-value currents. Warning: • The measuring device must be used only in compliance with the provi- sions mentioned hereinabove. • Correct usage of the measuring device assumes transport, installation, handling and maintenance according to the instructions. -
Page 13: Declaration Of Conformity
1.4. DECLARATION OF CONFORMITY SEFELEC1500M measuring devices are compliant with the regulatory provisions defined by: European directives 2006/95/EC pertaining to the safety of electrical equipment intended for use within cer- tain voltage limits (LVD) 2004/108/EC pertaining to electromagnetic compatibility (EMC) Harmonised standards IEC 61010-2-034 January 2017 edition Safety requirements for electrical equipment... -
Page 14: After-Sales Service
1.7. AFTER-SALES SERVICE For any technical questions you may have, please contact your technical representative or the after-sales service at the following addresses: EATON EATON Sefelec SAS Sefelec GmbH 19 rue des Campanules Karl-Bold-Str. 40 F-77185 - LOGNES D-77855 Achern... -
Page 15: Presentation Of The Device
2. PRESENTATION OF THE DEVICE 2.1. BASIC VERSION • The device includes in the same compact unit the functions for measuring insulation re- sistance and low currents. Its colour LCD touchscreen graphic display makes it easy to use. • Measuring insulation resistance is done under DC from 1 to 1,500 volts. •... -
Page 16: Accessories (To Order Separately)
2.3. ACCESSORIES (TO ORDER SEPARATELY) • SEFA-1500MHRT: Temperature and % of relative humidity measurement probe • SEFA-HV15 HV lead 1500VDC L=1.5 meters • SEFA-SE15: shielded high insulation probe, L=1.5 meters • SEFA-HVSE15-10: set of a HV lead and a shielded lead without ending for system integra- tion, L=10 meters •... -
Page 17: Measurement Specifications
3.5. MEASUREMENT SPECIFICATIONS General Specification Mains : 100-240Vac ±10% 50 to 60Hz / single phase Mains Protection : Temporized double fuse T10AH 250V Input Power : 700 VA max. Temperature range : Storage Operation -10°C to +60°C 0°C to +45°C Specified accuracy after 1/2-hour warm-up, RH<50%, temperature within 15-35°C Altitude : Up to 2 000 meters... - Page 18 Tera-Ohmmeter specification 0.1 kΩ to 2000 TΩ Ω to 2.10 Ω ) Measurement range : (1.10 10 measurement current ranges Temperature coefficient : ± 0.1%/°C Display resolution : 2 000 digits Test Voltage (ex.) 10 V 100 V 1 500V Ω...
-
Page 19: Safety
4. SAFETY 4.1. SAFETY WHEN WORKING WITH ELECTRICAL EQUIPMENT Risk of electric shock! • All precautions for using equipment connected to the mains must be tak- en when it is used. • In particular, the equipment must be earthed. WARNING •... -
Page 20: Safety Circuit
Protection for the personnel is the responsibility of the man- agement of the site where the measuring device is installed. EATON can only provide recommendations. The "safety" manager of the company using the device is responsible for ensuring compliance with the safety measures. -
Page 21: Optimising The Safety
SEFO-CO160) must be implemented. WARNING EATON on request can supply a locking system used during the test to control a type CA001, CA002 (image below) or CA003 safety cage in order to conduct the tests in complete safety. SEFELEC1500M Instructions... -
Page 22: Precautions For Use
If this instruction is not complied with, the measuring device can be damaged. As the SEFELEC1500M is a measuring instrument, EATON cannot be held liable for any equipment faults or loss of production resulting from damage to the tester by failure to comply with the operating conditions set out above (en- vironment, mains power supply and operation). -
Page 23: Commissioning
And according to your order: • The SEFA-SE15, SEFA-HV15, …measuring accessories • WinPass-MX software. • Measurement data document Please contact EATON if any items are missing. See the chapter After-sales service. 5.2. SETTING UP THE VARIO US CONNECTORS AND CORDS... -
Page 24: Turning On The Device
After turning off the unit, wait 2 seconds before turning it back on. IMPORTANT When switching on the power to the device after receipt, it displays a pattern with the EATON logo and then after approximately 10 seconds, the subsequent screen to ask for the language of... - Page 25 Choose the language; the device then displays the conditions for the use of the embedded soft- ware and asks you to accept the end user license agreement: Accept the text to be able to use the device. The full text can be found in the appendix chapter 22 of this leaflet.
- Page 26 The upper banner indicates: • the reference of the device: SEFELEC1500M • the software version V0.1.7 • the time 10:22 and the date 2019/03/04 The date and time parameters can be changed in the "General parameters" menu which can be accessed by pressing the gear icon on the screen.
- Page 27 Pressing the icon in the shape of a house in the upper banner returns you to the on/off menu. < Pressing the icon with the shape allows you to return to the previous menu. Entering numerical values for the parameters or filenames is done with the virtual keyboard that is displayed on the screen.
-
Page 28: Configuration Of The Device
6. CONFIGURATION OF THE DEVICE After turning on the device or when returning to the start-up menu, the home screen indi- cates: press the configuration button (gear) The LCD screen then displays the following information: SEFELEC1500M Instructions V1.06... -
Page 29: Language Selection
6.1. LANGUAGE SELECTION The messages displayed on the screen can be in French, English, German and several other languages. To choose a language, make the selection by pressing on the area indi- cating the selected language then scroll through the various languages and select the new language by pressing the ar- ea again. -
Page 30: Display Parameters
6.2. DISPLAY PARAMETERS From the "General settings" menu, press the Parameter area of the "Display" line: To obtain the following screen: Adjust the Brightness and the colours by moving the various cursors, keeping your finger pressed on the touchscreen and sliding from right to left or the other way. SEFELEC1500M Instructions V1.06... -
Page 31: Sound Parameters
6.3. SOUND PARAMETERS From the "General settings" menu, press the Parameter area of the "Sound" line: To obtain the following screen: Choose the various sound possibilities for the actions proposed. SEFELEC1500M Instructions V1.06... - Page 32 To adjust the volume of the sound, place your finger on the bar graph and slide your finger to the right maintaining contact with the screen in order to increase the volume and to the left to de- crease the volume. <...
-
Page 33: Time-Date Parameters
6.4. TIME-DATE PARAMETERS From the "General settings" menu, press the area indicating the time and the date of the "Time-Date" line: To obtain the following screen: Select the date format YYYY/MM/DD or DD/MM/YYYY then set the date using the drop-down windows or press the icon symbolising a calendar to select a date directly. - Page 34 Continue in the same way to set the time and validate with OK SEFELEC1500M Instructions V1.06...
-
Page 35: System Parameters
6.5. SYSTEM PARAMETERS From the "General settings" menu, press the Information area of the "System" line: To obtain the following screen: SEFELEC1500M Instructions V1.06... - Page 36 Update main Firmware of the MMI (Man-Machine Interface): The main Firmware of the MMI can be updated from the update file (check with out after-sales service to obtain the latest available version) which will be saved to a USB key. Then from the following screen: Press the area indicating the version number of the main Firmware (e.g.: V0.9.0) to obtain the following screen:...
- Page 37 Insert the USB key with the update file. Then press the "Update" button and follow the instructions It is important that the device is not turned off during the update NOTE Updating the Firmware of the function cards: The Firmware of the function cards can be updated from the update file (check with out after- sales service to obtain the latest available version) which will be saved to a USB key.
- Page 38 Press the area indicating function card Firmware Update to obtain the following screen: Press the "Cancel" button if you do not want to run the update. Insert the USB key with the update file. Then press the "Update" button and follow the instructions It is important that the device is not turned off during the update NOTE SEFELEC1500M Instructions...
-
Page 39: Access Parameters
6.6. ACCESS PARAMETERS From the "General settings" menu, press the active area of the "Access" line: To obtain the following screen: Choose the User level and enter the corresponding password to confirm the user level change. SEFELEC1500M Instructions V1.06... - Page 40 The Operator level cannot change the parameters or load a new test file. The Service level has no access limits to the various menus and features of the device with ad- ditional access to the calibration of the device. This level is only for Eaton technicians. Rules concerning the password: When changing the password, enter the old password then the new one.
-
Page 41: Selecting The Type Of Interface
6.7. SELECTING THE TYPE O F INTERFACE Scroll the general settings screen down to obtain the following screen: Press the selection area for the "Interface" line to obtain the following screen: Select the desired type of interface and set the communication parameters according to the indi- cations provided in the paragraph that describes the selected interface. -
Page 42: Restoring The Default Parameters
6.8. RESTORING THE DEFAULT PARAMETERS The device can restore the default parameters Scroll the general settings screen down to obtain the following screen: Press the active area of the Restore line to display: If you do not want to restore the parameters press the "Cancel" button; to restore press the "Restore"... -
Page 43: Storing The Results
6.9. STORING THE RESULTS In order to provide traceability for the measurements taken it is possible to save the test parameters as well as the measurement results to the internal memory of the device To activate this function after turning on the device or returning to the start-up menu, when the home screen indicates: press the access button for the results storage menu (diskette) SEFELEC1500M Instructions... - Page 44 The LCD screen then displays the following information: Activate the saving of measurement results by pressing on the right of the Store results area, ON is displayed. Deactivate the saving of measurement results by pressing on the left of the Store results area, OFF is displayed.
- Page 45 In order to make a backup copy or to copy a configuration from a device to another device, it is possible to export and import configuration files to a USB key. The measurement results stored in the device can also be exported to a USB key for archival or processing. Insert a USB key into an available USB port under the LCD screen.
- Page 46 Select the file by pressing on its name and slide it from the Device column to the USB key col- umn, or the opposite according to the desired operation. A message confirming whether or not the copy was a success will be displayed briefly. <...
-
Page 47: Configuring The Insulation Resistance Measurement
7. CONFIGURING THE INSULATION RESISTANCE MEASUREMENT After turning on the device or returning to the start-up menu, the home screen indicates: press the MΩ button to access the following measurement screen: SEFELEC1500M Instructions V1.06... - Page 48 Description of the measurement screen: Name of the pro- gramme Memory access Parameter access Measurement cycle Measurement Display Parameter shortcuts The measurement is displayed over 3 screens (Current, Voltage, Resistance) of which the order can be changed by pressing one of the 3 areas. Access to the measurement parameters can be done from the shortcut buttons located at the bottom of the measurement screen or from the button with the gear icon which displays the following menu: Choose the parameter to be modified by pressing the active area (yellow) of the line of the pa-...
-
Page 49: Setting The Measurement Time
7.1. SETTING THE MEASUREMENT TIME To change the measurement time, press the active area of the "Time" line to obtain: The Permanent mode does not use the internal timer of the device and the measurement will be taken by pressing the START push-button until the STOP push-button is pressed. Pressing the START push-button: for safety reasons, it is necessary to press for a time >... - Page 50 To use the internal timer select AUTO mode and set the Rise, Hold and Fall times from the con- figuration menu (values between 0.1 and 9,999 sec.): To set one of the measurement cycle times, press the active area of the corresponding parame- ter line: Enter the value of the time in seconds: if the value entered is outside of the minimum and maxi- mum limits it will be displayed in red.
-
Page 51: Setting The Measurement Voltage
7.2. SETTING THE MEASUREMENT VOLTAGE From the configuration menu or from the Voltage shortcut button at the bottom of the measure- ment screen, press the active area of the Voltage line: To obtain the following screen: Enter a voltage value between 1 and 1,500 VDC, if the value entered is outside of the authorised limits it will turn red. -
Page 52: Setting The Comparison Thresholds
7.3. SETTING THE COMPARISON THRESHOLDS The device offers two comparison thresholds Rmin and Rmax. The main threshold for insulation resistance measurement is the Rmin threshold, if the re- sistance measured is less than the Rmin threshold the result is FAIL, if the resistance measured is greater than Rmin the result is PASS. - Page 53 And press the active area of the threshold to be modified in order to obtain the following key- entry menu: Enter the threshold value by using the Tera, Mega, Giga or kilo Ω units. If the value entered is outside of the limits, it turns red. Confirm the threshold by pressing on the key-entry arrow.
-
Page 54: Selecting The Filtering Mode
7.4. SELECTING THE FILTERING MODE The SEFELEC1500M offers various filtering modes that make it possible to stabilise the meas- urement according to the components and the measuring environment. Press the active area of the "Filter"' line to select the mode that is best suited: To display the various modes like this: SEFELEC1500M Instructions V1.06... - Page 55 The device proposes three measurement speeds and two measurement configurations for ca- pacitive circuits: ➢ NORMAL: 5 measurements are averaged for each display with 3 displays per second ➢ SLOW: 15 measurements are averaged for each display with 1 display per second. ➢...
-
Page 56: Selecting The Megohm Per Kilometer Mode
7.5. SELECTING THE MEGOHM PER KILOMETER MODE The SEFELEC1500M proposes to indicate cable resistance values expressed as insulation per kilometre, with this formulation generally being that specified in the manufacturer's specifications or the standards. Cables can be comprised of several independent conductors connected to- gether in parallel for the measurement and the device will recalculate the value for 1 conductor. -
Page 57: Selecting The Measurement Range
7.6. SELECTING THE MEASUREMENT RANGE The SEFELEC1500M has an automatic measurement range search mode. This is the most practical operating mode for the user. It is however possible in the case where it is sought to increase the rapidity of the measurement to block the device in a range (range change time: 150 msec. -
Page 58: Saving The Measurement Parameters Under A File Name
7.7. SAVING THE MEASUREMENT PARAMETERS UNDER A FILE NAME All of the insulation resistance measurement parameters can be saved under a filename which will make it possible to find the configuration easily. After having set all of the parameters the latter are found under the filename mentioned in the zone herein below: To change the filename press the area with the filename in order to display a virtual keyboard and enter the new name. - Page 59 To recall a filename press the function button with the folder icon: To obtain the following screen: Search for the filename by scrolling up or down in the list of files. Press the desired filename then press outside of the file list display area or on the button with the yellow Arrow. This window also allows you to delete a filename.
- Page 60 From this window it is also possible to create a new file with the + button which generates a file which self-increments from a file named: file1 WARNING: any modification of a parameter of a file is automatically saved in the file NOTE SEFELEC1500M Instructions V1.06...
-
Page 61: Insulation Resistance Measurement
➢ The measurement accessories may contain elements limiting and protection it is forbidden to modify them without written permission of the company SEFELEC- EATON. ➢ In the case of use in conditions other than those specified in the manual of the de- vice, potential risks may occur for the safety of the user. - Page 62 Connect the measuring lead SEFA-SE15 to the Ix terminal provided for this purpose, the lead is locked by inserting the plug until it clicks. Continue in the same way with the lead SEFA-HV15 on the HV terminal. WARNING: connectors are equipped with locking nut to avoid unwanted disconnection. If necessary screw the nut and unscrew the nut to allow terminal removing.
-
Page 63: Precautions To Observe During A Measurement
8.2. PRECAUTIONS TO OBSERVE DURING A MEASUREMENT: To take a resistance measurement beyond a Teraohm, use an effective shielding connected to the guard terminal (grey terminal on the front panel for a floating measurement or ground termi- nal on the rear panel for a measurement with the guard connected to the ground). Erroneous measurements due to the presence of parasitic leakage currents or to introductions of mains fields are as such prevented. - Page 64 Press the START push-button. For safety reasons, it is necessary to press for a time > 1 second in order for the device to switch to MEASUREMENT mode, in the event the pressing is too short an information message will be dis- NOTE played briefly on the LCD screen.
- Page 65 At the end of the test the display indicates the last value measured before the falling of the volt- age and if the measurement is between Rmin and Rmax, i.e. considered as PASS. If the measurement is < Rmin or > Rmax, it will be considered as FAIL: The coloured parameter shortcut button will indicate the parameter which causes the FAIL result for the measurement.
- Page 66 IMPORTANT Before disconnecting the measured component, press the STOP push-button to confirm stop- page of the generating of High Voltage and discharge the component: STOP This action makes it possible to return to the initial measuring screen either to change the pa- rameters or to run another measurement by pressing the START push-button.
-
Page 67: Error Messages
8.3. ERROR MESSAGES: ➢ "SAFETY LOOP OPEN": the safety loop circuit is not closed, there is no connection be- tween points 1-9 or 2-10 of the socket C5 located on the rear panel of the device. Press OK to clear the message ➢... -
Page 68: Configuring The Current Measurement
9. CONFIGURING THE CURRENT MEASUREMENT After turning on the device or returning to the start-up menu, the home screen indicates: press the pA button to access the following measurement screen: SEFELEC1500M Instructions V1.06... - Page 69 Description of the measurement screen: Name of the pro- gramme Memory access Parameter access Measurement cycle Measurement Display Parameter shortcuts The measurement is displayed over 3 screens (Current, Voltage, Resistance) of which the order can be changed by pressing one of the 3 areas. Access to the measurement parameters can be done from the shortcut buttons located at the bottom of the measurement screen or from the button with the gear icon which displays the following menu: Choose the parameter to be modified by pressing the active area (yellow) of the line of the pa-...
-
Page 70: Setting The Measurement Time
9.1. SETTING THE MEASUREMENT TIME To change the measurement time, press the active area of the "Time" line to obtain: The Permanent mode does not use the internal timer of the device and the measurement will be taken by pressing the START push-button until the STOP push-button is pressed. Pressing the START push-button: for safety reasons, it is necessary to press for a time >... - Page 71 To use the internal timer select AUTO mode and set the Rise, Hold and Fall time from the con- figuration menu (values between 0.1 and 9,999 sec.): To set one of the measurement cycle times, press the active area of the corresponding parame- ter line: Enter the value of the time in seconds: if the value entered is outside of the minimum and maxi- mum limits it will be displayed in red.
-
Page 72: Setting The Measurement Voltage
9.2. SETTING THE MEASUREMENT VOLTAGE From the configuration menu or from the Voltage shortcut button at the bottom of the measure- ment screen, press the active area of the Voltage line: To obtain the following screen: Enter a voltage value between 1 and 1,500 VDC, if the value entered is outside of the authorised limits it will turn red. -
Page 73: Using External Power Supply With The Picoammeter
9.3. USING EXTERNAL POWER SUPPLY WITH THE PICOAMMETER The device provides the possibility of using an external power supply for measuring currents. If this power supply can be controlled by analogue voltage 0-10 VDC the device can send a value proportional to the desired voltage. - Page 74 To display the following screen : Select External. With a voltage and current value = 0 the device will not control the external power supply via an analogue voltage 0-10 VDC. With a voltage and current value the control can be done in the proportion of the max. voltage and the max.
- Page 75 In the case of an external source > 1,500 VDC it is necessary to use a protec- tive box (BAPA) and for voltages > 10,000 VDC a protective resistor of the RLHT series must be added. IMPORTANT SEFELEC1500M Instructions V1.06...
-
Page 76: Setting The Comparison Thresholds
9.4. SETTING THE COMPARISON THRESHOLDS The device offers two comparison thresholds Imin and Imax. The main threshold for current measurement is the Imax threshold, if the current measured is greater than the Imax threshold the result is FAIL, if the current measured is less than Imin the result is PASS. - Page 77 And press the active area of the threshold to be modified in order to obtain the following key- entry menu: Enter the threshold value by using the Pico, Nano, Micro, Milli ampere units. If the value entered is outside of the limits, it turns red. Confirm the threshold by pressing on the key-entry arrow.
-
Page 78: Selecting The Filtering Mode
9.5. SELECTING THE FILTERING MODE The SEFELEC1500M offers various filtering modes that make it possible to stabilise the meas- urement according to the components and the measuring environment. Press the active area of the "Filter"' line to select the mode that is best suited: To display the various modes like this: SEFELEC1500M Instructions V1.06... - Page 79 The device proposes three measurement speeds and two measurement configurations on ca- pacitive circuits: ➢ NORMAL: 5 measurements are averaged for each display with 3 displays per second ➢ SLOW: 15 measurements are averaged for each display with 1 display per second. ➢...
-
Page 80: Selecting The Measurement Range
9.6. SELECTING THE MEASUREMENT RANGE The SEFELEC1500M has an automatic measurement range search mode. This is the most practical operating mode for the user. It is however possible in the case where it is sought to increase the rapidity of the measurement to block the device in a range (range change time: 150 msec. -
Page 81: Saving Current Measurement Parameters Under A File Name
9.7. SAVING CURRENT MEASUREMENT PARAMETERS UNDER A FILE NAME All of the current measurement parameters can be saved under a filename which will make it possible to find the configuration easily. After having set all of the parameters the latter are found under the filename mentioned in the zone hereinbelow: To change the filename, press the area with the filename in order to display a virtual keyboard and enter the new name. - Page 82 To recall a filename press the function button with the folder icon: To obtain the following screen: Search for the filename by scrolling up or down in the list of files. Press the desired filename then press outside of the file list display area or on the button with the yellow Arrow. This window also allows you to delete a filename.
- Page 83 From this window it is also possible to create a new file with the + button which generates a file which self-increments from a file named: file1 WARNING: any modification of a parameter of a file is automatically saved in the file NOTE SEFELEC1500M Instructions V1.06...
-
Page 84: Current Measurement
➢ The measurement accessories may contain elements limiting and protection it is forbidden to modify them without written permission of the company SEFELEC- EATON. ➢ In the case of use in conditions other than those specified in the manual of the de- vice, potential risks may occur for the safety of the user. - Page 85 Connect the measuring cord SEF-SE15 to the base Ix provided for this purpose, the cord is locked by inserting the plug until it clicks. Continue in the same way with the cord SEF-HV15 on the HV terminal. WARNING: connectors are equipped with locking nut to avoid unwanted disconnection. If necessary screw the nut and unscrew the nut to allow terminal removing.
-
Page 86: Precautions To Observe During A Measurement
10.2. PRECAUTIONS TO OBSERVE DURING A MEASUREMENT: To take a current measurement less than the µA, use an effective shielding connected to the guard terminal (grey terminal on the front panel for a floating measurement or ground terminal on the rear panel for a measurement with the guard connected to the ground). Erroneous meas- urements due to the presence of parasitic leakage currents or to introductions of mains fields are as such prevented. - Page 87 Press the START push-button. For safety reasons, it is necessary to press for a time > 1 second in order for the device to switch to MEASUREMENT mode, in the event the pressing is too short an information message will be dis- NOTE played briefly on the LCD screen.
- Page 88 If the measurement is < Imin or >Imax, it will be considered as FAIL The coloured parameter shortcut button will indicate the parameter which causes the FAIL result for the measurement. SEFELEC1500M Instructions V1.06...
- Page 89 Before disconnecting the measured component, press the STOP push-button to confirm stop- page of the generating of High Voltage and discharge the component: STOP This action makes it possible to return to the initial measuring screen either to change the pa- rameters or to run another measurement by pressing the START push-button.
-
Page 90: Error Messages
10.3. ERROR MESSAGES: ➢ "SAFETY LOOP OPEN": the safety loop circuit is not closed, there is no connection be- tween points 1-9 or 2-10 of the socket C5 located on the rear panel of the device. Press OK to clear the message ➢... -
Page 91: Sequence Mode
11. SEQUENCE MODE The SEQUENCE mode is a very complete operating mode that allows you to create measurement programs that use different parameter files, different measurement func- tions, messages giving information or instructions for the operators as well as possibilities for displaying photos or plans. -
Page 92: List Of Available Functions In Sequence
11.1. LIST OF AVAILABLE FU NCTIONS IN SEQUENCE From the SEQUENCE mode screen, press on the following function key : To display the scrolling list of available functions: A SEQUENCE is made of a consists of a series of steps, each step being able to be one of the following functions: - Megohmmeter - Picoammeter... - Page 93 Each addition, deletion, modification of a step line is automatically saved under the name of the Sequence file, "default" in the example below: It is possible to change the name of the Sequence file by pressing the name and entering the new name.
- Page 94 Then press the icon NO ENTRY: Choose to skip these steps or activate them: To delete a step from a sequence, select the step line (s) to delete by checking the selection box: SEFELEC1500M Instructions V1.06...
- Page 95 Then press the Trash icon: Confirm (Delete) or not (Cancel) the deletion of these steps: SEFELEC1500M Instructions V1.06...
- Page 96 To recall an existing Sequence file, press the icon: to view the list of available files: The keys : Allow to add or delete files. To load a Sequence file, select it from the drop-down list and press the key: SEFELEC1500M Instructions V1.06...
-
Page 97: Megohmmeter Step
11.1.1. MEGOHMMETER STEP: The Megohmmeter step is used to perform an isolation resistance measurement with a chosen parameter file. To display the drop-down list of steps, click on the icon: Choose from the list of steps the Megohmmeter function: It is displayed as follows: See Sequence General rules in 11-1. -
Page 98: Picoammeter Step
11.1.2. PICOAMMETER STEP: The Picoammeter step is used to perform a current measurement with a chosen parameter file. To display the drop-down list of steps, click on the icon: Choose from the list of steps the Picoammeter function: It is displayed as follows: See Sequence General rules in 11-1. -
Page 99: Text Message Step
11.1.3. TEXT MESSAGE STEP: The text message step is used to insert a text message to inform or guide the operator. To dis- play the drop-down list of steps press the icon: Choose from the list of steps the Text message function: It is displayed as follows: See Sequence General rules in 11-1. - Page 100 Press Edit Title to access an input keyboard to give a title to the message. Proceed in the same way for the text of the message. It is necessary to enter a text, otherwise a sequence error message will be displayed. SEFELEC1500M Instructions V1.06...
-
Page 101: Image Message Step
11.1.4. IMAGE MESSAGE STEP: The Image Message step is used to insert an image to inform or guide the operator. To display the drop-down list of steps, click on the icon: Choose from the list of steps the Image message function: It is displayed as follows: See Sequence General rules in 11-1. - Page 102 On the Image line press Edit to display the image list. Scroll through the list of available images and select by pressing the name of the image. If there are no images in the device or to import new ones: •...
-
Page 103: Pdf Message Step
11.1.5. PDF MESSAGE STEP: The PDF Message step allows you to insert a file in PDF format to inform or guide the operator. To display the drop-down list of steps, click on the icon: Choose from the list of steps the PDF message function: It is displayed as follows: See Sequence General rules in 11-1. - Page 104 If there are no PDF files in the device or to import new ones: • Copy PDF files from a PC to a USB flash drive. It is recommended to limit the size of files <1MB. • Eject the USB key from the PC •...
-
Page 105: Condition Step
11.1.6. CONDITION STEP: The Condition step allows you to insert a condition in the sequence of the various steps. To dis- play the drop-down list of steps, click on the icon: Choose from the list of steps the Condition function: It is displayed as follows: See Sequence General rules in 11-1. - Page 106 Press the yellow zone to set the condition: The condition function requires the following information: • The number of the step to which the condition relates Enter a step number corresponding to a measurement function. In the case of a step number that does not correspond to a measurement function, the result of the step will always be GOOD and will make a non-conditional jump.
-
Page 107: Repetition Step
11.1.7. REPETITION STEP: The Repetition step is used to insert an iterative loop in the sequence of the various steps of a sequence. To display the drop-down list of steps, click on the icon: Choose from the list of steps the Repetition function: It is displayed as follows: See Sequence General rules in 11-1. -
Page 108: Pause Step
11.1.8. PAUSE STEP: The Pause step is used to insert a timed pause in the sequence of the various steps of a se- quence. To display the drop-down list of steps, click on the icon: Choose from the list of steps the Pause function: It is displayed as follows: See Sequence General rules in 11-1. -
Page 109: Enter Keyboard Step
11.1.9. ENTER KEYBOARD STEP: The Enter Keyboard step is used to insert an information entry in the sequence of the various steps of a Sequence, for example the name of an operator or a batch number of parts or any other information. - Page 110 Either a "default" name sequence calling a megohmmeter function with a parameter set called "default" followed by a text message and a call to a megohmmeter function with a set of parame- ters called "default" and a loopback 100 times. This corresponds to the following sequence: When the START button on the front panel of the device is lit in green, it is then possible to start the sequence...
- Page 111 The yellow progress bar at the bottom of the screen indicates the relative position of the step in the sequence. At the end of the measurement, the next step will display a text message Then the sequence will go to the second measurement in Megohmmeter mode: At the end of the n times repetition, the sequence will be finished with a synthesis of the meas- urement results: SEFELEC1500M Instructions...
- Page 112 In this example, the result of the sequence is BAD because of step 3/3 measurement in Meg- ohmmeter mode with the parameter file "MEG_100V". It is possible to review the screens of the different steps with the navigation keys: Press the Left arrow key to display the screen for the last step: SEFELEC1500M Instructions V1.06...
- Page 113 With the arrow keys to the right and to the left it is possible to display all the steps of the se- quence. Case of a PASS sequence result: To finish the sequence completely, press the STOP button illuminated in red SEFELEC1500M Instructions V1.06...
- Page 114 Before disconnecting the measured component, press the STOP push-button to confirm the stop of the high-voltage generation and discharge the component. STOP This action makes it possible to return to the initial Sequence screen either to change parame- ters or to redo a new measurement sequence by pressing the START pushbutton. SEFELEC1500M Instructions V1.06...
-
Page 115: Plc Interface (Programmable Logic Controller)
12. PLC INTERFACE (PROGRAMMABLE LOGIC CONTROLLER) The PLC function (Programmable Logic Controller) must be selected in the configuration menu (INTERFACE: PLC). NOTE The role of the programmable logic controller (PLC) is to allow for the control of the measuring instrument by a system of the programmable logic controller type. Implementing the safety loop circuit is indispensable. -
Page 116: Electrical Characteristics Of The Signals
12.1. ELECTRICAL CHARACTERISTICS OF THE SIGNALS INPUTS Number: 11 Type: Optoelectronic Input resistance: 2.2 kΩ Uminimum: 11 VDC Umaximum: 43 VDC OUTPUTS Number: 9 Type: Photo relay Maximum voltage: 48 VDC Maximum current / output: 100 mADC Resistance in closed state < 1.2Ω 12.2. -
Page 117: Connections
12.3. CONNECTIONS The input-output signals can be accessed on the rear panel of the device on terminal blocks C6, C7 and C8 Each terminal block has a mechanical coding device NOTE Connector C6 Connector C7 Connector C8 IN_OUT_0-10V_0 TYPE IN_OUT_0-10V_1 MESDCH GND10V IN_0-10V_3... -
Page 118: Definition Of The Input-Output Signals
12.4. DEFINITION OF THE INPUT-OUTPUT SIGNALS COMIN (C6-5) Electric common for the input signals. COMOUT (C7-4) Electric common for the output signals. CTRLIN (Input C6-6) Request to take control of the measuring instrument by the PLC. MES_DCH (Input C7-2) Switch to measurement or discharge. At logic high: Measurement. - Page 119 To match the memory numbers and Sequencing file names, go to the Sequence menu (refer to chapter 11 Sequence mode) and press the PLC key (the PLC interface must be selected in the General Settings menu): To display the following correspondence table: View the memory number by swiping the screen up or by pressing the elevator area on the left of the screen.
- Page 120 CTRLOUT (Output C7-5) Validation contact for taking control of the device by the PLC. EOT (Output C7-7) End of test contact PLCPASS (Output C7-8) Test result contact: pass PLCFAIL (Output C7-6) Test result contact: fail ERROR (Output C7-9) Indicates if an error occurred during the test , the SR0 to SR3 outputs provide the error type.
-
Page 121: Measurement-Discharge Cycle
12.5. MEASUREMENT-DISCHARGE CYCLE The PLC function (Programmable Logic Controller) must be select- ed in the configuration menu (INTERFACE : PLC). NOTE To take a measurement (See diagram no. 2) Activate the CTRLIN signal (logic High). The PLC must specify the measurement function on the TYPE input. - Page 122 Diagram no. 2: Running an insulation test Memory 5 - Test result fail. SEFELEC1500M Instructions V1.06...
- Page 123 Diagram no. 3: Execution of a sequence. Memory 3 - Result pass. PLC SYSTEM DEVICE SEFELEC1500M Instructions V1.06...
- Page 124 Diagram no. 4: Wiring of the PLC option with an external power supply. PLC SYSTEM DEVICE SEFELEC1500M Instructions V1.06...
- Page 125 Diagram no. 5: Wiring of the PLC option with the internal power supply of the measuring device. SEFELEC1500M Instructions V1.06...
-
Page 126: Ieee488-2 (Gpib) Interface
13. IEEE488-2 (GPIB) INTERFACE The IEEE488-2 function must be selected in the configuration menu, INTERFACE line: IEEE488. Enter the value of the address of the device between 0 and 30. NOTE SEFELEC1500M test and measuring instruments can be equipped with an interface of the IEEE488 type. -
Page 127: Syntax Rules
13.1. SYNTAX RULES A command intended for the device preferably ends with the character: (hexadecimal 0A, decimal 10). Codes can be sent in upper or lower case. The maximum number of commands in the same block cannot exceed 15 instructions. Be careful not to associate standard com- mands or requests with other types of commands. -
Page 128: Ethernet Interface
14. ETHERNET INTERFACE The ETHERNET function must be selected in the configuration menu, INTERFACE line: ETHERNET NOTE The test and measuring instruments of the SEFELEC series can be equipped with an inter- face of the Ethernet type. It allows all of the instruments in the range to be integrated into an automatic test or measuring system, whether intended for manufacturing control or for input control. -
Page 129: Cyber Security Recommendations
EATON is committed to minimizing the cybersecurity risk in its products and deploying cyberse- curity best practices in its products and solutions, making them more secure, reliable and com- petitive for customers. -
Page 130: Account Management
Following are some best practices that EATON recommends to physically secure your device: Secure the facility and equipment rooms or closets with access control mechanisms such as locks, entry card readers, guards, man traps, CCTV, etc. as appropriate. - Restrict physical access to cabinets and/or enclosures containing SEFELEC 5x and the asso- ciated system. -
Page 131: Network Security
Please ensure that encryption options are enabled. You can secure the product’s commu- nication capabilities by taking the following steps: EATON recommends opening only those ports that are required for operations and protect the network communication using network protection systems like firewalls and intrusion detection systems / intrusion prevention systems. -
Page 132: Logging And Events Management
14.1.7. LOGGING AND EVENTS MANAGEMENT - EATON recommends logging all falling within system and application events, including all ad- ministrative and maintenance activities. Logs should be protected from tampering and other risks to their integrity (for example, by restricting permissions to access and modify logs, transmitting logs to a security information and event management system, etc.). -
Page 133: Business Continuity/ Cybersecurity Disaster Recovery
BUSINESS CONTINUITY/ CYBERSECURITY DISASTER RECOVERY: Plan for Business Continuity / Cybersecurity Disaster Recovery EATON recommends incorporating SEFELEC 5x into the organization’s business continuity and disaster recovery plans. Organizations should establish a Business Continuity Plan and a Disas- ter Recovery Plan and should periodically review and, where possible, exercise these plans. As... -
Page 134: Connection Examples
It is possible to clear the list of permitted addresses (White list). From the Ethernet Interface menu, on the White list line, press Delete and confirm or not to the deletion of the all the author- ised IP addresses. 14.3. CONNECTION EXAMPLES 14.3.1. -
Page 135: Connection Between A Pc And A Device Through A Network
14.3.2. CONNECTION BETWEEN A PC AND A DEVICE THROUGH A NET- WORK In this configuration a straight Ethernet cable (not crossed) must be used. Check with your network administrator for the choice of the parameters for the device (IP ad- dress, Network mask, etc.) Note Most of the current switches are of the "auto sense"... -
Page 136: Procedure To Follow
14.4.1. PROCEDURE TO FOLLOW Go to Control panel/ Network and internet connections/ Properties Select Internet Protocol (TCP/IP) in the field "This connection uses the following items: " then click on Properties Select: Use the following IP address: Enter the IP address of the network card (PC) (Example 192.168.0.1) Enter your Subnet mask (Example 255.255.255.0) SEFELEC1500M Instructions V1.06... -
Page 137: Configuring The Ethernet Connection
In the last two windows opened, click on OK. 14.5. CONFIGURING THE ETHERNET CONNECTION SEFELEC1500M Instructions V1.06... -
Page 138: Dhcp (Dynamic Host Configuration Protocol)
14.5.1. DHCP (DYNAMIC HOST CONFIGURATION PROTOCOL) Recall: DHCP designates a network protocol of which the role is to ensure automatic configuration of the TCP/IP parameters of a station, in particular by automatically as- signing it an IP address and a network mask. Select to activate this mode. -
Page 139: List Of Ethernet Commands
14.5.6. LIST OF ETHERNET COMMANDS The syntax of the commands sent over the ETHERNET connection is compliant with the IEEE488-2 standard (1992 revision). Reminder of the numerical formats according to standard IEEE488-2: Format NR1: +/-<digit>...<digit> Format NR2: +/-<digit>...<digit>.<digit>...<digit> Format NR3: +/-<digit>...<digit>.<digit>...<digit>E+/-<digit>...<digit> NOTE: The code in parentheses are the expanded codes that can be interpreted by the device. -
Page 140: Malfunction
14.5.9. MALFUNCTION In the event the Ethernet connection does not operate as described in this manual, check the following points: Absence of a reaction of the device when sending commands: The devices in the SEFELEC series have several possible types of interfaces, check in the configuration menu that the ETHERNET mode was selected on the INTER- FACE line. -
Page 141: Rs232C Interface
15. RS232C INTERFACE The RS232C function must be selected in the configuration menu, INTERFACE line: RS232 NOTE The test and measuring instruments of the SEFELEC series are equipped with an interface of the RS232C type that operates in speaker and talker mode. It allows all of the instruments in the range to be integrated into an automatic test or measuring system, whether intended for manufacturing control or for input control. - Page 142 The transmission parameters cannot be modified and are: Parity: without Format: 8 bits Stop bit: To modify the transmission speed, go to the CONFIG menu, on the INTERFACE line and se- lect RS232. In the Baud rate area select the speed by scrolling through the values between 1200 bauds to 115 200 bauds.
-
Page 143: List Of Rs232C Commands
15.1. LIST OF RS232C COMMANDS The syntax of the commands sent over the RS232C connection was made compliant with IEEE488-2 standard (1992 revision). Reminder of the numerical formats according to standard IEEE488-2: Format NR1: +/-<digit>...<digit> Format NR2: +/-<digit>...<digit>.<digit>...<digit> Format NR3: +/-<digit>...<digit>.<digit>...<digit>E+/-<digit>..<digit> NOTE: The code in parentheses are the expanded codes that can be interpreted by the device. -
Page 144: Standardised Requests
*CLS Positions all of the standardised registers to the state in which the user finds them when the device is turned on. *RST Resets the device. WARNING: the device returns to Local mode, take control of the device with the REM command before any other command. - Page 145 Allows the device to be identified. The message returned by the device is in the follow- ing form: <field1>, <field2>, <field3>, <field4> with field1: Name of the manufacturer (e.g.: EATON) field2: type of device (e.g.: SEFELEC1500M...) field3: Serial number field4: Software version (e.g.: 1.60) *TST? Allows the operation of the device to be verified.
-
Page 146: Device-Dependent Commands
15.1.4. DEVICE-DEPENDENT COMMANDS MEG (MEGohmeter) Activates the megohmeter function. Must be sent from the starting pattern. PIC (PICOammeter) Activates the current measurement function. Must be sent from the starting pattern. SEQ (SEQuence) Activates the sequence function. Must be sent from the starting pattern. CONF (CONFig) Activates the configuration function. - Page 147 LLIM (LLIMit) <NR3> Changes the value of the lower threshold of the current parameter set for the active function. E.g.: MEG:LLIM 1.0E+6 (new value in Ohms) PIC:LLIM 1.50E-3 (new value in Amperes) The unit is automatically expressed in Volts, Ohms or Amperes and depends on the function.
-
Page 148: Device-Dependent Request
15.1.5. DEVICE-DEPENDENT REQUEST MEAS?: Returns one or several measurement results at the time the request is launched. Formats the response in a function Insulation: OHM 1.100E+08 VOLT 9.900E+02 AMP 9.000E-06 Current: OHM 1.100E+08 VOLT 9.900E+02 AMP 9.000E-06 15.1.6. OPERATING FAULT ON THE RS232C SERIAL LINK In the event the RS232C connection does not operate as described in this manual, please... -
Page 149: Application Notes
16. APPLICATION NOTES 16.1. PURPOSE OF THE DIELECTRIC TESTS The purpose of the dielectric strength tests is to: Detect the manufacturing defects of a piece of electrical equipment, Check the quality of the insulators of a piece of electrical equipment, Check that the electrical installation was carried out correctly, Check the insulation resistance of a piece of equipment or of an installation in order to following the changes and the ageing of it. -
Page 150: Influence Of The Environmental Conditions
16.3. INFLUENCE OF THE ENVIRONMENTAL CONDITIONS Temperature, pressure and humidity affect the results of dielectric tests. 16.3.1. TEMPERATURE As temperature affects the density of gases, it will modify the insulation properties of these gas and liquid insulators. The oils often used as insulators are never pure and the amount of dissolved gas increases with temperature which will adversely affect the insulating properties of the oil. -
Page 151: Insulation Resistance Measurement
16.4. INSULATION RESISTANCE MEASUREMENT The insulation resistance is measured to ensure that the various components and sub- assemblies in an electrical assembly have sufficiently high insulation resistance to ensure that the leakage currents do not reach unacceptable values. The principle is to apply a given stable direct voltage (there are various standard voltages) between predefined points, for a time that is usually specified, and then measuring the cur- rent passing through the material under test. -
Page 152: Cable Measurements
The contribution of the capacitance to the measured leakage current decreases exponen- tially with time. It is, therefore, important to specify the time taken for the test in order for the result to be significant. SEFELEC1500M devices can satisfy this requirement thanks to the built-in timer, able to time from 0.1 s to nearly 3 hours. -
Page 153: Test Voltage For Measurement
The contribution of the cable to the measured leakage current decreases exponentially with time. It is, therefore, important to specify the time taken for the test in order for the re- sult to be significant. SEFELEC1500M devices can satisfy this requirement thanks to the built-in timer, able to time from 0.1 s to nearly 3 hours. -
Page 154: Layout Of Sockets On The Rear Panel
17. LAYOUT OF SOCKETS ON THE REAR PANEL 17.1. DESCRIPTION OF THE REAR PANEL The rear panel includes the following elements: ➢ Mains socket with Fuses ➢ Ground connection stud bolt ➢ Measurement cable output area in the case of the REAR PANEL OUTPUT option. ➢... -
Page 155: Safety Connector C5
17.1.1. SAFETY CONNECTOR C5 Safety loop circuit contact: to connect with 9 Safety loop circuit contact: to connect with 10 Green lamp Red lamp +25V common red-green lamps 0V – ground Contact PASS (GOOD) (= +25 V) Contact FAIL (BAD) (= +25 V) Safety loop circuit contact: to connect with 1 Safety loop circuit contact: to connect with 2 Connection example of the red/green lamps, of the contacts of the safety circuit and of... -
Page 156: Maintenance And Calibration
18. MAINTENANCE AND CALIBRATION 18.1. GENERAL Our warranty (see beginning of this manual) guarantees this equipment against manufacturing and packaging defects. If the equipment does not appear to be operating correctly, or if you re- quire further information about using our equipment, please contact our technical service on +33 (0)1 64 11 83 40 if you are in France. - Page 157 We recommend that our equipment should be calibrated once a year. The calibration period depends on how often the measuring device is used (the EATON technical service can ad- vise on the recommended calibration period). The testers must be calibrated by qualified personnel who are fully familiar with the procedure using calibration equipment that has been certified.
-
Page 158: Eula: End User License Agreement
EATON, that may contain bug fixes or alternate program functions for the Software, and (b) a subsequent release of the Software, if and when developed by EATON. An Update does not include any release, new version, option, or future product, which EATON licenses separately. - Page 159 EATON. Licensee may transfer the Software directly to a third party only in connection with the sale of the EATON product in which it is installed or the sale of other products in which it may be permitted to be installed as described by EATON in the Documentation.
- Page 160 APPLICABLE LAW, THE INSTALLATION AND USE OF THE SOFTWARE IS AT LICENSEE’S SOLE RISK. 5.0 General Provisions. 5.1 Update Policy. EATON may from time to time, but has no obligation to, create Updates of the Software or components thereof. 5.2 Limitation on Liability. NOTWITHSTANDING ANY PROVISION OF THIS AGREEMENT TO THE...
- Page 161 C.F.R. § 12.212, and is provided to the U.S. Government only as a commercial end item. Consistent with 48 C.F.R. § 12.212 and 48 C.F.R. §§ 227.7202-1 through 227.7202-4, all U.S. Government End Users acquire the Software with only those rights set forth herein. Contractor / manufacturer is EATON Corpora- tion, 1000 Eaton Boulevard, Cleveland, Ohio 44122.
- Page 162 EATON, the disclosure of which would cause substantial harm to EATON that could not be remedied by the payment of damages alone and such confidential aspects of the Software shall not be disclosed to third parties without the prior written consent of EATON. According- ly, EATON will be entitled to preliminary and permanent injunctive and other equitable relief for any breach of this Section 5.13.
-
Page 163: Eu Declaration Of Conformity
20. EU DECLARATION OF CONFORMITY SEFELEC1500M Instructions V1.06... - Page 164 SEFELEC1500M Instructions V1.06...
- Page 165 Only order confirmations and Electrical Sector EMEA Route de la Longeraie technical documentation by Eaton is binding. Photos and pictures also do not 71110 Morges, Switzerland warrant a specific layout or functionality. Their use in whatever form is subject Eaton.eu...
Need help?
Do you have a question about the SEFELEC 1500M and is the answer not in the manual?
Questions and answers