
Related Manuals for Eaton Network Card-MS


Summary of Contents for Eaton Network Card-MS
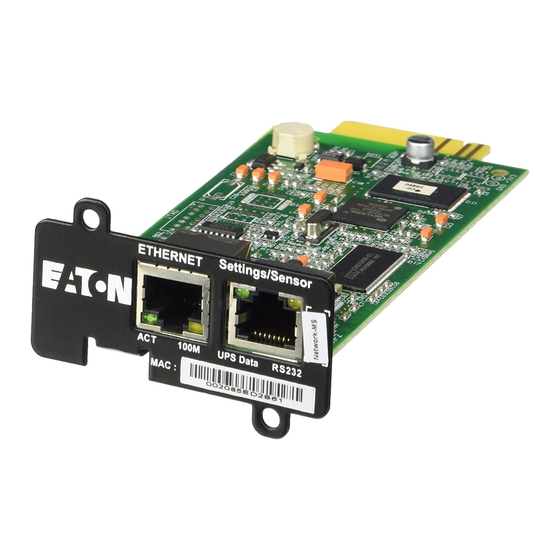
- Page 1 ® Eaton Network Card-MS Quick Start Instructions ETHERNET Settings/Sensor 100M UPS Data RS232 MAC: Package Contents Network Card-MS USB Cable Quick Start Instructions...
- Page 2 Mozilla Foundation. All other trademarks are property of their respective companies. ©Copyright 2015 Eaton Corporation, Raleigh, NC, USA. All rights reserved. No part of this document may be reproduced in any way without the express written approval of Eaton Corporation.
-
Page 3: Table Of Contents
Section 5 Obtain a DHCP-assigned IP Address ..........10 Section 6 Assign an IP Address Manually ............. 14 Section 7 Disable Browser Compatibility Mode ..........18 Section 8 Register a PredictPulse Subscription ..........19 Eaton Network Card-MS Quick Start Instructions P-164000507—Rev 1... -
Page 4: Section 1 Installation Checklist
Section 1 Installation Checklist Verify that the following items are available: Network Card-MS card package contents (card, cable, Quick Start Instructions) ® Phillips screwdriver ® ® Available USB port on a computer running Microsoft Windows ® Web browser (Microsoft Internet Explorer version 8.0 and higher,... -
Page 5: Section 2 Install The Card
Section 2 Install the Card Note: The hot-swappable Network Card-MS card can be installed without turning off the UPS or disconnecting the load. To install the Network Card-MS card: Remove the minislot cover from the UPS. Retain the screws. If not already done, record the card’s MAC address from the label on the card for future reference (see Step 2 in the “Installation Checklist”). -
Page 6: Section 3 Connect The Card To The Computer
(Depending on your laptop, you may need an adapter for this step.) Connect an active Ethernet cable (not supplied) from the network connection to the Ethernet port on the Network Card-MS (see Figure 2). Ethernet Cable Configuration Cable ETHERNET... -
Page 7: Section 4 Initialize The Card Configuration
In the New Connection Window, make the menu selection File > Properties. On the screen that displays, select New Connection Properties. From the “Connect Using... ” drop-down list, select the COM port that you are using (see Figure 3). Eaton Network Card-MS Quick Start Instructions P-164000507—Rev 1... - Page 8 Verify that your terminal program is set to the correct communication port for the serial connection. Verify that the card has power (one or more LEDs on the card are illuminated). The UPS should be turned on. Eaton Network Card-MS Quick Start Instructions P-164000507—Rev 1...
- Page 9 13. Enter the password (default is admin). The Network Card-MS main menu displays (see Figure 4). Figure 4. Network Card-MS Main Menu 14. Determine the IP address for the card. Either obtain a DHCP-assigned IP address or manually enter a fixed IP address: To obtain the IP address assigned through DHCP , continue to "Obtain a...
-
Page 10: Section 5 Obtain A Dhcp-Assigned Ip Address
Section 5 Obtain a DHCP-assigned IP Address From the Network Card-MS main menu, type 2 for Network Configuration. The Network Settings menu displays. Type 1 for Read Network Settings. At the cursor prompt, enter Y for “yes, ” in order to use DHCP to obtain an IP address from the network (see Figure 5). - Page 11 Maintenance menu (see Figure 6). Figure 6. Restart Process Example Messages Eaton Network Card-MS Quick Start Instructions P-164000507—Rev 1...
- Page 12 The settings supplied by the server using DHCP display (see Figure 7). Make a note of the static IP address. Figure 7. Network Configuration Menu 10. Type 0 and press Enter to return to the Network Card-MS main menu. Eaton Network Card-MS Quick Start Instructions P-164000507—Rev 1...
- Page 13 When the green UPS Data LED flashes regularly, the card has been restarted and is operating normally. 13. The card is now operational. To return to the Network Card-MS main menu, enter the password at the cursor (default is admin). Otherwise, type 0 and press Enter to exit the Network Settings menu, then type 0 and press Enter a second time to exit the main menu.
-
Page 14: Section 6 Assign An Ip Address Manually
Section 6 Assign an IP Address Manually From the Network Card-MS main menu, type 2 for Network Configuration and press Enter. The Network Settings menu displays (see Figure 8). Figure 8. Modifying the Network Settings Type 2 for Modify Network Settings. - Page 15 Type 1 again and press Enter to Restart the card from the boot. (Entering “1” here will not the display the “1” at the cursor, but it will cause the action to start.) Eaton Network Card-MS Quick Start Instructions P-164000507—Rev 1...
- Page 16 Maintenance menu (see Figure 10). Figure 10. Restart Process Example Messages Note: When the green UPS Data LED flashes regularly, the card has been restarted and is operating normally. Eaton Network Card-MS Quick Start Instructions P-164000507—Rev 1...
- Page 17 IP address is working, you are prompted to log on. Log on as administrator. The default user name and default password are “admin. ” When the Network Card-MS Web page displays, you know that the card is communicating with the network. Note: For detailed information, refer to the user’s guide for the...
-
Page 18: Section 7 Disable Browser Compatibility Mode
Disable Browser Compatibility Mode Browser compatibility allows Web pages designed for older versions to display properly. If data does not display properly on the Network Card-MS Web page, the browser compatibility mode should be disabled. To disable the compatibility mode: Open a Web browser. -
Page 19: Section 8 Register A Predictpulse Subscription
PredictPulse is a remote monitoring and management subscription service that collects and analyzes data from connected power infrastructure devices, providing Eaton with the insight needed to make recommendations and take action on your behalf. This service has limited availability outside of the United States. - Page 20 Double-click the downloaded Activate PredictPulse.exe icon. The PredictPulse registration window opens (see Figure 12). Figure 12. Registering a PredictPulse Subscription Enter the IP address for the installed Network Card-MS and click Find My Serial Number. Note: If the serial number does not display, click Start Over and manually enter the serial number.
- Page 21 When this stage of registration completes, an information window explains the next step (see Figure 13). Click Activate Another Serial Number to register multiple devices or click Exit to continue. Figure 13. Example of First Step E-mail Eaton Network Card-MS Quick Start Instructions P-164000507—Rev 1...
- Page 22 If you try to register a device that has already been registered, you will receive an error message e-mail from the PredictPulse support team with instructions about the problem. A profile e-mail displays with your profile data (see Figure 15). Eaton Network Card-MS Quick Start Instructions P-164000507—Rev 1...
- Page 23 Figure 15. Example Profile Page 10. Click Continue to finish the registration (see Figure 16). Eaton Network Card-MS Quick Start Instructions P-164000507—Rev 1...
- Page 24 Figure 16. Example Completion E-mail Eaton Network Card-MS Quick Start Instructions P-164000507—Rev 1...
- Page 26 164950239 P-164000507 1...
Need help?
Do you have a question about the Network Card-MS and is the answer not in the manual?
Questions and answers