Table of Contents
Advertisement
Quick Links
Advertisement
Table of Contents

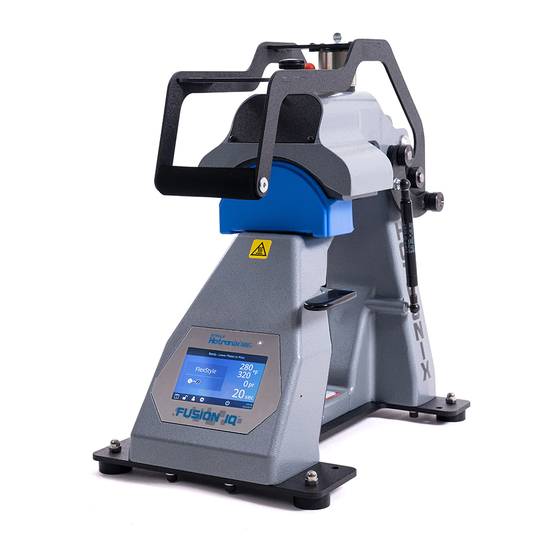
Summary of Contents for Stahls Hotronix FUSION 360 IQ
- Page 1 360 IQ CAP PRESS ™ OPERATOR’S MANUAL...
-
Page 2: Safety Instructions
HOTRONIX ® Safety Instructions 360 IQ CAP PRESS ™ When using your heat press, basic precautions should always be followed, including the following: 1. Read all instructions. 2. Use heat press only for its intended use. 3. To reduce the risk of electric shock, do not immerse the heat press in water or other liquids. 4. -
Page 3: Table Of Contents
Table Of Contents Safety Instructions Machine View Operating Instructions Connecting the System Start Up/Shut Down Home Screen Prepare to Print Touch Screen Guide 8-11 Setup Menu Password Setup Preset Setup Date & Time Setup Display Setup Auto On & Off Setup System Setup Calibration Updating Software... -
Page 4: Machine View
HOTRONIX ® Machine View 360 IQ CAP PRESS ™ Pressure Adjustment Knob Lift Handle Upper Heater Electromagnet Platen Alignment Knob Gas Shock Lower Heater with Thermal Conductive Pad Touch Screen Cap Hold- Down Lever Base ON/OFF Switch Cap Hold-Down Circuit Breaker Mechanism &... -
Page 5: Operating Instructions
Operating Instructions Connecting the System Insert power cord into IEC inlet located on the side of press (1.1). Connect the power cord into a properly grounded electrical outlet with a sufficient amperage rating. To remove a locking power cord (if equipped), depress the two red buttons while pulling on the plug (1.2). -
Page 6: Home Screen
HOTRONIX ® Operating Instructions 360 IQ CAP PRESS ™ Home Screen Status bar provides Displays current top helpful information heater temperature regarding heat press. Displays current bottom heater temperature Touch and edit your favorite presets. Displays current application pressure and time. Lock the screen Portal and WIFI ™... -
Page 7: Prepare To Print
Preparing to Print Before heat applying, set the target settings for the selected transfer material by: • Selecting a Preset (7.1), or • Manually entering target temperature, time and pressure. Temperature and time are controlled automatically. Pressure must be set manually: •... -
Page 8: Touch Screen Guide
HOTRONIX ® Touch Screen Guide 360 IQ CAP PRESS ™ Setup Menu Touch the Settings icon on the Home Screen (5.1) to configure your heat press. Managers can access all setup options, while Users can access a limited set (5.2). •... -
Page 9: Preset Setup
Preset Setup Touch the Columns icon (7.1) to select from a list of saved presets (7.2). Touch the arrow keys on the taskbar to scroll through a long list of presets (7.3). Touch a preset to select a material. Touch the Pencil icon (7.4) to enter edit mode, then touch preset name to edit settings. -
Page 10: Date & Time Setup
HOTRONIX ® Touch Screen Guide 360 IQ CAP PRESS ™ Date & Time Setup Touch the Settings icon on the Home Screen. • Touch Date & Time, information displays on right of screen (8.1). • Touch up/down arrows to select time zone. •... -
Page 11: Calibration
Calibration (Manager-Level Only) Your heat press comes pre-calibrated from the factory. Calibration is only required after sensor or controller replacement. Pressure is periodically self-calibrated. Incorrect calibration can result in poor print results or damage to your heat press which is not covered by warranty. Your heat press has a temperature calibration function (12.1). -
Page 12: Connect To The Iq Portal
HOTRONIX ® Connect to the IQ Portal 360 IQ CAP PRESS ™ ™ Create Your Account • Using a phone or computer, visit iq.hotronix.com to create an account (13.1). • Enter your name, email, and password. • Click on the confirmation link in the email you receive. •... -
Page 13: Electrical Schematic
Electrical Schematic Upper Heater Upper Heater 120V 50/60Hz 230/240V 50/60Hz TRIAC RTD Probe RTD Probe Strain Frame Gauge 500ºF 500ºF 500W 500W 260ºC 260ºC Proximity Switch PROX1 Electromagnet EMAG HTR2 PROBE2 Lower Heater Lower Heater 120V 50/60Hz 230/240V 50/60Hz RTD Probe RTD Probe Frame 500ºF... -
Page 14: Replacement Parts List
HOTRONIX ® Replacement Parts List 360 IQ CAP PRESS ™ PART# DESCRIPTION QTY. PART# DESCRIPTION QTY. 4-1183 Heater Arm, 360 IQ Hat 2-1006-46 Washer, 5/16” SS 2-1055-11 Steel Pin, 1/2” x 5-9/16” 4-1179 Lower Frame, 360 IQ Hat 1-1107-1 Hub Cap 1/2” 4-1180 Cap Hold Down, 360 IQ Hat 1-1048-3 Washer, 1/2”... - Page 15 Parts Location Guide WWW.HOTRONIX.COM...
-
Page 16: Contact
HOTRONIX ® CONTACT US 360 IQ CAP PRESS ™ Stahls’ Hotronix ® One Industrial Park Carmichaels, PA 15320 U.S.A. Technical Support 800.727.8520 Speak with a representative 24 hours a day, 7 days a week, 365 days a year. Customer Service 800.727.8520 Monday - Friday Replacement Parts...


Need help?
Do you have a question about the FUSION 360 IQ and is the answer not in the manual?
Questions and answers