
Subscribe to Our Youtube Channel
Related Manuals for Grundfos JP-PS Series


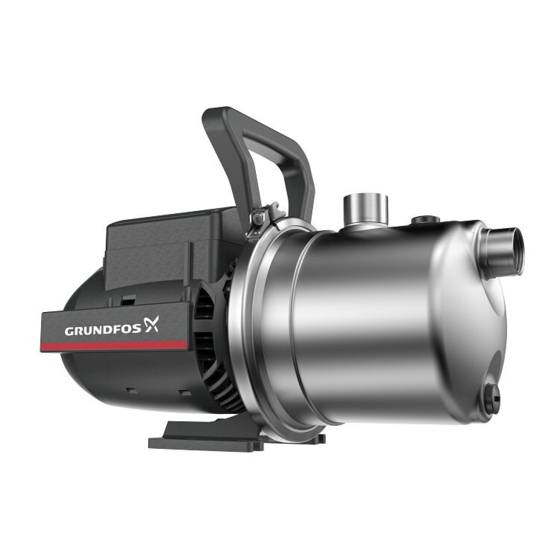
Summary of Contents for Grundfos JP-PS Series
- Page 1 GRUNDFOS INSTRUCTIONS JP-PS Jet pumps with pressure switch, 115/230 V, 60 Hz Service instructions...
-
Page 2: Table Of Contents
6.7 Fitting the pump housing 6.8 Connecting the power cable via the pressure switch 1.2 Notes Additional information The symbols and notes below may appear in Grundfos 7.1 Lubricant installation and operating instructions, safety instructions and 7.2 Torques service instructions. -
Page 3: Safety Information For Working On The Product
2. Safety information for working on the product CAUTION WARNING Hot or cold liquid Minor or moderate personal injury Electric shock - Make sure that escaping hot or cold liquid does not Death or serious personal injury cause injury to persons or damage to the - Switch off the power supply before you start any equipment. -
Page 4: Dismantling The Pump Housing
4.3 Dismantling the pump housing 4.4 Replacing the plugs Fig. 2 Dismantling the pump housing Fig. 4 Replacing the plugs 1. Place the pump vertically with the inlet facing upwards. To replace the fill plug (25) and drain plug (26): 2. -
Page 5: Dismantling The Motor Housing
4.6 Dismantling the motor housing Fig. 6 Removal of hydraulic parts Do not try to remove the diffuser (20) by using Fig. 8 Dismantling the motor housing screwdrivers or similar tools, as it might break. 1. Remove the terminal box cover (51) and upper motor shell housing (44) by loosening the screws (53). -
Page 6: Disconnecting The Power Cable From The Pressure Switch
5. Disconnecting the power cable from the 5.2 Removing the impeller pressure switch 1. Place the motor vertically with the impeller (19) facing upwards. If you are replacing the motor housing (42, 44), 2. Clamp the motor shaft end in a vice with soft copper or disconnect the power cable from the pressure switch aluminium jaw faces to protect the shaft end. -
Page 7: Removing The Shaft Seal
5.3 Removing the shaft seal 1. Remove the rotating part of the shaft seal (16) by inserting two flat screw drivers in the shaft seal spring. Lever the screw drivers against any two points at the edge of the seal disc. Do not touch the seal faces. -
Page 8: Assembling The Product
6. Assembling the product Position numbers of parts (numbers in brackets) refer to section 7.6 Exploded view. 6.1 Before assembling the product • Clean and check all parts. • Replace defective parts. 6.2 Fitting the shaft seal Fig. 19 Lubricating the seal disc 3. -
Page 9: Fitting The Impeller
6.5 Fitting the motor housing Fig. 22 Fitting the rotating part of the shaft seal 6.3 Fitting the impeller 1. Fit the impeller (19) on the shaft. 2. Spin the impeller (19) clockwise and tighten by hand until you feel the resistance of the mechanical stop. Fig. -
Page 10: Fitting The Hydraulic Parts
6. Fit the upper motor housing (44). 6.7 Fitting the pump housing 7. Fasten the screws (53) that hold the motor housing together. Torque: 1.5 ± 0.1 Nm. Verification of assembly: Turn the shaft by rotating the impeller (19) clockwise and check that the motor fan (14) does not touch the motor housing (42 and 44). -
Page 11: Connecting The Power Cable Via The Pressure Switch
6.8 Connecting the power cable via the pressure switch Fig. 1 Plugs and pressure switch connections 1. Locate the power-supply terminal and cable clamp inside the pressure switch (407). Fig. 32 Fitting the clamp ring 5. Place the screw (93) on one side and nut and washer (94) on the other side and tighten. - Page 12 6.8.1 Wiring diagrams Pressure switch to 115 V power cable Pressure switch to 115 V residential hardwiring Pos. Description Pos. Description Pressure switch Pressure switch Power cable (in) Residential hardwiring (in) To motor (out) To motor (out) Motor Motor Capacitor Capacitor From power cable to pressure switch: From residential hardwiring to pressure switch:...
-
Page 13: Additional Information
7. Additional information 7.3 Nameplate 7.1 Lubricant We recommend using soapy water. 7.2 Torques Torque Pos. Description [Nm] Screw for mounting the foot (56a) 12 ± 1 Screws that hold the motor housing 1.5 ± 0.1 together (42 and 44) Screws for wiring in the terminal box 2.2 ±... -
Page 14: Type Key
Dual voltage (115 or 230 V) 60 Hz Frequency [Hz] Conduit Type of power connection Country of origin 7.5 Fault finding the product Fault finding procedures are described in the installation and operating instructions. Use the QR code or link below: http://net.grundfos.com/qr/i/99613293... -
Page 15: Exploded View
7.6 Exploded view 72 73 Pos. Component Material Pump housing Stainless steel AISI 304 (EN 1.4301) O-ring Motor fan Composite Seal disc Stainless steel AISI 304 (EN 1.4301) Shaft seal, rotary part Carbon + NBR + AISI 304 Shaft seal, stationary part Alox + NBR Impeller Composite... - Page 17 GRUNDFOS Canada GRUNDFOS México GRUNDFOS Kansas City 2941 Brighton Road Boulevard TLC No. 15 9300 Loiret Blvd. Oakville, Ontario L6H 6C9 Canada Parque Industrial Stiva Aeropuerto Lenexa, Kansas 66219 Phone: +1-905 829 9533 C.P. 66600 Apodaca, N.L. México Phone: (913) 227-3400...
- Page 18 99615172 0519 ECM: 1261106 www.grundfos.com www.grundfos.us...
Need help?
Do you have a question about the JP-PS Series and is the answer not in the manual?
Questions and answers