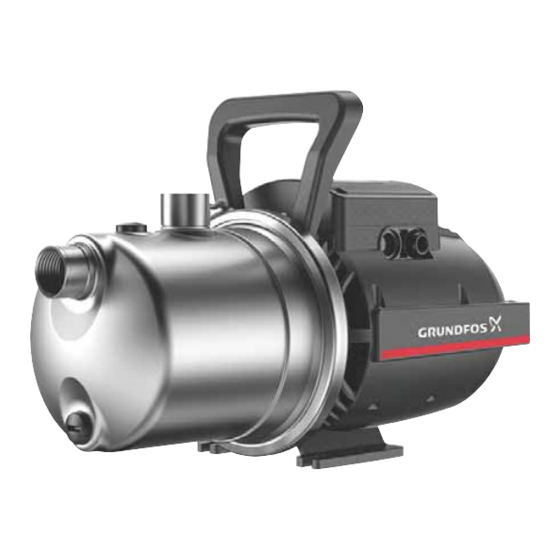
Grundfos JP Service Instructions Manual
Hide thumbs
Also See for JP:
- User manual ,
- Installation and operating instructions manual (52 pages) ,
- Instructions manual (21 pages)
Table of Contents
Advertisement
Advertisement
Table of Contents

Related Manuals for Grundfos JP


Summary of Contents for Grundfos JP
- Page 1 GRUNDFOS INSTRUCTIONS Service instructions...
-
Page 3: Table Of Contents
- Action to avoid the hazard. 6.7 Fitting the hydraulic parts 6.8 Fitting the pump housing 1.2 Notes Additional information The symbols and notes below may appear in Grundfos 7.1 Lubricant installation and operating instructions, safety instructions and 7.2 Torques service instructions. -
Page 4: Safety Information For Working On The Product
2. Safety information for working on the product Only qualified persons are allowed to service the WARNING pump. Electric shock Death or serious personal injury - Switch off the power supply before you start any work on the product. Make sure that the power Do not turn on the power supply until the pump has supply cannot be switched on accidentally. -
Page 5: Mounting The Handle
4. Mounting the handle 5. Dismantling the product Position numbers of parts (numbers in brackets) refer Position numbers of parts (numbers in brackets) refer to section 7.6 Exploded view. to section 7.6 Exploded view. 1. Fit the handle (190) on the motor flange. 5.1 Before dismantling the product •... -
Page 6: Replacing The Plugs
5.3 Replacing the plugs Replacing the plugs Fig. 5 1. Remove the two plugs (31) by turning each plug counterclockwise with a big flat screwdriver. 2. Lubricate the O-ring seats on the pump housing (1). See section 7.1 Lubricant. 3. Place the new plugs (31) and O-rings (32). Fasten the plugs (31) by turning the plug clockwise with a big flat screwdriver. -
Page 7: Dismantling The Motor Shell
5.5 Dismantling the motor shell 5.6 Disconnecting the power cable from the terminal If you are replacing the motor shell (42, 44), disconnect the power cable in the terminal box. If you are replacing the impeller (19) or shaft seal (16, 16a), you do not need to disconnect the power cable in the terminal box. -
Page 8: Removing The Impeller
5.8 Removing the impeller 5.9 Removing the shaft seal 1. Place the motor vertically with the impeller (19) facing upwards. Do not touch the seal faces. 2. Clamp the motor shaft end in a vice with soft copper or aluminium jaw faces to protect the shaft end. Fig. -
Page 9: Assembling The Product
1. Remove the rotating part of the shaft seal (16) by inserting two 6. Assembling the product flat screw drivers in the shaft seal spring. Lever the screw drivers against any two points at the edge of the seal disc. Position numbers of parts (numbers in brackets) refer to section 7.6 Exploded view. -
Page 10: Fitting The Impeller
1. Clamp the motor shaft end in a vice with soft copper or 6.3 Fitting the impeller aluminium jaw faces to protect the shaft end. See fig. 12. 1. Fit the impeller (19) on the shaft. 2. Lubricate the seal disc opening. See section 7.1 Lubricant. 2. -
Page 11: Fitting The Motor Shell
See wiring diagram. Capacitor Fig. 29 Wiring diagram for the JP pump 5. Tighten the terminal screws. Torque: 2.2 ± 0.2 Nm. Fig. 27 Fitting the nut and the lower motor shell 6. Tighten the cable clamp screw. Torque: 1.5 ± 0.1 Nm. Make sure not to overtighten the cable clamp screw. -
Page 12: Fitting The Hydraulic Parts
1. Place the pump in a vertical position with the shell grid (43) 6.7 Fitting the hydraulic parts facing downwards. 2. Fit the O-ring (28) on the seal disc (15). No lubrication is needed. Run a screw driver along the ring to remove any twisting. -
Page 13: Additional Information
7. Additional information 7.4 Type key Example: 7.1 Lubricant JP . 3- . 42 . PT- . V . 1x230 V . 50 Hz . 2m . SCHUKO . HU We recommend using soapy water. Code Description 7.2 Torques Jet Pump Torque Max. -
Page 14: Exploded View
7.6 Exploded view Fig. 37 Exploded view of JP pump Pos. Description Pos. Description O-ring Pump housing Lower motor shell O-ring Shell grid Motor fan Upper motor shell Seal disc Screws Shaft seal, rotary part Terminal box cover Shaft seal, stationary part... - Page 15 Brazil Turkey Unit 1, Ground floor Norway BOMBAS GRUNDFOS DO BRASIL GRUNDFOS POMPA San. ve Tic. Ltd. Sti. Siu Wai Industrial Centre GRUNDFOS Pumper A/S Av. Humberto de Alencar Castelo Branco, Gebze Organize Sanayi Bölgesi 29-33 Wing Hong Street &...
- Page 16 99592855 0319 ECM: 1255365 www.grundfos.com...
Need help?
Do you have a question about the JP and is the answer not in the manual?
Questions and answers