
Subscribe to Our Youtube Channel
Related Manuals for QNAP TS-h 83XU-RP Series


Summary of Contents for QNAP TS-h 83XU-RP Series
- Page 1 TS-hx83XU-RP TS-h1683XU-RP TS-h2483XU-RP User Guide Document Version: 1 27/10/2020...
-
Page 2: Table Of Contents
Forcing Qfinder Pro or myQNAPcloud to Locate the NAS................. 46 Hot-Swapping Failed Drives........................46 Recovering Unintentionally Removed Drives..................... 47 Support and Other Resources........................47 6. Glossary Cloud Key..............................48 myQNAPcloud............................48 myQNAPcloud Link.............................48 Qfinder Pro..............................48 QNAP ID..............................48 QuTS hero..............................48... -
Page 3: Preface
TS-hx83XU-RP User Guide 1. Preface About This Guide This guide provides information about the device and step-by-step instructions on installing the hardware. It also provides instructions on basic operations and troubleshooting information. Audience This document is intended for storage administrators. This guide assumes that the user is knowledgeable and qualified to install, maintain, and troubleshoot issues involving servers, server components, and storage systems. -
Page 4: Product Overview
AI applications, such as deep learning, data analysis, and other large data volume applications. The NAS runs on QNAP's latest QuTS hero operating system that is optimized for applications on the powerful ZFS file system. The TS-hx83XU-RP is available in 16-drive bays and 24-drive bay models for storing tetrabytes of data. - Page 5 Memory slots 4 x Long-DIMM DDR4 Important Use only QNAP memory modules to maintain system performance and stability. For NAS devices with more than one memory slot, use QNAP modules with identical specifications. Using unsupported modules may degrade performance, cause errors, or prevent the operating system from starting.
-
Page 6: Package Contents
• Rail kits are not included with the NAS and must be purchased separately. For details, contact an authorized reseller or go to http://shop.qnap.com. • Information on rail kit installation can be found in the installation guide included in the rail kit package. -
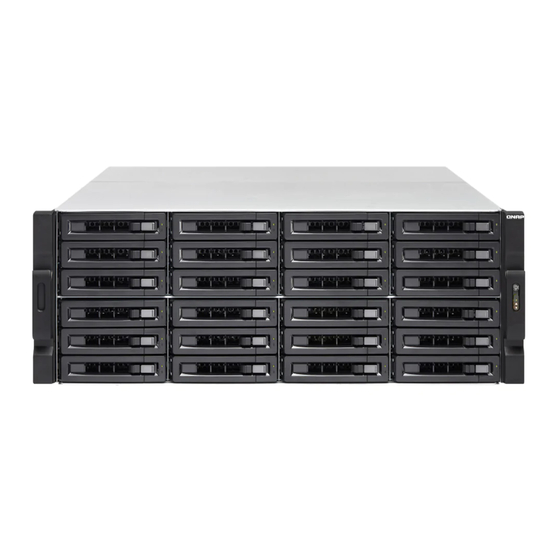
Page 7: Components
TS-hx83XU-RP User Guide Item Quantity Quick Installation Guide (QIG) Components Front Panel Component Component Power button Expansion unit LED Status LED Drive status LED LAN LED Drive activity LED Product Overview... -
Page 8: Rear Panel
TS-hx83XU-RP User Guide Rear Panel TS-h1683XU-RP Component Component Gigabit Ethernet activity LED Power supply unit 2 Gigabit Ethernet speed LED 10 Gigabit Ethernet Speed (RJ45) LED 10 Gigabit Ethernet Speed (SFP+) LED 10 Gigabit Ethernet Activity (RJ45) LED 10 Gigabit Ethernet Activity (SFP+) LED USB 3.2 Gen 2x2 5V/3A (10Gbps) Type-C ports PCIe full-height covers... -
Page 9: Rear Panel Network Interface
TS-hx83XU-RP User Guide Component Component Gigabit Ethernet activity LED 10 Gigabit Ethernet Activity (RJ45) LED Gigabit Ethernet speed LED 10 Gigabit Ethernet Speed (SFP+) LED PCIe full-height covers 10 Gigabit Ethernet Activity (SFP+) LED Power supply unit 1 USB 3.2 Gen 2x2 5V/3A (10Gbps) Type-C ports Power supply unit 2 USB 3.2 Gen 2 4V/1A (10Gbps) Type-A ports... -
Page 10: System Board
TS-hx83XU-RP User Guide TS-h2483XU-RP Note Only Gigabit Ethernet (RJ45) ports support Wake-on-LAN configurations. Component Specifications Component Specifications Ethernet port 4 GbE RJ45 Ethernet port 5 10GbaseT RJ45 Ethernet port 3 GbE RJ45 Ethernet port 6 10GbaseT RJ45 Ethernet port 1 GbE RJ45 Ethernet port 7 10GbE SFP+ SmartNIC... - Page 11 TS-hx83XU-RP User Guide Component Component PCIe slot 1 (PCIe 2.0 x4) Memory slot 4 PCIe slot 2 (PCIe 3.0 x8) Memory slot 3 Note A dual-port 10 Gbase-T network expansion card is pre-installed on this PCIe slot. PCIe slot 3 (PCIe 3.0 x4) Memory slot 2 PCIe slot 4 (PCIe 3.0 x4) Memory slot 1...
-
Page 12: Drive Numbering
TS-hx83XU-RP User Guide Component Component PCIe slot 4 (PCIe 3.0 x8) Memory slot 1 Note A dual-port 10 GbE SFP+ network expansion card is pre-installed on this PCIe slot. PCIe slot 2 (PCIe 3.0 x4) Drive Numbering TS-h1683XU-RP TS-h2483XU-RP Product Overview... -
Page 13: Safety Information
TS-hx83XU-RP User Guide Safety Information The following instructions help ensure personal safety and environmental safety. Read these instructions carefully before performing any operations. General Instructions • The device should be stored in a secure location with restricted access, controlled through the use of a tool, lock and key, or any means of security. -
Page 14: Installation Requirements
• Flat, anti-static surface without exposure to direct sunlight, liquids, or chemicals Hardware and peripherals • Storage drives For details on compatible drives, go to https://www.qnap.com/ compatibility/. • Network cable Tools • Phillips #1 or #2 screwdriver • Anti-static wrist strap... -
Page 15: Installation And Configuration
TS-hx83XU-RP User Guide 3. Installation and Configuration This chapter provides specific hardware and firmware installation and configuration steps. Hardware Installation This section provides information on installing drives, memory modules, and expansion cards. Drive Installation The TS-hx83XU-RP is compatible with 3.5-inch and 2.5-inch hard drives, and 2.5-inch solid-state drives. Installing 3.5-inch Hard Drives on 3.5-inch Trays Warning •... - Page 16 TS-hx83XU-RP User Guide b. Push the button to release the tray handle. c. Pull the tray out. 3. Install a drive on the tray. a. Place the drive on the tray so that the holes on the sides of the drive are aligned with the holes on the sides of the tray.
- Page 17 TS-hx83XU-RP User Guide 4. Load the tray into the bay. a. Insert the tray into the bay. b. Push the handle. c. Slide the lock to the right. Installation and Configuration...
- Page 18 TS-hx83XU-RP User Guide 5. Power on the NAS. Installing 2.5-inch Hard Drives on 3.5-inch Trays Warning • Installing a drive and installing QuTS hero deletes all data on the drive. • Observe electrostatic discharge (ESD) procedures to avoid damage to components. •...
- Page 19 TS-hx83XU-RP User Guide b. Push the button to release the tray handle. c. Pull the tray out. 3. Install a drive on the tray. a. Place the drive on the tray so that the holes on the sides of the drive are aligned with the holes on the sides of the tray.
- Page 20 TS-hx83XU-RP User Guide 4. Load the tray into the bay. a. Insert the tray into the bay. b. Push the handle. c. Slide the lock to the right. Installation and Configuration...
-
Page 21: Replacing Memory Modules
The TS-hx83XU-RP has four memory slots. You can increase the memory capacity of the NAS by upgrading memory modules. For optimal dual-channel performance, replace memory modules in all four slots at the same time. Use only QNAP memory modules to maintain system performance and stability. You can purchase QNAP memory modules from authorized resellers. Important QNAP recommends installing modules in pairs. - Page 22 TS-hx83XU-RP User Guide • Observe electrostatic discharge (ESD) procedures to avoid damage to components. • Moving fan blades: Keep your hands and other body parts away from moving fan blades. • Other moving components: Keep your hands and other body parts away from other moving components.
- Page 23 TS-hx83XU-RP User Guide 5. Remove an existing module. a. Push the retention clips outward simultaneously to release the module. b. Verify that the module has tilted upward and is completely released from the slot. Warning Attempting to remove a module that is not completely released may damage the module and the motherboard.
- Page 24 TS-hx83XU-RP User Guide Warning • Do not touch the internal components, particularly the metal connectors. • Do not bend the module. 6. Install a new module. a. Align the notch with the ridge in the slot. b. Insert the module into the slot. c.
- Page 25 TS-hx83XU-RP User Guide b. Slide the cover forward. c. Tighten the screws. Installation and Configuration...
-
Page 26: Replacing Expansion Cards
13. Check the value for Total memory. Replacing Expansion Cards The device supports selected expansion cards, some of which require QNAP PCIe brackets. QNAP-branded expansion cards purchased from the company website are shipped with the brackets necessary to fit the device. - Page 27 TS-hx83XU-RP User Guide 1. Power off the device. 2. Disconnect the power cord from the electrical outlet. 3. Disconnect all cables and external attachments. 4. Remove the case cover. a. Loosen the screws. b. Slide the cover back. c. Lift the cover off the device. 5.
- Page 28 Remove all screws of the existing bracket. b. Carefully pull the bracket away from the card. c. Attach the QNAP bracket to the card using the same screws. d. Verify that the bracket does not move. 7. Install the expansion card.
- Page 29 TS-hx83XU-RP User Guide Note This image shows removing an expansion card from a TS-h1683XU-RP NAS. 8. Attach the case cover. a. Place the cover on the device. b. Slide the cover forward. Installation and Configuration...
-
Page 30: Hot-Swapping Redundant Power Supply Units
TS-hx83XU-RP User Guide c. Tighten the screws. 9. Connect all cables and external attachments. 10. Connect the power cord to the electrical outlet. 11. Power on the device. Hot-swapping Redundant Power Supply Units Warning Installation and Configuration... - Page 31 TS-hx83XU-RP User Guide The NAS may have one or more power supply unit (PSU) cords. To avoid serious injuries, a trained service technician must disconnect all PSU cords before installing or replacing system components. 1. Power off the device. 2. Disconnect the power cord from the electrical outlet and the power supply unit (PSU) that you are replacing.
-
Page 32: Rail Kits
The device supports SAS expansion units, SATA JBOD expansion units, and USB expansion units. For details, please see table below. You can purchase storage expansion accessories from QNAP or an authorized reseller. For details, go to https://shop.qnap.com/. For the list of compatible expansion units and the maximum number of applicable expansion units, go to http://www.qnap.com/go/compatibility-expansion. - Page 33 TS-hx83XU-RP User Guide Expansion Unit Model Description Required Accessories TL-R400S • Uses a SAS 6 Gbps • 1 x SFF-8088 connector cable (SFF-8088) interface • QXP-400eS-A1164 host bus • Supports SATA/HDD/SSD adapter • RAIL-B02 TR-002 • Uses a USB 3.2 Gen 2 Type-C •...
- Page 34 TS-hx83XU-RP User Guide 3. Power on the expansion units. 4. Verify that the expansion units are recognized by the device. 5. Log on to QuTS hero as administrator. 6. Go to Main Menu > Storage & Snapshots > Overview > System . 7.
- Page 35 TS-hx83XU-RP User Guide Important The QNAP QXP host bus adapter is required for connecting the SATA JBOD enclosure to a host device. Third-party host bus adapters are not compatible with QNAP JBOD enclosures. For details, see Replacing Expansion Cards. 3. Connect the expansion units to the NAS using the following topology.
-
Page 36: Quts Hero Installation
Go to Main Menu > Storage & Snapshots > Overview > System . c. Verify that the expansion units are listed. QuTS hero Installation The TS-hx83XU-RP uses the QNAP QuTS hero operating system. You can install QuTS hero using any of the following methods: Installation and Configuration... -
Page 37: Installing Quts Hero Using Qfinder Pro
3. Run Qfinder Pro on a computer that is connected to the same local area network. Note To download Qfinder Pro, go to https://www.qnap.com/utilities. 4. Locate the NAS in the list and then double-click the name or IP address. The Smart Installation Guide opens in the default web browser. - Page 38 ASCII characters. 8. Click Next. 9. Specify the time zone, date, and time. QNAP recommends connecting to an NTP server to ensure that the NAS follows the Coordinated Universal Time (UTC) standard. 10. Click Next. The Configure the network settings screen appears.
-
Page 39: Installing Quts Hero Using The Cloud Key
1. Power on the device. 2. Connect the device to the internet. 3. Go to the QNAP Cloud Installation page using one of the following methods: • On your computer, go to http://install.qnap.com/. • Scan the QR code on the NAS using a mobile device. - Page 40 ASCII characters. 12. Click Next. 13. Specify the time zone, date, and time. QNAP recommends connecting to an NTP server to ensure that the NAS follows the Coordinated Universal Time (UTC) standard. 14. Click Next. The Configure the network settings screen appears.
- Page 41 TS-hx83XU-RP User Guide 20. Click Apply. A confirmation message appears. Warning Clicking Confirm deletes all data on the drive before installing QuTS hero. 21. Click Confirm. QuTS hero is installed. 22. Optional: Click Go to NAS Management. Click Go to NAS Management to set more advanced QuTS hero configurations and settings. For details, see QuTS hero User Guide.
-
Page 42: Basic Operations
TS-hx83XU-RP User Guide 4. Basic Operations This chapter describes basic NAS operations. Power Button Operation User Action Result Power on Press the button once. The device powers on. Power off Press and hold the button for 1.5 The device powers off. seconds. -
Page 43: Leds
TS-hx83XU-RP User Guide Operation User Action Result Advanced system Press and hold the The default factory settings are restored. reset button for 15 seconds. • To retrieve old data after an advanced system reset, recreate the previous folder structure on the NAS. LEDs LEDs indicate the system status and related information when the device is powered on. - Page 44 TS-hx83XU-RP User Guide Status Description System Status Flashes green and red • The drive is being formatted. alternately every 0.5 • The device is being initialized. seconds • The operating system is being updated. • RAID rebuilding is in progress. •...
- Page 45 TS-hx83XU-RP User Guide Status Description Drive Activity Green The drive is ready. Flashes green The drive is being accessed. No drive was detected. Orange The network connection is operating at 1 Gbps. Note The LAN LED can only detect the device's in-built Gigabit Ethernet port connections.
-
Page 46: Audio Alert
TS-hx83XU-RP User Guide Audio Alert Duration Frequency Description Short beep (0.5 seconds) 1 • The NAS is starting up. • When the reset button is pressed for 3 seconds, the NAS resets configurations. • When the reset button is pressed for 10 seconds, the NAS resets configurations and reboots. -
Page 47: Troubleshooting
TS-hx83XU-RP User Guide 5. Troubleshooting This chapter describes basic troubleshooting information. Forcing Qfinder Pro or myQNAPcloud to Locate the NAS If Qfinder Pro or myQNAPcloud is unable to locate the NAS during QuTS hero installation, the drives or data may be faulty. 1. -
Page 48: Recovering Unintentionally Removed Drives
Two disks per subgroup fail. Triple Mirror Multiple of 3. (For example, 3, 6, 9, 12 disks and so forth.) RAID-TP ≥ 5 Support and Other Resources QNAP provides the following resources: Resource Documentation https://download.qnap.com Compatibility List https://www.qnap.com/compatibility/ NAS Migration Compatibility https://www.qnap.com/en/nas-migration Expansion Unit Compatibility http://www.qnap.com/go/compatibility-expansion... -
Page 49: Glossary
Enables you to access the NAS over the internet without configuring complex port forwarding settings Qfinder Pro QNAP utility that lets you locate and access QNAP NAS devices in your local area network QNAP ID User account that enables you to use myQNAPcloud remote access and other QNAP services...
Need help?
Do you have a question about the TS-h 83XU-RP Series and is the answer not in the manual?
Questions and answers