red lion SL Series Manual
Idnustrial ethernet switches & media converter
Hide thumbs
Also See for SL Series:
- Installation & operating instructions (3 pages) ,
- Hardware manual (4 pages)
Advertisement
Advertisement

Related Manuals for red lion SL Series


Summary of Contents for red lion SL Series
- Page 2 ©2014-2020 Red Lion Controls, Inc. All rights reserved. Red Lion and the Red Lion logo are registered trademarks of Red Lion Controls, Inc. All other company and product names are trademarks of their respective owners. Red Lion Controls, Inc. 20 Willow Springs Circle...
-
Page 3: Table Of Contents
Drawing No. LP0977 Table of Contents Revision B Table of Contents Preface ............................1 Section 1 General Information ....................3 Section 2 LED Indicators ......................7 Section 3 Installation ......................... 9 Section 4 Power Wiring ......................21 Section 5 Communication Wiring ..................27 Section 6 Technical Specifications.................. - Page 4 Table of Contents Drawing No. LP0977 Revision B Slim Line (SL/SLX) Series...
-
Page 5: Preface
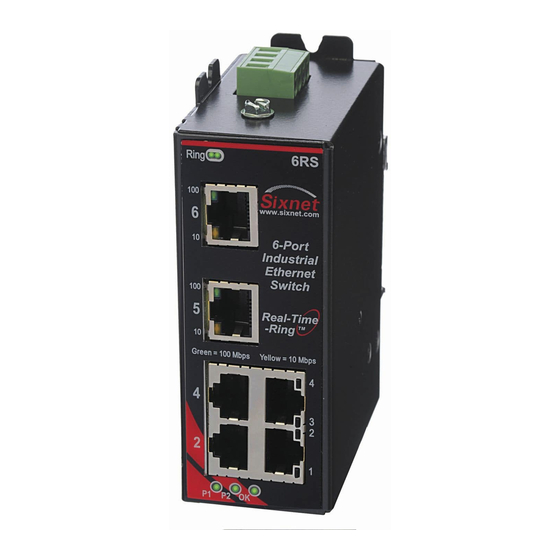
Drawing No. LP0977 Preface Revision B Preface This manual applies to the following products: SL-2ES-# 2-port unmanaged Ethernet media converter SLX-3ES-# 3-port unmanaged Ethernet media converter SLX-3EG-1 3-port unmanaged Gigabit Ethernet converter SLX-5EG-1 5-port unmanaged Gigabit Ethernet switch ... - Page 6 Preface Drawing No. LP0977 Revision B Slim Line (SL/SLX) Series...
-
Page 7: Section 1 General Information
Safety These industrial Ethernet Switches meet the following standards plus others: Standards Note: Some ratings may be pending on newer models. Contact Red Lion for the latest info. Electrical safety – CE per Low Voltage Directive and IEC61010-1 UL508 ... - Page 8 WEEE compliance – These devices comply with the WEEE directive. Do not throw away these devices in the standard trash. Contact Red Lion regarding proper disposal. RoHS compliance – RoHS These devices comply with the RoHS directive and are considered lead and other hazardous substance free.
- Page 9 (ou tout autre dispositif à l'état solide) devraient jamais être conçus pour être responsable de l'entretien de l'équipement consécutifs ou la sécurité du personnel. En particulier, Red Lion décline toute responsabilité pour les dommages, directs ou indirects, résultant de l'utilisation de cet équipement dans n'importe quelle application.
- Page 10 Section 1 General Information Drawing No. LP0977 Revision B NE DÉBRANCHEZ PAS L’ÉQUIPEMENT PENDANT QUE LE CIRCUIT AVERTISSEMENT EST DIRECT OU À MOINS QUE L’ENVIRONNEMENT SOIT CONNU (RISQUE D’EXPLOSION) POUR ÊTRE LIBRE DE CONCENTRATIONS INFLAMMABLES. DANS LES ENDROITS DANGEREUX OU POTENTIELLEMENT AVERTISSEMENT DANGEREUX, NE PAS SÉPARER UNE PARTIE DE L'UNITÉ...
-
Page 11: Section 2 Led Indicators
Otherwise, if it is OFF or flashing for an extended period of time then a problem is detected. In this case, please contact Red Lion for support. On unmanaged models there is typically one power LED that is ON if either power input Power LED (P1 or P2) has power applied to it. - Page 12 Section 2 LED Indicators Drawing No. LP0977 Revision B A 10 Mbps (10BaseT) connection is detected. This is a bi-color (green and yellow or orange) LED on models with one LED per RJ45 ACT / LNK / port. Speed LED Indicates that there is a proper Ethernet connection (Link) between ON Solid the port and another Ethernet device, but no communications activity...
-
Page 13: Section 3 Installation
Drawing No. LP0977 Section 3 Installation Revision B Section 3 Installation These industrial Ethernet switches can be snapped onto a standard DIN rail (EN50022) or Overview screwed directly to a flat panel. Refer to the mechanical drawings below to properly mount your switch. - Page 14 Section 3 Installation Drawing No. LP0977 Revision B Removal Recommended DIN rail removal steps: A. Insert screwdriver into DIN clip and pry until the bottom of the unit releases from the DIN rail. B. Unhook the top of the unit and remove it from the DIN rail. SLX-#ES models in metal case: Mounting Recommended DIN rail mounting steps:...
- Page 15 Drawing No. LP0977 Section 3 Installation Revision B Removal Recommended DIN rail removal steps: A. Push the whole unit down to free the bottom of the DIN rail clip. See blue circle area. B. Pull the bottom of the unit away from the DIN rail. C.
- Page 16 Section 3 Installation Drawing No. LP0977 Revision B Removal Recommended DIN rail removal steps: A. Insert screwdriver into DIN clip and pry until the bottom of the unit releases from the DIN rail. B. Unhook the top of the DIN clip and remove the unit from DIN rail. Slim Line (SL/SLX) Series...
- Page 17 Drawing No. LP0977 Section 3 Installation Revision B SLX-#MS and -#MG models in metal case with metal DIN rail clip: Mounting Recommended DIN rail mounting steps: 1. Hook the top back of the DIN rail clip on the unit over the DIN rail. 2.
- Page 18 Section 3 Installation Drawing No. LP0977 Revision B Snaps to standard 0.40" (1.02 cm) 2.90" Typical for DIN rail EN50022 (35 mm) SC or ST fiber [7.35 cm] Removable Screw Block 1.01" 6/8/9 2/3/5 [2.57 cm] 1.98" Ports Ports [5.02 cm] Dia.
- Page 19 Drawing No. LP0977 Section 3 Installation Revision B Metal DIN Clip (newer models) #12 screw Plastic DIN Clip (older models) 0.80" #10 screw 0.53" [2.04 cm] [1.36 cm] #8 screw Typ. for SC or ST Fiber 0.51" 1.92" #6 screw 0.40"...
- Page 20 Section 3 Installation Drawing No. LP0977 Revision B #12 screw #10 screw #8 screw 0.15" 1.92" 0.40" #6 screw [1.02 cm] [0.38 cm] [4.88 cm] typical Removable Snaps to standard Screw Block 2.60" DIN Rail SC Fiber [6.60 cm] EN50022 ST Fiber (35 mm) 5.05"...
- Page 21 Drawing No. LP0977 Section 3 Installation Revision B #12 screw #10 screw #8 screw Typical for SFP Xcvrs #6 screw 0.39" 2.15" 0.50" [1.27 cm] [0.99 cm] [5.46 cm] Snaps to standard Removable DIN Rail Screw Block 2.76" EN50022 [7.01 cm] (35 mm) 5.52"...
- Page 22 Section 3 Installation Drawing No. LP0977 Revision B #12 screw #10 screw Direct to panel #8 screw mounting guide Typical for SFP Xcvrs #6 screw 0.39" 2.15" 0.50" [1.27 cm] [0.99 cm] [5.46 cm] Snaps to standard Removable DIN Rail Screw Block 2.76"...
- Page 23 Drawing No. LP0977 Section 3 Installation Revision B Mechanical Dimensions for SLX-5EG-2SFP Mechanical Dimensions for SLX-5EG-1 Slim Line (SL/SLX) Series...
- Page 24 Section 3 Installation Drawing No. LP0977 Revision B The metal packaged models allow you to choose the mounting method that best fits your requirements. (Note: Not all methods are available on all models. Refer to the mechanical diagrams for details.) Vertical snap-on DIN rail Vertical screw-to- Flat screw-to-panel mounting...
-
Page 25: Section 4 Power Wiring
Drawing No. LP0977 Section 4 Power Wiring Revision B Section 4 Power Wiring These industrial Ethernet switches can be powered from the same DC source that is used Overview to power your other devices. A voltage in the range of 10 to 30 VDC needs to be applied between the P1 (plus) terminal and the Minus terminal as shown in the diagrams on the next page. - Page 26 Section 4 Power Wiring Drawing No. LP0977 Revision B TO PREVENT SHORTING THE POWER TO THE CASE ALWAYS UNPLUG THE SCREW TERMINAL BLOCK BEFORE PERFORMING ANY WIRING! To meet the requirements for UL you must do one of the following: UL Requirements 1.
- Page 27 Drawing No. LP0977 Section 4 Power Wiring Revision B Single DC Supply Dual DC Supplies Chassis Chassis Alarm Alarm Output Output Load (panel) Load (panel) (opt.) (opt.) Front of Back of Front of P2 P1 Switch Switch Switch (connectors) (connectors) (DIN rail) Power &...
- Page 28 Section 4 Power Wiring Drawing No. LP0977 Revision B One DC Supply Dual DC Supplies Chassis Alarm Alarm Chassis Output Output (panel) Load Load (panel) (optional) (optional) Back of Front of Front of P1 P2 Switch Switch Switch (DIN rail) (connectors) (connectors) Single DC Power...
- Page 29 Drawing No. LP0977 Section 4 Power Wiring Revision B Front of Switch (connectors) Single DC Power Redundant DC Power Power and Alarm Wiring For Power and Alarm Wiring for SLX-10/16/18-Mx Managed Switches ------------------------------------------------------- Power and Alarm Wiring for SLX-3EG-1 Managed Switches Slim Line (SL/SLX) Series...
- Page 30 Section 4 Power Wiring Drawing No. LP0977 Revision B Power and Alarm Wiring for SLX-5EG-1 Managed Switches Slim Line (SL/SLX) Series...
-
Page 31: Section 5 Communication Wiring
Drawing No. LP0977 Section 5 Communication Wiring Revision B Section 5 Communication Wiring These industrial Ethernet switches provide connections to standard Ethernet devices such Overview as PLCs, Ethernet I/O, industrial computers and much more. Three types of communication ports may be found on these switches: RJ45 (copper) Ethernet ports, fiber optic Ethernet ports and a serial or USB console port for management (managed models). - Page 32 Section 5 Communication Wiring Drawing No. LP0977 Revision B Typical Fiber Ports on Unmanaged Models Typical SC style Typical ST style connector on a connector on a SL-5ES-2/3SC SL-5ES-2/3ST Typical SC style Typical Fiber connector on a Typical ST style Ports on SLX-5MS-4/5SC connector on a...
- Page 33 PC (DB9 male) and the RS232 Wiring port of the Managed Switch (RJ45 female). Contact Red Lion or your switch vendor to purchase this adapter as an accessory. A typical DB9F to RJ45F adapter should be wired as follows:...
- Page 34 Section 5 Communication Wiring Drawing No. LP0977 Revision B Newer models of these switches may also have an USB port instead of or in addition to the USB Console RS232 port. Use a standard USB cable with a mini-USB plug on one end and an A-type- Port Wiring USB plug on the other end.
-
Page 35: Section 6 Technical Specifications
For the managed models, refer to the software user manual or datasheet Specs for complete software specifications. Note: These specifications are subject to change. Contact Red Lion for the latest details. General Specifications: Ethernet switch type Unmanaged or managed with up to 18 ports... - Page 36 Section 6 Technical Specifications Drawing No. LP0977 Revision B Switch power consumption 4.3 W (SLX-5EG-1) + PoE (typical all ports active at 6.2 W (SLX-5EG-2SFP) + PoE 1000 Mbps) PoE power consumption Up to 15.4 W per port RJ45 pin assignments for TX/V- (3, 6);...
- Page 37 Drawing No. LP0977 Section 6 Technical Specifications Revision B Gigabit Transceivers Part Number GMFIBER-SFP-500 GMFIBER-SFP-2K* GSFIBER-SFP-10K GSFIBER-SFP-30K GSFIBER-SFP-50K GSFIBER-SFP-80K Fiber Mode Fiber Length 500 m 2 km 10 km 30 km 50 km 80 km TX Power Min -9.5 dBm -9 dBm -9.5 dBm -2 dBm...
- Page 38 SLX-5/8MS models: -40 to +75°C (cold startup at -40°C) SLX-10/18MG-1 models: -40 to +75°C (cold startup at -40°C) SLX-16MS-1 model: -40 to +75°C (cold startup at -40°C) Contact Red Lion if wider ranges are needed. Storage temperature range -40 to +85 °C...
-
Page 39: Section 7 Service Information
Revision B Section 7 Service Information Service We sincerely hope that you never experience a problem with any Red Lion product. If you do need service, call Red Lion at 1-877-432-9908 for Technical Support. A trained specialist Information will help you to quickly determine the source of the problem. Many problems are easily resolved with a single phone call. - Page 40 Drawing No. LP0977 Revision B (a) Red Lion Controls Inc. (the “Company”) warrants that all Products shall be free from defects in material and workmanship under normal use for the period of time provided in “Statement of Warranty Periods” (available at www.redlion.net) current at the time of shipment of the Products (the “Warranty Period”).
Need help?
Do you have a question about the SL Series and is the answer not in the manual?
Questions and answers