Advertisement
Note: These instructions are for a typical installation. Refer to the long form installation and management
guides found at Red Lion website for full installation and management details.
1. Carefully remove the switch and any accessories from the shipping container and inspect them for damage.
Contact Red Lion immediately if any damage is discovered.
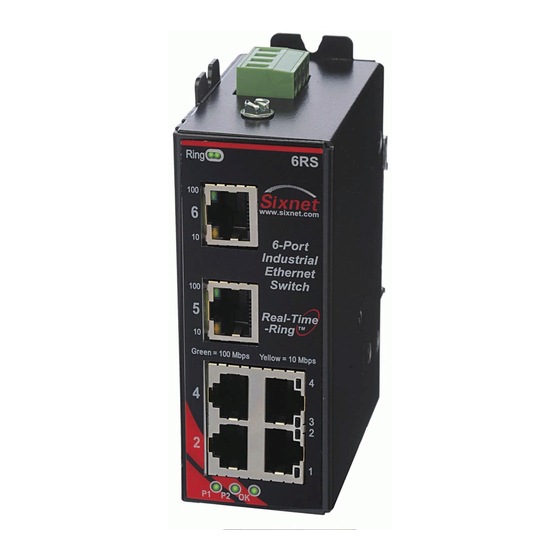
2. Install the switch to your DIN rail as shown in the diagram below. First, hook the top of the DIN rail clip to
the rail. Then push the bottom of the switch towards the rail until it locks into place. Refer to the full
installation guide for removal instructions.
3. Apply power to the switch per the instructions following the warnings below.
All power, input and output (I/O) wiring must be in accordance with Class I, Division 2 wiring methods and in
accordance with the authority having jurisdiction.
"This Equipment is Suitable for Use in Class I, Division 2, Groups A, B, C, D or Non-Hazardous Locations Only".
WARNING – EXPLOSION HAZARD – SUBSTITUTION OF COMPONENTS MAY IMPAIR SUITABILITY FOR CLASS I, DIVISION 2.
WARNING – EXPLOSION HAZARD – WHEN IN HAZARDOUS LOCATIONS, DISCONNECT POWER BEFORE REPLACING OR
WIRING UNITS.
WARNING – EXPLOSION HAZARD – DO NOT DISCONNECT EQUIPMENT UNLESS POWER HAS BEEN SWITCHED OFF OR THE
AREA IS KNOWN TO BE NONHAZARDOUS.
WARNING – EXPLOSION HAZARD – IN HAZARDOUS OR POTENTIALLY HAZARDOUS LOCATIONS, DO NOT SEPARATE ANY
PART OF THE UNIT WHEN ENERGIZED. USE THE UNIT FOR INTERNAL CONNECTIONS ONLY.
Tout pouvoir, le câblage d'entrée et de sortie (I/O) doivent être conformes aux méthodes de câblage de
Classe I, Division 2 et conformément à l'autorité compétente.
"
Cet équipement est adapté pour une utilisation en Classe1, Division 2, Groupes A, B, C et D ou endroits non-
dangereux seulement
AVERTISSEMENT – RISQUE D'EXPLOSION – LA SUBSTITUTION DE TOUT COMPOSANT PEUT NUIRE À LA CONFORMITÉ DE
CLASSE I, DIVISION 2.
AVERTISSEMENT – RISQUE D'EXPLOSION – LORSQUE DANS DES ENDROITS DANGEREUX, DÉBRANCHEZ LE CORDON
D'ALIMENTATION AVANT DE REMPLACER OU DE BRANCHER LES MODULES.
AVERTISSEMENT – RISQUE D'AVERTISSEMENT – NE DÉBRANCHEZ PAS L'ÉQUIPEMENT PENDANT QUE LE CIRCUIT EST
DIRECT OU À MOINS QUE L'ENVIRONNEMENT SOIT CONNU POUR ÊTRE LIBRE DE CONCENTRATIONS INFLAMMABLES.
AVERTISSEMENT – RISQUE D'EXPLOSION –
PAS SEPARER UNE PARTIE DE L'UNITE SOUS TENSION. SEULEMENT UTILISEZ L'APPAREIL POUR LES CONNEXIONS
INTERNES.
Phone: 800.894.0412 - Fax: 888.723.4773 - Web: www.clrwtr.com - Email: info@clrwtr.com
Installation & Operating Instructions
SL Models
in
Plastic Case
"
.
DANS LES ENDROITS DANGEREUX OU POTENTIELLEMENT DANGEREUX, NE
SL/SLX Series
(Quick Start Guide)
SLX Models
in
Metal Case
Advertisement
Table of Contents

Related Manuals for red lion SLX SERIES


Summary of Contents for red lion SLX SERIES
-
Page 1: Quick Start Guide
Note: These instructions are for a typical installation. Refer to the long form installation and management guides found at Red Lion website for full installation and management details. 1. Carefully remove the switch and any accessories from the shipping container and inspect them for damage. - Page 2 The switch will have a removable screw terminal plug (green) as shown in the diagram. The function of each position will be indicated on a label adjacent to the plug and/or on the side of the switch. The absolute minimum and maximum voltages are also indicated. To meet the UL requirements you must do one of the following: A.
- Page 3 To configure advanced settings in ring switches: A. Install the Ethernet Switch Tools found at Red Lion website. B. Run the utility and use the “Auto-find” feature to locate all your ring switches. C. Create your own custom configurations. See the online help for details.
Need help?
Do you have a question about the SLX SERIES and is the answer not in the manual?
Questions and answers