Table of Contents
Advertisement
Quick Links
Advertisement
Table of Contents

Subscribe to Our Youtube Channel
Related Manuals for Middle Atlantic Products Credenza Frame C3 Series


Summary of Contents for Middle Atlantic Products Credenza Frame C3 Series
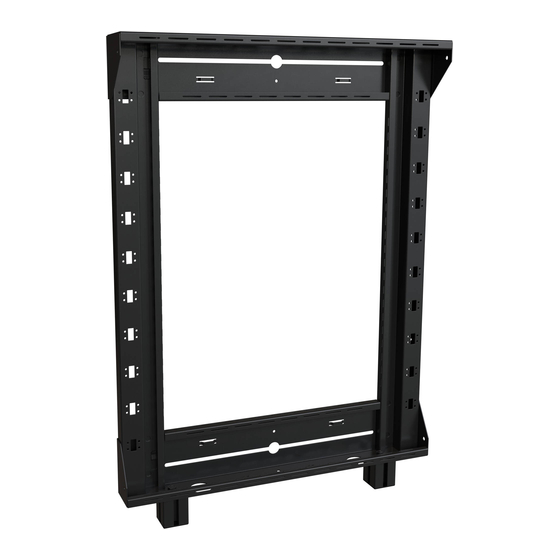
- Page 1 Instruction Sheet C3 SERIES Credenza Frame NOTE: The 1-, 2-, 3-, and 4-bay C3 credenza frames shown in 32” (813 mm) height. THANK YOU Thank you for purchasing the C3 Series Credenza Frame. Please read these instructions thoroughly before installing or assembling this product. 100-00032 Rev A...
-
Page 2: Important Safety Instructions
It is the responsibility of the Installer/User to ensure that this product is loaded according to specifications. WARNING: Middle Atlantic Products, electrical systems conform to and should be properly grounded in compliance with require- ments of the current National Electrical Code or codes administered by local authorities. All electrical products may present a possible shock or fire hazard if improperly installed or used. -
Page 3: Instructions Importantes Sur La Sécurité
INSTRUCTIONS IMPORTANTES SUR LA SÉCURITÉ • Lire ces instructions. • Respectez tous les avertissements. • Nettoyer uniquement avec un chiffon sec. • Conservez ces instructions. • Suivez toutes les instructions. • N'utilisez que des accessoires spécifiés par le fabricant. DANGER TENSION DANGEREUSE: Le symbole de la pointe de flèche, dans un triangle équilatéral, est destiné à alerter l'utilisateur sur la présence de tension dangereuse non isolée dans l'enceinte du produit qui peut être d'une ampleur suffisante pour constituer un risque d'électrocu- tion. -
Page 4: Weight Rating
WEIGHT RATINGS Model Number Weight Rating C3 1-Bay 24” (610 mm) and 32” (813 mm) Height 75 lbs. (34 kg) Per Bay, 25 lbs. (11 kg) On Top, 100 lbs. (45 kg) Maximum Total Rated Load C3 2-Bay 24” (610 mm) and 32” (813 mm) Height 75 lbs. - Page 5 INTRODUCTION NOTE: • Please take the time to carefully unpack and inspect all of your C3 Series products and gather their corresponding instruction sheets. They are referenced and used together for the C3 installation process and should be saved for future use. •...
- Page 6 ATTACHING YOUR FRAME USING THE DEFAULT (FRAME FEET) INSTALLATION HEIGHT NOTE: • If your installation includes a display mount option (C3-XX-LDXU), you must attach your frame to the wall using the default (frame feet) installation height as explained in this topic. •...
- Page 7 ATTACHING YOUR FRAME USING THE DEFAULT INSTALLATION HEIGHT (CONTINUED) 3. For each bay on your frame, use a pencil and mark top and bottom keyhole slot drilling locations based on your specific wall installation as follows: IF YOU ARE SECURING YOUR FRAME TO A WALL OF CINDERBLOCK OR CONCRETE: While your frame is still on the wall,...
- Page 8 ATTACHING YOUR FRAME USING THE DEFAULT INSTALLATION HEIGHT (CONTINUED) 4. The remaining sections of this topic show you how to attach your frame to your specific wall type when using the default (frame feet) installation height as follows: • “Attaching the Frame at Default Height to a Wall With Steel Studs or Cinderblocks” on page 8. •...
- Page 9 ATTACHING YOUR FRAME USING THE DEFAULT INSTALLATION HEIGHT (CONTINUED) Attaching the Frame at Default Height to a Wall With Wood Studs NOTE: Adjust torque on power driver to the “drill” setting. 1. Use power driver and 3/32” drill bit to drill holes in all the marked keyhole slot locations hitting the wall studs each time for proper support.
- Page 10 HANGING YOUR FRAME USING A CUSTOM INSTALLATION HEIGHT (CONTINUED) 2. Keeping the previous note in mind, select your desired overall height (from the finished floor to the top edge of your woodkit) and use a pencil and level to draw a horizontal line (approximately as wide as your frame, A) on the wall as shown.
- Page 11 HANGING YOUR FRAME USING A CUSTOM INSTALLATION HEIGHT (CONTINUED) 5. For each bay on your frame, use a pencil and mark top and bottom keyhole slot drilling locations based on your specific wall installation as follows: IF YOU ARE SECURING YOUR FRAME TO A WALL OF CINDERBLOCK OR NOTE: We strongly recommend...
- Page 12 HANGING YOUR FRAME USING A CUSTOM INSTALLATION HEIGHT (CONTINUED) 6. The remaining sections of this topic show you how to attach your frame (A) to your specific wall type when using a custom installation height as follows: • “Securing the Frame at Custom Height to a Wall With Steel Studs or Cinderblocks” on page 12. •...
- Page 13 HANGING YOUR FRAME USING A CUSTOM INSTALLATION HEIGHT (CONTINUED) Securing the Frame at Custom Height to a Wall With Steel Studs or Cinderblocks (Continued) 8. Team lift your frame (A) and work the bolt and washer on the wall through the top keyhole on the corresponding side of the frame.
-
Page 14: Warranty
Factory Distribution United States: New Jersey, California, Illinois - Canada: Ontario - The Netherlands: Weert At Middle Atlantic Products we are always listening. Your comments are welcome. Middle Atlantic Products is an ISO 9001 and ISO 14001 Registered Company. Page 14...
Need help?
Do you have a question about the Credenza Frame C3 Series and is the answer not in the manual?
Questions and answers