National Instruments PCMCIA-232 Getting Started
Serial hardware and software for windows nt
Hide thumbs
Also See for PCMCIA-232:
- Getting started (61 pages) ,
- Manual (237 pages) ,
- Getting started (67 pages)

Related Manuals for National Instruments PCMCIA-232


Summary of Contents for National Instruments PCMCIA-232
- Page 1 Serial Getting Started with Your PCMCIA Serial Hardware and Software for Windows NT PCMCIA Serial for Windows NT September 2000 Edition Part Number 321826C-01...
- Page 2 Sweden 08 587 895 00, Switzerland 056 200 51 51, Taiwan 02 2528 7227, United Kingdom 01635 523545 For further support information, see the Technical Support Resources appendix. To comment on the documentation, send e-mail to techpubs@ni.com © Copyright 1998, 2000 National Instruments Corporation. All rights reserved.
- Page 3 Any action against National Instruments must be brought within one year after the cause of action accrues. National Instruments shall not be liable for any delay in performance due to causes beyond its reasonable control.
- Page 4 Classification requirements are the same for the Federal Communications Commission (FCC) and the Canadian Department of Communications (DOC). Changes or modifications not expressly approved by National Instruments could void the user’s authority to operate the equipment under the FCC Rules.
- Page 5 • Connect the equipment into an outlet on a circuit different from that to which the receiver is connected. • Consult the dealer or an experienced radio/TV technician for help. Canadian Department of Communications This Class B digital apparatus meets all requirements of the Canadian Interference-Causing Equipment Regulations. Cet appareil numérique de la classe B respecte toutes les exigences du Règlement sur le matériel brouilleur du Canada.
-
Page 6: Table Of Contents
Configuration Change/View Communication Port Settings ..............3-1 General Port Settings .....................3-2 COM Port Number ..................3-3 Transceiver Mode....................3-3 FIFO Enabled ....................3-3 FIFO Buffers ....................3-3 Resources......................3-3 Resource Settings......................3-4 PCMCIA-232, PCMCIA-485, PCMCIA-232/4 ..........3-4 PCMCIA-232/2, PCMCIA-485/2..............3-5 © National Instruments Corporation PCMCIA Serial for Windows NT... - Page 7 Contents Chapter 4 Using Your Serial Hardware Advanced Transceiver Control for the PCMCIA-485........... 4-1 Four-Wire Mode ..................... 4-1 Two-Wire Mode: DTR with Echo ..............4-2 Two-Wire Mode: DTR Controlled ..............4-2 Two-Wire Mode: TXRDY Auto Control............4-2 Setting the Transceiver Control Mode ............4-2 Setting the Transceiver Mode with DeviceIoControl ........
- Page 8 Table A-1. RS-232, RS-422, and RS-485 Features ..........A-1 Table D-1. Physical Characteristics of the PCMCIA Serial Cards ......D-1 Table D-2. Environmental Characteristics of the Serial Hardware ......D-2 Table D-3. Software Characteristics................D-2 © National Instruments Corporation PCMCIA Serial for Windows NT...
-
Page 9: About This Manual
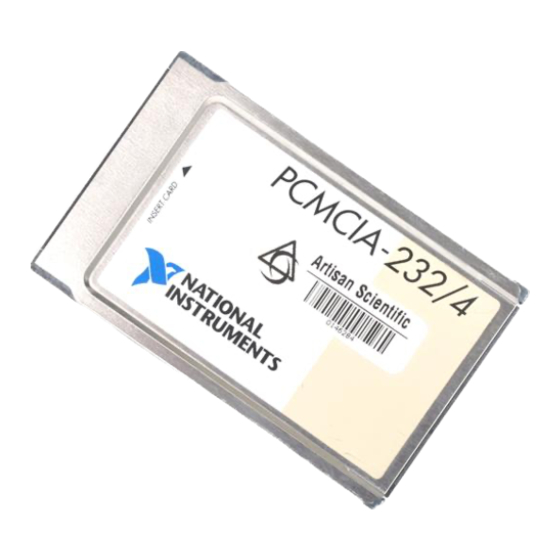
About This Manual This manual contains instructions to help you install and configure the National Instruments serial hardware and the NI-Serial software for Windows NT. The serial hardware covered by this manual includes the PCMCIA-232, PCMCIA-232/2, PCMCIA-232/4, PCMCIA-485, and PCMCIA-485/2. This manual assumes that you are already familiar with Windows NT. -
Page 10: Related Documentation
About This Manual Related Documentation The following documents contain information that you might find helpful as you read this manual: ANSI/EIA-232-D Standard, Interface Between Data Terminal • Equipment and Data Circuit-Terminating Equipment Employing Serial Binary Data Interchange EIA/RS-422-A Standard, Electrical Characteristics of Balanced •... -
Page 11: Introduction
Install the Serial Hardware Verify the Installation Chapter 2 Passes? Troubleshooting Connect the Cables Chapter 3 Configure the Serial Port Learn About Transceiver Control Modes Chapter 4 Review Programming Requirements Write Application Program © National Instruments Corporation PCMCIA Serial for Windows NT... -
Page 12: What You Need To Get Started
50 ft. You can connect the PCMCIA-485 hardware with up to 31 devices using serial cable lengths up to 4,000 ft. The PCMCIA-232 is available with one, two, or four ports. The PCMCIA-485 is available in a one-port version or two-port version. All PCMCIA cards come with cables for each port that terminates in a standard DB-9 D-Sub connector. -
Page 13: Ni-Serial Software Overview
• Configuration utility • Product manuals The NI-Serial software supports all National Instruments serial hardware, including all AT, PCI, PXI, CompactPCI, and PCMCIA versions. Time-Saving Development Tools Your kit includes the NI-Serial software for Windows NT. In addition, you can order the LabWindows/CVI or LabVIEW software from National Instruments to speed your application development time and make it easier to communicate with your instruments. -
Page 14: Using Your Serial Hardware With Labview And Labwindows/Cvi
ANSI C code. For ordering information, or to request free demonstration software, contact National Instruments. Using Your Serial Hardware with LabVIEW and LabWindows/CVI After you install your serial hardware and the NI-Serial software, you can use standard serial I/O functions in LabVIEW and LabWindows/CVI with your serial interface. -
Page 15: Installation And Verification
Select Start»Settings»Control Panel. Double-click on the Add/Remove Programs icon in the Control Panel to launch the Add/Remove Programs applet. A dialog box similar to the one in Figure 2-1 appears. © National Instruments Corporation PCMCIA Serial for Windows NT... -
Page 16: Figure 2-1. Add/Remove Programs Properties Dialog Box
Chapter 2 Installation and Verification Figure 2-1. Add/Remove Programs Properties Dialog Box Click on the Install button. When prompted, insert the NI-Serial Software for Windows 2000/NT/Me/9x CD and click on the Next button to proceed. The software installation wizard begins with the screen shown in Figure 2-2. -
Page 17: Install The Pcmcia Serial Hardware
The software installation is complete. Proceed to the next section, Install the PCMCIA Serial Hardware. Install the PCMCIA Serial Hardware Complete the following steps to install the PCMCIA-232 or PCMCIA-485 in your computer: Shut down the computer. Insert the card into a free PC Card (PCMCIA) socket the same way you insert a disk into a floppy drive. -
Page 18: Select Resources For The Pcmcia Card
Chapter 2 Installation and Verification Figure 2-3 shows how to insert a PCMCIA serial card and how to connect the cable. Portable Computer PCMCIA Socket PCMCIA Serial Cable Figure 2-3. Inserting a PCMCIA Serial Card Proceed to the next section, Select Resources for the PCMCIA Card. Select Resources for the PCMCIA Card Complete the following steps to select resources for your PCMCIA card. -
Page 19: Verify The Installation
Determine Which Physical Port Is Associated with COMx Select Start»Settings»Control Panel, and double-click on niports. A list showing installed National Instruments ports with their logical COMx names appears. If your interface is not on the list, refer to Appendix C, Troubleshooting and Common Questions. -
Page 20: Connect The Cables
Chapter 2 Installation and Verification Connect the Cables For the PCMCIA serial cards, you can use the standard DB-9 connector found on most serial cables. Figure 2-4 and Table 2-1 give the pin locations and descriptions of the DB-9 connector, which is found on the PCMCIA serial cable. PIN 5 PIN 9 PIN 6... -
Page 21: Connecting Two-Wire Devices
Refer to Chapter 4, Using Your Serial Hardware, for information on setting the transceiver mode for two-wire communication. Refer to Appendix A, Serial Port Information, for more information on duplex architectures. © National Instruments Corporation PCMCIA Serial for Windows NT... -
Page 22: Configuration
Follow these steps to configure the serial port. Select Start»Settings»Control Panel and double-click on the niports icon. A list of National Instruments ports appears, as shown in Figure 3-1. Figure 3-1. niports Configuration Utility Select the port you are interested in. -
Page 23: General Port Settings
Chapter 3 Configuration Click on the Resources button in the General Port Settings dialog box to view or configure the resources for the port. Refer to the Resource Settings section, later in this chapter, for more information. Click on Delete to remove hardware information about the port from Windows NT. -
Page 24: Com Port Number
Resources Click on the Resources button to display the resource configuration dialog box for the port. For more information on resource configuration, refer to the next section, Resource Settings. © National Instruments Corporation PCMCIA Serial for Windows NT... -
Page 25: Resource Settings
The following sections explain the resource configuration options for each serial interface. PCMCIA-232, PCMCIA-485, PCMCIA-232/4 Figure 3-3 shows the resource configuration dialog box for a PCMCIA-485. The PCMCIA-232 and PCMCIA-232/4 dialog boxes are similar. Figure 3-3. Resource Configuration Dialog Box for the PCMCIA-485 Base I/O Address: The base I/O address assigned to the port. -
Page 26: Pcmcia-232/2, Pcmcia-485/2
These cards require two base I/O settings, one for each port, and they share an IRQ. Figure 3-4 shows the resource configuration dialog box for a PCMCIA-485/2. The PCMCIA-232/2 dialog box is similar. Figure 3-4. Resource Configuration Dialog Box for the PCMCIA-485/2 Base I/O Address: The base I/O addresses assigned to the two ports. -
Page 27: Using Your Serial Hardware
Signal names with an overscore, such as DTR, indicate that the signal is active low. Four-Wire Mode Use the four-wire mode for most full-duplex systems. In this mode, the transmitter and receiver are always enabled. This mode is the default. © National Instruments Corporation PCMCIA Serial for Windows NT... -
Page 28: Two-Wire Mode: Dtr With Echo
Chapter 4 Using Your Serial Hardware Two-Wire Mode: DTR with Echo Use this mode in half-duplex systems where the DTR (Data Terminal Ready) line must control the transmitter. In the DTR-with-echo mode, the transmitter is tri-stated when the DTR signal of the UART (Universal Asynchronous Receiver/Transmitter) is asserted. -
Page 29: Setting The Transceiver Mode With Deviceiocontrol
Two-wire mode: DTR with echo Two-wire mode: DTR controlled Two-wire mode: TXRDY auto control For example, to set two-wire TXRDY auto control mode, use the following call: ULONG TranceiverMode = 131; DeviceIoControl(hDevice, IOCTL_SERIAL_SET_TRANSCEIVER_MODE,(PVOID) &TransceiverMode,sizeof(ULONG),lpOutBuffer, nOutBufferSize,lpBytesReturned,lpOverlapped); © National Instruments Corporation PCMCIA Serial for Windows NT... -
Page 30: General Programming Requirements
Chapter 4 Using Your Serial Hardware General Programming Requirements Once installed, the NI-Serial software is integrated into the standard Windows NT communications software. NI serial ports are used like any other Windows NT communications (COM) port. Windows NT has standard communication functions for use within either 16-bit (Win16) applications or 32-bit (Win32) applications. -
Page 31: Appendix A Serial Port Information
RS-232 uses transmission lines in which the state of each signal is represented by referencing the voltage level of a single line to ground. RS-232 was designed for serial communication up to © National Instruments Corporation PCMCIA Serial for Windows NT... - Page 32 Appendix A Serial Port Information distances of 50 ft. and with data rates up to 20 kbytes/s. However, because of improvements in line drivers and cabling, you can often increase the actual performance of the bus past the limitations on speed and distance recommended in the specification.
- Page 33 Because in a differential system each transmission line is composed of two separate wires, a full-duplex system is often referred to as a four-wire system. Figure A-1 shows a typical full-duplex system. © National Instruments Corporation PCMCIA Serial for Windows NT...
-
Page 34: Typical Full-Duplex System
Appendix A Serial Port Information Slave 1 Slave 2 Slave n Figure A-1. Typical Full-Duplex System Half Duplex A typical half-duplex multidrop bus architecture also involves a master-slave protocol. In a half-duplex system, all transmitters and receivers are connected to the same transmission line. A half-duplex system is often referred to as a two-wire system. -
Page 35: Multidrop Network Using Terminating Resistors
The terminating resistor should match the characteristic impedance of the transmission line (typically 100–120 Ω). National Instruments offers an optional DB-9 RS-485 termination connector that contains embedded terminating resistors for easy termination. -
Page 36: Straight-Through Cabling In A Dte-To-Dce Interface
Appendix A Serial Port Information Figure A-4 shows straight-through cabling in a DTE-to-DCE interface. Rx D Rx D Pin 2 Pin 2 Pin 2 Pin 2 Tx D Tx D Pin 3 Pin 3 Pin 3 Pin 3 Figure A-4. Straight-Through Cabling in a DTE-to-DCE Interface Straight-through cabling is still the standard method to connect a modem to your PC. -
Page 37: Uninstalling The Serial Hardware And Software
Select the port to remove from the list of ports as shown in Figure B-1. Figure B-1. Selecting an Interface to Uninstall Click on the Delete button. Note For two-port and four-port PCMCIA cards, all ports on the interface are removed. © National Instruments Corporation PCMCIA Serial for Windows NT... -
Page 38: Add/Remove Programs Properties Dialog Box
Appendix B Uninstalling the Serial Hardware and Software Uninstalling the NI-Serial Software Before uninstalling the software, remove all serial port information from the Windows NT Control Panel, as described in the previous section. You do not need to shut down Windows NT before uninstalling the software. Complete the following steps to remove the NI-Serial software: Select Start»Settings»Control Panel. - Page 39 Figure B-3. Uninstallation Results Shut down Windows NT, power off your computer, and remove your serial interfaces. If you want to reinstall the hardware and software, refer to Chapter 2, Installation and Verification. © National Instruments Corporation PCMCIA Serial for Windows NT...
-
Page 40: Troubleshooting And Common Questions
After you have identified the resource that caused the conflict, use the serial configuration utility, niports, to reconfigure your serial interface so that it uses conflict-free resources. For more information, refer to Chapter 3, Configuration. © National Instruments Corporation PCMCIA Serial for Windows NT... - Page 41 Resources button on the General Port Settings page. For more information about resource conflicts, refer to Chapter 3, Configuration. Verify that the National Instruments serial driver is installed. Use the Windows Explorer to display the Properties of serial.sys...
- Page 42 Refer to the section Determine Which Physical Port Is Associated with COMx, in Chapter 2, Installation and Verification. How can I change the COM numbers of my National Instruments serial ports? Refer to the General Port Settings section in Chapter 3, Configuration.
-
Page 43: Appendix D Specifications
(from PCMCIA expansion slot) PCMCIA-232 +5 VDC 40 mA Typical PCMCIA-485 +5 VDC 100 mA Typical PCMCIA-232/2 +5 VDC 60 mA Typical PCMCIA-485/2 +5 VDC 100 mA Typical PCMCIA-232/4 +5 VDC 60 mA Typical © National Instruments Corporation PCMCIA Serial for Windows NT... -
Page 44: Table D-2. Environmental Characteristics Of The Serial Hardware
Appendix D Specifications Table D-2. Environmental Characteristics of the Serial Hardware Characteristic Specification Operating Environment Component Temperature 0 to 70° C Relative Humidity 10 to 90%, noncondensing Storage Environment Temperature –40 to 120° C Relative Humidity 5 to 90%, noncondensing FCC Class A Verified Software Specifications Table D-3. -
Page 45: Technical Support Resources
Technical Support Resources Web Support National Instruments Web support is your first stop for help in solving installation, configuration, and application problems and questions. Online problem-solving and diagnostic resources include frequently asked questions, knowledge bases, product-specific troubleshooting wizards, manuals, drivers, software updates, and more. Web support is available through the Technical Support section of ni.com... - Page 46 Appendix E Technical Support Resources Worldwide Support National Instruments has offices located around the world to help address your support needs. You can access our branch office Web sites from the Worldwide Offices section of . Branch office Web sites provide ni.com...
- Page 47 American National Standards Institute bits bytes baud bits per second bits per second Celsius Computer Output Microform Clear To Send DB-xx subminiature D connector (where xx is the number of pins) © National Instruments Corporation PCMCIA Serial for Windows NT...
- Page 48 Glossary Data Carrier Detect Data Communications Equipment or Data Circuit-Terminating Equipment direct memory access Data Set Ready Data Terminal Equipment Data Terminal Ready (where the overscore denotes that the signal is active low) Electronic Industries Association electromagnetic interference Federal Communications Commission FIFO first-in-first-out feet...
- Page 49 Small Computer Systems Interface Transmit Transmit Data TXRDY Transmit Ready (where the overscore denotes that the signal is active low) UART universal asynchronous receiver/transmitter volts volts direct current VME eXtensions for Instrumentation © National Instruments Corporation PCMCIA Serial for Windows NT...
- Page 50 NI-Serial software null-modem cabling in (figure), A-6 installed, C-3 duplex architectures, A-3 diagnostic test failure, C-3 full duplex, A-3 naming National Instruments serial half duplex, A-4 ports, C-3 communication port settings, 3-1 viewing or changing, 3-1 communication port settings configuration, 3-1...
- Page 51 (figure), A-5 transceiver mode, 3-3 general programming requirements, 4-4 getting started, 1-2 glossary, G-1 naming National Instruments serial ports, C-3 National Instruments Web support, E-1 NI Developer Zone, E-1 NI serial setup screen (figure), 2-3 half duplex, A-4 niports configuration utility (figure), 3-1...
- Page 52 3-4 setup screen for NI serial software (figure), 2-3 PCMCIA-232, PCMCIA-485, software characteristics (table), D-2 PCMCIA-232/4, 3-4 software installation, 2-1 PCMCIA-232/2, PCMCIA-485/2, 3-5 getting started, 1-2 RS-232 standard, A-1 software specifications, D-2 features (table), A-1 specifications, D-1 RS-422 standard, A-2...
- Page 53 C-2 missing serial port in the niports list, C-1 resolving resource conflicts, C-1 two-wire devices, 2-7 Web support from National Instruments, E-1 connecting, 2-7 worldwide technical support, E-2 typical full-duplex system (figure), A-4 typical half-duplex system (figure), A-4 PCMCIA Serial for Windows NT ni.com...
Need help?
Do you have a question about the PCMCIA-232 and is the answer not in the manual?
Questions and answers