Table of Contents
Advertisement
Quick Links
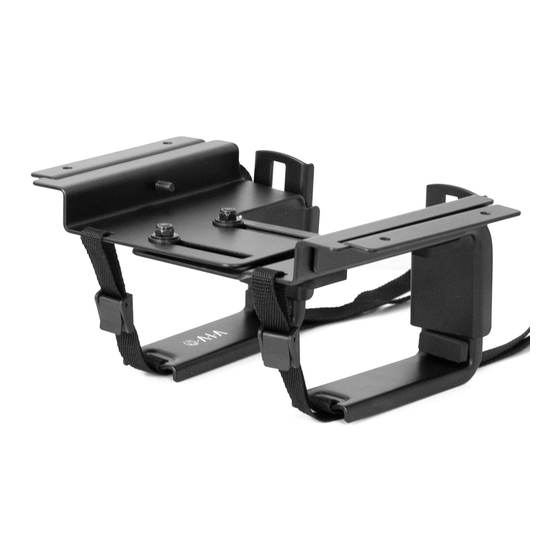
Universal Under Desk and Wall UPS Mount
Instruction Manual
SKU: MOUNT-UPS01
Scan the QR code with your mobile device or follow the link
for helpful videos and specifications related to this product.
https://vivo-us.com/products/mount-ups01
GET IN TOUCH | Monday-Friday from 7:00am-7:00pm CST
help@vivo-us.com
www.vivo-us.com
309-278-5303
Chat live with an agent!
Advertisement
Table of Contents

Related Manuals for Vivo MOUNT-UPS01


Summary of Contents for Vivo MOUNT-UPS01
- Page 1 Universal Under Desk and Wall UPS Mount Instruction Manual SKU: MOUNT-UPS01 Scan the QR code with your mobile device or follow the link for helpful videos and specifications related to this product. https://vivo-us.com/products/mount-ups01 GET IN TOUCH | Monday-Friday from 7:00am-7:00pm CST help@vivo-us.com...
- Page 2 WARNING! If you do not understand these directions, or if you have any doubts about the safety of the installation, please call a qualified technician. Check carefully to make sure there are no missing or defective parts. Improper installation may cause damage or serious injury.
- Page 3 STEP 2 Adjust the mount horizontally to where the brackets won’t interfere with any buttons or cords. Adjust the mount vertically so the UPS is snug but still able to be removed. This will be re-tightened in a later step. NOTE: Due to the variability of UPS’s, some outlet ports may be blocked by the brackets.
- Page 4 STEP 4 Place the mount (A) against the mounting location and mark drilling locations with a pencil. If mounting to a wood stud wall, use of a stud finder is recommended. STEP 5 Remove the screws from the sides of the mount (A), and separate into the screws (A1), brackets (A2) and mount (A3).
- Page 5 STEP 6 OPTION A: Under Desk Installation Using marked locations, drill 3/8” (10mm) deep holes using a 1/8” (3mm) drill bit. Mount the brackets (A2) to the desk using ST4.8x19mm screws (C). OPTION B: Wood Stud Wall Installation Using marked locations, drill 1.6” (40mm) deep holes using a 1/8” (3mm) drill bit. Mount the brackets (A2) to the wall using ST4.2x35mm screws (B) with washers (F).
- Page 6 STEP 6 (Continued) OPTION C: Drywall Installation Using a Phillips screwdriver, screw drywall anchors (D) into marked locations (the anchors are self tapping and do not require pre-drilling the wall). Mount the brackets (A2) to the wall using ST4.2x35mm screws (B) with washers (F). OPTION D: Concrete/Brick Wall Installation Using marked locations, drill 1.6”...
- Page 7 STEP 7 Slide the mount (A3) onto the brackets (A2) and secure using screws (A1). FOR OPTION A FOR OPTION B, C, D STEP 8 Loosen the two nuts on each support and re-insert the UPS into the mount. Push the supports against the UPS and tighten down the nuts.
- Page 8 - 92% within < 3hr www.vivo-us.com AVG. RESOLUTION TIME : < 15 M (within office hrs) Chat live with an agent! 309-278-5303 AVG. RESOLUTION TIME : 5M 4S (within office hrs) FOR MORE VIVO PRODUCTS, CHECK OUT OUR WEBSITE AT: www.vivo-us.com...
Need help?
Do you have a question about the MOUNT-UPS01 and is the answer not in the manual?
Questions and answers