Table of Contents
Advertisement
Quick Links
Grid-connected inverter
3PH 100KTL-136KTL-HV
User Manual
Zucchetti Centro Sistemi S.p.A. - Green Innovation Division
Via Lungarno, 248 - 52028 Terranuova Bracciolini - Arezzo, Italy
tel. +39 055 91971 - fax. +39 055 9197515
innovation@zcscompany.com - zcs@pec.it – www.zcsazzurro.com
Pile Reg. IT12110P00002965 - Share Capital € 100,000.00 fully paid up
AR Companies Reg. no. 03225010481 - REA AR - 94189
ISO 9001 Certified Company - Certificate no. 9151 - CNS0 - IT-17778
Advertisement
Table of Contents

Related Manuals for ZCS 3PH 100KTL-HV


Summary of Contents for ZCS 3PH 100KTL-HV
- Page 1 Via Lungarno, 248 - 52028 Terranuova Bracciolini - Arezzo, Italy tel. +39 055 91971 - fax. +39 055 9197515 innovation@zcscompany.com - zcs@pec.it – www.zcsazzurro.com Pile Reg. IT12110P00002965 - Share Capital € 100,000.00 fully paid up AR Companies Reg. no. 03225010481 - REA AR - 94189...
-
Page 2: Table Of Contents
Table of Contents Preliminary safety instructions ................................6 1.1. Safety instructions ..................................6 1.2. Symbols and icons ..................................9 Product features ......................................11 2.1. Product presentation ................................11 2.2. Description of functions ..............................13 2.3. Module protection .................................. 15 2.4. Efficiency and derating curves ............................16 Installation ........................................ - Page 3 Troubleshooting and maintenance ..............................58 7.1. Troubleshooting ..................................58 7.2. Maintenance ..................................... 64 Uninstalling ........................................65 8.1. Uninstallation steps ................................65 8.2. Packaging ....................................65 8.3. Storage ......................................65 8.4. Disposal ...................................... 65 Technical data ......................................66 Warranty terms and conditions ..............................67 3 / 67 User’s Manual 3PH 100KTL-136KTL-HV Rev.
- Page 4 Technical support ZCS offers a support and technical consultancy service accessible by sending a request directly from the website https://www.zcsazzurro.com/it/support. For the Italian territory, the following toll-free number is available: 800 72 74 64. 4 / 67 User’s Manual 3PH 100KTL-136KTL-HV...
- Page 5 Scope This manual describes the assembly, installation, electrical connections, commissioning, maintenance and troubleshooting of the following inverters: 3PH 100KTL-HV / 3PH 125KTL-HV / 3PH 136KTL-HV Keep this manual so that it is accessible at all times. Recipients This manual is intended for qualified technical personnel (installers, technicians, electricians, technical...
-
Page 6: Preliminary Safety Instructions
1. Preliminary safety instructions If you have problems or questions regarding the reading and understanding of the following information, please contact Zucchetti Centro Sistemi S.p.A. through the appropriate channels. Note General information in this chapter Safety instructions It mainly highlights the safety instructions to be followed during installation and use of the equipment. Symbols and icons Introduces the main safety symbols on the inverter. - Page 7 Attention Do not remove the information label or open the inverter. Otherwise, ZCS will not provide any warranty or maintenance. Note 7 / 67 User’s Manual 3PH 100KTL-136KTL-HV Rev.
- Page 8 Operation Contact with the electrical grid or the terminal of the equipment may cause electrocution or fire! Do not touch the terminal or the conductor connected to the electrical grid. Follow all the instructions and safety requirements relating to the mains connection.
-
Page 9: Symbols And Icons
1.2. Symbols and icons Safety signals High voltage of inverter may be harmful to health! Only qualified personnel can operate the product. Keep this product out of the reach of children. Danger Pay attention to possible burns due to hot parts. Only touch the screen or press the keys while the inverter is in operation. - Page 10 Ground connection point Read this manual before installing the inverter. Indication of the allowable temperature range Positive and negative polarities of the input voltage (DC). RCM (Regulatory Compliance Mark). The product complies with the requirements of the applicable Australian standards. 10 / 67 User’s Manual 3PH 100KTL-136KTL-HV Rev.
-
Page 11: Product Features
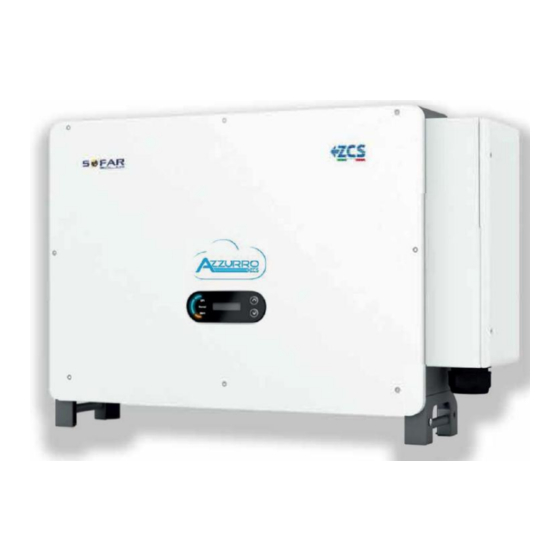
2. Product features General information in this chapter Product overview The field of use and overall dimensions of the 3PH 100KTL-136KTL-HV inverters are indicated in this section. Description of functions It describes how the 3PH 100KTL-136KTL-HV inverters and their internal operating modules work. Efficiency curve Describes the efficiency curves of the inverter. - Page 12 Dimensions description • Overall dimensions: H x W x D = 693.5 mm x 995.5 mm x 368 mm Figure 3 – Front, side and back view of the inverter and bracket • Labels on the inverter 12 / 67 User’s Manual 3PH 100KTL-136KTL-HV Rev.
-
Page 13: Description Of Functions
Figure 4 – Do not remove the label on the side of the inverter 2.2. Description of functions The DC voltage generated by the PV modules is filtered through the input board before entering the power board. The input board also has the function of detecting the insulation impedance and the DC input voltage/current. - Page 14 Electrical block diagram AZZURRO 3PH 100KTL-136KTL-HV has 16-24 DC input strings. 10-12 MPPT trackers that converters the direct current of PV array to grid-compliant, three phase current and feeds in into the utility grid. Both DC and AC side has Surge Protection Device (SPD). Figure 5 –...
-
Page 15: Module Protection
Inverter functions A. Energy management unit Remote control to start/ shunt down inverter through an external control. B. Feeding reactive power into the grid The inverter is able to produce reactive power thus to feed it into the grid through the setting of the phase shift factor. -
Page 16: Efficiency And Derating Curves
The ground fault condition is indicated by a red LED on the front panel. 2.4. Efficiency and derating curves Efficiency curve for an ZCS Azzurro model belonging to the 3PH 100KTL-136KTL-HV family 125KTL-HV Efficiency curve 100% 600V... -
Page 17: Installation
3. Installation General information in this chapter This chapter describes how to install the 3PH 100KTL-136KTL-HV inverter. Installation notes: DO NOT install 3PH 100KTL-136KTL-HV inverters near flammable materials. DO NOT install 3PH 100KTL-136KTL-HV inverters in an area where flammable or explosive materials are stored. -
Page 18: Installation Process
3.1. Installation process Figure 7 - Installation steps 3.2. Checks before installation Checking the outer packaging Packaging materials and components may be damaged during transport. Therefore, please check the materials of the outer packaging before installing the inverter. Check the surface of the box for external damage such as holes or tears. - Page 19 100KTL 20PCS PV- input connector 125KTL 20PCS 136KTL 24PCS 100KTL 20PCS PV+ metal pin 125KTL 20PCS 136KTL 24PCS 100KTL 20PCS PV- metal pin 125KTL 20PCS 136KTL 24PCS M10*90Hexagon screws 4 PCS 4 PCS Auxiliary Handle M6*30 Hexagon screws 2 PCS Manual 1PCS Warranty Card...
-
Page 20: Installation Tools
COM 16pin connector 1PCS 3.3. Installation tools The following tools are required for installation of the inverter and electrical connections; therefore, they must be prepared before installation. Tool Function Drill To drill holes in the wall for Recommended drill bit: 10mm fixing the bracket To screw and unscrew screws for Screwdriver... - Page 21 To remove the DC connectors MC4 removal tool from the inverter Diagonal pliers To cut and tighten the cable ends To remove the outer sheath of Wire stripping tool the cables RJ45 2 pieces Cable cutter To cut the power cables Crimping tool To crimp the power cables To check the voltage and current...
-
Page 22: Installation Position
Safety goggles Protective clothing Protection mask Protective clothing 3.4. Installation position Choose an appropriate installation location for the inverter. Follow the requirements below to determine the installation position. 22 / 67 User’s Manual 3PH 100KTL-136KTL-HV Rev. 1.0 24/02/2021 Identification: MD-AL-GI-00 Rev. - Page 23 Figure 8 – Requirements for installing a single inverter 23 / 67 User’s Manual 3PH 100KTL-136KTL-HV Rev. 1.0 24/02/2021 Identification: MD-AL-GI-00 Rev. 1.0 of 24/02/2021 - Application: GID...
- Page 24 Figure 9 – Requirements for installing multiple inverters Note: For safety reasons, ZCS S.p.A. and/or its partners may not carry out any technical repairs or maintenance work, or move the inverter from and to the ground if it is installed at a height of more than 180 cm from the ground.
-
Page 25: Moving The 3Ph 100Ktl-136Ktl-Hv Inverter
3.5. Moving the 3PH 100KTL-136KTL-HV inverter This section describes how to move the inverter correctly 1) When opening the packaging, insert your hands into the slots on both sides of the inverter and take a hold of it as shown in Figure below. Two people are needed to carry out this operation in order to ensure the safety of people and the correct handling of the inverter. - Page 26 Figure 11 – Auxiliary handle position 3) Lifting equipment. Tighten the screws of two M12 rings into the inverter sides according to the instruction diagram below (Note: M12 rings need self-preparation). Figure 12 – Installation of rings Fastened and tied the rope through two rings. Lifting inverter 50 mm above ground by using lifting equipment, check the tightening device of the hoisting ring and rope.
-
Page 27: Installing The 3Ph 100Ktl-136Ktl-Hv Inverter
Keep balance when lifting the inverter, avoid to crash on wall or other objective . Stop working in bad weather condition such as raining, heavy fog, winding. Attention 3.6. Installing the 3PH 100KTL-136KTL-HV inverter 1) Placed the rear panel on the mounting wall, determine the mounting height of the bracket and mark the mounting poles accordingly. - Page 28 2) Insert the expansion bolt vertically into the hole. Figure 19 - Screws into the holes 3) Align the rear panel with the hole positions, fix the rear panels on the wall by tightening the expansion bolt with the nuts. Figure 20 - Install rear panel 4) Lift the inverter and hang it on the rear panel,and fixing both side of inverter with M6 screw (accessories).
- Page 29 Figure 21 - Fix inverter 5) Use wall mount bracket, ensure the pole position are in same level by using level rule and take a mark with maker. Figure 22 - Ensure hole position 6) Drilling hole by using Hammer Drill, recommend to do a stain proofing. 29 / 67 User’s Manual 3PH 100KTL-136KTL-HV Rev.
- Page 30 Figure 23 - Drilling holes 7) Use M10 screw and M10 flat washer to secure the wall bracket (Note:M10*50 screw and M10 flat washer need self-preparation). Figure 24 - Fix wall bracket 8) Repeat step 4). Note: if height between ground and bracket is less than 1.3m, use auxiliary handle for installation. Otherwise, use lifting equipment.
- Page 31 Figure 25 - Installation position of auxiliary handle 31 / 67 User’s Manual 3PH 100KTL-136KTL-HV Rev. 1.0 24/02/2021 Identification: MD-AL-GI-00 Rev. 1.0 of 24/02/2021 - Application: GID...
-
Page 32: Electrical Connections
4. Electrical connections General information in this chapter This chapter describes the electrical connections of the 3PH 100KTL-136KTL-HV inverter. Carefully read this section before connecting the cables. NOTE: Before making any electrical connections, ensure that the DC and AC circuit breakers are open. Remember that the accumulated electrical charge remains in the inverter capacitor after the DC and AC circuit breakers have been switched off. -
Page 33: Electrical Connections
4.7. Safety check Before operate inverter, check the PV array, inverter DC side safety connection and AC side safety connection. 4.1. Electrical connections Figure 26 - Flowchart for connecting cables to the inverter 4.2. Terminal connector Connector description as below: *take picture as reference 33 / 67 User’s Manual 3PH 100KTL-136KTL-HV... -
Page 34: Connecting Pngd Cables (Grounding)
Name Connection Description DC input terminals PVX+/PVX- PV connector For WIFI,GPRS,Ethernet USB/WIFI port USB/WIFI/GPRS/ETHERNET Communication RS485 Communication RS485 Modbus/DRMs RS485/DRMs port/ DRMs port AC output terminals AC output terminal Connecting terminal of the Grounding ground , choose at least one for grounding connection 4.3. - Page 35 2) Insert the exposed core wires in the OT terminal and crimp them using a crimping tool, as shown in figure below. Recommend using OT terminal: OTM6, Cable: ≥6mm². Note 1: L3 is the length between the insulation layer of the ground cable and the crimped part. L4 is the distance between the crimped part and the conductor wires protruding from the crimped part.
-
Page 36: Connecting The Ac Output Power Cables
4.4. Connecting the AC output power cables Inverter has a standard and integrated residual current monitoring unit (RCMU), when inverter detected leakage current excess 300mA, it will cut off with utility grid for protection. For external Residual Current Device (RCD), the rated residual current shall be 300mA or higher. Precondition: Inverter AC side should connect a three phase circuit current to ensure inverter can be cut off with utility grid for abnormal condition. - Page 37 Wiring Terminal and Precautions Note: Before connect to grid, please ensure the grid voltage and frequency of local grid meet the requirement of inverter , any question please seek local grid company for help. Inverter can only connect to grid after get the permission from local grid company Should not connect any loads between inverter and AC circuit breaker OT/DT Requirement:...
- Page 38 Figure 33 - AC Terminal size Wring Procedure The section will use a five core wire as a sample, four core wire has same connection process. The table below presents recommend AC cable size. Name Type Area(mm²) Copper Wire: 95~185; Aluminum Recommended: Outdoor four-core/five- AC Cables Wire: 120~240;...
- Page 39 5) Crimp the Terminal. 6) Depending on the grid configuration, connect L1, L2, L3 and N to the terminals according to the label and tighten the screw on the terminal using a screwdriver. 39 / 67 User’s Manual 3PH 100KTL-136KTL-HV Rev.
- Page 40 Note: Phase lines use M12 terminal connector, PE line use M8 terminal connector. The position of“PE”Line and “N”Line should not be opposite. Opposite position may cause inverter permanently faulty. As shown in the figure below ,for HV model ,the N-wire does not need to be connected. (HV model:100KTL-HV,125KTL-HV,136KTL-HV).
-
Page 41: Connecting The Dc Input Power Cables
7) Closed wiring box cover, and tighten the screw. 4.5. Connecting the DC input power cables Connect the 3PH 100KTL-136KTL-HV inverter to the photovoltaic strings using DC input power cables. Select the input mode: the 3PH 100KTL-136KTL-HV inverter has 10-12 MPPTs, which can be set independently or in parallel, depending on how the system was designed. - Page 42 1) Find the metal contact pins in the accessories bag, connect the cable according below figure (1.Positive cable, 2. negative cable). Figure 35 – DC cable connection 2) Crimp the PV metal contact pin to the striped cable using a proper crimping pliers. 3) Insert wire into the connector cap nut and assemble into the back of male or female plug, When you heard a “click”, the pin tact assembly is seated correctly.
- Page 43 4) Measure PV voltage of DC input with multimeter, verify DC input cable polar and connect DC connector with inverter until hearing a slight sound indicated connection succeed. Figure 36 - DC cable connection Note: Please use multimeter to make sure the PV array positive pole and negative pole! Dealing:If need to remove the PV connector from inverter side, please use the Removal Tool as below diagram, move the connector gently.
-
Page 44: Connecting The Communication Cables
Figure 187 – Removing the DC connector 4.6. Connecting the communication cables Note: When layout the wiring diagram, please separate the communication wiring and power wiring in case the signal be affected. USB/Wifi Port Port Description: USB: USB PORT Use for updating the software USB/WIFI port Use for connect WIFI: WIFI/GPRS/ETHERNET... - Page 45 COM-Multi function communication port The table below presents recommend com cable size. Area Outer diameter Name Type (mm) (mm²) RS485 Communication Outdoor shielded twisted pair meets local 3 core: 4~8 0.25~1 Wire standards Port Description: Define Function Note RS485A RS485 signal+ RS485A RS485 signal+ Wire connection monitoring or...
- Page 46 46 / 67 User’s Manual 3PH 100KTL-136KTL-HV Rev. 1.0 24/02/2021 Identification: MD-AL-GI-00 Rev. 1.0 of 24/02/2021 - Application: GID...
-
Page 47: Commissioning The Inverter
5. Commissioning the inverter 5.1. Safety inspection before commissioning Make sure that the DC and AC voltages fall within the range permitted by the inverter. Attention Photovoltaic strings Before turning on the inverter, it is necessary to examine the photovoltaic string. Check the open- circuit voltage of each photovoltaic panel and compare it with the data in the technical datasheet. - Page 48 Zucchetti Centro Sistemi S.p.A. shall not be held responsible for any consequences resulting from the incorrect selection of the country code. If the inverter indicates the presence of any faults, refer to section 7.1 of this manual or contact the Zucchetti Centro Sistemi S.p.A.
-
Page 49: Operating Interface
6. Operating interface General information in this chapter This section describes the display and its operation, as well as the buttons and LED indicators of the 3PH 100KTL-136KTL-HV inverters. 6.1. Operating panel and display Buttons and LED indicators Figure 19 - LCD display with buttons and LED indicators Main buttons: ˄... -
Page 50: Main Interface
6.2. Main interface LCD interface indicated inverter status, alarm information, communication connection, PV input current and voltage, grid voltage,current and frequency, today generation, total generation. Inverter working status, PV 1 -12 PV input voltage and current. Inverter working status, PV generated power. Inverter working status, today generated electricity. - Page 51 Inverter working status, Wi-Fi/ RS485 status. Inverter faulty alarm. When power turn on, LCD interface displays INITIALIZING, refer below picture. When control board successfully connected with communication board, the LCD display the current state of the inverter,display as shown in the figure below. 51 / 67 User’s Manual 3PH 100KTL-136KTL-HV Rev.
- Page 52 Inverter states includes: wait, check, normal, fault and permanent Wait: Inverter is waiting to Check State when reconnect the system. In this state, grid voltage value is between the max and min limits and so on; If not, inverter will go to Fault State or Permanent State. Check: Inverter is checking isolation resistor, relays, and other safety requirements.
-
Page 53: Main Menu
6.3. Main menu Long press the down button under standard interface to enter into main interface, Main interface including below information: Normal ---------Long press DOWN button 1.Enter Setting 2.Event List 3.SystemInfo 4.Display Time 5.Software Update Enter setting Interface as below The “Settings”... - Page 54 Note1: Some settings need to enter the password (the default password is 0001), when entering the password, short press to change the number, long press to confirm the current number, and long press after entering the correct password. If "password error, try again" appears, you will need to re-enter the correct password.
- Page 55 Set Power Ratio (The country is set at 10) Set generation ratio. Event list Event List is used to display the real-time event records, including the total number of events and each specific ID No. and happening time. User can enter Event List interface through main interface to check details of real-time event records, Event will be listed by the happening time, and recent events will be listed in the front.
-
Page 56: Updating Inverter Software
The user enters the main menu by long pressing the DOWN button, short press and turns the page to select menu contents, then long press the button to enter "3. SystemInfo". Turning the page down can select the system information to view. Display Time Long press the button and short press the button to turn the page in the standard user interface to enter into “4.Display Time”,then long press the button to display the current system time. - Page 57 4) Insert USB drive into the USB port of inverter. 5) Then turn on DC switch and enter into the online upgrade to the main menu"5.Software Update"in the LCD display program. The method to enter the menu can refer to operation interface of LCD. 6) Input the password 0715 and then begin the update process.
-
Page 58: Troubleshooting And Maintenance
7. Troubleshooting and maintenance 7.1. Troubleshooting This section describes the potential errors for this product. Please read carefully for the following tips when doing the troubleshooting: 1) Check the warning message or faulty codes on the inverter information panel. 2) If not any error code display on the panel, please check the following lists: Is inverter be installed in a clean, dry, ventilated environment? Is the DC switch turn off? Are the cable cross section area and length meet the requirement? - Page 59 If the fault occurs occasionally, the possible cause is that the external circuits are abnormal occasionally. inverter automatically returns to normal operating status after the fault is ID05 GFCIFault GFCI Fault rectified.If the fault occurs frequently and lasts a long time,check whether the insulation resistance between the PV array and earth(ground) is too low, then check the insulation conditions of PV...
- Page 60 Check whether the fault is rectified. If no, The Grid voltage sampling please contact technical support. ID30 ConsistentFault_Vgrid value between the master and salve is not consistent ID31 ConsistentFault_DCI SPI Communication Faulty ID33 SpiCommFault (DC) (DC side) SPI Communication Faulty ID34 SpiCommFault(AC) (AC side)
- Page 61 Model2 over-temperature ID60 TempFault_Inv2 protection Model3 over-temperature ID61 TempFault_Inv3 protection ID65 VbusRmsUnbalance Unbalanced RMS value of bus voltage Unbalanced instantaneous ID66 VbusInstantUnbalance value of bus voltage If the configuration of the PV array is Bus undervoltage during grid correct, could be the sun irradiation is too ID67 BusUVP connection...
- Page 62 ID100 Reserved ID102 HwPVOCP PV hardware overcurrent ID103 HwACOCP AC output hardware overcurrent ID113 OverTempDerating Overtemperature derating ID114 FreqDerating Frequency derating ID115 FreqLoading Frequency loading This faulty only cause alarm, It will not directly cause the system to enter a ID116 VoltDerating Voltage derating...
- Page 63 Communication BOARD support. ID149 EEPROM error Communication BOARD ID150 FLASH error ID153 SCI communication (DC side) ID154 SCI communication (AC side) ID155 ID156 Inconsistent software version ID157 ID158 ID161 ForceShutdown ForceShutdown ID162 RemoteShutdown RemoteShutdown ID163 Drms0Shutdown Drms0 shunt down Inverter shows ID83 when remote derating.
-
Page 64: Maintenance
7.2. Maintenance Inverters generally do not require daily or routine maintenance. In any case, for proper long-term operation of the inverter, make sure that the heatsink for cooling the inverter has enough space to ensure adequate ventilation and that it is not obstructed by dust or other items. Cleaning the inverter Use an air compressor, a soft dry cloth or soft-bristled brush to clean the inverter. -
Page 65: Uninstalling
8. Uninstalling 8.1. Uninstallation steps Disconnect the inverter from the AC grid by opening the AC circuit breaker. Disconnect the inverter from the photovoltaic strings by opening the DC circuit breaker. Wait 5 minutes. Remove the DC connectors. ... -
Page 66: Technical Data
9. Technical data TECHNICAL DATA 100KTL-HV 125KTL-HV 136KTL-HV 66 / 67 User’s Manual 3PH 100KTL-136KTL-HV Rev. 1.0 24/02/2021 Identification: MD-AL-GI-00 Rev. 1.0 of 24/02/2021 - Application: GID... -
Page 67: Warranty Terms And Conditions
10. Warranty terms and conditions To view the Warranty Terms and Conditions” offered by ZCS Azzurro, please refer to the documentation inside the product box and on the website www.zcsazzurro.com. 67 / 67 User’s Manual 3PH 100KTL-136KTL-HV Rev. 1.0 24/02/2021 Identification: MD-AL-GI-00 Rev.
Need help?
Do you have a question about the 3PH 100KTL-HV and is the answer not in the manual?
Questions and answers