
Subscribe to Our Youtube Channel
Related Manuals for Episode EA-RSP-2D-200


Summary of Contents for Episode EA-RSP-2D-200
- Page 1 INSTALLATION MANUAL Response Series DSP Amplifiers EA-RSP-2D-200 EA-RSP-8D-100 EA-RSP-12D-100 EA-RSP-16D-100...
-
Page 2: Supported Models
• Each output provides powerful DSP capabilities including a 10-band parametric EQ, tone controls, high- and low- pass filters, audio delay, and a limiter. • Wide assortment of DSP presets including genre-based, custom, and Episode speaker presets. • Ethernet controlled, with a browser user interface, enabling easy setup of all system parameters. -
Page 3: Regulatory Information
page | 3 9. Do not defeat the safety purpose of the polarized or grounding-type plug. A polarized plug has two blades with one wider than the other. A grounding type plug has two blades and a third grounding prong. The wide blade or the third prong are provided for your safety. - Page 4 page | 4 cause harmful interference to radio or television reception, which can be determined by turning the equipment off and on, the user is encouraged to try to correct the interference by one or more of the following measures: •...
-
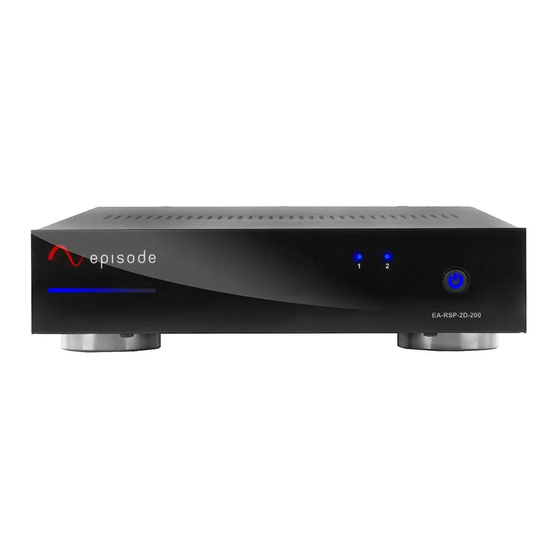
Page 5: Front And Rear Panel Descriptions
EA-RSP-8D-100 EA-RSP-12D-100 EA-RSP-16D-100 EA-RSP-2D-200 A. Power LED light bar: Blue LED light bar positioned on the left side of the front face panel. Blue LED is at its highest intensity on the left side of the light bar. LED functionality: •... - Page 6 | 6 Back panel EA-RSP-16D-100 E F G EA-RSP-2D-200 J K L M A. Analog inputs: Local line-level inputs, analog RCA unbalanced type. B. Analog loop outputs: Stereo RCA input loop outputs, RCA unbalanced type. C. Zone SPEAKER OUTPUTS: 4-position Phoenix-style connectors (8-, 12-, and 16-channel models) and 5-way binding posts (2-channel model) for speaker wiring connections.
-
Page 7: Installing The Amplifier
page | 7 INSTALLING THE AMPLIFIER The full-width amplifiers (8-, 12-, and 16-channel models) come with rack-mount ears and can be installed in a 2U rack space or on a shelf. CAUTION! To prevent damage, maintain a 1U space below the amp for fresh air intake, and maintain adequate ventilation space to the sides of the amplifier. -
Page 8: Connecting The Amplifier
page | 8 CONNECTING THE AMPLIFIER These amplifiers are designed to operate as a multi-room audio system, requiring physical audio connections as well as connections to a control system. This section describes how to set up the physical connections required for the amplifier and the devices associated with it. - Page 9 page | 9 CONNECTING AUDIO OUTPUTS Audio output jacks allow each source to be looped out to the audio inputs of an additional amplifier creating a larger audio system. A subwoofer output is joined with each speaker output, providing optional 2.1 audio for every audio zone.
- Page 10 3. In a web browser on the same local network, enter the amplifier’s IP address that was assigned by the router (such as 192.168.1.2). The login screen opens. 4. Enter the default (first-time only) password “episode” (the user name is also “episode”). The amplifier’s configuration screen opens.
- Page 11 8. Edit presets in the DSP PRESET EDIT menu, including frequency response, limiter, EQ, crossover (high-pass & low-pass), and delay. For in-depth information on DSP presets and the browser user interface, visit the Episode Response Series Amplifier product page on SnapAV.com and click the Videos tab.
- Page 12 page | 12 SETTING UP THE AMPLIFIER POWER MODE These amplifiers can be set up to automatically power on when needed. There are three Power Mode options available from the browser user interface: Power Button, Voltage Trigger, and Audio Sense. To set POWER MODE to Power Button: 1.
-
Page 13: Standby Settings
page | 13 To set POWER MODE to Audio Sense: 1. Using the browser user interface, set POWER MODE to Audio Sense. Note: In this mode, the amplifier can be turned on when audio is sensed or when an IP/IR command is received. -
Page 14: Specifications
| 14 SPECIFICATIONS General Specification EA-RSP-8D-100 EA-RSP-12D-100 EA-RSP-16D-100 EA-RSP-2D-200 Stereo RCA inputs Analog inputs 4 pair 6 pair 8 pair 1 pair Stereo RCA outputs Analog loop outputs 4 pair 6 pair 8 pair 1 pair 8 channels: 4 stereo... -
Page 15: Warranty
| 15 Power Specification EA-RSP-8D-100 EA-RSP-12D-100 EA-RSP-16D-100 EA-RSP-2D-200 AC mains power 100-120V / 200-240V, 50/60 Hz Power consumption 800W 1200W 1600W 200W When Power Mode is set to Power Button: Standby power consumption 1.38W with network connection, < 0.5W with no network connection... - Page 16 © 2020 Wirepath Home Systems, LLC Rev 20-07-09-0830...
Need help?
Do you have a question about the EA-RSP-2D-200 and is the answer not in the manual?
Questions and answers
where can i fid a schematic for episode EA-AMP-12D-70