Advertisement
Available languages
Available languages
Quick Links
ENGLISH
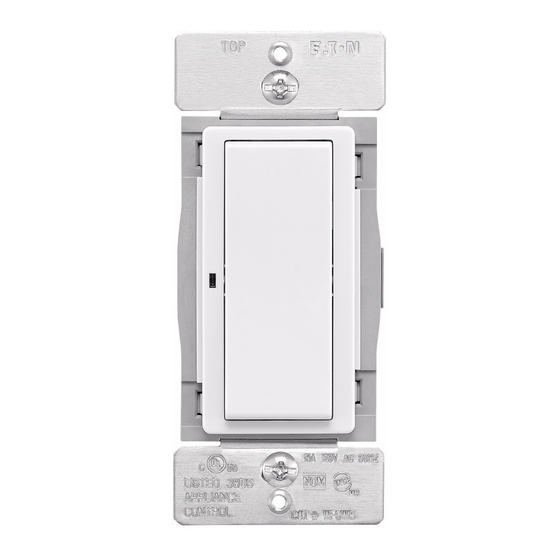
WFSW15 - WI-FI SMART SWITCH
WARNINGS AND CAUTIONS:
• Turn OFF circuit breaker or remove
fuse(s) and test that power is OFF
before installation process.
• Never wire any electrical device with power
turned ON. Wiring switch HOT may cause
permanent damage to switch and void
warranty.
• If you are not sure about any part of these
instructions, please contact a licensed
electrician.
IMPORTANT: Wi-Fi Smart Switch will not work
or will be damaged if wired incorrectly, and
the warranty will be voided. Refer to the wiring
instructions provided.
CAUTION
• Use only with 120V AC 60 Hz.
• Do not exceed maximum rating of the switch as indicated on the device.
• Must be installed and used in accordance with electrical codes.
• If a bare copper or green ground connection is not available in the wall box, contact a
licensed electrician for installation.
• Use only #14 or #12 copper wire rated for at least 75°C with these devices. DO NOT USE WITH ALUMINUM
WIRE.
NOTE: The Wi-Fi Smart Switch is wired directly to the light fixture. For Multi-location applications (3-Way/4-Way)
a regular 3-Way switch can be used.
ELECTRICAL RATINGS
Current Capacity: 15Amps | Voltage: 120Vac | Horsepower: 1/2HP | Frequency: 60Hz
WI-FI SMART SWITCH INSTALLATION INSTRUCTIONS:
GETTING STARTED
Download the Amazon Alexa App and use the quick start guide provided to start the installation process.
The LED indicator will stop blinking once the device is added to the Amazon Alexa App.
For more information, visit
www.eaton.com/smarthome
OPERATION INSTRUCTIONS
• Press the ON button to turn the lights ON
• Press the OFF button to turn the lights OFF
• When the lights are ON, press and hold the OFF button for 2 seconds until the LED indicator blinks. After a 10
second delay, the lights will fade off
FACTORY RESET: The switch can be reset to exclude the device from its network and will
restore the device to all factory defaults.
• Press and hold the ON button until the LED indicator blinks for the second time (20 secs).
• Release the button
• The LED indicator will start blinking again indicating the switch is not part of the Wi-Fi network
WI-FI SMART SWITCH COLOR CHANGE KIT INSTRUCTIONS
INSTRUCTIONS POUR LA TROUSSE DE CHANGEMENT DE COULEUR DE L'INTERRUPTEUR INTELLIGENT WI-FI
INSTRUCCIONES DEL KIT DE CAMBIO DE COLOR DEL INTERRUPTOR INTELIGENTE CON CONEXIÓN WI-FI
EXPLODED VIEW FOR CCK
STEP 1: Squeeze top tabs on either side of the device
ÉTAPE 1 : Serrer les languettes supérieures des deux côtés de l'appareil
PASO 1: Encaje todas las pestañas superiores a cada lado del dispositivo
NOTE: Not all products include color change kits.
REMARQUE : Certains produits ne comprennent pas de trousse de changement de couleur.
NOTA: No todos los productos incluyen kits de cambio de color.
ON Button
ON Button
Botón ON (ENCENDIDO)
Bouton marche
LED Indicator
LED Indicator
Indicador LED
Témoin à DEL
OFF Button
OFF Button
Botón OFF (APAGADO)
Bouton arrêt
EXPLODED VIEW FOR CCK
STEP 2: Pull faceplate off
ÉTAPE 2 : Retirer le plateau de montage
PASO 2: Retire la placa frontal
DATA AND INFORMATION CONTAINED HEREIN ARE THE PROPERTY OF EATON
CORPORATION AND ARE SUBJECT TO CHANGE WITHOUT PRIOR NOTICE
RESIDENTIAL AND WIRING DEVICES DIVISION
203 COOPER CIRCLE , PEACHTREE CITY, GEORGIA 30269
TITLE
Wi-Fi Smart Switch, White
SIZE SCALE DWG NO
COD-249
B
1:1
THIRD ANGLE PROJECTION
DIMENSIONS ARE IN INCHES
DIMENSIONS IN [ ] ARE IN MM
FRACTIONS
1/64
ENGLISH (IN)
DECIMALS
.015
THIS IS AN ELECTRONIC CAD DRAWING.
METRIC (MM)
DECIMALS
.40
WIRING DIAGRAMS
Single Location Control Installation (WFSW15)
Installation de la commande à un emplacement unique (WFSW15)
Instalación del control de ubicación única (WFSW15)
Neutral
Neutral
Neutre
Neutre
Neutral
Neutro
Neutro
3-Way
3 voies
3 vías
Ground
Mise à la terre
Ground
Tierra
Two Location Control Using a 3-Way Switch
Commande à deux emplacements liée à un interrupteur à 3 voies
Control de dos ubicaciones mediante un interruptor de 3 vías
Neutral
Neutre
Neutro
Neutral
Green/Vert/Verde
Green
Neutral
Neutre
Neutro
Neutral
Common
Common
Commun
Común
Multi-Location Control Using a 3-Way Switch
Commande à plusieurs emplacements liée à un interrupteur à 3 voies
Control multiubicación mediante un interruptor de 3 vías
Green/Vert/Verde
Green
Neutral
Traveler wire
Traveler
Neutre
Fil voyageur
Neutral
wire
Neutro
Cable guía
Common
Common
Commun
Común
Traveler wire
Traveler
Fil voyageur
Cable guía
DATA AND INFORMATION CONTAINED HEREIN ARE THE PROPERTY OF EATON
CORPORATION AND ARE SUBJECT TO CHANGE WITHOUT PRIOR NOTICE
RESIDENTIAL AND WIRING DEVICES DIVISION
203 COOPER CIRCLE , PEACHTREE CITY, GEORGIA 30269
TITLE
Wi-Fi Smart Switch, White
SHEET REV
SIZE SCALE DWG NO
SHEET REV
A
COD-249
B
1:1
3 OF 3
3 OF 3
DIMENSIONS ARE IN INCHES
THIRD ANGLE PROJECTION
DIMENSIONS IN [ ] ARE IN MM
X.X
X.X
FRACTIONS
1/64
ENGLISH (IN)
DECIMALS
.015
THIS IS AN ELECTRONIC CAD DRAWING.
METRIC (MM)
DECIMALS
.40
DO NOT REVISE MANUALLY.
DO NOT REVISE MANUALLY.
Black
Noir
Neutral
Black
Negro
Hot
Hot
Sous tension
Caliente
Load
Charge
3-Way
Carga
Load
Neutral
Black
Neutre
Noir
Neutro
Neutral
Black
Negro
Load
3-Way
Charge
3 voies
Carga
3 vías
3-Way
Load
Ground
Mise à la terre
Tierra
Ground
Neutral
Neutre
Neutral
Neutro
Green/Vert/Verde
Green
3-Way
3 voies
3-Way
3 vías
Common
Common
Commun
Común
Ground
wire
Mise à la terre
Ground
Tierra
STEP 3: Line up all tabs and snap the faceplate on
ÉTAPE 3 : Aligner toutes les languettes et encliqueter le plateau de
montage
PASO 3: Alinee todas las pestañas y encaje la placa frontal
A
X.X
X.X
Hot 120V
Sous tension de 120 V
Caliente 120 V
Hot 120V
Light Fixture
Light Fixture
Luminaire
Luminaria
Hot 120V
Sous tension de 120 V
Caliente 120 V
Hot 120V
Light Fixture
Luminaire
Light Fixture
Luminaria
Black
Hot 120V
Noir
Sous tension de 120 V
Negro
Caliente 120 V
Hot 120V
Black
Load
Charge
Carga
Load
Light Fixture
Light Fixture
Luminaire
Luminaria
EXPLODED VIEW FOR CCK
www.eaton.com
www.eaton.com/wiringdevices
EIS-0250-EFS (REV. A)
Advertisement

Related Manuals for Eaton WFSW15


Summary of Contents for Eaton WFSW15
- Page 1 • Turn OFF circuit breaker or remove Single Location Control Installation (WFSW15) fuse(s) and test that power is OFF Installation de la commande à un emplacement unique (WFSW15) before installation process. Instalación del control de ubicación única (WFSW15) • Never wire any electrical device with power...
- Page 2 Eaton Wiring Devices warrants its Switch to be free of defects in materials and workmanship in normal use and service for a period of two years from date of original purchase.
-
Page 3: Guide De Dépannage
à l’adresse suivante : Quality Control Dept., Eaton Wiring Devices, 203 Cooper Circle, Peachtree City, GA 30269; ou au Canada : Eaton Wiring Devices, 5925 McLaughlin Road, Mississauga (Ontario) L5R 1B8. Eaton réparera ou remplacera l’unité défectueuse, à sa discrétion. Eaton ne pourra être tenu responsable en vertu de la présente garantie si l’examen prouve que le problème a été causé par une mauvaise utilisation, une utilisation abusive, une installation inadéquate, une altération, un mauvais entretien ou une réparation inappropriée avant l’envoi à... -
Page 4: Instrucciones De Funcionamiento
Eaton Wiring Devices garantiza que su Interruptor no presenta defectos en los materiales ni en la mano de obra en condiciones normales de uso y servicio durante un período de dos años a partir de la fecha de compra original. - Page 5 Folding and Printing Instructions- Document Dimensions: 8.5” W x 11” H 2-sided printing, Accordian fold in fourths logo at top, fold in fourths again. Final Size: 2.25” W x 2.75” H...
Need help?
Do you have a question about the WFSW15 and is the answer not in the manual?
Questions and answers