Table of Contents
Advertisement
Quick Links
Advertisement
Table of Contents

Subscribe to Our Youtube Channel
Related Manuals for Flytec 6040


Summary of Contents for Flytec 6040
- Page 1 Flytec 6040 GPS Firmware Vers.2.07b Revision: 08.07.2014...
- Page 3 Flytec is not responsible for loss or injury caused by the use of this instrument. You assume all risks associated with flying and the use of this instrument. Individuals who ignore this warning do so at their own risk and may suffer serious personal injury, property damage, or death.
- Page 4 1.6.6! Clear/ Initialize Memory ....................14! 1.6.7! Simulation Mode ....................... 15! 1.6.8! Instrument Setup ......................16! 1.6.9! SD Card ..........................16! 1.7! Using the 6040 ..........................19! 2! Functions ............................20! 2.1! Altimeter and Air Pressure ......................20! 2.2! Absolute Altimeter (Alt 1) ......................21! 2.2.1! Relative Altitude (Alt 2) .....................
- Page 5 6.4! Uploading Airspace with FlyChart ....................49! 6.4.1! Creating an Airspace File with FlyChart ................52! 6.5! Transferring New Firmware to the 6040 ..................53! 6.6! Optional Software ........................53! 6.7! Viewing the Contents of an IGC File ................... 54! 7! Batteries and Charging ........................
-
Page 6: General Operation
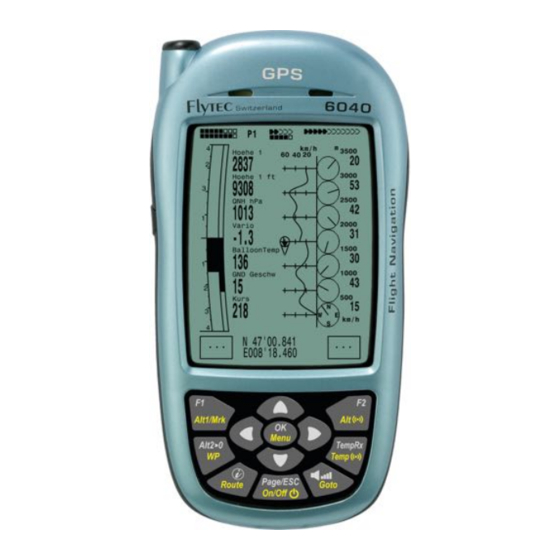
Operation Manual Flytec 6040 1 General Operation 1.1 Instrument Overview Connection Jack for Wall Adapter Vehicle Charging Optional Wind Sensor 110-230 V/AC Cable 12V DC TT34 Receiver Antenna Speaker Charger Jack SD Card Slot USB Mini B USB Cable Charging Status LED... -
Page 7: Switching The Instrument On/Off
When the battery test is complete the 6040 will enter run-mode. Battery Bank 1: 88% Battery Bank 1: 88% To switch the 6040 off, press and hold the On/Off key for 3 seconds. ------------------------------------------ FLIGHT -ANALYSIS To prevent unintentional switch-off, the display will show “really ------------------------------------------ switch off?? Press OK to confirm.”... -
Page 8: Entering Text
FlyChart (as discussed in section 6.2), this can also be accomplished with the 6040 keypad even though it does not have letter/number keys. To serve as an example, the following is the process for entering the pilot’s name into the 6040:... - Page 9 Operation Manual Flytec 6040 1.4 Display The 6040 has three different flight display pages: Main, Map and Windlayer. When the 6040 is switched on, after the start-up sequence, it defaults to the Main page. The other pages can be sequentially stepped through using short presses of the Page/Esc key.
- Page 10 Operation Manual Flytec 6040 The data shown in the user-fields can be selected by the user. The Main page can be Km/h set to display either 5 or 7 user-fields, and -2.5 there are three sub-pages of user-fields that 2816...
- Page 11 Operation Manual Flytec 6040 Action on Map Page The map scale is incrementally increased until the complete track is shown. Zoom out The map scale is incrementally decreased to show greater detail. Zoom in Jumps back to complete flight view.
-
Page 12: Windlayer Page
Between the vario scale and the wind layer graph are 5 user-fields. As you fly through different altitudes, the 6040 stores the wind speed and direction observed by the internal GPS and will display this information plotted against a vertical altitude scale. The scale will automatically adjust based on your altitude above the take-off elevation;... -
Page 13: User-Fields
Operation Manual Flytec 6040 1.5 User-fields The Main and Windlayer pages each have 3 sub-pages of user-fields that can be scrolled through using a short press of the key. The sub-page number (P1, P2 or P3) is shown next to the battery status. - Page 14 Envelope temperature from optional TT34 * Only available once the GPS has fixed its position 1.6 Main Menu To access the 6040 Main Menu, long press the Menu key. To select one of the sub-menus, highlight the desired item with the !"...
- Page 15 Operation Manual Flytec 6040 Select CTR File 1.6.9 Save Settings 1.6.9 Restore Settings 1.6.9...
- Page 16 Operation Manual Flytec 6040 1.6.1 Flight Memory and Tracks This menu contains all the flight recordings stored in the 6040. To view the list, highlight Flight Memory and Tracks using the !" keys and press the OK key. The records are stored according to the date of each flight, shown in the left column with the most recent flight on top.
- Page 17 1.3.2 Not set 1.6.6 Clear/ Initialize Memory In this menu the 6040 memory can be cleared and re-formatted. To view the options, highlight Clear/Initialize Memory in the Main Menu using the !" keys, and press OK. The various clearing/reformatting options can be executed by highlighting the desired action with the !"...
-
Page 18: Simulation Mode
1.6.7 Simulation Mode Simulation mode is an excellent way to learn how to use the 6040. In Simulation mode, the 6040 operates normally but you can alter your altitude, ground speed, vertical speed (vario), head/tailwind component, and track via the keypad. The GPS receiver is turned off during the simulation (“Simulation”... -
Page 19: Instrument Setup
1.6.9 SD Card It is recommended that the 6040 be used with an SD card installed since the instrument will keep a system log file on the SD card, which can be beneficial when troubleshooting. The following files can be stored on and read from an SD/SDHC card loaded into the 6040 SD card slot: Any number of flights (saved as secure IGC Files) •... - Page 20 SD card via a PC in GPS eXchange format (.gpx) and then imported into the 6040. The waypoint list in a 6040 can be saved to the SD card prior to loading a new list so that the original list can be reloaded at a later time.
- Page 21 It should be noted that for obvious reasons, the following items are not restored to a 6040 with a different serial number: Pilot name, Glider type, Glider Id, LCD contrast and GPS module type, device serial number, firmware version, unlocked software packages, device manufacture Flytec or Brauniger), calibration data (absolute pressure, differential pressure, LCD voltages and temperature correction).
-
Page 22: Setting Up The Instrument
ON/OFF key. • Do not forget to switch off the instrument before stowing. Viewing recorded flights To view a flight on the 6040 display: • Turn on the 6040. • Select Flight memory in the Main Menu. -
Page 23: Altimeter And Air Pressure
It is calculated several times a day, and can be taken from the aviation weather forecast or requested from airfields. In practice, most pilots set the altimeter based on a known altitude before launching. The 6040 provides five altitude and two QNH pressure displays: Alt 1 Altitude above sea level (QNH). - Page 24 Setting Alt 1 based on 29.92inHg/1013hPa: If the 6040 is not already in Alt 1 setting mode (Mod Alt1 !" is shown in the Information Field) it can be called up with a long-press of the Alt 1 key. Set Alt 1 referenced to 29.92 inHg/1013 hPa using a...
- Page 25 Altitude Alert/Alarm The 6040 has an Altitude Alert function to help the pilot avoid predetermined altitudes. Floor and ceiling limits can be set, as well as flight corridors. If the pilot flies over a ceiling or below a floor or leaves a corridor, Alt1 display switches to an inverse display (white number on a black background to draw attention to the exceeded limit) and a discreet alert tone is given.
- Page 26 2.3 Variometer 2.3.1 Graphic Vario Display The 6040 displays vertical speed digitally and graphically P1 & in ft/min or m/s and indicates whether the pilot is ascending *100 or descending and at what rate. The first scale range on the analog variometer display is +/-800 ft/min (Figure 1).
-
Page 27: Digital Vario
2.4.1 Wind Speed When the optional Vane-Wheel Sensor is plugged in to the 6040, the wind speed can be displayed in the Wind speed user-field. The sensor is quite sensitive and can measure speeds as low as 1 mph or 1 km/h. Measuring errors resulting from manufacturing tolerances can be corrected by applying a sensor correction factor in Menu>Settings>Speed>Vane wheel correction. -
Page 28: Time And Date
It is also possible to enter half-hour time zones by adding a 0.5 h shift to the set time zone. 2.6 Ambient Temperature The 6040 uses an internal temperature sensor, not only for compensation of the pressure sensors but also for automatically regulating the contrast of the display. The temperature can be displayed in the user-field Temp and can be set to Fahrenheit or Celsius in Menu>Instrument setup>Units. - Page 29 If the envelope temperature reaches the alarm threshold, the 6040 will alert the pilot with an audible double beep every 5 seconds and the value in the MaxEnvTemp user-field will be shown as white numbers on a black background (to draw attention to the exceeded limit).
-
Page 30: Battery Status
To prevent the recurrence of the error message during that flight, short press the TempRX key to turn off the receive function of the 6040. In this case, Off will be displayed in lieu of the TT34 signal strength display (top of the Main and Windlayer pages). Of course, prior to the next flight,... -
Page 31: Installation
(e.g., batteries are removed or are completely dead), or if the 6040 is moved 125 miles or more (when it is not turned on) from the last reception point, then the Almanac must be re-established. In this case it can take 10 minutes or more to determine your new... -
Page 32: Assessment Of Gps Reception Quality
(time/date) from the GPS signal (if necessary). The position error is between 7 m and 40 m depending on the number of received satellites and their position relative to the 6040; on average the position error is approximately 20 m. 3.3 Compass and Flight Direction... -
Page 33: Distance To Take-Off
6 mph (10 km/h) and the vario is less than 20ft/min (0.1 m/sec) for 60 seconds. Only flights that are at least 3 minutes long are saved in the Flight Memory. The 6040 can be set to start and stop recording manually instead of automatically in Menu>Settings>Recording. -
Page 34: Waypoints And Coordinates
3.5 Waypoints and Coordinates A waypoint (WP) is any single point on the earth’s surface to which you would like to go. The 6040 can save up to 200 different waypoints. Each waypoint can include a user-assigned name up to 17 characters, the waypoint’s coordinates and waypoint altitude. - Page 35 – such as FlyChart, SeeYou or CompeGPS. However, you can add waypoints to your list or edit existing ones using the 6040 keypad. To show the list of waypoints stored in the 6040, highlight Waypoints in the Main Menu and press the OK key. To add a waypoint, see below in this section.
-
Page 36: Goto Function
Route. Distance to the cylinder can be seen in the user-field Dist Cyl. 3.6 Routes A route is a sequence of waypoints to be flown in order. The 6040 can store up to twenty routes; the waypoints used on a route must first have been entered into the 6040’s waypoint list. Each route can also be assigned a route name, for example, Quest Air Triangle. -
Page 37: Flying Routes
Operation Manual Flytec 6040 If the 6040 route list contains more than eight routes, there will be a down arrow at the lower right edge of the list to show that additional pages of routes follow. To scroll down one page at a time, press the arrow;... -
Page 38: Competition Route
P1& 3.7 Competition Route The 6040 Competition Route consists of a series of waypoints that are mandatory (i.e. start gate, turnpoints and goal) and is used to 2816 define a route for flying a competition task. The Competition Route... - Page 39 IGC files, see Section 4.3. 4 Flight Memory The term “barograph” is not used with respect to the 6040 because a barograph is an air pressure (altitude) recorder and the 6040 records much more data than just pressure altitude. The flight...
- Page 40 Flight Analysis page. Important: Although the 6040 will store up to 100 flights, it is recommended that the Flight Memory be downloaded routinely to FlyChart, SeeYou, or some other program and then cleared using Menu>Clear/Initialize memory>Delete all flights.
-
Page 41: Track Map
However, within this 10-second period it is quite possible that a momentary climb rate greater than 2 m/sec occurred. Due to the 6040’s 1-second update rate, the Flight Analysis page would show the higher value. Flight Analysis page data is not transferred when flights are downloaded to a PC. -
Page 42: Digital Signature
At the completion of a flight the 6040 automatically generates a Digital Signature and saves it within the IGC file (G-Record). During this process the 6040 will display “Generating Digital Signature” in the Information Field. - Page 43 Pre-load CTR file on to an SD card: Airspace files are compiled on a PC and saved to an SD card. The SD card is loaded into the 6040, the desired airspace file is selected in the SD-Card menu and the 100 closest airspaces of that file are automatically loaded into the airspace list (after the instrument gets a GPS fix).
- Page 44 Operation Manual Flytec 6040 Sample airspace: Warning distance 400m (CTR alarm set to 2) 400m$ Bouchs$ 400m$ 50m$ ⌖ 400m$ 400m$ In the example above, crossing the orange or purple line yields single tone alarm and brings up CTR Info Page. Crossing red line yields double tone alarm and brings up CTR Info Page. A pilot at the blue target is inside the 400m horizontal warning distance and therefore would have received the single tone alarm and CTR info page would be automatically displayed.
- Page 45 Operation Manual Flytec 6040 Danger Areas Obstacles (e.g., cables) Wildlife protection area Cable car 5.1.1 Recalling Detailed Airspace Information The CTR info page can be called up anytime with a short press of the i --------------------- key and the five closest airspaces are shown. To see the details of one...
- Page 46 Flytec program OpenAir2faf available on the Flytec website. This small program checks to see if the format is correct and, if necessary, corrects any errors. In order for this file to be read by the 6040, the file name must be 8 characters or less with...
- Page 47 In which case you can simply copy the file into a folder named CTR on an SD card and insert the card into the 6040. The instructions for creating an .faf file and saving to an SD card are in the section 5.2.2.
- Page 48 Operation Manual Flytec 6040 2. Download the airspace utility OpenAir2faf.exe from www.flytec.com. Double click the file and the install wizard will guide you through the installation. After the installation is complete, three shortcuts (English, French, German) to the program will be added to your desktop (of course the other shortcuts can be deleted).
- Page 49 (e.g., GPS dump). The procedure for editing/entering/deleting an airspace with the Comment shown on real time map (top left) 6040 keypad is given below; the procedure for using FlyChart can be found in Section 6.4. ------------------------------------- Ctr 1 Warning distance: If you...
- Page 50 Operation Manual Flytec 6040 character of the airspace name and it can be changed with the !" keys. With the F1 key you can switch between capital letters and symbols, and lower case letters and numbers. Pressing the$ arrow key acknowledges a character and moves the cursor forward to the next character. Once the Airspace name has been edited (or left as is), confirm the name by pressing the OK key.
-
Page 51: Downloading Flights
After the status bar shows the upload is complete, you have the option to save this configuration in FlyChart as the default 6040 configuration, or to save it under a different name when you click the Close box. In this way it is possible to save multiple configurations that can be quickly loaded into the 6040. - Page 52 Other avoidances like power lines, wildlife refuges, etc. can be added to these files as needed. Airspace files saved with FlyChart will have the suffix *.fa5 and can be quickly loaded to the 6040. See section 6.4.1 for more information on creating an airspace file.
- Page 53 Once an airspace list has been built and saved with FlyChart (*.fa5 file) it can be uploaded to the 6040 as follows. The following assumes that you have installed and set up FlyChart on your PC and have connected the 6040 with the USB cable.
- Page 54 PC with the USB cable and turned on, and in the Airspaces menu. If the speaker is turned on, the 6040 will beep as the airspaces are loaded. If a problem occurs during transfer, a lower-pitched beep will sound. After uploading is complete you can confirm that the airspaces have been transferred by clicking the Download button in FlyChart and viewing, in the Restricted Areas frame, which restricted areas are actually stored in the 6040.
- Page 55 FlyChart for future use. 8. Click the Upload button to send the airspaces to the 6040. If the speaker is turned on, the 6040 will beep while the airspaces are being loaded. If a problem occurs during transfer, a lower-pitched beep will sound.
-
Page 56: Optional Software
6.6 Optional Software With the help of a release code obtainable from the Flytec AG or Flytec USA, additional special functions can be activated. To enter a release code: • Select Optional SW-Packages from Instrument Setup in the Main Menu and press OK. - Page 57 Operation Manual Flytec 6040 Viewing the Contents of an IGC File To view the raw data contained in the IGC file, download the instrument with a flight evaluation program such FlyChart or SeeYou, save the flight as an IGC file and then open the desired flight file with a text editor.
- Page 58 Operation Manual Flytec 6040 10. The latitude and longitude values are in the XX°XX.XXX’ format. For space reasons, the degree and decimal symbols are omitted from the IGC file. For example, the latitude value 3628350 above should be read as 36º 28.350’. Using the number format code ##"º"...
-
Page 59: Batteries And Charging
In this case the charging cable should be removed and replaced after the batteries have been allowed to cool down. Important: The 6040 should not be switched on during charging, as this will interfere with proper charging of the batteries. -
Page 60: Maintenance And Warranty
Cleaning of the housing should be limited to non-abrasive and non- solvent based cleaners used with a soft cloth. When not in use, the 6040 should be stored in the supplied carry bag; of course the bag must be kept clean and dry. -
Page 61: Warranty
Flytec for service instructions. Please carefully read this operation manual before you contact Flytec for operation or service issues. WARNING: In rare cases the 6040 may not provide any data at all, or the data provided may be incorrect. Flytec will not be held responsible for any claims resulting from missing or incorrect data. - Page 62 Operation Manual Flytec 6040 The instrument was tested according to following Standards and is compliant. 47CFR15, ICES-003, Issue 4 This device complies with part 15 of the FCC Rules. Operation is subject to the following two conditions: (1) This device may not cause harmful interference, and (2) This device must accept any interference received, including interference that may cause undesired operation.
- Page 63 Operation Manual Flytec 6040 10 Mounting Optional TT34 Temperature Transmitter Approx 3 feet (1meter) Circular Top Opening (Parachute) The temperature transmitter must be mounted approximately 3 feet underneath the top opening (parachute) outside of the envelope Position for mountingTT34 Envelope...
Need help?
Do you have a question about the 6040 and is the answer not in the manual?
Questions and answers