Advertisement
Quick Links
HIM-18033-04EN
Document No.
Part No.Plug:20877-0**T-0※ Receptacle:20879-0**E-0※
4
S20389
3
S19758
2
S19466
1
S18713
Rev.
ECN
Confidential C
CABLINE
Instruction Manual
August 6, 2020
December 13, 2019
August 1, 2019
August 1, 2019
Date
-UM
®
T.Masunaga
T.Masunaga
T.Masunaga
Y.Miyazaki
Prepared by
I-PEX Inc.
1 / 15
-
-
-
T.Masunaga
Checked by
H.Ikari
H.Ikari
H.Ikari
H.Ikari
Approved by
QKE-DFFDE09-03 REV.8
Advertisement

Related Manuals for I-PEX CABLINE-UM


Summary of Contents for I-PEX CABLINE-UM
- Page 1 August 6, 2020 T.Masunaga H.Ikari S19758 December 13, 2019 T.Masunaga H.Ikari August 1, 2019 S19466 T.Masunaga H.Ikari S18713 August 1, 2019 Y.Miyazaki T.Masunaga H.Ikari Rev. Date Prepared by Checked by Approved by Confidential C I-PEX Inc. QKE-DFFDE09-03 REV.8 1 / 15...
- Page 2 CABLINE-UM Instruction Manual HIM-18033-04EN This manual is to explain the insertion & withdrawal methods and important points in handling of CABLINE-UM connector plug with cable for the purpose of proper use. 【Connector Name, Part number】 ◆The cable side connector Product Name : CABLINE-UM Plug Part No.
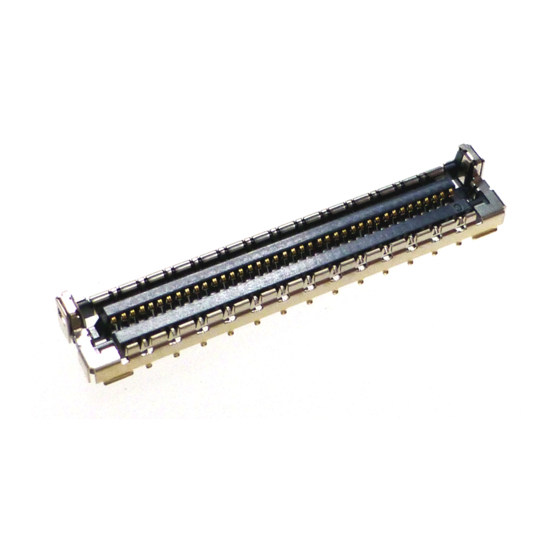
- Page 3 Document No. CABLINE-UM Instruction Manual HIM-18033-04EN 【Names of each part of the connector.】 Lock cover finger hook Lock cover Mating direction Receptacle I-PEX mark Plug Lock cover open Plug finger hook Confidential C 3 / 15...
- Page 4 Document No. CABLINE-UM Instruction Manual HIM-18033-04EN 【Comparing Plug parts numbers】 20877-0**E-01 20877-0**E-02 20877-0**E-03 With Lock Cover Without Lock Cover With PULL TAPE HOLDER PULL TAPE PULL TAPE HOLDER 【Comparing Receptacle parts numbers】 20879-0**E-01 20879-0**E-02 Shell Soldering Area Shell Soldering Area Refer to red dotted box below.
- Page 5 Document No. CABLINE-UM Instruction Manual HIM-18033-04EN 【Connector Insertion Manual】 1.Which direction to mate As shown in Fig.1, make sure to place a cable on non-soldered tail side. Non-soldered tail side Cable Soldered tail side Fig.1 Fig.2 Correct Connector Mating View CAUTION Do not mate the connector while cable is at soldered tail side.
- Page 6 Document No. CABLINE-UM Instruction Manual HIM-18033-04EN 2.How to Mate Push the center of cable connector vertically until it clicks. The clicking shows the mating completion. [Fig. 6] Push both ends of the connector to make sure the mating is completed. [Fig. 7]...
- Page 7 Document No. CABLINE-UM Instruction Manual HIM-18033-04EN 【How to Withdraw Cable Connector by finger】 ① Lift a lock cover finger hook outward on one end and repeat it again on opposite side to release lock cover. Make sure that the inner lock part is completely released. (see Fig.9) ②...
- Page 8 Document No. CABLINE-UM Instruction Manual HIM-18033-04EN 【How to Withdraw Cable Connector by pull jig】 ① Lift a lock cover finger hook outward on one end and repeat it again on opposite side to release lock cover. Make sure that the inner lock part is completely released. (see Fig.12) ②...
- Page 9 Document No. CABLINE-UM Instruction Manual HIM-18033-04EN The side view The front view Fig.15 【Pull Jig】 When withdrawal using pull jig, jig shape is presented in Fig.16 for reference. pos. 18.2 16.6 12.8 15.5 22.2 20.6 16.8 19.5 Unit: mm Fig.16 Reference : Plug Pull Jig...
- Page 10 Document No. CABLINE-UM Instruction Manual HIM-18033-04EN CAUTION ・Do not lift lock cover finger hook inward or excessive force applied to the connectors may damage them. ・Do not unmate a cable connector by pulling cable. ・When withdrawing the connector, we recommend that you pull the finger perpendicular to PCB.
- Page 11 Document No. CABLINE-UM Instruction Manual HIM-18033-04EN CAUTION ・Do not unmate plug before opening lock cover, or it may damage receptacle and decreases plug retention force. Fig.20 Unmating connectors by force Damaged Initial Photo.1 Damaged RECE. Confidential C 11 / 15...
- Page 12 Document No. CABLINE-UM Instruction Manual HIM-18033-04EN [How to unmate by using PULL TAPE】 ※For connector with PULL TAPE HOLDER only ① Place the TAPE attached to the PULL TAPE HOLDER vertically against PCB. Fig.21 Mated Connector with PULL TAPE ② Hold center of the PULL TAPE with fingers and pull up vertically to unmate plug from receptacle.
- Page 13 Document No. CABLINE-UM Instruction Manual HIM-18033-04EN CAUTION ・Do not pull one side of the PULL TAPE and rotate it while unmating. [Fig. 23] Do not pull the PULL TAPE toward arrowed direction, or it may tear the PULL TAPE and deform SHELL-A and PULL TAPE HOLDER. Make sure to hold center of the PULL TAPE and pull it up vertically.
- Page 14 Document No. CABLINE-UM Instruction Manual HIM-18033-04EN 【Caution in Cable Connector Handling】 ・Handle the cable connector carefully in cable harnessing work so that pulling force is NOT applied to specific cables. ・Be careful so that pulling force and/or repeated bending force is NOT applied to the cable attachment part of a cable connector.
- Page 15 Document No. CABLINE-UM Instruction Manual HIM-18033-04EN 【Recommend Vacuum Nozzle Design for Receptacle】 Figure 29 shows the recommended vacuum areas of receptacle top surface. If current vacuum nozzle for mounter cannot vacuum well, refer to figure 30 for recommended vacuum nozzle design.
Need help?
Do you have a question about the CABLINE-UM and is the answer not in the manual?
Questions and answers