Table of Contents
Advertisement
Quick Links
MANUFACTURED BY:
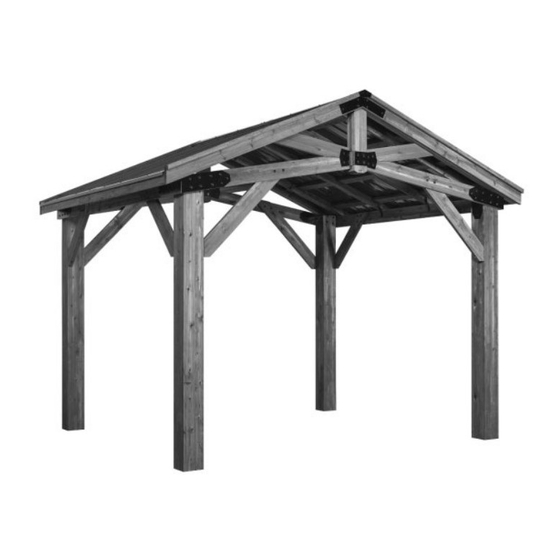
10x12 BRINDLEWOOD GAZEBO
Backyard Discovery
3305 Airport Drive
Pittsburg, KS 66762
Model # 2106512
Owner's Manual & Assembly Instructions
800-856-4445
average 2 person assembly time
assembly time may vary based on skill level
For the most up to date assembly manual,
to register your set, or to order replacement parts please visit
www.backyarddiscovery.com
SAVE THIS ASSEMBLY MANUAL FOR FUTURE REFERENCE IN THE EVENT THAT
YOU NEED TO ORDER REPLACEMENT PARTS.
Made in China | INS-2106512-A-BRINDLEWOOD-ENG
Advertisement
Table of Contents

Related Manuals for Backyard Discovery 10x12 BRINDLEWOOD GAZEBO


Summary of Contents for Backyard Discovery 10x12 BRINDLEWOOD GAZEBO
- Page 1 MANUFACTURED BY: 10x12 BRINDLEWOOD GAZEBO Backyard Discovery 3305 Airport Drive Pittsburg, KS 66762 Model # 2106512 Owner's Manual & Assembly Instructions 800-856-4445 average 2 person assembly time assembly time may vary based on skill level For the most up to date assembly manual, to register your set, or to order replacement parts please visit www.backyarddiscovery.com...
- Page 2 INSTALLATION SERVICES AVAILABLE! Need a helping hand? Let our team of professionals handle the installation for you! *Installation services are only available to U.S. customers. With Go Configure, we bring you 18 years of experience right to your doorstep. We service a wide array of indoor and outdoor recreation products that most consumers don’t have the time or ability to deliver &...
- Page 3 Owner’s Manual Please Read This Before Starting Assembly The store where you made your purchase does not stock parts for this item. If you have assembly questions or you are missing or have damaged parts, please call you can also visit www.backyarddiscovery.com or e-mail customerservice@backyarddiscovery.com Please have the following information ready when you make your call: •...
- Page 4 Botanical, Adventure Playsets, and Leisure Time Products. Backyard Discovery warrants that this product is free from defect in materials and workmanship for a period of one (1) year from the original date of purchase. This one (1) year warranty covers all parts including wood, hardware, and accessories. All wood carries a fi ve (5) year pro-rated warranty against rot and decay. Refer to the schedule below for charges associated with replacement of parts under this Limited Warranty.
- Page 5 Owner’s Manual Safety Warnings and Maintenance Instructions IT IS IMPORTANT TO CHECK AND TIGHTEN ALL HARDWARE AT THE BEGINNING AND DURING THE SEASON AS THEY MAY LOOSEN DUE TO WOOD EXPANSION AND CONTRACTION. • DO NOT climb or walk on the roof for any reason •...
- Page 6 About Our Wood Backyard Discovery uses 100% Cedar (C. Lanceolata) wood. Although we take great care in selecting the best quality lumber available, wood is still a product of nature and susceptible to weathering which can change the appearance of your set.
- Page 7 Owner’s Manual Assembly Tips Protrusion Hazard Incorrect Correct If you see exposed threads and your bolt protrudes beyond the T-Nut you may have over tightened the bolt or used incorrect hardware. If you’ve overtightened, remove the bolt and add washers to eliminate the protrusion.
- Page 8 Owner’s Manual Assembly Tips ASSEMBLY TIP: Keep and eye out for these boxes which will contain helpful pictures and information making the assembly process as quick and painless as possible. Sorting Wood When removing the wood from the boxes we recommend arranging them by part number before you begin assembly.
- Page 9 Owner's Manual 5/16...
- Page 10 Owner's Manual It is critically important that you start with square and level footings, concrete pad or deck to attach your structure Pay close attention to the items needed for each step. Make sure you are using the correct hardware for each step.
- Page 11 Owner's Manual GABLE BOARD - W4L13344 TOP RAIL - W4L13805 1 3/8"x5 1/4"x24 1/4" (36x134x615) (x4) 1 3/8" x 5 1/4" x 31 3/8" (36 x 134 x 796) (x4) TOP RAIL - W4L13347 1 3/8"x5 1/4"x62 1/4" (36x134x1582) (x2) GABLE BOARD - W4L13349 CORBEL - W4L13804 1 3/8"x1 1/2"x5 1/4"...
- Page 12 Owner's Manual GABLE TRUSS - W2A02856 2 13/16"x33 5/8"x64 1/2" (72x854x1640) (x4) GABLE PANEL - W2A02847 2 13/16"x5 1/4"x80 3/16" (72x134x2037) (x2) GABLE PANEL - W2A02848 2 13/16"x5 1/4"x80 3/16" (72x134x2037) (x2) POST - W2A02854 (x2) 7"x7"x92 1/16" (178x178x2274) POST - W2A02855 7"x7"x92 1/16"...
- Page 13 Owner's Manual H100564 H100468 LAG SCREW WH BLK BOLT WH BLK (x13) (x22) 1/4x4 5/16x1 H100792 LAG SCREW WH BLK H100459 BOLT WH BLK (x9) 1/4x3 (x54) 5/16x1 1/4 H100193 NUT BARREL H100407 BOLT WH BLK H100192 NUT BARREL (x30) (x3) WH BLK (x95)
- Page 14 Owner's Manual H100201 SCREW PFH BLK H100483 H100391 SCREW PFH BLK SCREW PFH BLK (22) 8x2-1/2 (x4) (x64) 8x2 1/4 H100200 SCREW PFH BLK H100392 SCREW PWH BLK H100797 SCREW PWH BLK (x35) 8x1 1/2 (x17) 8x3/4 (x17) H100760 SCREW WOODGRIP H100833 SCREW H100759...
- Page 15 Owner's Manual A4M01130 A4M01147 GABLE BRACKET PEAK SEAM BRACKET (x2) (x2) A4M01129 GABLE BRACKET (x4) A4M01152 LEFT OUTSIDE BRACKET A4M01151 (x2) RIGHT OUTSIDE BRACKET (x2) RIGHT ANGLE A4M01154 LEFT ANGLE A4M01153 (x2) BRACKET (x2) BRACKET A4M01155 TIE BRACKET (x4) A6P00296 7x7 POST FOOT A4M00950 (x4)
- Page 16 Owner's Manual A4M01124 29 GA STEEL SHEETING (x8) A6P00398 RIDGE CAP PROTECTOR (x2) A4M01116 RIDGE CAP 29 GA (x2) A4M01127 RIDGE CAP SPLICE (x1) A4M00983 ROOF EDGE TRIM SPLICE (x2) A4M00982 ROOF EDGE TRIM (x4) 9205413 ELECTRICAL ENCLOSURE (x1)
- Page 17 GAZEBO ASSEMBLY POST - W2A02854 6"x6"x92 1/16" (178x178x2274) (x2) A6P00296 H100200 SCREW PFH BLK 7x7 POST FOOT (x4) (x16) 8x1 1/2 POST - W2A02855 (x2) 6"x6"x92 1/16" (178x178x2274) COMPLETE THIS STEP TWICE FOR EASE OF ASSEMBLY WE RECOMMEND USING SAW HORSES FOR STEPS 1 THRU 6.
- Page 18 GAZEBO ASSEMBLY GABLE BOARD - W4L13344 H100512 BOLT WH BLK 1 3/8"x5 1/4"x24 1/4" (36x134x615) (x4) (x8) 5/16x4 GABLE BOARD - W4L13349 1 3/8"x1 1/2"x5 1/4" (36x38x134) H100192 NUT BARREL (x2) H100459 BOLT WH BLK (x24) (x16) WH BLK 5/16x1 1/4 5/16x7/8 H100483 SCREW PFH BLK...
- Page 19 GAZEBO ASSEMBLY TOP RAIL - W4L13805 1 3/8" x 5 1/4" x 31 3/8" (36 x 134 x 796) (x4) H100963 BOLT WH BLK (x28) 5/16x7-3/4 GABLE TRUSS ASSEMBLY (x2) FROM PREVIOUS STEP POST - W2A02855 H100468 BOLT WH BLK H100471 LAG SCREW POST - W2A02854...
- Page 20 GAZEBO ASSEMBLY GABLE TRUSS ASSEMBLY GABLE TRUSS ASSEMBLY (x1) POST...
- Page 21 GAZEBO ASSEMBLY TRUSS - W4L13836 H100201 SCREW PFH BLK (x4) 1 7/16" x 1 15/16" x 74 15/16" (36 x 50 x 1903) (16) 8x2-1/2 COMPLETE THIS STEP TWICE FLUSH TOPS...
- Page 22 GAZEBO ASSEMBLY H100792 LAG SCREW WH BLK H100205 BOLT WH BLK H100405 WASHER LOCK (x4) 1/4x3 (x8) 5/16x2-1/4 (x4) EXT BLK 6x15 CORBEL - W4L13803 1 3/8"x5 1/4"x46 1/2" (36x134x1180) (x4) H100192 NUT BARREL H100199 WASHER LOCK (x8) H100198 WASHER LOCK WH BLK (x8) EXT BLK...
- Page 23 GAZEBO ASSEMBLY PEAK SEAM A4M01147 H100564 LAG SCREW WH BLK (x2) BRACKET H100405 WASHER LOCK GABLE PANEL - W2A02847 (x12) 1/4x4 (x12) EXT BLK 2 13/16"x5 1/4"x80 3/16" (72x134x2037) (x2) 6x15 H100471 LAG SCREW H100200 SCREW PFH BLK GABLE PANEL - W2A02848 A4M01130 (x8) (x4)
- Page 24 GAZEBO ASSEMBLY H100792 LAG SCREW WH BLK H100205 BOLT WH BLK TOP RAIL - W4L13347 H100405 WASHER LOCK (x2) 1/4x3 (x8) 5/16x2-1/4 1 3/8"x5 1/4"x62 1/4" (36x134x1582) (x2) EXT BLK (x2) 6x15 H100192 NUT BARREL CORBEL - W4L13804 H100199 WASHER LOCK (x8) H100198 WASHER LOCK...
- Page 25 GAZEBO ASSEMBLY H100792 LAG SCREW WH BLK H100205 BOLT WH BLK H100405 WASHER LOCK (x2) 1/4x3 (x8) 5/16x2-1/4 (x2) EXT BLK CORBEL - W4L13804 6x15 (x2) 1 3/8"x5 1/4"x35 7/8" (36x134x910) H100192 NUT BARREL H100199 WASHER LOCK (x8) H100198 WASHER LOCK WH BLK (x8) EXT BLK...
- Page 26 GAZEBO ASSEMBLY RAFTER - W4L13340 1 3/8"x3 3/8"x77 3/8" (36x86x1965) (x8) H100391 SCREW PFH BLK (x24) FASCIA - W4L13339 FASCIA - W4L13345 1"x3 3/8"x74 5/8" (24x86x1896) (x2) 1"x3 3/8"x44" (24x86x1118) (x2) H100200 SCREW PFH BLK (x8) RAFTER - W4L13806 8x1 1/2 RAFTER - W4L13807 (x2) 1"x3 3/8"x39 3/4"...
- Page 27 GAZEBO ASSEMBLY H100379 T-NUT BLK (x16) 5/16 SHEATHING BOARD - W4L13341 H100459 BOLT WH BLK (x8) 1 3/8"x3 3/8"x73 1/4" (36x86x1861) (x16) 5/16x1 1/4 SHEATHING BOARD - W4L13342 H100198 WASHER LOCK H100391 SCREW PFH BLK 1 3/8"x3 3/8"x45 3/4" (36x86x1161) (x8) (x16) EXT BLK...
- Page 28 GAZEBO ASSEMBLY NOTE: USE THIS PAGE TO FAMILIARIZE YOURSELF WITH THE ROOF PANEL & ASSIST YOU IN THE COMING STEPS. WARNING: GLOVES SHOULD BE WORN WHEN HANDLING ROOF PANELS; EDGES ARE SHARP. • Note the pre-drilled holes on the top end of each sheet shown below. These holes will always go towards the ridge of the roof and will be used to install the ridge cap in a later step.
- Page 29 GAZEBO ASSEMBLY H100760 SCREW (x8) WOODGRIP 10x1 1/4 A4M01124 29 GA STEEL SHEETING (x2) 1/4 in [7 mm] 1/8 in [4 mm] HOLD SHEETING INSIDE OF FRAME MAKE SURE YOUR ROOF PANEL IS NOTE THRU HOLES SQUARE BEFORE MOVING ON. NOTE RIB OVERLAP FLUSH SHEETING...
- Page 30 GAZEBO ASSEMBLY H100760 SCREW (x24) WOODGRIP 10x1 1/4 SHEATHING BOARD...
- Page 31 GAZEBO ASSEMBLY H100760 SCREW (x32) WOODGRIP 10x1 1/4 A4M01124 29 GA STEEL SHEETING (x2) 1/8 in [3 mm] HOLD SHEETING INSIDE OF FRAME NOTE HOLE LOCATIONS NOTE RIB OVERLAP FLUSH ENDS OF SHEETING REPEAT STEPS 12 THROUGH 14 FOR THE OTHER SIDE.
- Page 32 GAZEBO ASSEMBLY A4M00983 ROOF EDGE TRIM SPLICE (x2) H100759 SCREW TAPPING (x16) 1/4x3/4 A4M00982 ROOF EDGE TRIM (x4) COMPLETE THIS STEP TWICE SCREWS GO THROUGH EDGE TRIM INTO THE TOP OF THE RIBS IN THE APPROXIMATE LOCATIONS SHOWN. DUE TO MULTIPLE LAYERS OF METAL ON THE EDGE TRIM, IT IS RECOMMENDED THAT A 1/8"...
- Page 33 GAZEBO ASSEMBLY H100391 SCREW PFH BLK (x4) WITH AT LEAST TWO PEOPLE LIFT ASSEMBLED ROOF PANEL COMPLETE THIS STEP TWICE AND SLIDE IT INTO THE TRACKS ON THE RAFTERS. ONCE IN PLACE, INSTALL ATTACHMENT HARDWARE AS SHOWN. SLIDE ROOF PANEL UPWARD. THEN INSTALL HARDWARE.
- Page 34 GAZEBO ASSEMBLY H100407 BOLT WH BLK H100198 WASHER LOCK (x3) H100199 WASHER LOCK 5/16x1 1/2 H100192 NUT BARREL (x3) EXT BLK (x3) EXT BLK (x3) WH BLK 8x19 12x19 5/16x7/8...
- Page 35 GAZEBO ASSEMBLY H100354 BOLT WH BLK H100770 WASHER FLAT BLK (x4) 5/16x6 1/2 (x4) 5/16 H100378 BOLT WH BLK TRUSS A4M01148 H100192 NUT BARREL (x2) (x2) 5/16x1 3/4 BRACKET (x2) WH BLK H100479 NUT LOCK BLK 5/16x7/8 (x4) 5/16 REPEAT ON OTHER SIDE...
- Page 36 GAZEBO ASSEMBLY H100797 SCREW PWH BLK (x16) A4M01155 TIE BRACKET (x4)
- Page 37 GAZEBO ASSEMBLY A4M01127 RIDGE CAP SPLICE (x1) A4M01116 RIDGE CAP 29 GA (x2) RIDGE CAP ASSEMBLY PREPARATION INSTALL THE PROVIDED RIDGE CAP SPLICE BY SLIDING EACH RIDGE CAP INTO THE SPLICE AS SHOWN UNTIL CENTERED.
- Page 38 GAZEBO ASSEMBLY RIDGE CAP STIFFENER - W4L13591 1"x2 3/8"x69 1/4" (24x60x1760) (x2) H100833 SCREW WOODGRIP A6P00398 (16) 10x3/4 RIDGE CAP PROTECTOR (x2) RIDGE CAP STIFFENER - W4L13590 1"x2 3/8"x47 5/8" (24x60x1210) (x2) ASSEMBLE BY ALIGNING THE HOLES ON EACH RIDGE CAP TO THE HOLES IN THE RIDGE CAP SPLICE TO ENSURE THAT THE OVERALL REMOVE SPACERS AS SHOWN LENGTH IS 117 1/16"...
- Page 39 GAZEBO ASSEMBLY 117 in [2974 mm] H100392 SCREW PWH BLK (x16) 8x3/4 RIDGE CAP ASSEMBLY FROM PREVIOUS STEP RIDGE CAP ASSEMBLY FROM PREVIOUS STEP. USING AN ADULT HELPER, SLIDE RIDGE CAP ASSEMBLY CAREFULLY ACROSS THE ROOF RIDGE UNTIL BOTH ENDS SIT INSIDE RAFTERS AS SHOWN.
- Page 40 GAZEBO ASSEMBLY STEEL POST A4M00950 H100471 LAG SCREW STEEL POST PLATE A4M00949 ANCHORING (x8) (x32) WH BLK (x8) PLATE WITH 5/16x1 1/2 FLANGE...
- Page 41 GAZEBO ASSEMBLY H100200 SCREW PFH BLK A100314 A100241 "A" REVISION TAG BYD ID TAG (SMALL) WITHOUT AGES (x4) 8x1 1/2 (x1) (x1) FRONT REAR...
- Page 42 GAZEBO ASSEMBLY H100120 SCREW CONCRETE ANCHOR H100630 WASHER FLAT BLK (x16) 1/4x2 (x16) 8x19 MANUFACTURER RECOMMENDS INSTALLATION ON CONCRETE SURFACE OR CONCRETE POST PADS. SEE BELOW. FOR INSTALLATION ON WOOD DECK, YOU MUST ENSURE THERE IS AMPLE STRUCTURAL SUPPORT UNDER DECK. HARDWARE NOT INCLUDED.
- Page 43 GAZEBO ASSEMBLY H100966 SCREW RAISED HEAD 9205413 ELECTRICAL ENCLOSURE (x4) 8x1 1/2 (x1) (INCLUDED WITH ELECTRICAL ENCLOSURE) REFER TO ELECTRICAL ENCLOSURE MOUNTING INSTRUCTIONS.
Need help?
Do you have a question about the 10x12 BRINDLEWOOD GAZEBO and is the answer not in the manual?
Questions and answers