Table of Contents
Advertisement
Quick Links
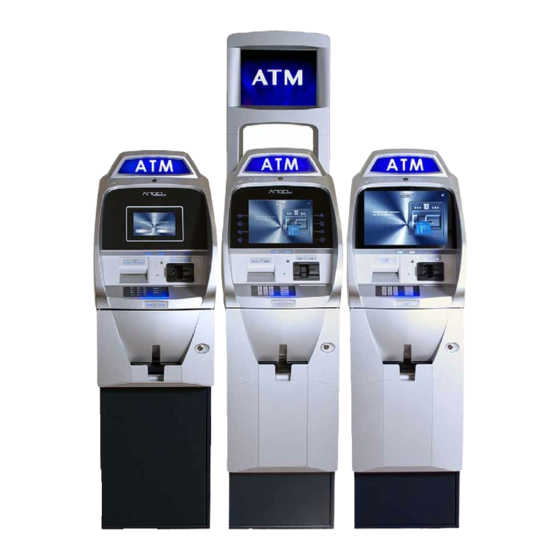
USER'S MANUAL
ARGO Series
©2019 Triton Systems of Delaware, LLC. All Rights Reserved. ATMGurus®, the ATMGurus logo and tagline,
Triton®, and the Triton logo are all registered trademarks of Triton Systems of Delaware, LLC. The third party
trademarks that may be identified herein are the trademark of their respective owners. Triton disclaims any affili-
ation, connection, or association between its products and services, and those of the respective trademark owners,
or any sponsorship or approval of its products and services by such trademark owners.
TDN 07103-00339 Rev. D
Advertisement
Table of Contents

Related Manuals for Triton ARGO Series


Summary of Contents for Triton ARGO Series
- Page 1 ©2019 Triton Systems of Delaware, LLC. All Rights Reserved. ATMGurus®, the ATMGurus logo and tagline, Triton®, and the Triton logo are all registered trademarks of Triton Systems of Delaware, LLC. The third party trademarks that may be identified herein are the trademark of their respective owners. Triton disclaims any affili- ation, connection, or association between its products and services, and those of the respective trademark owners, or any sponsorship or approval of its products and services by such trademark owners.
-
Page 2: Revision History
This guide covers configuration information for Triton ARGO Series ATM’s. scope This manual applies to all service personnel involved in installing, converting, or upgrading hardware on Triton ATMs nationwide and abroad. application This user guide provides information, methods, and easy-to-follow instructions for operating the Triton ARGO Series. -
Page 3: Glossary
Plain Old Telephone System Ringer Equivalence Number RJ-11 Regulated Jack 11 (phone/modem) RJ-45 Regulated Jack 45 (ethernet) Secure Socket Layer TCP/IP Transmission Control Protocol/Internet Protocol Transport Layer Security Total Quality Management Underwriters Laboratory USOC Universal Service Code Order Triton Systems ©... -
Page 4: Table Of Contents
....................11 keypad operations ....................12 on-screen keypad ....................13 menu-based operation ...................15 customer transactions ..................16 setup basics ........................17 triton configuration wizard ..................18 emv configuration ......................34 e-receipt configuration ....................41 management functions ....................43 terminal close functions ..................44 schedule close ....................44 send terminal totals ...................45 trial close ......................45... - Page 5 ..............119 lockout feature ....................119 battery low warning ...................120 changing the battery - straight deadbolt ...........120 changing the battery - swing bolt ..............120 dispenser operation .......................121 dispenser .........................121 note condition.......................122 preparing notes .....................122 cassette close ......................123 Triton Systems ©...
- Page 6 ....................133 test dispense ......................136 general maintenance .....................137 replenishing receipt paper ................137 cleaning the enclosure ..................140 cleaning the display ....................140 cleaning card reader ..................141 t9 keypad battery replacement ................142 triton warranty statement ..................143 software end-user agreement: ..................153 Triton Systems ©...
-
Page 7: Introduction
The list below contains important features of the ARGO series ATM. — Reliable, state-of-the-art operating system PC platform design. The ARGO series uses a Microsoft ® Windows CE 7.0 operating system with Triton’s custom designed X3 main board. -
Page 8: Standard Features
— The ATM transfers status information to the host processor using status monitoring with options to send basic or advanced monitoring information. — Triton Connect™ remote monitoring software allows the user to view the journal, monitor operation and alarm conditions, update operating parameters, update software, and reset the ATM. -
Page 9: Specifications
• 20% - 70% for polymer notes notes notes LCD Resolution 800 x 480 capacitive touch 800 x 600 1024 x 768 capacitive touch LCD Back-light Modem (Optional) 56,000 bps 56,000 bps 56,000 bps EMC Standard EN55024 EN55024 EN55024 Triton Systems ©... -
Page 10: Basic Operations
Triton Systems ©... -
Page 11: Control Panel Layout
The customer may choose a standard printed receipt via text message or email. Neither the ATM or Triton retains the email information nor will either use it for marketing purposes. The screen will display the (*) character in place of the actual email account information. -
Page 12: Keypad Operations
16-key group below the LCD screen. The keys have integral raised braille symbols to conform to ADA requirements. When the screen requests numeric characters, press the desired numbers on the keypad. Rest of Page is Blank Triton Systems ©... -
Page 13: On-Screen Keypad
Certain Management Functions screens require the entry of alpha and/or numeric characters. The ARGO series offers three types of virtual on-screen keyboards: qwerty, alphanumeric, and alphabetic. Users may toggle between the three keyboards by pressing the Change Keyboard Style button. The Left button moves the cursor one character to the left. - Page 14 5. Press the <CLEAR> key to Backspace. 6. Press the <1> key to reposition the keyboard to another location on the display. 7. Press the <2> key to position the cursor on a new line Rest of Page is Blank Triton Systems ©...
-
Page 15: Menu-Based Operation
Cancel button, the ATM displays the Customer Welcome screen. If the user presses the Enter button, the screen returns to the active function prior to the time-out. If the user does not select within an additional 30 seconds, the ATM will automatically go to the welcome screen. Triton Systems ©... -
Page 16: Customer Transactions
The processor forwards a confirmation message and authorization to dispense currency to the ATM. The ATM dispenses requested currency and a receipt of the transaction. The processor credits the merchant’s account for any cash withdrawals plus surcharge fees typically by the end of the next business day. Triton Systems ©... -
Page 17: Setup Basics
ID and 1234 for the password, so the default log on will be 001234. 3. Press the Enter button. Use the Triton Configuration Wizard, or complete the minimum required items below to configure the ARGO Series for service. -
Page 18: Triton Configuration Wizard
The wizard will setup the minimum requirements for the ARGO Series. If you are familiar with the ARGO series, you may choose to bypass the wizard and go directly to the Management Functions in the next section. - Page 19 7. Enter the Terminal ID data, maximum of 15 characters with no spaces, provided by the host processor. 8. Press the Enter and Return button to save the Terminal ID and return to the Configuration Wizard menu. Triton Systems ©...
- Page 20 < and > buttons or the Left and Right buttons, to toggle between the month, day and year. The Up and Down buttons will increment the highlighted number. 13. Press the Enter and Return button to save the date and return to the Configuration Wizard menu. Triton Systems ©...
- Page 21 The ATM will not enter into service until the dispenser has performed a successful test dispense and the Multiple Amount has been set. Must follow the instruction steps in sequence. 19. Select Multiple Amount (3). Open the vault to access and remove the cassette, then press the Enter button. Triton Systems ©...
- Page 22 20. Replace the cassette into the dispenser. Press the Enter button. 21. Enter Multiple Amount which is the note value (i.e. $5, $10, $20). Press the Enter and Return button. 22. Select Start Quantity (4). Remove and replenish the cassette. Press the Enter button. Triton Systems ©...
- Page 23 24. The ATM will automatically perform a Trial Cassette Close, right image below. 25. To print a hard copy, press the Print button, then press the Enter button to print a copy via the receipt printer. The screen will return to the Trial Cassette Close report. Triton Systems ©...
- Page 24 30. After printing, saving, or emailing the report, press the Back button to return to the Trial Cassette Close screen. 31. Press the Back button to return to the Configuration Wizard menu. Press the Next button to continue to the next set of requirements. Triton Systems ©...
- Page 25 33. Select Message Format (2). Press the Up or Down button to highlight the format option provided from the host processor. Press the Select button to enter a check mark in the box. Press the Save and Return button. Triton Systems ©...
- Page 26 The Left and Right buttons move the cursor one position per click. The Back- space button deletes the character to the left of the cursor. 39. Enter the Domain Name or IP address via on-screen keyboard. 40. Press the Enter and Return button. Triton Systems ©...
- Page 27 44. Enter the case-sensitive communications header provided by the host processor using the on-screen keyboard. Press the Change Keyboard Style button to select either alphanumeric, qwerty, or numeric keyboard. 45. Press the Enter and Return button, then press the Next button to continue to the next set of requirements. Triton Systems ©...
- Page 28 If a mistake or error occurs, the ATM will go back to the Change Password screen. The users will have to step through the sequence again. If user 1 password changed, enter the password and the new password can be the same password. 47. Enter current user 1’s password using the T9 keypad, then press the Enter button. Triton Systems ©...
- Page 29 48. Enter user 1’s new password using the T9 keypad, then press the Enter button. Verify the new password again and press the Enter button. **Note** A good user 1 password change will proceed to change user 2’s password. 49. Enter current user 2’s password via the front panel T9 keypad, then press the Enter button. Triton Systems ©...
- Page 30 58 are an example of what a user should see when entering master keys. Check digits shown are for ex- ample purposes only. 51. Select either Enter PIN Master Keys (2) or Enter MAC Master Keys (3), and follow on-screen instructions. Host processor will provide master keys and specific instructions for entering keys. Triton Systems ©...
- Page 31 If the on-screen check digits do not match the check digits provided by the host processor, press the Cancel button to terminate key entry. Select either Enter PIN Master Keys (2) or Enter MAC Master Keys (3), and follow on-screen instructions to re-enter the keys. Triton Systems ©...
- Page 32 Press either Enter PIN Master Keys (2) or Enter MAC Master Keys (3), and follow the on- screen instructions. 58. If the master keys were entered successfully, right image below, press the Enter button to return to the Config- uration Wizard menu. Triton Systems ©...
- Page 33 Enter and Return button to save. 64. After completing these steps, press the Next button in the bottom, right corner of the screen. This completes the Configuration Wizard and returns the user to Management Functions menu. Continue to the next section. Triton Systems ©...
-
Page 34: Emv Configuration
Press the Page Up and Page Down buttons to navigate through the options. Press the Enable/Disable button or touch the desired file to toggle on (check mark) or off (no check mark), then press the Save and Return button. Triton Systems ©... - Page 35 7. Select EMV Journal Entries (6) to toggle on (check mark) or off (no check mark). This option directs the ATM to record extra received/transmitted data to the journal during an EMV transaction for dispute resolu- tion, right image below. Triton Systems ©...
- Page 36 Home, and End buttons to navigate through the report. 9. To print a hard copy, press the Print button, then press the Enter button to print a copy via the receipt printer. The screen will return to the Terminal EMV Configuration report. Triton Systems ©...
- Page 37 13. User will receive either a success or a fail screen. Press the Enter button. The screen will return to the Termi- nal EMV Configuration report. 14. After printing, saving, or emailing the report, press the Back button to return to the EMV Configuration screen. Triton Systems ©...
- Page 38 If the ATM reboots after the last EMV transaction, no data is available. 16. To print a hard copy, press the Print button, then press the Enter button to print a copy via the receipt printer. The screen will return to the Last Transaction EMV Data report. Triton Systems ©...
- Page 39 Triton Systems ©...
- Page 40 20. User will receive either a success or a fail screen. Press the Enter button. The screen will return to the Last Transaction EMV Data report. 21. After printing, saving, or emailing the report, press the Back button to return to the EMV Configuration screen. Triton Systems ©...
- Page 41 22. Select Auto Select Language (9) to toggle on (check mark) or off (no check mark). This option enables auto selection of the language for an EMV transaction based on the preferred language on the card. Disable this feature so the display will present the language selection screen to the customer. end of emv configuration Triton Systems ©...
-
Page 42: E-Receipt Configuration
Address (2), Host Port (3), Host Response Timeout (5), Electronic Receipt Heartbeat Interval (6), and Enter Host Password (7) are set by Triton. Do not change these option value unless the main board has been replaced and/or the values are specified by Triton Technical Support. - Page 43 4. Triton recommends the settings for the Host Response Timeout (5) and Electronic Receipt Heartbeat Interval (6) as a reference point, but may be changed to troubleshoot connectivity. 5. Once the option Enable Electronic Receipts (1) has been toggle on (check mark), select Test Host Connection (8) and test the connection between this ATM and the electronic receipt host.
-
Page 44: Management Functions
The Systems Parameters menu allows the user to manage various basic settings on the ARGO Series, such as Date and Time, Volume Control, and Shutdown Terminal. For more information on each function, please see the X3 Configuration Manual. -
Page 45: Schedule Close
5. Press the Enter and Return button to save changes and return to Schedule Close menu. 6. The Day of the Week option is automatically set to Every Day. Press the Save and Return button to save changes and return to the Terminal Close Functions menu. Triton Systems ©... -
Page 46: Send Terminal Totals
Day Close can be printed, when totals are sent from the host processor. This function does not clear totals or change the business date. 1. Navigate to Management Functions > Terminal Close Functions (1). 2. Select Trial Close (3). Press the Enter button to begin the operation. Triton Systems ©... - Page 47 4. To save the report onto a USB drive, press the Save To File button. Press the Enter button to begin the save process. When the process is complete, press the Enter button and the screen will return to the Trial Close report. Triton Systems ©...
- Page 48 7. User will receive either a success or a fail screen. Press the Enter button. 8. After either printing, saving or emailing the report, press the Back button to return to the Terminal Close Functions screen. Triton Systems ©...
-
Page 49: Day Close
3. The ATM will contact the host, then display the Day Close report. To print a hard copy, press the Print button, then press the Enter button to print a copy via the receipt printer. The screen will return to the Day Close re- port. Triton Systems ©... - Page 50 Press the Enter button to accept the address and send the Day Close report to the email address or press the Cancel button to return to the previous screen and correct the email address. Triton Systems ©...
-
Page 51: Trial Cassette Close
1. Navigate to Management Functions > Terminal Close Functions (1). 2. Select Trial Cassette Close (5) option. 3. Select the desired cassette(s) to be included in the trial cassette close, then press the Save and Return button. Triton Systems ©... - Page 52 5. To save the report onto a USB drive, press the Save To File button. Press the Enter button to begin the save process. When the process is complete, press the Enter button and the screen will return to the Trial Cassette Close report. Triton Systems ©...
- Page 53 8. User will receive either a success or a fail screen. Press the Enter button. 9. After either printing, saving, or emailing the report, press the Back button on the Trial Cassette Close report to return to the Terminal Close Functions screen. Triton Systems ©...
-
Page 54: Cassette Close
4. The screen displays the Cassette Close report. To print a hard copy, press the Print button, then press the Enter button to print a copy via the receipt printer. The screen will return to the Cassette Close report. Triton Systems ©... - Page 55 Press the Enter button to accept the address and send the Cassette Close report to the email address or press the Cancel button to return to the previous screen and correct the email address. Triton Systems ©...
- Page 56 8. User will receive either a success or a fail screen. The screen will return to the Cassette Close report. 9. Press the Back Button. Triton Systems ©...
- Page 57 13. After printing, saving, or emailing the new report, press the Back button. The ATM will contact the host and return with a Day Close report. Print, save, or email the new report. 14. Press the Back button to return to the Terminal Close Functions screen. Triton Systems ©...
-
Page 58: Cassette Close Options
6. Select Display New Cassette Totals (5) to toggle on (check mark) or off (no check mark). This option, when enabled (checked), will display the new totals report when performing a close. 7. When finished with selecting the cassette close option, press the Save and Return button to return to the Terminal Close Functions screen. Triton Systems ©... -
Page 59: Add Cash
6. Use the front panel or on-screen numeric keypad to enter the number of bills added to cassette. This is not the cassette value. 7. Press the Enter and Return button. 8. Repeat steps 3-7 for each desired cassette. 9. Press the Save and Return button. Press the Back button to return to the Management Functions menu. Triton Systems ©... -
Page 60: Diagnostics
3. Use Page Up, Page Down, Home, and End buttons to navigate through report. 4. To print a hard copy, press the Print button, then press the Enter button to print a copy via the receipt printer. The screen will return to the Current Terminal Error report. Triton Systems ©... -
Page 61: Terminal Error History
1. Navigate to Management Functions > Terminal Status (8). 2. Select Terminal Error History (2). 3. The screen will display the error code history. Use Page Up, Page Down, Home, and End buttons to navigate through report. Triton Systems ©... - Page 62 5. To save the report onto a USB drive, press the Save To File button. Press the Enter button to begin the save process. When the process is complete, press the Enter button and the screen will return to the Terminal History Error report. Triton Systems ©...
- Page 63 8. User will receive either a success or a fail screen. Press the Enter button and the screen will return to the Terminal Error History report. 9. After printing, saving, or emailing the report, press the Back button to return to the Terminal Status screen. Triton Systems ©...
-
Page 64: Reset Terminal Error
1. Navigate to Management Functions > Terminal Status (8). 2. Select Configuration Summary (4). 3. The screen will display the report. Use Page Up, Page Down, Home, and End buttons to navigate through report. Triton Systems ©... - Page 65 5. To save the report onto a USB drive, press the Save To File button. Press the Enter button to begin the save process. When the process is complete, press the Enter button. The screen will return to the Configuration Summary report Triton Systems ©...
- Page 66 8. User will receive either a success or a fail screen. Press the Enter button and the screen will return to the Configuration Summary report. 9. After printing, saving, or emailing the report, press the Back button to return to the Terminal Status screen. Triton Systems ©...
-
Page 67: Restore Default Parameters
1. Navigate to Management Functions > Terminal Status (8). 2. Ensure USB drive is installed into an empty USB port on main board/baseboard. 3. Select Save Parameters to External Storage (6). Press the Enter button to save the current ATM parameters. Triton Systems ©... - Page 68 5. If the ATM operates via an Ethernet IP Address, press the Yes or No button to save or not save the Ethernet IP setting, left image below. 6. If the ATM has graphics, press the Enter button to copy the graphics or press the Cancel button to abort the graphics, right image below.. Triton Systems ©...
-
Page 69: Restore Parameters From External Storage
1. Navigate to Management Functions > Terminal Status (8). 2. Ensure USB drive with previously saved parameters is installed into an empty USB port on mainboard/base- board. 3. Select Restore Parameters from External Storage (7). Press the Enter button to continue parameter replacement. Triton Systems ©... - Page 70 6. Touch Browser (1) Look in: on the screen or press the keypad number (1). 7. Press the Up or Down button to highlight the desired file location. Press the Select button to check the box. Press the Save and Return button. Triton Systems ©...
- Page 71 10. Press the Up or Down button to highlight the desired TSF file. Press the Enter and Return button. The main- board will upload the file. After the screen shows the parameters were restored successfully, press the Enter button to return to the Terminal Status screen. Triton Systems ©...
-
Page 72: Software Update History
4. To print a hard copy, press the Print button, then press the Enter button to print a hard copy via the receipt printer. The screen will return to the Software Update History report. Triton Systems ©... - Page 73 Press the Enter button to accept the address and send the Software Update History report to the email address or press the Cancel button to return to the previous screen and correct the email address. Triton Systems ©...
-
Page 74: Cash Dispenser Status
1. Navigate to Management Functions > Diagnostics (2) > Dispenser (4). 2. Select Cash Dispenser Status (1). 3. The screen will display the report. If the report is greater than one page, use the Page Up, Page Down, Home, or End buttons to navigate through report. Triton Systems ©... - Page 75 5. To save the report onto a USB drive, press the Save To File button. Press the Enter button to begin the save process. When the process is complete, press the Enter button. The screen will return to the Cash Dispenser Status report. Triton Systems ©...
- Page 76 8. User will receive either a success or a fail screen. Press the Enter button. The screen will return to the Cash Dispenser Status report. 9. After printing, saving, or emailing the report, press the Back button to return to the Terminal Status screen. Triton Systems ©...
-
Page 77: Purge (Dispenser)
This function dispenses notes from each operational cassette into the reject cassette. No notes are sent to exit. 1. Navigate to Management Functions > Diagnostics (2) > Dispenser (4). 2. Select Test Dispense (3). Select a desired single cassette or All Cassettes to begin the test dispense operation. Triton Systems ©... -
Page 78: Card Reader Status
1. Navigate to Management Functions > Diagnostics (2) > Card Reader (5). 2. Select Card Reader Status (1). 3. The screen will display the report. If the report is greater than one page, use the Page Up, Page Down, Home, or End buttons to navigate through report. Triton Systems ©... - Page 79 Press the Enter button to accept the address and send the Card Reader Status report to the email address or press the Cancel button to return to the previous screen and correct the email address. Triton Systems ©...
- Page 80 8. User will receive either a success or a fail screen. Press the Enter button. The screen will return to the Card Reader Status report. 9. After printing, saving, or emailing the Card Reader Status report, press the Back button to return to the Card Reader Diagnostics screen. Triton Systems ©...
-
Page 81: Card Reader Totals
4. To save the report onto a USB drive, press the Save To File button. Press the Enter button to begin the save process. When the process is complete, press the Enter button. The screen will return to the Card Reader Totals report. Triton Systems ©... - Page 82 Cancel button to return to the previous screen and correct the email address. 7. User will receive either a success or a fail screen. Press the Enter button. The screen will return to the Card Reader Totals report. Triton Systems ©...
-
Page 83: Scan Card
2. Select Scan Card (3). 3. Insert card into card reader. Card reader will attempt to read an EMV chip. If no chip is detected, card reader will read magnetic strip. 4. Remove card when on-screen prompt appears. Triton Systems ©... - Page 84 6. To save the report onto a USB drive, press the Save To File button. Press the Enter button to begin the save pro- cess. When the process is complete, press the Enter button. The screen will return to the Management Report. Triton Systems ©...
- Page 85 9. User will receive either a success or a fail screen. Press the Enter button. The screen will return to the Man- agement Report. 10. After printing, saving, or emailing the Management Report, press the Back button to return to the Card Reader Diagnostics screen. Triton Systems ©...
-
Page 86: Device Status (Printer)
5. To save the report onto a USB drive, press the Save To File button. Press the Enter button to begin the save process. When the process is complete, press the Enter button. The screen will return to the Device Status report. Triton Systems ©... - Page 87 Press the Enter button to accept the address and send the Device Status Report to the email address or press the Cancel button to return to the previous screen and correct the email address. Triton Systems ©...
-
Page 88: Reset/Test Printer
1. Navigate to Management Functions > Diagnostics (2) > Printer (6). 2. Select Reset/Test Printer (2). 3. Printer automatically prints fifty lines of data on a test receipt. Press the Back button to returns to the Termi- nal Diagnostics screen. Triton Systems ©... -
Page 89: Ping Remote Host Address (Modem/Ethernet)
TCP/IP communication. Press the Enter and Return button. 4. The screen will display a success or failed test. Press the Enter button to return to the Modem | Ethernet screen. 5. Press the Back button to return to the Terminal Diagnostics screen. Triton Systems ©... -
Page 90: Test (Modem/Ethernet)
3. Use the on-screen alphanumeric, qwerty, or numeric keyboard to enter a valid phone number. Press the Enter and Return button. 4. The screen will display either a failed attempt or disconnect complete. 5. Press the Back button (2) twice to return to the Terminal Diagnostics screen. Triton Systems ©... -
Page 91: Device Status (Keypad)
5. To save the report onto a USB drive, press the Save To File button. Press the Enter button to begin the save process. When the process is complete, press the Enter button. The screen will return to the Keypad Status report. Triton Systems ©... - Page 92 Cancel button to return to the previous screen and correct the email address. 8. User will receive either a success or a fail screen. Press the Enter button. The screen will return to the Keypad Status report. Triton Systems ©...
-
Page 93: Test (Keypad)
Only the T7 keypad will show “down” and “up” on the screen. The other keypads will show only “down” on the screen. 7. Press ENTER on keypad to complete button test and return to the Keypad Diagnostics screen. 8. Press the Back button twice to return to the Management Functions screen. Triton Systems ©... -
Page 94: Electronic Journal
5. To save the report onto a USB drive, press the Save To File button. Press the Enter button to begin the save process. Depending on the file size, it may take several minutes to save the file. When the process is complete, press the Enter button. The screen will return to the Journal Data screen. Triton Systems ©... - Page 95 6. After printing, or saving the Journal Data report, press the Back button. 7. Press the Enter button to mark records as audited, or press the Cancel button to leave records unaudited and return to the Electronic Journal screen. Triton Systems ©...
-
Page 96: Display Last X
3. Use the front panel or on-screen numeric keypad to enter the number of journals to display. Press the Enter and Return button. 4. The screen will display the report. Use the Page Up, Page Down, Home or End button to navigate through the report. Triton Systems ©... - Page 97 Depending on the file size, it may take several minutes to save the file. When the process is complete, press the Enter button. The screen will return to the Journal Data screen. 7. After printing or saving the Journal Data screen, press the Back button to return to the Electronic Journal screen. Triton Systems ©...
-
Page 98: Display Selected Records
3. Select Audit Filter (1). Use the Up or Down button to highlight which category of records to view, then press the Select button to check the box. Press the Save and Return button. Triton Systems ©... - Page 99 5. Select Date Filter (3). Use the Up and Down buttons to highlight all or a date range of records to view, then press the Select button to check the box. Press the Save and Return button. Triton Systems ©...
- Page 100 8. Use the Page Up, Page Down, End, or Home button to scroll through the report. 9. To print a hard copy, press the Print button, then press the Enter button to print a copy via the receipt printer. The screen will return to the Journal Data report. Triton Systems ©...
- Page 101 Left and Right buttons to the left side of the screen, or the < and > buttons on the front panel keypad. 11. Select Start Date (4). Set the desired start date, then press the Enter and Return button. Triton Systems ©...
- Page 102 12. Select End Date (5). Set the desired end date, then press the Enter and Return button. 13. If this is not grayed out, select Field (6). Use the Up or Down button to highlight the desired option, then press the Select button to check the box. Press the Save and Return button. Triton Systems ©...
- Page 103 16. Press the Change Keyboard Style button to select the on-screen alphanumeric, qwerty, or numeric keyboard. The Left and Right buttons moves the cursor one position per click. The Backspace button deletes the char- acter to the left of the cursor 17. Press the Enter and Return button. Triton Systems ©...
- Page 104 Depending on the file size, it may take several minutes to save the file. When the process is complete, press the Enter button. The screen will return to the Journal Data report. 22. After printing or saving the Journal Data report, press the Back button to return to the Electronic Journal screen. Triton Systems ©...
-
Page 105: Clear Journal
3. Press the Enter button to clear all journal entries and mark as audited or press the Cancel button to return to the Electronic Journal screen. 4. If the journal entries are marked as audited, press the Enter button on the second Clear Journal screen to return to the Electronic Journal screen. Triton Systems ©... -
Page 106: Archive/Delete Journal
Choosing None (Delete) option for Archive Location will permanently delete all journal records. 3. Select Archive Location (1). Use the Up or Down button to highlight the desired archive location, then press the Select button to check the box. Press the Save and Return button. Triton Systems ©... - Page 107 Press the Enter and Return button. 6. Should receive either records archived or records not found. 7. Press the Enter button to return to the Electronic Journal screen. Press the Back button to return to the Man- agement Functions screen. Triton Systems ©...
-
Page 108: Auto Archive
3. Select Archive Location (1). This option selects where the archived audited journal records will be saved. 4. Use the Up or Down button to highlight the desired archive location, then press the Select button to check the box. Press the Save and Return button. Triton Systems ©... - Page 109 A warning screen will follow if enabled. 10. On the warning screen, press the Enter button to enable or press the Cancel button leave the option unchecked. 11. Press the Back button to return to the Management Functions screen. Triton Systems ©...
-
Page 110: Password Maintenance
The ATM arrives with a default user ID and password (001234). (00) is the ID. (1234) is the password. 5. Confirm the password by re-entering the new password, then press the Enter button to return to the Password Maintenance screen. Triton Systems ©... -
Page 111: Change Username
The Left and Right buttons moves the cursor one position per click. The Backspace button deletes the char- acter to the left of the cursor. 5. Press the Enter and Return button to save changes and return to the Password Maintenance screen. Reset of page left blank Triton Systems ©... -
Page 112: Modify User Access
1. Navigate to Management Functions > Password Maintenance (4). 2. Select Modify User Access (3). 3. Use the front panel or on-screen numeric keypad to enter the user ID to be modified. Press the Enter or the Enter and Return button. Triton Systems ©... -
Page 113: Add User
3. The User ID is a number between 01-99 including the numbers 01 and 99 not assigned to another user. Use the front panel or on-screen numeric keypad to enter a new user ID, then press the Enter or the Enter and Return button. Triton Systems ©... - Page 114 7. Use the numeric on-screen keypad to enter a new password, then press the Enter button. 8. Re-enter the new password for confirmation, then press the Enter button to save changes and return to the Password Maintenance. Triton Systems ©...
-
Page 115: Remove User
5. If you enter a valid user ID, press the Enter button to remove the user, or press the Cancel button to return to the Password Maintenance screen. 6. Press the Back button to return to the Management Functions screen. Triton Systems ©... -
Page 116: System Parameters
Left and Right buttons to the left side of the screen, or the < and > buttons on the keypad. Use the on-screen numeric keypad, the front panel keypad, or the Up or Down button to change the numbers. Triton Systems ©... -
Page 117: Volume Control
2. Select Volume Control (3). Press the Up or Down button to adjust the volume to the desired level. The vol- ume of each click will change. 3. Press the Enter and Return button to save changes and return to the System Parameters screen. Triton Systems ©... -
Page 118: Shut Down The Terminal
3. Wait for the above Shut down screen, before accessing the ATM power supply and press the power switch to the OFF (O) position. restart terminal 1. Navigate to Management Functions > System Parameters (5). 2. Select Restart the Terminal (5). 3. Press the Enter button and the ATM will reboot. Triton Systems ©... -
Page 119: Software Update
6. Press the Up or Down button to highlight the desired file and press the Select button to check the box. 7. Press the Save and Return button. Press the Enter button to start the file upload. 8. The ATM will upload and install the new software files. This may take several minutes. Triton Systems ©... -
Page 120: Electronic Lock Operation
4. An incorrect combination entry will cause the lock beeps three (3) times. Repeat steps 1 - 3. changing the lock’s combination For your convenience, Triton Systems provide a YouTube video named “Changing the Combination on an Elec- tronic Lock with Swing Bolt by Triton Systems/ATMGurus”. -
Page 121: Battery Low Warning
Repeated LED flashing and beeping during the opening step indicates the battery is low and needs immediate replacement. Triton recommends replacing of the battery at least twice annually. The inside of the vault/cabinet door for straight deadbolt-style locks contains the battery box. The swing bolt-style lock hides the batteries behind the dial. -
Page 122: Dispenser Operation
With multiple cassettes installed at the same time, the number of test rejects could fill the single note compart- ment of the reject cassette. Triton recommends removing any rejected notes from the unit before placing the ATM into service. -
Page 123: Note Condition
For new or uncirculated currency, separate the notes before inserting into the cassette. Use a note counter if avail- able. As an alternative, flip through each bundle of notes in both directions at each end, or strike each bundle against a hard surface which may sufficiently separate the currency. Triton Systems ©... -
Page 124: Cassette Close
4. To print a hard copy, press the Print button, then press the Enter button to print a copy via the receipt printer. The screen will display the Cassette Close report. 5. After printing the report, continue to step 6 to save the report or press the Back button and go to step 9. Triton Systems ©... - Page 125 17. Use the on-screen numeric keypad to enter the number of bills loaded into the cassette. This number is not the cassette value. 18. If more than one cassette was replenished, the screen will display another on-screen numeric keypad for each cassette to enter the number of bills loaded into the cassette. Triton Systems ©...
- Page 126 20. Press the Print button to print a hard copy or press the Save to File button to save to a USB drive. 21. After printing or saving the report, press Back button to return to the Terminal Close Functions screen. Rest of page Blank Triton Systems ©...
-
Page 127: Loading Scdu/Hcdu Cassettes
4. When prompted via Management Functions, remove the cassette by grasping the handle. Lift slightly and pull the cassette from the dispenser. Place the cassette on a flat surface. 5. Use the security key to unlock the cassette and open the lid. Triton Systems ©... - Page 128 11. Use the handle to slide the cassette and fully insert it into the dispensing mechanism. 12. Repeat steps 4-11 for additional cassettes for HCDU dispenser. 13. Continue with Cassette Close or other procedure via Management Functions. Triton Systems ©...
-
Page 129: Loading Sdd Cassette
3. Line up the two prongs on the loader tray with the openings at the bottom of the cassette. Slide the cassette onto the loading tray or insert the cassette loading handle into the openings. Triton Systems ©... - Page 130 13. Insert the cassette key and prime the cassette (Green indicator). 14. Use the handle to slide the cassette and fully insert it into the dispensing mechanism. 15. Continue with Cassette Close or other procedure via Management Functions. Triton Systems ©...
-
Page 131: Loading The Minimech
This will allow the packer plate to compress the currency. Do not overfill. 5. Release the packer plate against the notes. 6. Use the handle to slide the cassette and fully insert it into the dispensing mechanism. 7. Continue with Cassette Close or other procedure via Management Functions. Triton Systems ©... -
Page 132: Loading The Ecdm-100
Level the notes. Single notes should not protrude from the bundle. 8. Place the currency into the cassette. Allow at least one inch of clearance between the retracted packer plate and the currency. Do not overfill. 9. Release the packer plate against the currency. Triton Systems ©... - Page 133 10. Close the lid and use the cassette security key to lock the cassette. 11. Use the handle to slide the cassette and fully insert it into the dispensing mechanism. 12. Continue with Cassette Close or other procedure via Management Functions. Triton Systems ©...
-
Page 134: Loading The Nmd50
The reject cassette must be primed before inserting the cassette into the mechanism or damage can occur to the cassette and mechanism. 8. Use the handle to slide and fully insert the cassette into the dispensing mechanism with the handle in front of the cassette. Similar to the cassette image above. Triton Systems ©... - Page 135 Triton Systems ©...
- Page 136 10. If your cassette has a lock, use the note cassette key to unlock the cassette. 11. Open cassette by simultaneously pressing the green release button and lifting the lid. 12. Pull the packer plate to the front of the cassette (toward the handle). Ensure the packer plate is fully back. Triton Systems ©...
- Page 137 If applicable, lock the cassette with the cassette key. 17. Use the handle to slide the cassette and fully insert it into the dispensing mechanism. 18. Repeat all steps for the remaining cassettes. 19. Continue with Cassette Close or other procedure via Management Functions. Triton Systems ©...
-
Page 138: Test Dispense
3. Select the desired single cassette or select All Cassettes to begin the test dispense operation. A screen will display a success or failed dispense. 4. Press the Enter button to select another cassette for testing or press the Back button three times to return to the Management Functions opening screen. Triton Systems ©... -
Page 139: General Maintenance
**Note** Only qualified service personnel are authorized to repair or service ATMs. Should a malfunction occur, do not attempt to service the unit yourself. Contact a Triton-certified service provider. replenishing receipt paper 1. Unlock the top closure and pull the hinged door forward. - Page 140 8. Feed the end of the paper into the printer take-up slot. The printer will activate and automatically feed the paper through the printer and slightly out the front of the control panel. Triton Systems ©...
- Page 141 The lever moves in three positions. Close the printer assembly and perform step 8 again. Visually inspect the release pin holding the printer securely. 12. Close top closure and lock panel. 13. Test printer via Management Functions > Diagnostics (2) > Printer (6) > Reset/Test Printer (2). Triton Systems ©...
-
Page 142: Cleaning The Enclosure
LCD screen. These kits contain anti-static solution without alcohol or ammonia. 3. Wipe screen with a dry, lint-free cloth after cleaning to remove excess moisture. 4. Power ATM on. Triton Systems ©... -
Page 143: Cleaning Card Reader
For proper maintenance of the card readers, Triton recommends using the special cleaning cards (P/N 05010- 00024) available at www.atmgurus.com. Multiple types of card readers including magnetic stripe, EMV, and hybrid readers can use these waffle-type cleaning cards. Clean the card reader at least once per month. At heavy usage locations clean card reader more often. -
Page 144: T9 Keypad Battery Replacement
For your convenience, connect to the Internet’s YouTube and search for the video T5/T9 Keypad Battery Re- placement by Triton Systems ATMGurus. **Note** Go to www.atmgurus.com to purchase spare batteries, P/N 01300-00025. 1. Open the front Facia to access the back of the keypad. Remove the battery cover, red arrow, from the keypad. -
Page 145: Triton Warranty Statement
The Manufacturer warrants that the Merchandise delivered to a distributor will perform in accordance with the Manufacturer’s published specifications as detailed below from date of shipment from Long Beach, MS. The Manufacturer’s warranty shall not apply to any damage resulting from abuse, negligence, accident, or to any loss or damage to the Merchandise while in transit. - Page 146 Triton at the Purchaser’s expense. Triton shall not be responsible for misuse or abuse of a unit, and any attempts to remove or deface the serial number or date code on a unit or any component thereof, or any attempt to repair a unit or to repair or replace any component by anyone other than a service technician authorized by Triton shall void this warranty.
- Page 147 Triton at the Purchaser’s expense. Triton shall not be responsible for misuse or abuse of a unit, and any attempts to remove or deface the serial number or date code on a unit or any component thereof, or any attempt to repair a unit or to repair or replace any component by anyone other than a service technician authorized by Triton shall void this warranty.
- Page 148 Triton reserves the final right in determining acceptance of a warranty claim. • Merchandise received in not originally obtained through Triton or Triton or installed in the unit the Pur- chaser initiated the warranty claim will be returned without processing.
- Page 149 • A 25% restocking fee is charged if the opened Merchandise is returned intact. Triton may refuse to accept if Merchandise is returned in inadequate packaging, subjected to abnormal envi- ronmental conditions, altered, modified, or used. Triton reserves the final right in determining acceptance of returned Merchandise.
- Page 150 Waiver by either the Manufacturer or Purchaser Triton Systems ©...
- Page 151 ATMGurus shall void this warranty. Smart Safes ATMGurus warrants the components of each refurbished model, excluding software and related documentation, Triton Systems ©...
- Page 152 Such damages include, but are not limited to, loss of profits, loss of revenue, loss of data, loss of use of the merchandise, or any associated merchandise, cost of capital, cost of substitute or replacement merchandise, facilities or services, downtime, Purchaser’s time, the claims of third parties, including customers, and injury to property. Triton Systems ©...
- Page 153 • Merchandise altered or modified outside the specifications set forth by the Manufacturer or ATMGurus may not be accepted as a warranty return. Incomplete components (parts missing) may not be accepted as valid Triton Systems ©...
- Page 154 ATMGurus reserves the final right in determining acceptance of a warranty claim. • Merchandise received in not originally obtained through Triton or ATMGurus or installed in the unit the Purchaser initiated the warranty claim will be returned without processing.
-
Page 155: Software End-User Agreement
Triton or its suppliers. The software is licensed for use on this specific Triton ATM product and may not be used on any other product. Otherwise, the supporting documentation, if any, may be copied only as essential for backup or archive purposes in support of your use of the ATM. - Page 156 Any warranty pertaining to the ATM, its mechanical components exclusive of the ATM software, shall be gov- erned and controlled by any warranty given to you by Triton in a separate document accompanying this ATM. The foregoing limitation of liability and exclusion of certain damages will apply regardless of the success or effec- tiveness of other remedies.
Need help?
Do you have a question about the ARGO Series and is the answer not in the manual?
Questions and answers