Table of Contents
Advertisement
Quick Links
Advertisement
Table of Contents

Related Manuals for Triton ARGO RL1713


Summary of Contents for Triton ARGO RL1713
- Page 1 ANUAL TDN 07103-00339 ORPORATE EADQUARTERS 21405 B S TREET , MS. 39560 EACH PHONE: (800) 259-6672 PHONE: (228) 575-3100 FAX: (228) 575-3101 2013 Triton. All Rights Reserved. TRITON logo is a registered trademark of Triton © Systems of Delaware, LLC.
- Page 2 ARGO U ANUAL DOCUMENT UPDATES February 19, 2013 Original February 21, 2013 Added camera cutout site info March 7, 2013 Added specifi cation table March 28, 2013 Changed card reader cleaning part from 06200-00055 to 05010-00024. July 26, 2013 Removed all TDM250 & motorized card reader references December 17, 2013 Added Relative Humidity for Australia notes in Section 1 Page 6.
-
Page 3: Table Of Contents
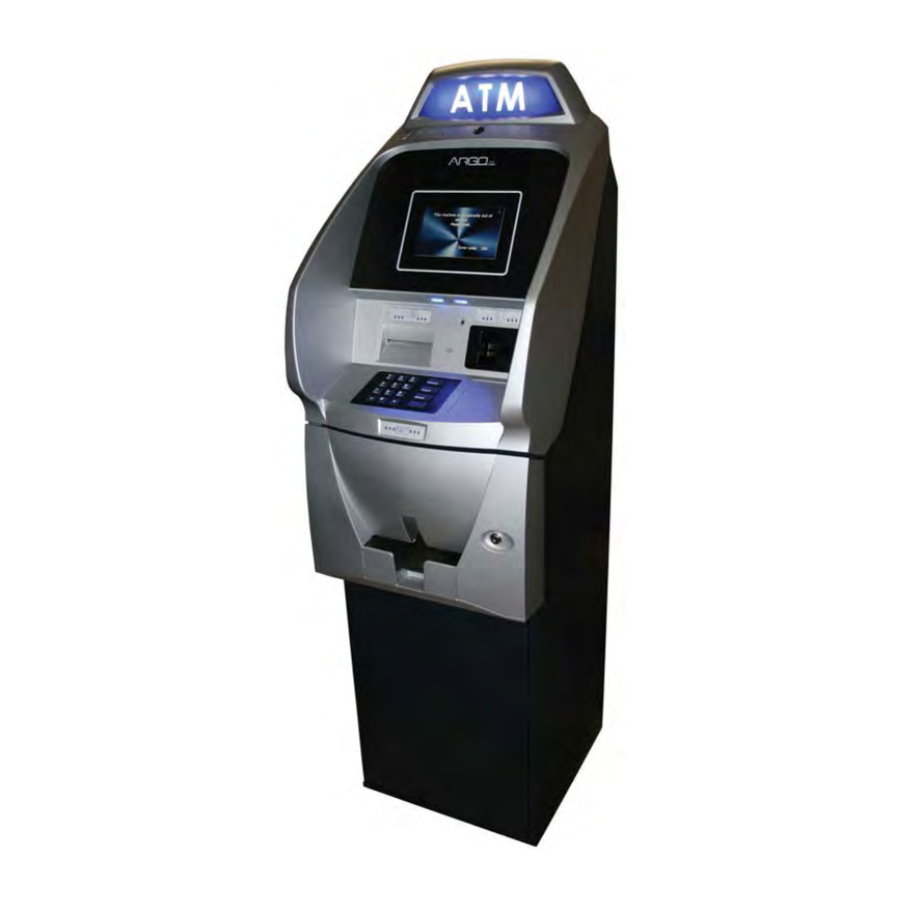
ARGO U ANUAL The Triton ARGO ATM is a lobby terminal designed for indoor use only. The ARGO line includes models RL1713, RL27XY, and RL63XY. The following sections provide the steps used to understand and operate all functions supported by the ARGO ATM. The ARGO’s larger screens and touch technology simplifi es the user experience and operation. - Page 4 UPPLEMENT ANAGEMENT URPOSE This guide covers the procedure of operating all functions of a Triton ARGO ATM with security and ease of operation in mind. All units come with pre-loaded software; later updates will be made available online. Scope This manual applies to all service personnel involved in the process of maintaining, converting, or upgrading hardware and software on Triton ATMs nationwide and abroad.
-
Page 5: Section 1: Introduction
1: I ECTION NTRODUCTION... -
Page 6: Feature Highlights
ARGO U ANUAL Once unit is unpacked, set up, and power restored, you will be asked to set up passwords and security basics. The user manual describes the operating features and shows how to perform procedures typically performed by the owner/operator personnel. Below are the basic features of the ARGO. - Page 7 Highly reliable, state-of-the-art operating system PC platform design. The ARGO uses Microsoft ® Windows CE 5.0 operating system with Triton’s X2 technology. Supports Windows fi le formats ® for adding custom logos and advertisements. In addition, it features Triton’s completely custom design X2 motherboard.
- Page 8 ARGO U ANUAL High-capacity electronic journal stores transaction details for later printout and analysis. Satisfi es Americans with Disabilities Act (ADA) specifi cations for height and access; audio transactions for the visually impaired. Complies with UK accessibility guidelines (DDA) and California access compliance, Title 24.
-
Page 9: Standard Features
TATUS ONITORING In addition, Triton Connect™ remote monitoring software can be used to view the journal, monitor operation and alarm conditions, update operating parameters, and reset the terminal. . Cabinets available in UL 291 Business Hours Service or UL 291 Level... -
Page 10: Specifications
ARGO U ANUAL PECIFICATIONS ITEM 7” DISPLAY 12.1” DISPLAY Operating System Windows CE 5.0 Windows CE 5.0 64 MB 128 MB Flash Drive 128 MB 128 MB TCP/IP 10 BASE-T/100 BASE-TX with SSL 10 BASE-T/100 BASE-TX with SSL • Max current: 3.3A @ 115 VRMS at 60 Hz •... -
Page 11: Section 2: Basic Operation
2: B ECTION ASIC PERATION... -
Page 12: Introduction
ARGO U ANUAL NTRODUCTION This section describes the basic operation of the terminal. The following topics are covered: . Describes the layout of the terminal’s control panel. ONTROL ANEL AYOUT . Describes the use of the alphanumeric keypads. EYPAD PERATION . -
Page 13: Function Keys
ARGO U ANUAL UNCTION The eight (8) keys, arranged in two four-key groups on left and right of screen, are called screen function keys. A screen function key is only active when a corresponding function or menu option is present next to that key. The function keys are designated F1 through F8, as shown below. -
Page 14: On-Screen Keypad Operation
ARGO U ANUAL CREEN EYPAD PERATION The virtual keypad will be displayed at any time a text entry is required. (Also available by pressing the F-8 function key.) This is used for certain management functions, as well as entering e-mail addresses where receipts can be sent paperless. (Some models will be equipped with paper thermal printers for the option to print receipts.) In models that do not have touch screen entry option, use the keys described below to navigate and enter required data. -
Page 15: Menu-Based Operation
ARGO U ANUAL ASED PERATION The terminal operates as a menu driven system. Messages and menu options presented on the LCD display screen guide the user’s actions. The desired menu option is selected by pressing one of the keys located to the left and right of the display. - Page 16 If the password is lost or forgotten, the password cannot be changed or recovered in the fi eld. The main board must be returned to Triton for a reset. A service charge will apply. If you will have additional people that will be accomplishing closes and replenishing cassettes, you may add them and provide passwords here.
-
Page 17: Customer Transactions
ARGO U ANUAL If you do not select a menu choice within 30 seconds, the terminal will automatically default to the Customer Welcome screen (a benefi t of this feature is that in the event of a power interruption, the terminal will automatically begin accepting customer transactions shortly after power is restored). - Page 18 ARGO U ANUAL ATM transaction processing. The ATM sends the customer transaction request to a processor. A processor is a fi nancial intermediary, such as an Independent Sales Organization (ISO), bank, or other fi nancial institution that provides transaction- processing services for ATMs. The ATM must be set up with a particular processor before customer transactions can take place.
-
Page 19: Voice-Enabled Transaction
(b) having the receipt sent to his phone as a text message, or (c) sent to an E-mail account. The E-mail information is not retained by the ATM or Triton, and will not be used for any marketing purposes. The account is not shown on the screen, only the * fi gures as the account is entered. - Page 20 ARGO U ANUAL 7” ARGO with printer and topper...
-
Page 21: Section 3: Cassette Close / Cash Replenishment
3: C ECTION ASSETTE LOSE EPLENISHMENT SCDU HCDU MiniMech NMD50... -
Page 22: Introduction
ARGO U ANUAL NTRODUCTION The purpose of this section of the manual is to describe the procedures for cassette closing and replenishment. Information concerning note handling and quality issues are explained where appropriate. ISPENSING ECHANISMS * PLEASE READ * The ARGO Model RL1713 production units are equipped with the MiniMech dispenser and have the shallow cabinet design. -
Page 23: Note Condition
ARGO U ANUAL ONDITION The number of rejects can be directly infl uenced by the technique used to load the cassettes and the quality of the currency. Notes loaded into the mechanism cassettes must be in fi t condition if a high level of performance (low reject and failure rate) is expected from the unit. -
Page 24: Cassette Close Procedures
ARGO U ANUAL ASSETTE LOSE ROCEDURES Follow access instructions to enter M . Select T . Select ANAGEMENT UNCTIONS ERMINAL LOSE UNCTIONS ASSETTE LOSE Select cassette to close. A check mark ( ) identifi es After cassette has been reinserted in the dispenser, which cassette is selected. -
Page 25: Replenish Cassette Procedures
ARGO U ANUAL EPLENISH ASSETTE ROCEDURES SCDU/HCDU Unlock and open the security cabinet door. Remove any rejected notes. The reject compartment is located above the cassette. To remove the note tray, grasp the tray handle, lift slightly, and slide the tray out of the mechanism. Place the note tray on a fl... - Page 26 ARGO U ANUAL Release the packer plate against the notes. Close the lid and lock with the security key. Using the handle, slide the note tray into the dispensing mechanism. Make sure the note tray is fully inserted! HCDU- repeat steps 1-7 for additional cassette. Ensure the Reject door is closed.
- Page 27 ARGO U ANUAL Slide cassette onto the loading tray. Lift lid to expose the reject tray. Remove any rejected notes. DO NOT recycle rejected notes! Cassette on Loading Tray Lid open to expose Reject Lift the reject tray. Push the packer plate to rear of cassette and latch in place.
- Page 28 ARGO U ANUAL Unlock and open the security cabinet door. To remove the note tray, grasp the tray handle and slide the tray out of the mechanism. Place note tray on a fl at level surface. Remove any rejected notes. The reject compartment is located nearest the handle side of the tray. Removing note tray from the Removing rejected notes.
- Page 29 ARGO U ANUAL NMD50 Removing Note Cassettes UNLOCK the cassettes through Management Functions. Press keys to route through from the Main Menu: Diagnostics (2) > Dispenser (4) > Cassette Parameters (8). Note: This is also accessable via Main Menu: Terminal Confi guration (6) > Cassette Setup (4) >...
- Page 30 ARGO U ANUAL Open the cassette by simultaneously pressing the release button and lifting the lid. Flip the lid back fully, allowing it to rest on the table or other fl at surface. Press release button and lift lid. Move the packer plate to the rear of the cassette (toward the handle).
- Page 31 ARGO U ANUAL Close the cassette lid. Fold the lid down to its locked position. The release button should pop out allowing the lid to mate cleanly with the body of the cassette. If applicable, lock the cassette with the cassette key. Replace the cassette into the dispenser using the reverse of the steps used to remove the cassette from the dispenser.
- Page 32 ARGO U ANUAL ISPENSER PERATION Close and lock the security cabinet. Verify the cassettes are Locked (NMD only) and In Service (multi-cassette use). All Cassettes Locked NOTE: The NMD50 cassettes is checked. MUST be Locked and In-Service (checked) for normal operation. Each cassette is checked for Cassette In Service.
- Page 33 ARGO U ANUAL 12.1” ARGO Deep cabinet...
-
Page 34: Section 4: General Maintenance
4: G ECTION ENERAL AINTENANCE 12.1” ARGO with topper... -
Page 35: Introduction
*IMPORTANT* Only qualifi ed service personnel are authorized to repair or service the terminal. Should a malfunction occur, DO NOT attempt to service the unit yourself! Contact your Triton certifi ed service provider! EPLENISHING THE ECEIPT APER NOTE: This operation must be completed with the AC power applied to the ATM. - Page 36 ARGO U ANUAL Remove the pape r and spool from the paper bracket. Remove the tab securing the end of the new paper roll to itself. Use scissors to cut off all of the paper up to Remove paper roll from bracket. and including the glue tab.
- Page 37 ARGO U ANUAL 10. Rotate the printer towards the front of the unit. Rotate printer open. 11. Check the blue lever to ensure it’s in the correct position as shown. If it is not in the position shown, move the lever to the correct position. (Lever moves to three positions.) Close the printer assembly and perform step 8 again.
-
Page 38: Cleaning The Enclosure
ARGO U ANUAL LEANING THE NCLOSURE The ATM front panel is highly durable, resisting scratches and fi nger smudges. However, occasional cleaning of the front panel and the plastic enclosure may be desirable. A soft dry or slightly damp cloth may be used for cleaning. - Page 39 ARGO U ANUAL Insert the cleaning card into the card reader and move in and out several times. Remove the cleaning card and turn over to use other side. Insert again several times. Remove cleaning card and discard. They are designed to be used only once.
-
Page 40: Section 5: Setup Basics
5: S ECTION ETUP ASICS 12.1” ARGO with printer No topper... -
Page 41: Introduction
ANUAL NTRODUCTION Triton ATMs require a minimum amount of confi guration in order to place them into fully functional order. These confi guration requirements are listed in the steps below. These are the minimum requirements for bringing the ATM live and in service. Please refer to the XScale/X2 Confi guration Manual for other, optional confi... -
Page 42: Change Master Password
ARGO U ANUAL HANGE ASTER ASSWORD (Resolves Error Code 246.) To change the master password, starting from the Main Menu: Press 4 (Password Maintenance). Enter the new password on the popup screen. Enter password only, not the “00” user ID of the Master. The password may consist of between 4-12 numeric digits. -
Page 43: Set Denomination
ARGO U ANUAL ENOMINATION (Resolves error code 186.) Denomination for each cassette must be set up. The process depends on what type dispenser is in the ATM. From the Main Menu, press 6 (Terminal Denomination setup steps from this point are Confi... - Page 44 ARGO U ANUAL 3) Press 7 (Multiple Amount). 4. A) MiniMech, SDD, SCDU, or HCDU (continued) 4) Enter the denomination amount. 5) Press Enter. 6) For HCDU with two cassettes, repeat 4) At prompt, remove selected cassette from these steps for the second cassette. the dispenser, then press Enter.
-
Page 45: Enter Host Phone Number
ARGO U ANUAL 4. C) NMD50 (continued) 9) Press 2 (All Cassettes Locked) to check C7) Press 6 (Cassette in Service) to place (lock) both cassettes. cassette in service (checkmark displays). 8) Repeat steps 2-7 for the other NMD cassette in the dispenser. NTER HONE UMBER... - Page 46 Host. See the XScale/X2 Configuration Press ENTER. Manual or contact Triton Technical Support for more help in setting up communication on your ARGO ATM. Press ENTER again to set changes.
-
Page 47: Enter Terminal Id
ARGO U ANUAL NTER ERMINAL (Resolves error code 189.) The terminal ID is provided by the host processor. From the Main Menu, press 6 (Terminal Enter the Terminal ID received from the Host Confi guration). Processor. When entering alpha characters, use the virtual keyboard. -
Page 48: Enter Master Keys
ARGO U ANUAL NTER ASTER (Resolves error code 190.) The following steps are for entry of the DES PIN Master Keys. Master Keys and information regarding them are provided by the Host Processor. On the Main Menu, press 7 (Key Management). A) T7 PCI EPP a) On Key Management menu, press 4 (Set Passwords). - Page 49 ARGO U ANUAL 3. A) T7 PCI EPP (continued) f) Re-enter new password to confi rm, and press ENTER. c) Enter default password (000000) for User 2, and press ENTER. g) Press 2 (Change User 2 Password) and repeat steps e) and f) for User 2. d) Press 1 (Change User 1 Password).
- Page 50 ARGO U ANUAL B) T5 PCI EPP c) Enter password for the user, and press ENTER. a) On Key Management menu, press 4 (Set Passwords). NOTE: On the T5 EPP, the password must be between 8-16 numeric digits. NOTE: Some hosts may provide the passwords for User 1 and User 2.
- Page 51 ARGO U ANUAL On the Key Management screen, press 1 (Enter Press ENTER to select the default setting of Master Keys). New Key. Enter PIN Master Key part A using the function keys and keypad schema shown on screen. Enter User 1 password, and press ENTER. Enter User 2 password, and press ENTER.
-
Page 52: Download Working Keys
ARGO U ANUAL 12. Press ENTER when prompted to add part to 14. Press ENTER when successful. existing key. 15. Press CANCEL and proceed to Download 13. Repeat steps 9-12 for part B of the Master Key. Working Keys. OWNLOAD ORKING (Resolves error code 188.) On the Key Management menu, press 2... - Page 53 It is now ready to process transactions. There are several other, optional confi guration features, but these complete the basic setup requirements. For further information, see the XScale/X2 Confi guration Manual or contact Triton Technical Support: North America: 1 (800) 259-6672 Outside of North America: +1 (228) 575-3100 12.1”...
- Page 74 UPPLEMENT T7 PCI-EPP ATTERY EPLACEMENT ROCEDURES SA-1...
- Page 75 Battery Case Spare battery connection EXISTING BATTERY - DO NOT REMOVE BEFORE CONNECTING A SPARE BATTERY FIRST! The spare battery for the T5 PCI-EPP may be purchased from Triton Systems: P/N 01300-00025 (T5 PCI-EPP Lithium Backup Battery) SA-2...
- Page 76 - minutes to replace with a spare battery before losing the data stored (keys, passwords) in the keypad. Battery Case The spare battery for the T7 PCI-EPP may be purchased from Triton Systems: P/N 01300-00023 (T7 PCI-EPP Lithium Battery) SA-3...
- Page 77 NTENTIONALLY LANK SA-4...
- Page 78 T5 PCI-EPP UPPLEMENT ANAGEMENT ROCEDURES T7 PCI-EPP...
- Page 79 T5 - T7 PCI-EPP (T5) / K ANAGEMENT ROCEDURES T5 PCI-EPP IFFERENCES WITH THE KEYPAD YOU MUST NOT REMOVE BATTERY FROM EPP FIRST WITHOUT CONNECTING A NEW BATTERY T5 EPP WILL BE PERMANENTLY DAMAGED IF UNPOWERED AND BATTERY IS REMOVED BEFORE CONNECTING A NEW BATTERY SER PASSWORDS MUST BE AT LEAST CHARACTERS...
- Page 80 B - K UPPLEMENT ANAGEMENT ROCEDURES /T5 PCI-EPP ANAGEMENT ROCEDURES INSTALLED > M NTER ANAGEMENT UNCTIONS REVIOUSLY USERS HAD TO ENTER THE > K ANAGEMENT (6) “Z ” INITIAL PASSWORD OF SIX EROS BEFORE BEING ALLOWED TO SET THE PASSWORDS HIS IS NO LONGER T5 PCI-EPP REQUIRED...
- Page 81 T5 - T7 “E ” ELECT NTER ASTER OPTION ENTERS THE FIRST KEY PART CHAR ). R ACTERS EFERENCE THE KEY LAYOUT DISPLAY BELOW HE MAIN KEYPAD WILL MIRROR THE NUMBER ALPHA NUMERIC KEYS <E > FTER ENTERING THE KEYS PRESS THE NTER FUNCTION...
- Page 82 B - K UPPLEMENT ANAGEMENT ROCEDURES “C ” HECK DIGITS PROMPT APPEARS “C ” HECK DIGITS PROMPT APPEARS <E >. RESS NTER OU WILL BE PROMPTED THAT THE KEY WAS SUCCESS FULLY CHANGED PROMPT APPEARS TO ENTER THE SECOND KEY PART <E >.
- Page 83 T5 - T7 /T7 PCI-EPP ANAGEMENT ROCEDURES INSTALLED > M T7 U NTER ANAGEMENT UNCTIONS SER PASSWORDS ARE INITIALLY SET TO > K (6) “Z VEPP) ANAGEMENT EROS SIMILAR TO BEFORE BEING AL LOWED TO SET THE PASSWORDS “S ” ELECT ASSWORD OPTION...
- Page 84 B - K UPPLEMENT ANAGEMENT ROCEDURES “E ” <A > ELECT NTER ASTER OPTION SE THE RROW KEY TO TOGGLE BETWEEN “N ” “A ” ( TO AN EXISTING KEY <E > RESS NTER FOR THE APPLICABLE ENTRY ENTERS THE FIRST KEY PART CHAR ).
- Page 85 T5 - T7 PROMPT APPEARS TO ENTER THE SECOND KEY PART OU WILL BE PROMPTED THAT THE KEY WAS SUC <E >. RESS NTER CESSFULLY CHANGED MAC M EPEAT SEQUENCE FOR ENTERING ASTER KEY ENTERS THE SECOND KEY PART CHAR IF REQUIRED ).
Need help?
Do you have a question about the ARGO RL1713 and is the answer not in the manual?
Questions and answers