Eaton Series 1 Repair Information
Hydrostatic fixed motors
Hide thumbs
Also See for Series 1:
- Parts and service (32 pages) ,
- Repair information (32 pages) ,
- Repair information (28 pages)

Related Manuals for Eaton Series 1


Summary of Contents for Eaton Series 1
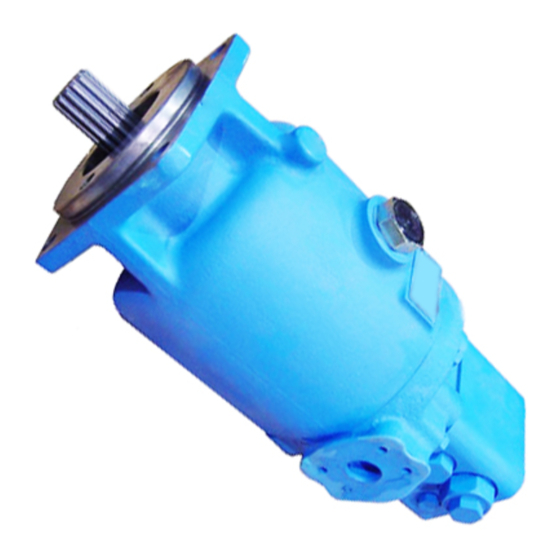
- Page 1 Eaton ® September, 1997 Hydrostatic Fixed Motors Repair Information Motors with Valve Blocks Motors with Integral Shuttle and Low Pressure Relief Valves Series 1 Models 33-64 Hydrostatic Fixed Motors...
-
Page 2: Table Of Contents
The purpose of this manual is to provide you with service information and procedures for disassembly and reassembly of Eaton Hydrostatic Fixed Displacement Motors (Series 1; Models 33, 39, 46, 54, and 64). Motors with valve blocks and motors with integral shuttle and low pressure relief valves are covered. - Page 3 Refer to specific part listings covering your Eaton motor when ordering replacement parts. Listings are available from the Hydraulics Division in Eden Prairie, MN. See example tag below for motor identification. When ordering replacement parts, you must include the following information: ID Tag A - Displacement (cu.in./rev.)
- Page 5 Item End Cover with Integral Shuttle Description Qty. and Low Pressure Relief Valve 18 Spacer ..................4 19 Retaining Strap ................2 20 Cap Screw ..................4 21 Cylinder Barrel Assembly ............. 1 22 Dowel Pin (5/16 x 5/8 long) ............5 23 Bearing Plate ................
-
Page 6: Disassembly Shaft Seal
Important: Cleanliness is extremely important when repairing a hydrostatic pump or motor. Before disconnecting the lines , clean foreign material from exterior of unit. Work in a clean area. Clean all metal parts in clean solvent. Blow parts dry with air. Don’t wipe parts with cloth or paper towel, because lint or other matter could cause damage. - Page 7 Disassembly 6. Remove O-rings and back-up rings from mounting face of valve block. Gage Port Motor with Valve Block Plugs Integral Shuttle and Low Pressure High Pressure Relief Valve Relief Valves Low Pressure Relief Valves Back Up O-rings Rings Square Cut Ring Figure 3 7.
-
Page 8: Disassembly/Reassembly Valve Block
Shuttle Valve Plugs Valve Block Valve Block Shuttle Valve Springs Shuttle Valve Shuttle Valve Plugs Shuttle Valves Figure 6 Shuttle Spool Shuttle Valve Spring Figure 4 13. Install shuttle spool and shuttle valves in valve block. 8. Use a 1 in. hex wrench to remove two shuttle valve plugs. Then remove shuttle valve springs. - Page 9 Valve Block Disassembly End Cover with Integral Shuttle and Low Pressure Relief Valve Low Pressure Relief Valve Low Pressure Shims Relief Valve Back Up Rings Shuttle Valve Square Cut Ring Figure 7 Gauge Port Plugs 15. Install two high pressure relief valves – as shown in Fig 5. Torque valve to 25 lb-ft [Nm].
-
Page 10: Disassembly End Cover
Standard End Cover Note: Use the same procedure to remove the end cover from the motor with integral shuttle and low pressure relief valve. Input Rotation Rotation Metering Slots MOTOR PUMP Figure 11 18. Pump valve plates are all unidirectional and motor valve plates are bidirectional. - Page 11 Bearing Puller and Special Tool – Low Clearance Bearing Puller (see page 19) 26. Carefully reposition motor on its side. Using 1/4 inch hex bit socket, remove two cap screws that retain swashplate in housing. 27. Remove washers from cap screws and discard. Replace with new washers.
- Page 12 Note: See Bearing Cone Assembly Tool Critical Page 18 Sealing Area Figure 17 33. Reposition cylinder barrel and swashplate so that the swashplate is in the down position. Using a 1/4 inch hex key to remove the cap screws from the retaining strap on one side of the swashplate.
- Page 13 Reassembly Next, measure thickness of both piston slipper flange and 37. Before reassembly of fixed displacement (fixed clearance) slipper retainer plate. Subtracting this measurement from motor, clean all parts and assemblies in clean solvent and spacer measurement gives fixed clearance of unit. Fixed blow them dry with compressed air.
- Page 14 46. Install two headless 5/16 inch cap screws (five to six inches long) in swashplate. These cap screws will guide swashplate into pocket in housing. 47. When installing cylinder barrel and swashplate into housing, align pin in housing with notch in swashplate. Figure 22 48.
- Page 15 53. Install two dowel pins and gasket on end cover. Shaft Bearing 54. Lubricate and install bearing shims and bearing cup into Cone end cover. Driver 55. Check output shaft subassembly end play by installing end (see cover without installing either valve or bearing plates. This page 17) remove cylinder barrel’s spring tension against output shaft.
-
Page 16: Reassembly Shaft Seal
Reassembly of Shaft Seal Valve Plate Important: For best sealing results, clean the metal-to metal seal surfaces with an aerosol cleaner such as Freon or Held Firmly trichlorethylene. This cleaner must evaporate and not leave in Position any residue. It must also be compatible with Viton. Do not touch these surfaces with hands. -
Page 17: Install Valve Block
Reassembly Install Valve Block 67. Install O-rings and back-up rings on valve block. The high pressure ports require an O-ring and back-up ring. The O- ring goes on first, then the back-up ring – with the rounded side of ring toward the O-ring – as shown in Fig 30. Install O-Ring square-cut ring in low pressure drain port of valve block. - Page 18 Tool – Shaft Rotating Seal Puller Available from Owatonna Tool Co. No. CAS - 1844 Pump Headless Input Cap Screw Shaft Guide Bearing Cone Remove head and grind end into cone Tool Tool – Limit Stop for Bearing Cone Installation Material –...
- Page 19 Low Clearance Bearing Puller 3/8-16 UNC - 26 Thread as shown 2 places NOTE: Grind Bore to Size After Splitting and Heat Treatment Model Number... Etched on this Face in 1/8 in. High Letters Material/ Heat Treat Stentor / 45 - 55 R Title Cone Bearing Puller...
- Page 20 Hydrostatic Fluid Recommendations A reputable supplier can help you make the best selection of hydraulic fluid for use in Eaton hydrostatic products. For satisfactory operation, the following recommendations apply: • The filter system used in the hydraulic circuit must be capable of maintaining the fluid at ISO Cleanliness Code 18/13 per SAE J1165.
- Page 21 Shanghai 200021 Tel: +41 (0) 21 811 4600 China Tel: 952-937-9800 Tel: 86-21-6387-9988 Fax: 952-294-7722 Fax: +41 (0) 21 811 4601 Fax: 86-21-6335-3912 www.eaton.com/hydraulics © 2008 Eaton Corporation All Rights Reserved Printed in USA Document No. E-MOPI-TS009-E Supersedes 07-127 November 2008...
Need help?
Do you have a question about the Series 1 and is the answer not in the manual?
Questions and answers