Advertisement
Advertisement

Related Manuals for Häfele HBO-3K65B


Summary of Contents for Häfele HBO-3K65B
- Page 1 495.06.285 HBO-3K65B INSTRUCTION MANUAL BUILT-IN ELECTRIC OVEN...
- Page 2 DEAR CUSTOMER, Caution!
-
Page 3: Table Of Contents
TABLE OF CONTENTS Safety instructions ......................4 Description of the appliance ..................... 8 Installation ......................... 10 Operation ........................... 12 Baking in the oven – practical hints ................16 Cleaning and maintenance ....................18 Technical data ........................24... -
Page 4: Safety Instructions
SAFETY INSTRUCTIONS Warning: The appliance and its accessible parts become hot during use. Care should be taken to avoid touching heating elements. Children less than 8 years of age shall be kept away unless continuously supervised. This appliance can be used by children aged from 8 years and above and persons with reduced physical, sensory or mental capabilities or lack of experience and knowledge if they have been given supervision or instruction concerning... - Page 5 SAFETY INSTRUCTIONS Danger of burns! Hot steam may escape when you open the oven door. Be careful when you open the oven door during it. Please note that depending on the temperature the steam can be invisible. resistant to high temperatures. to overheating or boiling over.
- Page 6 HOW TO SAVE ENERGY Using energy in a respon- sible way not only saves money but also helps the environment. So let’s save energy! And this is how you can do it: Do not uncover the pan too often (a watched pot never boils!). Do not open the oven door unnecessarily often.
- Page 7 DISPOSAL OF THE APPLIANCE UNPACKING During transportation, protec- ply be disposed of with normal tive packaging was used to household waste, but should protect the appliance against be delivered to a collection and any damage. After unpack- recycling centre for electric and ing, please dispose of all elements of packaging in a shown on the product, the...
-
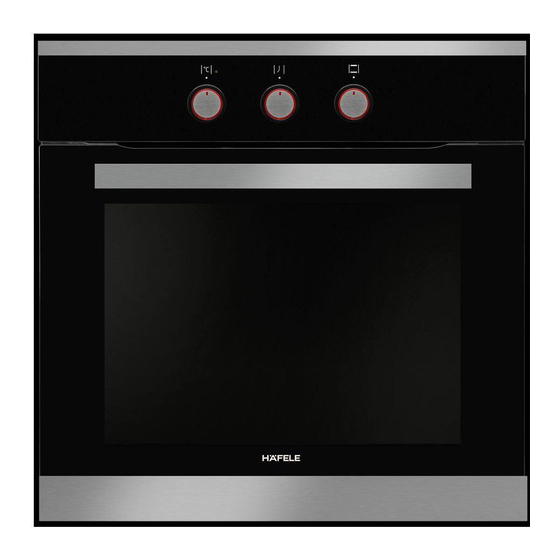
Page 8: Description Of The Appliance
DESCRIPTION OF THE APPLIANCE Electronic Temperature control... - Page 9 SPECIFICATIONS OF THE APPLIANCE Side Telescopic *optional...
-
Page 10: Installation
INSTALLATION Installing the oven The kitchen area should be dry and aired When installing the oven, easy access to all control elements should be ensured. This is a Y–type design built–in oven, which means that its back wall and one side wall can be placed next to a high piece of furniture or a wall. - Page 11 INSTALLATION Electrical connection The oven is manufactured to work with length with a plug including a protection contact. A connection socket for electricity supply pin and may not be located above the cooker. After the cooker is positioned, it is necessary to make the connection socket accessible to the user.
-
Page 12: Operation
OPERATION Timer The function of this timer is not only to provide Remove packaging, clean the interior of a warning signal about an expiring of time the oven. given before, but also have a built-in auto- timers have a sign on a scale. - Page 13 OPERATION Oven with automatic air circulation (including a fan and an ultra-fan Independent oven lighting heater) Set the knob in this position to light up The oven can be heated up using the bottom the oven interior. and top heaters, the grill or the ultra-fan he- Rapid Preheating function you should turn the knob to the se- Top heater, roaster and fan on.
- Page 14 OPERATION Bottom heater on Convection with ring heating ele- When the knob is set to this position ment and bottom heater on the oven is heated using only the With this setting the convection fan bottom heater. Baking of cakes from and bottom heater are on, which in- creases the temperature at the bottom the bottom, moist cakes, pizza.
- Page 15 OPERATION Use of the grill The grilling process operates through infrared rays emitted onto the dish by the incandes- cent grill heater. Set the oven knob to the position marked grill the oven door shut). cooking level; and if you are grilling on the grate insert a tray for dripping on the level Close the oven door.
-
Page 16: Baking In The Oven - Practical Hints
BAKING IN THE OVEN – PRACTICAL HINTS Baking we recommend using the baking trays which were provided with your cooker; it is also possible to bake in cake tins and trays bought elsewhere which should be put on the drying rack; for baking it is better to use black trays which conduct heat better and shorten the baking time;... - Page 17 BAKING IN THE OVEN – PRACTICAL HINTS Oven with automatic air circulation (including a fan and an ultra-fan heater) Type Oven Temperature Level Time in minutes functions dish 160 - 200 2 - 3 160 - 180 2 - 3 20 - 40* 140 - 160 2 - 3...
-
Page 18: Cleaning And Maintenance
CLEANING AND MAINTENANCE By ensuring proper cleaning and mainte- Important! nance of your cooker you can have a sig- Do not use any abrasive agents, harsh detergents or abrasive ob- operation of your appliance. jects for cleaning. Before you start cleaning, the cooker must Only use warm water with a small addition of dishwashing liquid to that all knobs are set to the “... - Page 19 CLEANING AND MAINTENANCE Db have stainless steel sliding telescopic wire shelf supports. To remove them for runners attached to the wire shelf sup- washing, pull the front catch, then tilt the ports. The telescopic runners should be support and remove from the rear catch. removed and cleaned together with the wire shelf supports.
- Page 20 CLEANING AND MAINTENANCE Replacement of the oven light bulb In order to avoid the possibility of an electric shock ensure that the appliance is Set all control knobs to the position “ ”/“0” and disconnect the mains plug, unscrew and wash the lamp cover and then wipe it dry.
- Page 21 CLEANING AND MAINTENANCE Removing the inner panel Door removal per door slat, prying it gently on the sides chamber for cleaning, it is possible to remove the door. To do this, tilt the safety catch part the hinge is correctly placed on the protrusion the oven, the safety catch should be carefully set it may cause damage to the hinge when closing the door.
- Page 22 CLEANING AND MAINTENANCE 3. Pull the inner glass panel from its seat Regular inspections Besides keeping the oven clean, you 4. Clean the panel with warm water with should: some cleaning agent added. Carry out the same in reverse order to trol elements and cooking units of the cooker.
- Page 23 CLEANING AND MAINTENANCE Regular inspections Caution! Besides keeping the oven clean, you All repairs and regulatory activities should: should be carried out by the ap- carry out periodic inspections of the con- propriate service centre or by an trol elements and cooking units of the cooker.
-
Page 24: Technical Data
TECHNICAL DATA Power rating max. 3,1 kW The Manufacturer hereby declares that this product complies with the general requirements pursuant to the following European Directives: The Low Voltage Directive Electromagnetic Compatibility Directive 2014/30/EC, ErP Directive 2009/125/EC, and therefore the product has been marked with the symbol and the has been issued to the manufacturer and is available to the competent authorities regulating the market.
Need help?
Do you have a question about the HBO-3K65B and is the answer not in the manual?
Questions and answers