Table of Contents
Advertisement
Quick Links
Advertisement
Table of Contents

Related Manuals for RADWAG HY10 Series


Summary of Contents for RADWAG HY10 Series
- Page 2 SEPTEMBER 2020...
- Page 3 PRECAUTIONS Prior to installation, use or maintenance activities, carefully read this user manual. Use the PUE HY10 Indicator only as intended. Prior to the first use, carefully read this user manual. Use the device only as intended. Place weighed loads in the centre of the weighing pan. Load the weighing pan with loads of gross weight which does not exceed the maximum capacity.
-
Page 4: Table Of Contents
Contents 1. INTENDED USE ..............................5 2. WARRANTY CONDITIONS ..........................5 3. MAINTENANCE..............................6 3.1. Cleaning Stainless Steel Components ......................6 3.2. Cleaning ABS Components......................... 6 3.3. Cleaning Platform Scales for Meat Industry ....................6 4. SERVICE AND REPAIR ............................. 8 5. -
Page 5: Intended Use
(mouse, keyboard, USB flash drive). 2. WARRANTY CONDITIONS A. RADWAG feels obliged to repair or exchange all elements that appear to be faulty by production or by construction. B. Defining defects of unclear origin and means of their elimination can only... -
Page 6: Maintenance
3. MAINTENANCE In order to ensure safety in the course of cleaning, it is necessary to disconnect the device from the mains. With this condition met, uninstall the weighing pan and other detachable components. Cleaning of the weighing pan while still installed may cause damage of the measuring system. - Page 7 These are much more resistant to long-lasting harsh conditions typical for slaughterhouses and livestock purchase sites. Powder-coated livestock scales can be used for rare small volume production, they must be stored clean in dry storage area and can be washed using water with detergent. Do not use any agents or cleansers that are not intended to come into contact with skin (i.e.
-
Page 8: Service And Repair
In case of any sign of damage, it is necessary to disconnect the device form the mains immediately. The damaged component must be replaced or repaired by RADWAG service directly. In case of any problems with correct operation of the scale, contact the closest manufacturer's service point. -
Page 9: Mechanical Design
6. MECHANICAL DESIGN 6.1. 1-Load-Cell Scales 1-load-cell HY10 scale is intended to carry out fast and precise mass measurement of up to 300 kg loads. Its characteristic feature is a platform with one load cell only. The platform is equipped with a stainless steel weighing pan. -
Page 10: Scales With Load-Cell Modules
Multiple load cell scale design, the main components Multiple load cell scale design, the main components: 1 - weighing pan, 2 - load cells, 3 - feet. 6.3. Scales with Load-Cell Modules HY10 scale with load cell modules is intended to carry out mass measurement of silos. -
Page 11: Dimensions
6.4. Dimensions For overall dimensions read product card of a respective scale, the product cards are to be found on RADWAG website www.radwag.pl. 6.5. Connectors PUE HY10 indicator, connectors Grounding terminal. Power cord cable gland. USB A connector. USB M12 4P connector. -
Page 12: Pins Assignment
Spot intended for cable gland / additional equipment connector (Vk2, 12OUT, PROFIBUS OUT) – mounted depending on indicator type, by default plugged. Spot intended for cable gland / additional equipment connector (Vk1, RS485, Analog OUT) – mounted depending on indicator type, by default plugged. RS232 (3) M12 8P connector, optional. -
Page 13: Technical Specifications
Pin1 – IN1 Pin2 – IN2 Pin3 – IN3 Pin4 – IN4 4INPUTS Pin5 – COM Pin6 – 24VDC Pin7 – GND Pin8 – NC 6.7.1. Technical Specifications Output parameters Output quantity Output type Solid-state relay Cable cross-section 0.14 - 0.5 mm Maximum output current 0.5 A DC Maximum output voltage... -
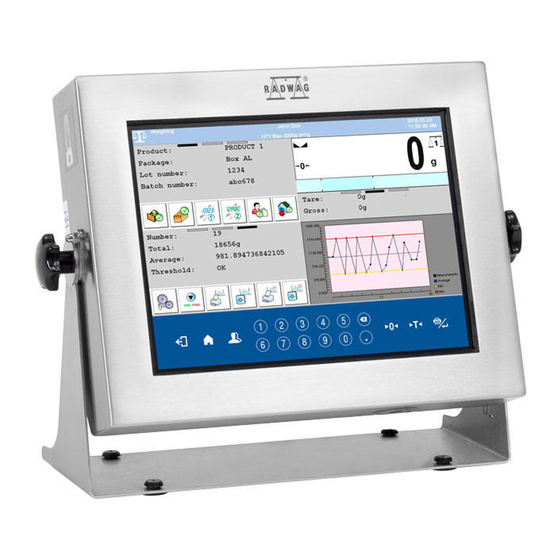
Page 14: Operation Panel
6.8. Operation Panel Keys Press to go back Press to enter the menu. Press to go to the home screen. Press to log in. Press to zero the scale. Press to tare the scale. Press to send the weighing result to a printer or a computer. Press to delete the last character. -
Page 15: Installation
7. INSTALLATION 7.1. Unpacking and Installation Mind not to damage cable connecting the indicator and a weighing platform. 7.1.1. 1-Load-Cell Multifunctional Scales Take the device out of the packaging. Place the device on a flat and even surface. Keep it away from any sources of heat. -
Page 16: Track Scales: Hy10.2K Series
The scale is installed on a rail of the load-bearing structure of the suspended track, the load cell is installed in a particular section of the track. The scale must be installed by an authorized RADWAG service exclusively, otherwise the warranty gets null and void. -
Page 17: Levelling: 1-Load-Cell Platform Scales
7.2. Levelling: 1-Load-Cell Platform Scales It is necessary to level the scale, do it by turning its feet. Keep turning the feet until the air bubble takes central position. 7.3. Levelling: 4-Load-Cell Platform Scales To level the platform use the levelling feet and the level indicator. Each foot can be turned left and right, turning causes tilt. -
Page 18: Home Screen
8. HOME SCREEN The home screen can be divided into 2 sections: a top bar, a workspace. Home screen layout: Detailed instruction on how to configure the home screen is to be found in „PUE HY10 Indicator Software Manual”. 8.1. Top Bar The top bar displays the following information: Working mode name and symbol. -
Page 19: Workspace
8.2. Workspace The workspace is placed under the top bar, it features 4 screens, programmable for each working mode. You can customize the workspace freely. 9. OPERATING THE MENU Due to a colour display and a touch panel, operation of the HY10 indicator menu is intuitive and simple. -
Page 20: Return To Weighing
Press to clear edit box content. Press to enable/disable an on-screen keyboard. Press to read printout template saved to *.lb file (the button becomes active upon USB flash drive connection). Press to save the template to *.lb file (the button becomes active upon USB flash drive connection). -
Page 21: Operation Conditions For Special Scales
In case of eccentric loading make sure that: a) the weight of loads placed close to one of the pan edges does not exceed ½ of the max capacity, b) the weight of loads placed in the pan corner does not exceed 1/3 of the max capacity. - Page 22 ramp scales (trucks used in meat plants); it is necessary to select platform matching the span of truck casters, this is to make sure that in case of trucks of weight close to maximum capacity the load is transferred onto platform close to load-carrying sections (profiles): ...
-
Page 23: Diagrams Of Connection Cables
11. DIAGRAMS OF CONNECTION CABLES Indicator - computer cable Indicator - printer cable (EPSON) Indicator - printer cable (ZEBRA) - Page 24 USB adapter cable Indicator – barcode scanner cable (LS2208) Indicator – PRINT, TARE, ZERO, STOP cable...
-
Page 25: Technical Specifications
Indicator - IN/OUT cable „Scale-Ethernet” cable is a standard network cable terminated with RJ45 connectors on both ends. 12. TECHNICAL SPECIFICATIONS For technical specifications of respective scales go to RADWAG website www.radwag.pl. 13. ERROR MESSAGES...
Need help?
Do you have a question about the HY10 Series and is the answer not in the manual?
Questions and answers