
Related Manuals for RADWAG HRP.R Series


Summary of Contents for RADWAG HRP.R Series
- Page 1 HRP .R high resolution scales Manual number: IMMU-19-01-07-28-EN RADWAG BALANCES AND SCALES www.radwag.com...
- Page 2 JULY 2015 - 2 -...
-
Page 3: Table Of Contents
TABLE OF CONTENTS 1. GENERAL INFORMATION ..............7 Connectors overview .................. 8 Intended use ....................9 Usage precautions ..................10 Warranty ....................10 Metrological parameters monitoring............10 User manual significance ................10 Staff training ..................... 10 2. TRANSPORT AND STORAGE ............11 Delivery check .................. - Page 4 10.3 User unit ....................41 11. MISCELLANEOUS PARAMETERS ............. 42 11.1 Available menu languages ................ 42 11.2 Accesss levels ..................42 11.3 ‘Beep’ sound – reaction on pressing function button ........ 43 11.4 Backlight and adjusting display brightness ..........43 11.5 Backlit turn-off time ...................
- Page 5 17.2.4 Return to weighing mode............87 17.3 Checkweighing ..................87 17.3.1 Declaring threshold values ............88 17.3.2 Return to weighing mode............90 17.4 Dosing ...................... 90 17.4.1 Entering target weight ..............91 17.4.2 Return to weighing mode............93 17.5 Percent Weighing ..................93 17.5.1 Reference Weight determination by weighing ......
- Page 6 20.2.1 Format of data sent as response for commands generated from a computer ................128 21. COMMUNICATION PROTOCOL ............130 21.1 List of commands ..................130 21.2 Response format to commands sent from a computer level ....132 21.3 Commands overview ................132 22.
-
Page 7: General Information
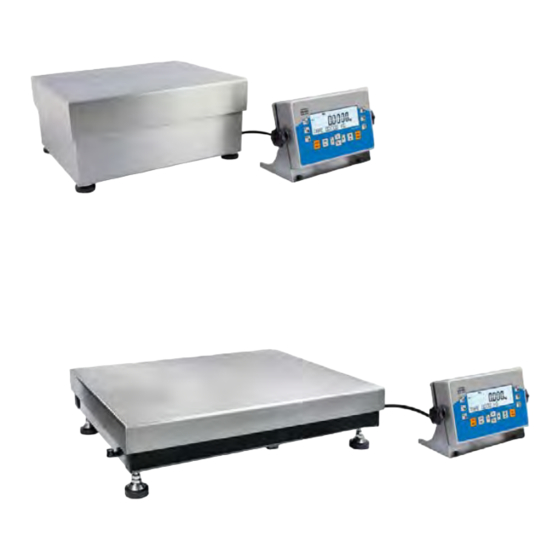
GENERAL INFORMATION Dimensions: HRP 16, HRP 32, HRP 62 Dimensions: HRP 150 - 7 -... -
Page 8: Connectors Overview
1.1 Connectors overview HRP 16, HRP 32, HRP 62 scales HRP 150 scales - 8 -... -
Page 9: Intended Use
High resolution weighing platform, HRP.R, features the following interfaces: 1xRS 232, 2xIN (PRINT/TARE). Data safety and archiving is assured by software dedicated for RADWAG terminals. Features: Brand new design of the electromagnetic mechanism housed in a •... -
Page 10: Usage Precautions
1.3 Usage precautions Do not use the scale as a dynamic weighing instrument. Even if small quantities of weighed material are added or removed from the weighing pan of the instrument, the reading should be taken only after stabilisation of the measurement results. Do not place any magnetic materials on the weighing pan, as this can cause damage to the measuring system of the instrument. -
Page 11: Transport And Storage
TRANSPORT AND STORAGE 2.1 Delivery check Please check the packaging immediately upon delivery, while unpacking the device make sure that there are no visible signs of external damage. 2.2 Packaging Please retain all parts of the original packaging should the scale be transported in the future. -
Page 12: Unpacking, Installing And Testing
UNPACKING, INSTALLING AND TESTING 3.1 Place of use and installation The scale should be stored and used in locations free of vibrations and • shakes, and free of air movement and dust. Ambient air temperature should not exceed the range of: +10 °C ÷ +40 °C. •... - Page 13 HRP 150 platform installation Take the scale out of its packaging, make sure that you touch „OUTER FRAME” only. Connect the terminal and the weighing module. - 13 -...
- Page 14 Install mandrels for the weighing pan. Disassembly transport lock by undoing screws and removing fixing washers. - 14 -...
-
Page 15: Levelling
Install the weighing pan. 3.3 Levelling Before plugging the device to the mains, level it by turning its feet. Keep turning the feet until an air bubble takes central position of the level indicator ring. Make sure that your device is placed firmly on all its feet. -
Page 16: Connecting Peripherals
First, display unit test is carried out (all the elements and pictograms are backlit for a short time), next, the name and the program number appear consequently, the indication is ZERO (with scale-related reading unit). During scale start-up, internal adjustment mechanism is tested (single location and elevation of the internal mass adjustment). -
Page 17: Basic Functions
BASIC FUNCTIONS Unit-related functions: weighing in grams [g], • weighing in milligrams [mg] (devices with d≤0.001g), • weighing in kilograms [kg] (devices with d≥0.01g, • weighing in carats [ct], • weighing units from beyond • [lb], [oz], [ozt], [dwt], [tlh], [tls], [tlt], [tlc], [mom], [gr], [ti], [N], [baht], [tola]. Operating modes: parts counting, •... -
Page 18: Keyboard
KEYBOARD Press to switch the display ON/OFF. If switched off, components other than the display are powered, the device is in stand-by mode. F9 button of the computer keyboard. Press to enter databases and data recorded for particular database: user, product, tare. F10 button of the computer keyboard. - Page 19 Press to enter home menu. F7 button of the computer keyboard. Navigating arrows for operating menu or changing parameter value. - 19 -...
-
Page 20: Start-Up
START-UP When plugged to the mains, the scale displays program name and number, next it proceeds to the weighing mode. 6.1 Temperature stabilization period Prior to measurement it is necessary to wait until the scale stabilizes thermally, For scales stored in much lower temperatures before plugging to the mains (e.g. during winter period), thermal stabilisation period shall take 4 –... -
Page 21: User Menu
USER MENU The menu comprises 6 parameter groups. Each group features its own symbol starting with a capital letter, P. 7.1 Operating user menu The user operates the menu pressing overlay buttons: Press to enter the main menu. Press to select group of parameters one by one downwards or to change parameter value by one value down. - Page 22 Press to insert a character while editing text values, e.g. user name. ADJUSTMENT P1.1 INT.CALIB [internal adjustment] P1.2 EXT.CALIB [external adjustment] P1.3 USER CALIBRATION [user adjustment] P1.4 CALIBRATION TEST [adjustment test] P1.5 AUTO.CALIB. NONE [automatic adjustment] P1.6 AUTO.CALIB.C [time of automatic adjustment] OPERATING MODE P2.1 ACCESSIBILITY...
- Page 23 INTERVAL [setting intervals continuous transmission] E2R SYSTEM YES/NO [turning on/off cooperation with E2R system] P4.2 PRINTER COM1/COM2/USB/WI [printer connection port] FI/PENDRIVE/USB PC/NONE P4.3 BARCODE COM1/COM2/NONE [barcode reader port] READER P4.4 ADD.DISPLAY COM1/COM2/NONE [additional display port] P4.5 EXT.BUTTONS TARE/PRINT PRINTOUT P5.1 CAL.REPORT [contents of the adjustment report] P5.2...
-
Page 24: Return To Weighing
INFO P7.1 BALANCE ID P7.2 SCALE TYPE P7.3 PROG. VER. P7.4 TEMP. [temperature] P7.5 SETUP PRNT. [scale parameters printout] UNITS P7.1 ACCESSIBILITY [declaration of units to be available for scale operation] P7.2 START UNIT [selection of a start unit, unit active on scale start-up] P7.3 USER UNIT U1... -
Page 25: Logging In
LOGGING IN In order to have full access to user parameters and be enabled to edit databases, the scale operator should log in as <ADMINISTRATOR> each time running the scale. The software enables the entry of 10 users with various access rights. First logging in procedure Go to the main window and press button or a respective function... - Page 26 Permissions level dependent access to edition of user parameters, databases and software functions. Permissions Available operations level Operator Free editing of parameters of <Readout> submenu. Modification of settings for <Misc.> parameter group, except for settings for <Date and Time>. The operator can start and carry out all weighing processes. operator preview information...
-
Page 27: Weighing
WEIGHING 9.1 Good weighing practice In order to ensure long lasting use of the device and reliable measurement of weighed loads, follow the guidelines below: Start the scale with no load on a weighing pan (permissible value of load • on the weighing pan on scale start is ±10% of its maximal capacity). -
Page 28: Zeroing
variation at a workstation greater than 3°C). The procedure of scale adjustment is described further down this user manual. Prior to measurement, it is recommended to load the weighing pan a few • times with mass close to scale max capacity. Check if unloaded scale indicates “precise zero”... -
Page 29: Tarring
CAUTION! Zeroing the display indication is possible only within the ±2% range of instrument’s maximal capacity. If the zeroed value is above the ±2% of the maximal capacity, then the software indicates an error message Err2. 9.3 Tarring Tarring is a function allowing to determine net weight of a measured object. In order to determine net weight of the object, place object’s container (packaging) on the weighing pan, and on stabilization of measurement result press key. -
Page 30: Weighing Mode Settings
Use arrow buttons to select the tare which is to be recalled and press • button, The scale returns to the weighing mode, the display indicates entered tare • value with minus „–" sign. For any operating mode, press button. •... -
Page 31: Filter Level Setting
P2.2.3 – PRINT MODE P2.2.3.1 – MODE [EACH / WHEN STAB. / AUTO] P2.2.3.2 – AUTO. PROG P2.2.4 – INFORMATION [TARE / NETTO / GROSS / USER / PRODUCT / /NSTD. INF. / NONE] P2.2.5 – INF. NSTD. (non-standard information – any text, max 19 characters) P2.2.6 –... -
Page 32: Value Release
9.4.2 Value release Since ambient conditions at a workplace vary, it is necessary to determine the value release parameter in a most preferable way enabling scale adaptation, parameter options are: FAST.+REL., FAST or RELIABLE. Depending on selected option, weighing time is either shorter or longer. 9.4.3 Autozero function The software features autozero function (Auto) ensuring precise mass indication. -
Page 33: Last Digit Display
9.4.4 Last digit display Function enables displaying the last digit on a display. 9.4.5 Ambient conditions Ambient conditions parameter features two settings: STABLE and UNSTABLE. Selecting STABLE mode makes the scale work much faster, ie. weighing takes much less time than for UNSBABLE mode. This parameter relates to ambient and environmental conditions in which the scale operates. -
Page 34: Printout Mode
Wait until the measurement indication is stable, automatic tarring of the • packaging weight proceeds (Net marker appears in the upper part of the display), Put product that is to be packed on the packaging; • Display shows a net weight of the product; •... - Page 35 <AUTO> select this option enable automatic printing • measurements. If this option has been selected, remember to select <AUTO THRES > parameter to suit your needs. Automatic operation procedure: Press button to zero the scale (marker of stable measurement • and zero marker are displayed).
-
Page 36: Temporary Measuring Unit
For automatic operation function, the measurement is not send from the computer to the printer as long as the mass measurement stays within the set value range <P 2.2.3.2 PROG THRES>. 9.7 Temporary measuring unit Temporary measuring unit function is designed to enable selection of a measuring unit which is to be indicated next to mass reading during the operation. - Page 37 <BARGRAF> option presents amount of used weighing capacity in a graphic form, it concerns 0 – MAX range. Display with bargraph option activated for scale with 1000 g Max capacity: 500 g heavy load placed on a weighing pan means that 50% of max capacity has been used (half-filled bargraph bottom line).
-
Page 38: Non-Standard Information
9.9 Non-standard information Function designed to enable declaring non-standard information, which is to be displayed in the bottom line of the display. A user can insert any text consisting of maximum 19 characters. It should be remembered that if the declared non-standard information is to be visible, parameter P2.1.2 should be set to <... -
Page 39: F Shortcut Keys
9.10 F shortcut keys Function designed to enable assigning quick access for weighing functions which are to be accessible by pressing F1, F2, F3 or F4 keys. As a user you can choose between the following options for <WEIGHING> mode: <NONE / ENTER TARE / PRINT HEADER / PRINT FOOTER / VARIABLE 1 / VARIABLE 2>. -
Page 40: Units
UNITS P8 UNITS parameter group is designed to enable the user to change availability of mass units in-course of scale operation and to define two user units, thus positively effecting comfort and speed of operation. It is possible to change unit during weighing mode operation or during operation of other modes. -
Page 41: User Unit
10.3 User unit The user may declare two units. The user unit is a result of indication multiplied by coefficient given for the user unit. The units are displayed as [u1] – user unit 1, and [u2] – user unit 2. Procedure for declaration of a coefficient for the user unit: - 41 -... -
Page 42: Miscellaneous Parameters
MISCELLANEOUS PARAMETERS Miscellaneous parameters menu is designed to provide scale customization providing more comfortable operation. The parameters are to be found in parameters group P6 MISC. Settings modification for particular parameters of this parameter group proceeds likewise as described in the previous section. MISC P6.1 LANGUAGE... -
Page 43: Beep' Sound - Reaction On Pressing Function Button
11.3 ‘Beep’ sound – reaction on pressing function button Parameter designed to enable switching on/ switching off the ‘beep’ sound responsible for informing a user about pressing any key of scale overlay. - ‘beep’ sound switched off - ‘beep’ sound switched on. 11.4 Backlight and adjusting display brightness Parameter designed to enable setting the brightness of the backlight, or switching... -
Page 44: Date
– time given in minutes 1; 2; 3; 5;10 If the software registers stable indication for a specified time interval, set in parameter <P6.6 AUTO OFF> settings, than the display is turned-off immediately (inactive backlight function, no indication on the display, clock displayed). To run the scale, it is necessary to press button located on the terminal keypad. -
Page 45: Time Format
MM – month DD – day 11.10 Time format Parameter designed to enable altering time format on the printout [12H / 24H]. For the value [12H], in parameter P6.6 TIME, letters <A> or <P> are displayed next to the time value. Where: A - hours before noon, P - hours after noon. - Page 46 Test results: *Deviation for Max. *Value of repeatability of indication expressed as standard deviation An exemplary report: ............--------- GLP Autotest: Report --------- Balance type PS 3000.R2 Balance ID 400010 User Admin Software rev. v.0.4.9 Date 2013.07.16 Time 09:17:16 ----------------------------------------------- Number of measurements Reading unit 0.001/0.01 g...
- Page 47 - 47 -...
-
Page 48: Information On The Device
INFORMATION ON THE DEVICE INFO menu includes information on the device and its software. The parameters are strictly informative. Once the parameter <PRINT. SET> is chosen, the scale settings are sent to the printer (all parameters). The parameters are transferred via port selected for <PRINTERS>. -
Page 49: Adjustment Procedure
ADJUSTMENT PROCEDURE Adjustment procedure is performed in order to ensure the highest weighing accuracy, it is required to carry out the adjustment procedure once a while. For adjustment performance, introduce a corrective factor of indications to scale memory, remember to refer the said factor to a mass standard. Adjustment should be carried out: before the beginning of weighing procedure, •... - Page 50 Successive weighings can be carried out for about 2 minutes, no longer. • After 2-minute time interval, message ‘CAL_30’ is displayed, countdown • timer counting seconds from 30..29..28 to 0 is run. The user has 30 seconds to make a decision on next steps: •...
-
Page 51: Adjustment Menu Parameters
13.2 Adjustment menu parameters ADJUSTMENT P1.1 INT.CALIB [internal adjustment] P1.2 EXT.CALIB [external adjustment] P1.3 USER [user adjustment] CALIBRATION P1.4 CALIBRATION [adjustment test] TEST P1.5 AUTO.CALIB. NONE/TIME/TEMP/BOTH [automatic adjustment] P1.6 AUTO.CALIB.C [time automatic adjustment] INT.CALIB – internal adjustment Start of an internal adjustment process. Adjustment is carried out automatically, no user assistance is required. -
Page 52: Manual Adjustment
CALIBRATION TEST – adjustment process test Fuction designed to enable comparison of intenal adjustment weight with its value saved in scale memory. The process is carried out automatically, its result is displayed on the screen (if the scale is connected via communication port with a computer or a printer, the adjustement test result is printed out). -
Page 53: External Adjustment
The scale performs internal adjustment automatically. During adjustment process do not load the weighing pan with any load. The message <DO NOT TURN OFF CALIBRATION> is displayed in the bottom line. Once adjustment process is completed, scale saves its result in memory and returns to weighing mode. CAUTION! - Press Esc button to abort adjustment process. -
Page 54: Report On Adjustment - Printout
First declare the mass of a weight that is to be used for adjustment. The mass must be ≥ 30% Max capacity. Once the mass of the weight is entered and confirmed, a message prompting the user to remove the weight from the pan is displayed: <REMOVE MASS> (the weighing pan must be empty). -
Page 55: Determining Printout Content
DETERMINING PRINTOUT CONTENT 14.1 Report on adjustment CAL. REPORT group of parameters is designed to enable declaring data that is to be printed on an adjustment printout. P5.1 CAL.REPORT P5.1.1 PROJECT P5.1.2 CALIB. TYPE P5.1.3 USER P5.1.4 PROJECT P5.1.5 DATE P5.1.6 TIME P5.1.7... -
Page 56: Header Printout
CAL. DIFFER Option enables printing out the difference between mass of an adjustment weight measured during the last adjustment and the current measured mass of this weight. DASHES Option enables printing out dashes that separate the date of a printout from a signature. SIGNATURE Option enables providing an area for the signature of a user performing the adjustment. - Page 57 P5.2.11 EMPTY LINE P5.2.12 CAL.REPORT P5.2.13 NON-STANDART NONE PRNT. NSTD.PRN. 1 NSTD. PRN. 2 NSTD.PRN.3 NSTD. PRN.4 Variable Overview DASHES Option enables printing out separating dashes. WORKING MODE Option enables printing out the name of a working mode. DATE Option enables printing out the date of the carried out adjustment.
-
Page 58: Glp Printout - Measurement Result Section
For parameter P5.2.13 select: NONE / NSTD.PRN. 1 / NSTD. PRN. 2 NSTD.PRN.3 / NSTD. PRN.4 For instruction on entering non-standard printouts read later sections of this user manual. Printout example 14.3 GLP PRINTOUT – measurement result section GLP PRINTOUT group of parameters is designed to enable declaring data that is to be printed on the measurement result printout. -
Page 59: Footer Printout
out adjustment. TIME Option enables printing out the time of the carried out adjustment. USER Option enables printing out the name of a logged-in user. PRODUCT Option enables printing out the name of a currently selected product. VARIABLE 1 Option enables printing out the value of VARIABLE VARIABLE 2 Option enables printing out the value of VARIABLE Option enables printing out net weight value in a... - Page 60 P5.4.2 DATE P5.4.3 TIME P5.4.4 SCALE TYPE P5.4.5 BALANCE ID P5.4.6 USER P5.4.7 PRODUCT P5.4.8 VARIABLE 1 P5.4.9 VARIABLE 2 P5.4.10 DASHES P5.4.11 EMPTY LINE P5.4.12 CAL.REPORT P5.4.13 SIGNATURE P5.4.14 NON-STANDART NONE PRNT. NSTD.PRN. 1 NSTD. PRN. 2 NSTD.PRN.3 NSTD. PRN.4 Variable Overview WORKING MODE...
-
Page 61: Non-Standard Printouts
manual). SIGNATURE Option enables providing an area for the signature of a user performing the adjustment. NSTD. PRNT. Option enables printing out one of 100 non-standard printouts on the footer printout. You can choose one of the following options: NONE / non-standard printout name. -
Page 62: Inserting Texts
14.5.1 Inserting texts Variables with the same values for all operating modes. Printout of a “%” character Current net mass in the current unit Current net mass in the basic unit Current gross mass in the basic unit Current tare mass in the basic unit Current date Current time Scale number... - Page 63 Every single printout can contain max 160 characters (letters, numerals, non- standard characters, spaces). A user can apply non-standard characters depending on type of data that is to be printed out. Example 1: “RADWAG” DATE: <current measurement date> TIME: <current measurement time> PRODUCT MASS: <current mass indication>...
- Page 64 Example 2: To crop the paper after the printout has been carried out by EPSON printer (if the printer is equipped witth an autocutter blade) the user must select (for a given printout: HEADER, GLP PRINTOUT or FOOTER) an option of non-standard printout 1, 2, 3 or 4 with <%E>...
-
Page 65: Variables
14.6 Variables Variable is defined as alphanumeric data which can be linked to printouts, products or other information related to weighing. Every variable is characterized by its content, the content must be given. Variables are used for entering various data during the weighing process, e.g. -
Page 66: Databases
DATABASES Scale software features three editable databases (USERS, PRODUCTS, TARES) and two non-editable databases storing measurements (WEIGHINGS, ALIBI). Data saved within particular databases: USERS – 100 different users. PRODUCTS – 1000 different products. TARES – 100 different masses of the packaging. WEIGHINGS –... - Page 67 Permissions level dependent access to edition of user parameters, databases and software functions. Permissions Available operations level Operator Free editing of parameters of <Readout> submenu. Modification of settings for <Misc.> parameter group, except for settings for <Date and Time>. The operator can start and carry out all weighing processes. operator preview information...
- Page 68 With new user name entered, provide remaining data. User code – Max 6 characters User password – Max 8 numbers Access level Language Once all of the data is entered, return to the weighing mode. In order to select a user, follow the logging-in procedure described in section 8. - 68 -...
-
Page 69: Products
Removing a user – procedure: • Enter the user database – read the description above. • Select the user that is to be removed from the list. • Press button. • The software shows <DELETE?> message in the bottom line. •... -
Page 70: Tares
15.3 Tares TARES – 100 different weights of the packaging. Each tare record is characterized by the following data: - 70 -... -
Page 71: Weighings
NAME (30 characters), TARE (packaging weight, accuracy of a reading unit). In order to add tare, enter tares database, adding new user and adding new tare procedures are likewise. Provide packaging details. 15.4 Weighings Weighings database is non-editable, i.e. the weighing-related data is recorded automatically. - Page 72 • Value of variable 1 and 2 The software records the measurements in a so called loop, i.e. when the measurement 10 001 is recorded, the measurement 1 is automatically deleted from the scale memory. The recorded measurements cannot be deleted. As a user you can view and print out the recorded data.
- Page 73 To swap between measurement-related data, press . The data relating to the measurement can be printed out by selecting the option <PRINT> and pressing button. Record example: Date 21.06.2013 Time 13:05:02 User Product Tare 0.000 g Gross 0.000 g --------------Cal. report.-------------- Cal.
-
Page 74: Alibi Memory
Data to be printed out depends on the settings of parameter P5.3 GLP PRINTOUT. Parameters selected for the printout (<YES> option), are printed out also on measurement result printout for WEIGHINGS database (read sec. 14.3.) 15.5 ALIBI memory The device is equipped with “ALIBI” memory allowing you to record and store up to 100 000 measurements carried out on the scale. - Page 75 To swap between measurements recorded in database, use the arrow buttons, . Pressing one of these buttons lets you to move to the next measurement either up or down the list. To view the remaining data relating to a respective measurement, first select the measurement in question, next press button: The software automatically shows measurement-related data, the data is presented...
- Page 76 ALIBI record example: Date 19.06.2013 Time 6:48:41 Result 199.90 g Tare 0.000 g User SMITH Product PILL To return to the weighing mode press button repeatedly. - 76 -...
-
Page 77: Database Export And Import
DATABASE EXPORT AND IMPORT Option designed to allow the user to: Archive data relating to the carried out weighments – WEIGHMENT • database and ALIBI database. Copy the products databases and tares databases between devices of this • series. This can be performed by means of an external flash memory, USB, with <FAT file system>. -
Page 78: Database Export
Special computer software manufactured by RADWAG company is used to read data from database files: ALIBI and WEIGHINGS. The data from files storing information from PRODUCTS, USERS, and TARES databases is read automatically by the software when option <IMPORT>... -
Page 79: Database Import
16.2 Database import <IMPORT> function is designed to allow transfer of data, recorded in scale databases, form one scale to another. This is a quick and reliable way for inserting the data without any mistakes. To import the database, plug a memory stick to USB port, next select IMPORT option and choose one of the following: The following options are available: Import of all databases... - Page 80 The data can be printed out on any printer connected to the computer. More data can be recorded in the same file. The software adds any new data to the file that has already been created on a memory stick. Consequently, a user can continue saving measurements in the same file once created.
-
Page 81: Operation Modes
OPERATION MODES Weighings • Parts Counting • Checkweighing • Dosing • Percent Weighing • Animal Weighing • Density Determination of solids • Density Determination of liquids • Statistics • Totalising • Peak Hold • Pipettes Calibration • In order to run a particular mode press button, next select it from the list. -
Page 82: Operation Modes Accessibility
Once the button has been pressed, the name of the first available function is shown. - press to select the working mode, - press to enter the selected working mode. For overview of operation modes setup, read later sections of this manual. 17.1 Operation modes accessibility This group of parameters is designed to let you declare which modes are to be... -
Page 83: Parts Counting - Equal Weight Pieces
17.2 Parts Counting – equal weight pieces Parts Counting mode allows you to count small objects of the same weight. Run Parts Counting function • • When Parts Counting mode is run for the first time, the reference sample weight equals 0.0000g. -
Page 84: Reference Sample Weight Determination With The Use Of Sample Of Known Quantity
F shortcut keys As a user you can assign weighing mode functions for quick access. The functions shall be operated by F1, F2, F3 and F4 buttons. List of functions to be declared for <PARTS COUNTING> mode: NONE no function assigned to the button ENTER SAMPLE function initiates an option of entering the reference weight of a single piece... - Page 85 Press F button to which the function <ENTER SAMPLE> is assigned, wait • to see the editing window <SAMPLE QUANTITY> Use navigating buttons to select the correct sample • quantity. For option: sample quantity (displayed value <0000>) enter demanded, • use navigating buttons.
-
Page 86: Entering Reference Sample Weight
Put declared number of pieces in the container, wait until the result is • stable (the symbol is displayed), confirm the weight by pressing button, The software automatically counts a single piece weight and enters • <PARTS COUNTING> mode, number of pieces on the pan (pcs) is displayed. -
Page 87: Return To Weighing Mode
Confirm the entered weight value by pressing button, • The software automatically counts a single piece weight and enters • <PARTS COUNTING> mode, number of pieces on the pan (pcs) is displayed. In the bottom line, a single piece weight value is displayed (if the option has been selected for the function <INFORMATION>). -
Page 88: Declaring Threshold Values
F shortcut keys As a user you can assign weighing mode functions for quick access. The functions shall be operated by F1, F2, F3 and F4 buttons. List of functions to be declared for <CHECKWEIGHING> mode: NONE no function assigned to the button ASSIGN function initiates an option of ascribing checkweighing THRESHOLDS... - Page 89 Confirm the entered threshold value by pressing button, • The software automatically proceeds to the editing window of MAX high • threshold value, which is to be given in the current unit. Use the navigating arrows to set a particular value. Confirm the entered threshold value by pressing button, •...
-
Page 90: Return To Weighing Mode
value. Bottom line of the display, if <BARGRAPH> option is enabled, shall demonstrate weight indication, in a graphic form, in relation to set thresholds. <Min>: mass lower than the value of the low threshold <Ok>: mass contained within thresholds <Max>: mass higher than the value of the high threshold 17.3.2 Return to weighing mode 17.4 Dosing... -
Page 91: Entering Target Weight
i.e.: the software accepts correctly dosed value within the following thresholds: from 97,500g to 102,500g. F shortcut keys As a user you can assign weighing mode functions for quick access. The functions shall be operated by F1, F2, F3 and F4 buttons. List of functions to be declared for <DOSING>... - Page 92 Use navigating buttons to enter the target weight • Confirm the entered target weight by pressing button, • The software automatically sets tolerance of target mass dosing. • navigating buttons tolerance value • Confirm the entered tolerance value by pressing button, •...
-
Page 93: Return To Weighing Mode
Bottom line of the display, if <BARGRAPH> option is enabled, shall demonstrate weight indication, in a graphic form, in relation to target weight and set tolerance value. <Min>: mass lower than the Target Value - Tolerance <Ok>: mass contained within tolerance Target Value +/- Tolerance <Max>: mass greater than the Target Value + Tolerance 17.4.2 Return to weighing mode 17.5... -
Page 94: Reference Weight Determination By Weighing
As a user you can assign weighing mode functions for quick access. The functions shall be operated by F1, F2, F3 and F4 buttons. List of functions to be declared for <PERCENT WEIGHING> mode: NONE no function assigned to the button ENTER SAMPLE function initiates an option of entering reference weight for control of weight deviation... -
Page 95: Entering Reference Weight
Put reference weight (as 100%) on the pan, wait for the indication to be • stable ( symbol is displayed) and confirm the weight by pressing button. The software automatically enters the measured load value as a reference • weight and enters <PERCENT WEIGHING> mode, 100.000% value is displayed within the main section, reference sample weight value (target weight) is displayed in the bottom line (if such option has been selected for the function <INFORMATION>) -
Page 96: Return To Weighing Mode
Confirm the entered weight by pressing button. • The software automatically enters <PERCENT WEIGHING> mode, • 0.000% value is displayed within the main section, reference sample weight value (target weight) is displayed in the bottom line (if such option has been selected for the function <INFORMATION>) 17.5.3 Return to weighing mode 17.6 Animal Weighing... -
Page 97: Additional Mode Settings
17.6.1 Additional mode settings Animal Weighing mode features standard weighing mode parameters along with supplementary parameters designed to improve this mode operation. Supplementary parameters: AVERAGING TIME – time period for measurement records analysis, • obtained data is used to determine average measurement result. THRESHOLD - value expressed in mass measuring units, to start •... -
Page 98: Running The Process Manually - Means Of Operation
Read “F shortcut keys” section of this user manual for procedure on assigning functions to F buttons. 17.6.2 Running the process manually – means of operation To manually start the process, go to the mode setup, select an <AUTOSTART> parameter, next select <NO> value. Procedure: With modified settings, return to the main window, to do it press •... - Page 99 Put a container for the load on the weighing pan, wait for a stable • indication and carry out tarring. Next, enter the mode options and start the measurement procedurę, follow • the below procedure. - 99 -...
-
Page 100: Running The Process Automatically - Means Of Operation
With completed proces the measurement result is locked and • automatically printed. To finish the measurement press button. • The program automatically returns to the main window of Animal Weighing • mode. 17.6.3 Running the process automatically – means of operation To automatically start the process, go to the mode setup, select an <AUTOSTART>... -
Page 101: Return To Weighing Mode
17.6.4 Return to weighing mode 17.7 Density determination - solids Density of solids mode allows density determination of a typical sample. Using this function entails an additional kit for determining density of solids and liquids (optional equipment). CAUTION! Shall you see –nuLL- message on your display after density determination kit installation, apply supplementary weights. -
Page 102: Density Determination Procedure
VARIABLE 2 function initiates selection and editing of variable 2 Read “F shortcut keys” section of this user manual for procedure on assigning functions to F buttons. 17.7.1 Density determination procedure Density determination of solids can be carried out by means of two pre-defined types of liquids or user-defined liquid of specified density: WATER (distilled water), •... - Page 103 Press <ENTER> to confirm the selected liquid, the software proceeds to • setting liquid temperature. For <OTHER> option selected, insert density value. • Weighing operation begins. • First, place load on the top weighing pan of the density determination kit •...
- Page 104 Next, place load on the bottom pan of the density determination kit • (weighing in the liquid), wait for stable indication and press button to confirm. Now the program automatically calculates and displays the tested solid • object density, a report on the measurement is sent to a selected port of a printer.
-
Page 105: Return To Weighing Mode
The report may be reprinted upon pressing button. In order to finish, press button. The software returns to the main window of the mode and a next measurement can be performed. The scale operates with previously set parameter values (liquid, temperature) thus shortening time needed for the exact measurement. - Page 106 Enter <DENSITY OF LIQUIDS> function. • Prepare a sample. • Initiate the process (like in case of solids density determination). • Following the displayed messages insert the process setup. • Enter sinker volume • The program proceeds to weighing. • First, place the sinker on the hook (mass determination in the air), wait for •...
- Page 107 mass determination in liquid) – wait for stable indication and press button to confirm. The program automatically calculates and displays the tested solid object • density, a report on the measurement is sent to a selected port of a printer. Report example: - 107 -...
-
Page 108: Return To Weighing Mode
The report may be reprinted upon pressing button. In order to finish, press button. The software returns to the main window of the mode and a next measurement can be performed. The scale operates with previously set parameter values (sinker volume) thus shortening time needed for the exact measurement. 17.8.2 Return to weighing mode 17.9 Statistics... - Page 109 user ENTER TARE function initiates an option of entering packaging weight SELECT TARE function initiates an option of selecting packaging weight, out of product database PRINT HEADER function initiates printout of a designed header PRINT FOOTER function initiates printout of a designed footer VARIABLE 1 function initiates selection and editing of variable 1 VARIABLE 2...
-
Page 110: Means Of Operation
17.9.1 Means of operation Enter <STATISTICS> mode. • Place the first load on the weighing pan. • Wait for stable indication and press button to confirm, the • measurement is saved in the device memory, next it is automatically printed out with the measurement number. Remove the load from the weighing pan •... - Page 111 Carry out measurements for other loads • Now, with all measurements saved, you can check statistics results, to do • it press button: Press button to select <RESULT> option. • Press buttons to read statistics. • - 111 -...
-
Page 112: Deleting Statistics
Select <PRINT> option and press button to initiate printing out the • statistics data, the data is printed in a form of a report. Report example: -------------- Statistics -------------- 455.600 g 50.6222 g 49.939 g 51.380 g 1.441 g 0.39605 g 0.78 % ---------------------------------------- 17.9.2 Deleting statistics... -
Page 113: Return To Weighing Mode
<END> option when run results with statistics data printout, <RESULT> • window opens, use it to check the data and to reprint it if necessary. Press button to return to <STATISTICS> mode home screen, data • for carried out measurements is zeroed automatically. Now you can either begin another series of measurements or return to the •... -
Page 114: Means Of Operation
totalising procedure DELETE LAST selecting this option causes subtracting recently added mass from the total mass of the mixture SELECT PRODUCT function initiates an option of selecting a product from a product database LOG IN function initiates an option of logging in of a selected user ENTER TARE function initiates an option of entering packaging weight... - Page 115 Total sum and data relating to quantity of ingredients added to the total • sum are displayed in the bottom line (if such option has been selected for totalising mode). Load container intended for weighing the ingredients, tare its mass. Next, •...
- Page 116 <RESULT> message is displayed in a bottom line along with total weight • indication presented within the main display area; final report with information on individual ingredients weights, total weight and applied tare weigh is printed out. Report example: -------------- Totalising ----------- 38.000 g 100.000 g 50.000 g...
-
Page 117: Return To Weighing Mode
17.10.2 Return to weighing mode 17.11 Peak Hold This mode is designed to enable peak hold applied to the weighing pan during a single checkweighing process. Peak Hold mode features standard weighing mode parameters along with a supplementary parameter, i.e. threshold, which specifies value for Peak Hold mode activation. -
Page 118: Means Of Operation
ENTER TARE function initiates an option of entering packaging weight SELECT TARE function initiates an option of selecting packaging weight, out of product database PRINT HEADER function initiates printout of a designed header PRINT FOOTER function initiates printout of a designed footer VARIABLE 1 function initiates selection and editing of variable 1 VARIABLE 2... -
Page 119: Return To Weighing Mode
detected indication is held on the main display and the pictogram <Max> is shown at the top of the display. To print the result, press button. • To start the new process of peak hold measurement, remove the load from •... -
Page 120: Communication
COMMUNICATION Communication menu has been designed to enable ports setup. The settings are accessed upon pressing button. Communication with peripheral devices is established via the following port: COM 1 (RS232), • 18.1 RS 232 port (COM) Procedure: Select <COM 1> communication port, •... -
Page 121: Peripheral Devices
− communication with a scale, − switching the continuous transmission on and off, and − enabling/disabling cooperation of the device with E2R software of Radwag production. 19.1.1 Port for computer connection Procedure: press button, •... -
Page 122: Continuous Transmission
set parameters related to cooperation with a computer, i.e. port to which • the computer is to be connected, <P4.1.1 PORT>. Accessible option: COM 1 – RS 232 port, to which the computer is connected 19.1.2 Continuous transmission Continuous transmission parameter has been designed to enable turning on/off continuous transmission of a measurement. -
Page 123: Cooperation With E2R
The setting is valid for continuous transmission in calibration unit and in current unit activated by means of the scale (see parameter P4.2.1.2), it is also valid for continuous transmission activated by command sent from a computer (read section 14 COMMUNICATION PROTOCOL). 19.1.4 Cooperation with E2R E2R is a control system, it controls all weighings performed on a scale. - Page 124 <PREFIX> and <SUFFIX> parameters settings are available for all the printouts sent from scale, e.g. adjustemnt reports, density, statistics etc., and for the header, footer and GLP printouts. CAUTION! It must be remembered that inserting paper crop command to <SUFFIX> parameter (control code) results in sending the code after each printout.
-
Page 125: Barcode Scanner
• PARITY – none Printer parameters for the PERIPHERALS group: • PORT – COM1 or COM2 (the one to which the printer is connected) • PREFIX - 1B742D (1250 code page) • SUFFIX - 1D564108 (paper crop for EPSON printers equipped with an auto cutter blade) If there are any unexpected signs on the printout in the place of the last digit (for verified scales), than <P4.2.2 PREFIX>... -
Page 126: Additional Display
COM 1 • CAUTION! The scale cooperates with an additional display manufactured by RADWAG. Ensuring correct cooperation between the scale and the additional display requires baud rate parameter value to be set to 115200 bit/s for the port to which the additional display is plugged. -
Page 127: Cooperation With Peripherals
COOPERATION WITH PERIPHERALS CAUTION! A peripheral device that is connected to RS 232 or USB port of the scale, has to be powered from the common low voltage power network, equipped with common anti-shock protection, in order to provide that possible occurrence of different potentials in zero cables of the peripheral device and the scale is precluded. -
Page 128: Format Of Data Sent On Pressing Print Button
20.2 Format of data sent on pressing PRINT button Printout format 4 - 12 14 - 16 stability marker - [space] – when stable - [?] – when unstable - [^] – if maximum range is exceeded - [v] – if minimum range is exceeded character - [space] –... - Page 129 - [^] – if there is an error exceeding the maximal range + - [v] – if there is an error exceeding the maximal range - characters - [space] – for positive values, or [-] for negative values mass - 9 characters – aligned to the right unit - 3 characters –...
-
Page 130: Communication Protocol
COMMUNICATION PROTOCOL General information A. A character based communication protocol scale-terminal is designed for establishing communication between RADWAG scale and peripheral devices via RS 232 interface. B. It consists of commands sent from a peripheral device to the scale and responses from the scale. - Page 131 Give value of high checkweighing threshold Set mass value of a single item Set target mass value Set reference mass value Give balance serial number Value release Internal adjustment performance Disable automatic internal adjustment of the device Enable automatic internal adjustment of the device Give available working modes Set working mode Give current working mode...
-
Page 132: Response Format To Commands Sent From A Computer Level
21.2 Response format to commands sent from a computer level On receipt of a command, the terminal sends a response in one of the following formats: XX_A CR LF command understood and in progress XX_D CR LF command carried out (appears only after the command XX_A) XX_I CR LF command understood but not accessible at this moment XX _ ^ CR LF... - Page 133 T_A CR LF - command understood and in progress T_D CR LF - command carried out T_A CR LF - command understood and in progress T_v CR LF - command understood but tarring range exceeded T_A CR LF - command understood and in progress T_E CR LF - time limit exceeded while waiting for stable measurement result T_I CR LF...
- Page 134 Response format: 7-15 stability space space character mass space unit marker Example: S CR LF – command sent from a computer S _ A CR LF – command understood and in progress S _ _ _ _ - _ _ _ _ _ _ 8 . 5 _ g _ _ CR LF – command carried out, weight value in basic measuring unit given as response.
- Page 135 S U _ A CR LF – command understood and in progress S U _ _ _ - _ _ 1 7 2 . 1 3 5 _ N _ _ CR LF – command carried out, weight value in current measuring unit given as response. Immediately send measurement result in current measuring unit Format: SUI CR LF Accessible answers:...
- Page 136 CU1_I CR LF - command understood but not accessible at this moment CU1_A CR LF - command understood and in progress MASS FRAME - response is mass value in current measuring unit Response format: 7-15 stability space character mass space unit marker Switch off continuous transmission in current weighing unit...
- Page 137 Give value of high checkweighing threshold Format: OUH CR LF Accessible response: UH_MASS CR LF – command carried out Response format 4-12 space mass space unit space Mass - 9 characters aligned to the right Unit - 3 characters aligned to the left Set mass value of a single item (only for PARTS COUNTING) Format: SM_XXXXX CR LF, where: _ - space, XXXXX –...
- Page 138 x – serial number of the device (inserted in between inverted commas) Example: Command: NB CR LF – give serial number Response: NB_A_”1234567” – serial number of the device – ”1234567” Value release Format: SS CR LF Accessible responses: SS_OK CR LF - command understood, execution in progress Command’s function is similar to function of button PRINT located on an overlay, Internal adjustment...
- Page 139 OMI - Give available working modes Command overview: Command returns accessible working modes. Format: OMI <CR><LF> Accessible responses: - command carried out, accessible working OMI <CR><LF> modes returned n_”Mode name” <CR><LF>: n_”Modename” <CR><LF> OK <CR><LF> - command understood but not accessible at OMI_I <CR><LF>...
- Page 140 Response: OMI <CR><LF> - accessible working modes are given; 2<CR><LF> number 4 <CR><LF> 12<CR><LF> OK <CR><LF> - command carried out OMS - Set working mode Command overview: Command sets acessible working modes. Format: OMS_n <CR><LF> Accessible responses: OMS_OK <CR><LF> - command carried out - error in-course of command execution, no parameter OMS_E <CR><LF>...
- Page 141 UI – Give available weight units Command overview: Command gives units available for a particular device and for a current working mode. Format: UI <CR><LF> Accessible responses: – command carried out, available units UI_”x , … x ”_OK<CR><LF> given in return –...
- Page 142 UG – give current weight unit Command overview: Command gives current unit. Format: UG <CR><LF> Accessible responses: – command carried out, current unit given as a UG_x_OK<CR><LF> response – command understood but not accessible at this UG_I <CR><LF> moment x – parametr, unit Example: Command: UG<CR><LF>...
- Page 143 Response: PC_A_”Z, T, S, SI, SU, SUI, C1, C0, CU1, CU0, DH, UH, ODH, OUH, SM, TV, RM, NB, K1, K0, SS, IC, IC1, IC0, OMI, OMS, OMG, BP, PC " BN – Give scale type Format: BN <CR><LF> Accessible responses: - command understood, scale type given as a BN_A_”x”...
- Page 144 Example: Command: RV <CR><LF> – give program number Response: RV_A_”r.3.0.9” – program version – ”r.3.0.9” Set AUTOZERO function Format: A_n <CR><LF> Accessible responses: - command carried out A_OK <CR><LF> - an error occurred on command carrying out, no A_E <CR><LF> parameter available or incorrect format - command understood but not accessible at this A_I <CR><LF>...
- Page 145 Example: Command: EV_1 <CR><LF> – set value ‘stable’ for ambient conditions option Response: EV_OK <CR><LF> – ambient conditions option set to value ‘stable’ <AMBIENT CONDITIONS> parameter is set to value <STABLE> until command EV 0 swaps it to value <UNSTABLE>. Set filter Command overview: Command lets the user set filter for a particular device.
- Page 146 - command carried out ARS_OK <CR><LF> - an error occurred on command carrying out, no ARS_E <CR><LF> parameter available or incorrect format - command understood but not accessible at this ARS_I <CR><LF> moment n – parameter, decimal value determining value release options n →...
-
Page 147: Error Messages
Example: Command: LDS_1 <CR><LF> – set last digit option to value ‘always’ Response: LDS_OK <CR><LF> – ‘always’ value has been set Send the latest error code Format: ER <CR><LF> Accessible responses: - command understood, the latest error code given as ER_A_x <CR><LF>... - Page 148 O F E L E C T R O N I C W E I G H I N G I N S T R U M E N T S RADWAG BALANCES AND SCALES POLAND, 26 – 600 Radom, 28 Bracka Street...
Need help?
Do you have a question about the HRP.R Series and is the answer not in the manual?
Questions and answers