Table of Contents
Advertisement
Advertisement
Chapters
Table of Contents

Related Manuals for Schulze PRETREATmaker IV


Summary of Contents for Schulze PRETREATmaker IV
- Page 1 Bedienungsanleitung Version 18.02 PRETREATmaker IV...
-
Page 3: Table Of Contents
Einführung Inhalt Einführung Inhalt Abbildung der Maschine Technische Daten Sicherheitsvorkehrungen der Maschine Sicherheitsvorkehrungen am Arbeitsplatz Inbetriebnahme Garantiebestimmungen Hinweise für den Transport Stromversorgung 100 - 240 VAC Inbetriebnahme der Maschine Anwendungsbereich und Beispieleinstellung Geschwindigkeitseinstellung Arbeiten mit der Maschine Sprüheinstellung Position des T-Shirts Automatikmodus Input-Schnittstelle / Barcode System (optional) Filter auf der Carriage... -
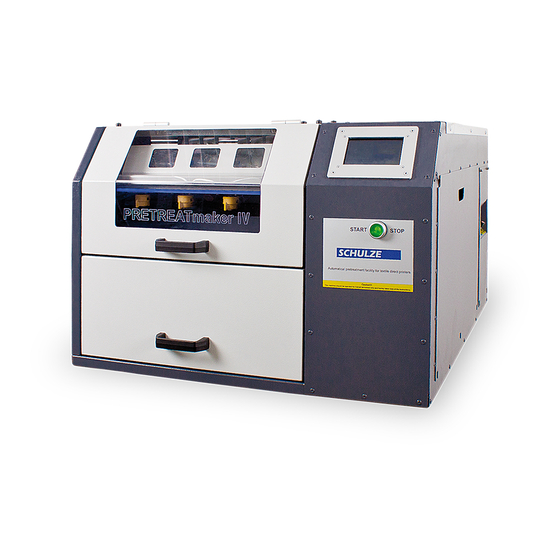
Page 4: Abbildung Der Maschine
Die Maschine erzeugt einen Schalldruckpegel von weniger als 70db (A) Sicherheitsvorkehrungen der Maschine Der PRETREATmaker IV ist mit verschiedenen Sicherheitsvorkehrungen ausgestattet, um eine sichere Anwendung zu gewährleisten. Hauptsicherung 6A Die Sicherung befindet sich im hinteren Teil der Maschine. Im Fall einer Überlastung, schützt sie die Maschine vor Schäden. Wird diese Sicherung aktiviert, muss sie ersetzt werden. -
Page 5: Inbetriebnahme
Hinweise für den Transport Der PRETREATmaker IV wird für den Transport in eine Schutzfolie eingepackt und auf der Palette festgeschraubt. Prüfen Sie gleich nach dem Erhalten der Maschine, ob die Verpackung in ordnungsgemäßem Zustand und ob die Maschine nicht beschädigt ist. Wenn Sie den PRETREATmaker IV zu einem späteren Zeitpunkt versenden müssen, bitten wir Sie, die Maschine genauso auf der Palette festzuschrauben. -
Page 6: Anwendungsbereich Und Beispieleinstellung
Bevor Sie den PRETREATmaker IV zum ersten Mal einschalten, kontrollieren Sie bitte, ob Ihre Steckdose in ordnungsgemäßem Zustand ist und ob die Schutzleitung richtig angeschlossen ist. Vor der Arbeit müssen Sie alle Tanks kontrollieren (Foto 1). Der Precoating Behälter muss täglich geschüttelt werden (Foto 2). -
Page 7: Geschwindigkeitseinstellung
Geschwindigkeitseinstellung Um die Geschwindigkeit der Carriage einzustellen, drücken Sie die Taste “settings” (Foto 1). Mit den Tasten + und - stellen Sie die gewünschte Geschwindigkeit ein.(Foto 2). Wenn Sie die Geschwindigkeit erhöhen, wird die Menge des Precoatings auf dem T-shirt reduziert. Wenn Sie die Geschwindigkeit reduzieren, wird die Menge des Precoatings erhöht. -
Page 8: Input-Schnittstelle / Barcode System (Optional)
Verbrauchsmenge an Precoating-Flüssigkeit, nach jedem Sprühvorgang, im Display angezeigt werden (Foto 1). Die Waage wird an die Elektronik des PRETREATmaker IV angeschlossen (Foto 4 a). Das max. zulässige Gesamtgewicht der Wage beträgt 12 kg (Foto 4 b). Installation der Waage Der PRETREATmaker IV ist mit einem Stecker für die Waage ausgestattet. -
Page 9: Precoating-Flüssigkeit Wechseln Im Laufenden Betrieb Mit Düsen
Die Mengen wurden auf einer Fläche von 34 x 40 cm mit neuen Düsen TP800050 und destillieren Wasser ermittelt.Die Mengen beinhalten den ganzen Verbrauch, auch die Menge der Flüssigkeit, die sich auf den Wänden des PRETREATmaker IV abgesetzt hat. Je nach Verdünnung von dickflüssigem Mittel mit Wasser, Abnutzung der Düsen oder Druckabweichungen... -
Page 10: Wartung
Wartung Der PRETREATmaker IV muss jeden Tag gereinigt und die Tanks jeden Tag mehrmals kontrolliert werden. Kontrollieren Sie die Flüssigkeit in dem Reste-Tank. (Foto 1). 1. Der Reste-Tank darf nicht überlaufen, dieser muss nach Bedarf entleert werden (Foto 2). 2. Der Precoating-Tank muss jeden Tag geschüttelt werden und der Filter in dem Tank immer in einer Flüssigkeit getaucht sein (Foto 3). -
Page 11: Austausch Der Hauptsicherung
Austausch der Hauptsicherung Sollte die Maschine nach dem Einschalten nicht funktionieren und der Hauptschalter leuchten aber das Display keine Information anzeigen, müssen sie die Hauptsicherung der Maschine überprüfen. Die Hauptsicherung (6A) befindet sich an der Rückseite der Maschine. Um die Sicherung auszutauschen, müssen Sie das Gerät ausschalten und dann den Stromstecker aus der Steckdose ziehen. -
Page 12: Schaltplan
Schaltplan male MX-5559-04P electronics connector female MX-5557-04P strain gauge connector LED strip with sensor LED BLUE 12V reed relay KA-O2 black white green coil TYPE3 12V DC 22mm coil plug PG9 TYPE3 load cell BT-NA-020 black green white KA-O2 drawer front cover top cover 1 12... - Page 13 Display LCD PRETREATmaker IV 807054 807052 Electronic v7 Belt 10 T-5 lenght 1740 mm 803457 807006 SFDP1-016-100-34 Pre-coating pump Water pump 807020 Elektro magnet 12V Filter element carriage 807057 Switch 801809 Power supply 110 - 240 V 807053 807034 Sensor...
-
Page 14: Anschlussschema
Anschlussschema 807039 807036 807028 807019 807030 807037 807037 807056 807036 807020 803422 807057 807006 807027 807025 807043 807016 807018 807044 807044 807019 807051 807025 807015 807058 807015 Filter 807016 Tank 5L + connector + filter 807018 807006 Spiral tube 6 mm UC-0604-15-BK Pump 12V SFDP1-016-100-34 807036... -
Page 15: Fehlerbehebung
Fehlerbehebung Kontrollieren Sie immer den aktuellen Stand auf www.pretreatmaker.com. Problem Ursache Behebung Streifenbildung auf 1. Die Düsen sind verstopft. 1. Reinigen Sie Düsen, siehe Anleitung Kapitel 4.3. der Oberfläche. 2. Düse austauschen Unregelmäßiger Strahl aus den 2. Filter ist verstopft. Reinigen Sie den Filter oder setzen Sie einen neuen ein. - Page 16 Der Display 1. Wackelkontakt an dem Kabel Kontrollieren Sie die Kabelverbindung zwischen der Elektronik und reagiert nicht auf zwischen dem Display und der dem Display und tauschen Sie notfalls das Kabel aus. Befehle. Keine Elektronik. Funktionen möglich. Kein 2. Display ausgefallen Display neu starten.
- Page 17 Instruction manual Version 18.02 PRETREATmaker IV...
-
Page 19: Introduction
Introduction Content 1. Introduction Content Construction of the machine Technical data Protection of the device Safety arrangements at the workplace Initiation Warranty terms and conditions Notes regarding transportation Supply voltage 100 - 240 VAC Preparation of the machine for operation Use and example of settings Carriage speed settings Work with the machine... -
Page 20: Construction Of The Machine
The testing should be protocoled. If any irregularities regarding functionality or safety are found during the testing, these have to been noted and reported to Walter Schulze GmbH in written form within 7 days. Until clarification the machine can not be used. -
Page 21: Initiation
Notes regarding transportation The PRETREATmaker IV is packed with protective film and fastened to a pallet. Right after receipt of the machine, condition of the packaging and the machine itself should be controlled. If the machine has to be sent to another place later on, it should be packed and placed on the pallet in the same way. -
Page 22: Use And Example Of Settings
Use and example of settings The PRETREATmaker IV is destined for automatic application of pre-coat for white ink in printers directly printing on fabrics. The device is equipped with 4 nozzles. To smoothly change the ammount of precoating adjust the carriage speed (chapter 2.6). To double the ammount of sprayed precoating press the button (picture 1). -
Page 23: Carriage Speed Settings
Carriage speed settings To change the carriage movement speed, press the settings button (picture 1). Adjust the carriage speed setting as needed (picture 2). By increasing the carriage speed the ammount of sprayed precoating liquid will be reduced and by reducing the speed the ammount will be increased. -
Page 24: Barcode Printing (Optional)
The PRETREATmaker IV can be optionally equipped with a scale. Through the installation of the scale the consumption rate of precoating liquid can be seen on the display after each spray run (picture 1). The scale is connected to the PRETREATmaker IV electronic (picture 4 a). The scale... -
Page 25: Changing The Precoating Liquid During Operation
It was developed on tests on a a 34 x 40 cm surface, while using distilled water and brand new TP800050 nozzles. The values contain also the amount od precoating liquid that was sprayed on the wall inside of the PRETREATmaker IV. Depending on the dilution level of the precoating liquid and the nozzles degree of wear the values may differ by +/- 3g. -
Page 26: Maintenance
10. Once a week all the tubes and precoating pumps should be cleaned with water. The graphical instruction is available on the PRETREATmaker IV touchscreen. Press maintenance button and follow the instructions: - before you start make sure, that the water container is filled with water;... -
Page 27: Instructions For Replacement Of The Main Fuse
Instructions for replacement of the main fuse In case the machine is not working after it has been switched on and the main switch-key is shining but the display is not working, then check the main safety fuse. The main safety fuse (6A) is located on the back side of the machine. In order to replace the safety fuse turn off the machine and pull out the power plug. -
Page 28: Connection Diagram
Connection diagram male MX-5559-04P electronics connector female MX-5557-04P strain gauge connector LED strip with sensor LED BLUE 12V reed relay KA-O2 black white green coil TYPE3 12V DC 22mm coil plug PG9 TYPE3 load cell BT-NA-020 black green white KA-O2 drawer front cover top cover... - Page 29 Display LCD PRETREATmaker IV 807054 807052 Electronic v7 Belt 10 T-5 lenght 1740 mm 803457 807006 SFDP1-016-100-34 Pre-coating pump Water pump 807020 Electromagnet 12V Filter element carriage 807057 Switch 801809 Power supply 110 - 240 V 807053 807034 Sensor 807055...
-
Page 30: Pipes Connection
Pipes connection 807039 807036 807028 807019 807030 807037 807037 807056 807036 807020 803422 807057 807006 807027 807025 807043 807016 807018 807044 807044 807019 807051 807025 807015 807058 807015 Filter 807016 Tank 5L + connector + filter 807018 807006 Spiral tube 6 mm UC-0604-15-BK Pump 12V SFDP1-016-100-34... -
Page 31: Troubleshooting
Troubleshooting Look at the www.pretreatmaker.com to see the latest version of Troubleshooting Problem Possible reason Solution Streaking on the 1. The nozzles are clogged. 1. Clean the nozzles. See Manual Chapter 4.3. surface. Irregular 2. Replace the clogged nozzle. stream shape from the nozzles. - Page 32 The display does 1. A loose contact on the cable Check the cable connection between the electronics and the display not respond to between the display and the and replace the cable if necessary. commands. No electronics. functions possible. No “beep” sound 2.
- Page 33 Istruzioni per l’uso Versione 18.02 PRETREATmaker IV...
-
Page 35: Introduzione
Introduzione Sommario 1. Introduzione Sommario Costruzione della macchina Specifiche tecniche Dispositivi di sicurezza Sicurezza sul posto di lavoro Preparazione all’uso Condizioni di garanzia Note relative al trasporto Tensione di alimentazione 100 - 240 VAC Preparazione della macchina al funzionamento Applicazione ed esempio di impostazioni Impostazione della velocità... -
Page 36: Costruzione Della Macchina
Emissione sonora La macchina genera meno di 70dB di rumore (A) Dispositivi di sicurezza Al fine di garantire la massima sicurezza sul lavoro, l’apparecchio PRETREATmaker IV è stato dotato di alcuni dispositivi di sicurezza indipendenti Fusibile principale 6A Il fusibile (6A) si trova sulla parte posteriore dell’apparecchio. In caso di sovraccarico esso protegge la macchina da danni. Sostituire il fusibile se è... -
Page 37: Preparazione All'uso
Note relative al trasporto La macchina PRETREATmaker IV è imballata in pellicola protettiva e fissata al pallet. Subito dopo la consegna della macchina, verificare che l’imballaggio sia in buone condizioni e che la macchina non sia danneggiata. Se la macchina viene successivamente rispedita in un altro luogo, deve essere riposta nello stesso modo nell’imballagio. -
Page 38: Applicazione Ed Esempio Di Impostazioni
Applicazione ed esempio di impostazioni Il PRETREATmaker IV è un apparecchio destinato a trattare tessuti con il liquido di pretrattamento sotto il toner bianco per stampanti di stampa diretta su tesutti. L’apparecchio è dotato di 4 ugelli. La stesura del liquido avviene direttamente sopra il tessuto. I contenitori non possono essere riempiti con altri liquidi. -
Page 39: Impostazione Della Velocità Del Carrello
Impostazione della velocità del carrello Per cambiare la velocità del movimento del carrello, premere il tasto „settings” (foto 1). Regolare la velocità del carrello secondo le proprie esigenze (foto 2). Aumentando la velocità del carrello, la quantità del liquido di pretrattamento applicato diminuirà, e diminuendo la velocità del carrello, la quantità... -
Page 40: Stampa Dei Codici A Barre (Opzione)
Uso della basculla (opzione) Come opzione, l’apparecchio PRETREATmaker IV può essere dotato di una basculla. Dopo l’installazione della basculla, la quantità del liquido di pretrattamento usato sarà indicata sullo schermo dopo ogni ciclo (foto 1). La basculla deve essere collegata all’elettronica dell’apparecchio PRETREATmaker IV (foto 4 a). -
Page 41: Scelta Del Contenitore
La tabella seguente presenta il rapporto tra la velocità del carrello e la quantità del liquido applicato. È stata elaborata sulla base di prove su una superficie dalle dimensioni di 34 x 40 cm, usando acqua distillata e nuovi ugelli TP800050. I valori indicati prendono in conto anche il liquido di pretrattamento, spruzzato sulle pareti dentro la macchina. -
Page 42: Manutenzione
10. Una volta alla settimana tutti i tubi flessibili e le pompe del liquido di pretrattamento devono essere puliti con acqua. Le istruzioni grafiche sono disponibili sullo schermo dell’apparecchio PRETREATmaker IV. Premere il pulsante „maintenance” e seguire le istruzioni: - prima di cominciare assicurarsi che il contenitore con l’acqua distillata sia pieno;... -
Page 43: Istruzioni Per La Sostituzione Del Fusibile Principale
Istruzioni per la sostituzione del fusibile principale Se la macchina non funziona dopo l'accensione, l'interruttore principale si accende e lo schermo non mostra alcun valore, controllare il fusibile principale. Il fusibile principale (6A) si trova sulla parte posteriore della macchina. La sostituzione del fusibile principale deve essere effettuata da una persona autorizzata, dopo la segnalazione del guasto al fornitore dell'apparecchio. -
Page 44: Schema Di Collegamento
Schema di collegamento male MX-5559-04P electronics connector female MX-5557-04P strain gauge connector LED strip with sensor LED BLUE 12V reed relay KA-O2 black white green coil TYPE3 12V DC 22mm coil plug PG9 TYPE3 load cell BT-NA-020 black green white KA-O2 drawer front cover... - Page 45 Schermo LCD PRETREATmaker IV 807054 807052 Parti elettroniche v7 Cinghia 10 T-5 lunghezza 1740 mm 803457 807006 Pompa dell'acqua pompa del liquido di pretrattamento SFDP1-016-100-34 807020 Bobina 12 V Filtro sul carrello 807057 Interruttore principale 801809 Cavo di alimentazione 110 - 240 V...
-
Page 46: Schema Di Collegamento Delle Pompe
Schema di collegamento delle pompe 807039 807036 807028 807019 807030 807037 807037 807056 807036 807020 803422 807057 807006 807027 807025 807043 807016 807018 807044 807044 807019 807051 807025 807015 807058 807015 Filtro 807016 Contenitore 5 L + presa + filtro 807018 807006 Tubo flessibile... -
Page 47: Soluzioni Ai Problemi
Soluzioni ai problemi Visitare il sito www.pretreatmaker.com per vedere l’ultima versione della risoluzione ai problemi. Problema Causa probabile Soluzione Strisce di liquido di 1. Ugelli intasati. 1. Pulire gli ugelli. Vedi punto 4.3. pretrattamento si formano 2. Sostituire l’ugello intasato. sulla superficie. - Page 48 Lo schermo non 1. Mancanza di collegamento tra lo Controllare il collegamento tra la scheda elettronica e lo schermo e reagisce ai schermo e la scheda elettronica. sostituire il cavo se necessario. comandi. Il dispositivo non emette alcun 2. Errore dello schermo. Riavviare lo schermo.
- Page 49 Instrukcja obsługi Instrukcja użytkowania Wersja 18.02 PRETREATmaker IV...
-
Page 51: Wstęp
Wstęp Spis treści 1. Wstęp Spis treści Budowa maszyny Dane techniczne Zabezpieczenia maszyny Bezpieczeństwo w miejscu pracy Czynności przygotowawcze Warunki gwarancji Uwagi dotyczące transportu Napięcie zasilania 100 - 240 VAC Przygotowanie maszyny do pracy Zastosowanie i przykładowe ustawienia Ustawienie prędkości wózka Praca przy maszynie Ustawienie zakresu nanoszonego precoatingu Pozycja koszulki... -
Page 52: Budowa Maszyny
Hałas Maszyna generuje hałas mniejszy niż 70dB (A) Zabezpieczenia maszyny W celu zapewnienia maksymalnego bezpieczeństwa pracy, urządzenie PRETREATmaker IV zostało wyposażone w kilka niezależnych zabezpieczeń Główny bezpiecznik - 6A Bezpiecznik (6A) znajduje się w tylnej części urządzenia. W przypadku przeciążenia chroni on maszynę przed uszkodzeniem. -
Page 53: Czynności Przygotowawcze
Uwagi dotyczące transportu Maszyna PRETREATmaker IV pakowana jest w folię ochronną i mocowana do palety. Zaraz po otrzymaniu maszyny należy sprawdzić, czy opakowanie jest w dobrym stanie, a urządzenie nie jest uszkodzone. Jeżeli maszyna będzie w późniejszym terminie odsyłana do innego miejsca, należy umieścić... -
Page 54: Zastosowanie I Przykładowe Ustawienia
Zastosowanie i przykładowe ustawienia PRETREATmaker IV to urządzenie przeznaczone do automatycznego nanoszenia podkładu pod biały atrament dla drukarek do druku bezpośredniego na tekstyliach. Urządzenie wyposażone jest w 4 dysze. Nakładanie podkładu odbywa się bezpośrednio nad tkaniną. Zbiorniki nie mogą być wypełnione innymi cieczami. Aby płynnie zmienić ilość nanoszonego podkładu należy ustawić prędkość wózka.(rozdział 2.6). -
Page 55: Ustawienie Prędkości Wózka
Ustawienie prędkości wózka Aby zmienić prędkość ruchu wózka należy wcisnąć przycisk settings (zdjęcie 1). Dostosować prędkość wózka według potrzeb (zdjęcie 2). Zwiększając prędkość wózka, ilość nanoszonego podkładu zmniejszy się, a zmniejszając prędkość wózka, ilość nanoszonego podkładu wzrośnie. Stosunek prędkości wózka do ilości nanoszonego podkładu przedstawiony został w tabeli znajdującej się w rozdziale 3.6. Jeśli używany jest gęsty płyn, zalecane jest aby rozcieńczyć... -
Page 56: Druk Kodów Kreskowych (Opcja Dodatkowa)
Urządzenie PRETREATmaker IV może zostać opcjonalnie doposażone w wagę. Dzięki instalacji wagi, ilość zużytego precoatingu będzie pokazywana na wyświetlaczu po każdym cyklu (zdjęcie 1). Wagę należy podłączyć do elektroniki urządzenia PRETREATmaker IV (zdjęcie 4 a). Maksymalne obciążenie wagi wynosi 12 kg (zdjęcie 4 b). -
Page 57: Wybór Zbiornika
Poniższa tabela przedstawia stosunek prędkości wózka do ilości nanoszonego podkładu. Została opracowana w oparciu o testy na powierzchni o wymiarach 34 x 40 cm, przy zastosowaniu wody destylowanej i nowych dysz TP800050. Przedstawione wartości zawierają również precoating, który został rozpylony na ściankach wewnątrz maszyny. W zależności od stopnia rozcieńczenia precoatingu oraz zużycia dysz, wartości mogą... -
Page 58: Konserwacja
10. Raz w tygodniu wszystkie węże oraz pompy precoatingu powinny zostać wyczyszczone wodą. Instrukcja graficzna jest dostępna na wyświetlaczu urządzenia PRETREATmaker IV. Należy wcisnąć przycisk „maintenance” i postępować według instrukcji: - przed rozpoczęciem, należy upewnić się, że zbiornik z wodą destylowaną jest uzupełniony;... -
Page 59: Instrukcja Wymiany Bezpiecznika Głównego
Instrukcja wymiany bezpiecznika głównego Jeżeli maszyna po włączeniu nie działa, włącznik główny świeci się, a wyświetlacz nie pokazuje żadnych wartości, należy sprawdzić główny bezpiecznik. Bezpiecznik główny (6A) znajduje się z tyłu maszyny. Wymiana bezpiecznika głównego musi być przeprowadzona przez osobę uprawnioną, po uzgodnieniu awarii z dostawcą... -
Page 60: Schemat Połączeń
Schemat połączeń male MX-5559-04P electronics connector female MX-5557-04P strain gauge connector LED strip with sensor LED BLUE 12V reed relay KA-O2 black white green coil TYPE3 12V DC 22mm coil plug PG9 TYPE3 load cell BT-NA-020 black green white KA-O2 drawer front cover top cover... - Page 61 Wyświetlacz LCD PRETREATmaker IV 807054 807052 Elektronika v7 Pasek 10 T-5 lenght 1740 mm 803457 807006 SFDP1-016-100-34 pompa precoatingu Pompa wody 807020 Cewka 12V Filtr na karetce 807057 Włącznik główny 801809 Zasilacz 110 - 240 V 807053 807034 Czujnik 807055...
-
Page 62: Schemat Podłączenia Pomp
Schemat podłączenia pomp 807039 807036 807028 807019 807030 807037 807037 807056 807036 807020 803422 807057 807006 807027 807025 807043 807016 807018 807044 807044 807019 807051 807025 807015 807058 807015 Filtr 807016 Zbiornik 5L + złączka + filtr 807018 807006 Wąż spiralny 6 mm UC-0604-15-BK Pompa 12V SFDP1-016-100-34... -
Page 63: Rozwiązywanie Problemów
Rozwiązywanie problemów Sprawdź na stronie www.pretreatmaker.com aktualną wersję rozwiązywania problemów. Problem Możliwa przyczyna Rozwiązanie Powstawanie pasków 1. Zatkane dysze. 1. Wyczyścić dysze. Patrz rozdział 4.3. precoatingu na 2. Wymienić zatkaną dyszę. powierzchni. Nieregularny kształt strumienia 2. Zatkany filtr Wyczyścić lub wymienić zatkany filtr. Patrz rozdział 4.6. płynącego z dysz. - Page 64 Wyświetlacz nie 1. Brak styku we wtyczce Sprawdzić połączenie między elektroniką a wyświetlaczem i wymienić reaguje na pomiędzy wyświetlaczem a kabel jeśli to konieczne. polecenia. elektroniką Urządzenie nie wydaje dźwięku 2. Błąd wyświetlacza Zrestartować wyświetlacz. Wyłączyć i włączyć ponownie maszynę. podczas naciskania przycisków na 3.
-
Page 65: Testing Report
European representative of the manufacturer company ROMANIK hereby declares that the following machine: PRETREATmaker IV Seriennummer / Serial number ....übereinstimmt mit den Bestimmungen folgender EG-Richtlinien / is compliant with the specifications of the following EC directives:... -
Page 66: Ce - Dichiarazione Di Conformità
ROMANIK, dichiara con la seguente che la macchina designata sopra: PRETREATmaker IV Numero di serie ....è conforme alle specificazioni delle seguenti direttive CE:...
Need help?
Do you have a question about the PRETREATmaker IV and is the answer not in the manual?
Questions and answers