Sierra MaxTrak 180 Series Quick Start Manual
Hide thumbs
Also See for MaxTrak 180 Series:
- Instruction manual (55 pages) ,
- Installation instructions (2 pages)
Advertisement
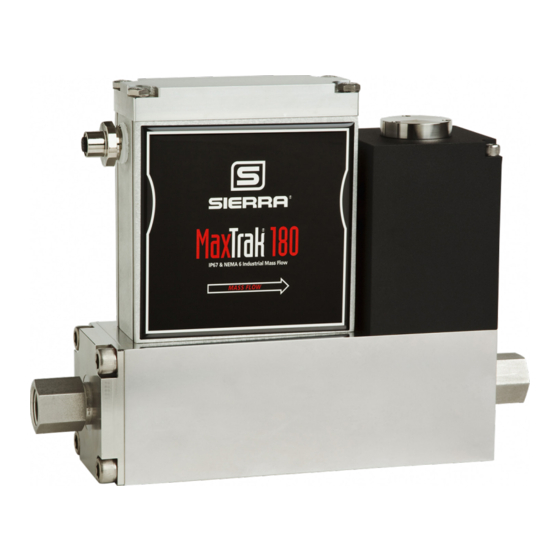
MaxTrak
180 Series
®
This Quick Start Guide for MaxTrak® 180 Mass Flow Meters and
Controllers gives easy set up and installation instructions.
For complete instructions, please download and read the
MaxTrak 180 Series Instruction Manual. Before installing meter,
follow the steps below.
Step 1. Download Instruction Manual
To get technical information, download the MaxTrak 180 Series
Instruction Manual at sierrainstruments.com/maxtrak-manual.
Step 2. Download FREE Software
Download the most current SmartTrak product software at
sierrainstruments.com/smarttrak-software. Use the included cable
(if ordered) to connect the meter to your computer.
IMPORTANT!
If you do not have an internet connection, you must
download the software to a USB stick or other storage device.
Safety
1. Apply power only after checking the wiring diagrams on page 2 and Chapter 2 in the Instruction Manual.
2. Apply gas flow only after checking plumbing connections for leaks. Sierra recommends checking for leaks with a pressure-decay test.
As these instruments are NEMA 6 / IP67 rated, a liquid leak detector may also be used.
Installation and Wiring
1. Consult the instrument's data label (on the rear of the instrument) for all proper operating parameters.
Note Please note the orientation and install the instrument in this position. If the information on the data label does not match your
process conditions, contact Sierra Instruments customer service.
2. Install a 10-micron in-line filter upstream of your instrument. If the gas contains any moisture, the moisture must be removed. Particles
larger than 60 microns and moisture may damage your instrument.
3. For mechanical mounting, flow direction is indicated on the large front label. The weight of the instrument is 10 lbs (4.5 kg)—be certain it is
properly supported. Four mounting screw holes are supplied on the bottom of the instrument. Two are metric (M6), two are SAE 8-32. See
drawing in technical data sheet for details.
Warning! Do not apply power to the output loop on units equipped and calibrated for a 4-20 mA output signal.
This is not a loop-powered device. Damage will occur.
4. If your instrument has the WT option, attach the water-tight cable to the electrical connector on the inlet side. Connect the wires in this
cable per the diagram on reverse. You do not need to open the instrument, if you have ordered the WT option.
5. If your instrument does not have the WT option, all electrical connections, including power, are applied via the terminal strip which is
located inside the waterproof enclosure. You may run your wiring into the instrument via standard conduit (attach to our 1/2-inch FNPT
port) or through our cable gland (option gland). Both are located on the inlet side of the enclosure.
a) Remove the top section of the enclosure by unscrewing the four mounting bolts on the top of the instrument (bolt size SAE 7/16 inch).
Gently pry the top section off the instrument (not the complete cover, just the top section). Do not remove the O-ring seal around the
perimeter of the enclosure.
1 | MaxTrak 180 Series
QUICK START GUIDE
Advertisement
Table of Contents

Related Manuals for Sierra MaxTrak 180 Series


Summary of Contents for Sierra MaxTrak 180 Series
- Page 1 1. Apply power only after checking the wiring diagrams on page 2 and Chapter 2 in the Instruction Manual. 2. Apply gas flow only after checking plumbing connections for leaks. Sierra recommends checking for leaks with a pressure-decay test. As these instruments are NEMA 6 / IP67 rated, a liquid leak detector may also be used.
- Page 2 Separate your individual wires (16-28 gauge required) and connect to the terminal strip on the top of the upper circuit board. Wire per the diagrams below. Note This terminal strip is unique to the MaxTrak 180 Series instruments and different than the description in the SmartTrak 100 Series Instruction Manual.
- Page 3 Limited Warranty Policy – Register Online All Sierra products are warranted to be free from defects in material and workmanship and will be repaired or replaced at no charge to Buyer, provided return or rejection of product is made within a reasonable period but no longer than one (1) year for calibration and non-calibration defects, from date of delivery.
- Page 4 We Understand Flow is Tough. We can solve this together. www.sierrainstruments.com 4 | MaxTrak 180 Series PN: 47-0408-G...
Need help?
Do you have a question about the MaxTrak 180 Series and is the answer not in the manual?
Questions and answers