Sierra Smart-Trak 100 series Instruction Manual
Hide thumbs
Also See for Smart-Trak 100 series:
- Instruction manual (32 pages) ,
- Quick start manual (2 pages) ,
- Quick installation manual (2 pages)

Related Manuals for Sierra Smart-Trak 100 series


Summary of Contents for Sierra Smart-Trak 100 series
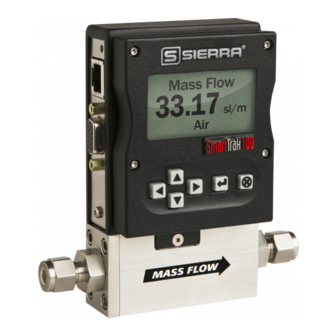
- Page 1 Smart-Trak Smart-Trak Smart-Trak Series 100 ® ® INSTRUCTION MANUAL 100M MFC (0-200 slpm) 100L MFC (0-50 slpm)
- Page 2 Series 100 Instruction Manual Table of Contents INSTRUCTION MANUAL IM-100 Rev.B.1 July 2005 CORPORATE HEADQUARTERS 5 Harris Court, Building L Monterey, CA 93940 Phone (831) 373-0200 (800) 866-0200 Fax (831) 373-4402 www.sierrainstruments.com EUROPE HEADQUARTERS Bijlmansweid 2 1934RE Egmond a/d Hoef The Netherlands Phone +31 72 5071400 Fax +31 72 5071401 ASIA HEADQUARTERS 100 Jiangnan Dadao Zhong Guang Bldg.
- Page 3 Series 100 Instruction Manual IMPORTANT CUSTOMER NOTICE Sierra Instruments, Inc. is not liable for any damage or personal injury, whatsoever, resulting from the use of Sierra Instruments standard mass flow meters or control- lers for oxygen gas. You are responsible for determining if this mass flow meter or controller is appropriate for your oxygen application.
- Page 4 Series 100 Instruction Manual Table of Contents TABLE OF CONTENTS Chapter 1 Introduction Introduction.............1-1 Using this Manual..........1-1 Safety Information ..........1-2 Receipt of System Components .........1-2 Definitions Used in This Manual........1-3 The Smart-Trak Flow Sensing Principle......1-4 Chapter 2 Installation Before You Begin Installation........2-1 Smart-Trak Data Labels..........2-1 Pre-Installation Checklist ..........2-2 Installing the Instrument-Plumbing........2-3...
- Page 5 Change Full Scale..........5-14 Change Password (Lost Passwords) ......5-15 Lost Password............5-16 Other Useful Features..........5-16 Comm Port............5-17 Read Controller Parameters........5-17 Web Links............5-17 PDF Information ..........5-17 Chapter 6 Technical Support and Service Technical Support ………………………………….…………6-1 Sierra Websites ............…6-2 Returning Equipment to the Factory…………………………….6-3 IM-100-B...
- Page 6 Series 100 Instruction Manual Table of Contents Appendix A Gas Tables Pre-programmed gas list-Dial-A-Gas …………………………..A-1 K-Factor Calculations ……………………...……..……………A-1 Gas Tables with K-factors ……………...……………………...A-2 Appendix B Product Specifications Performance Specifications………………..…………………..B-1 Operating Specifications …………………..…………………..B-1 Physical Specifications ………………..………………….……B-3 Optional Accessories……..………………..…………………..B-4 Appendix C Flow Chart for Pilot Module User Interface Appendix D HD DB-15 PIN Configuration Appendix E Dimensions and Mounting IM-100-B...
-
Page 7: Im-100-B
Welcome to the future of gas flow measurement! The Sierra Instruments’ Smart-Trak Series 100 is an innovation from Sierra, a company that has designed and manufactured gas mass flow measurement instruments since the early 1970’s. This manual is your guide to Smart-Trak. Visit the dedicated Smart- Trak website www.sierrasmarttrak.com any time for more infor-... -
Page 8: Safety Information
• Appendix D: PIN Configuration of the mini-D connector • Appendix E: Dimensional Drawings & Mounting Instructions. Throughout this manual, we use the word instrument as a ge- neric term to represent all models of Sierra Instruments’ Smart- Trak Series 100 mass flow meters and controllers. SAFETY INFORMATION... -
Page 9: Im-100-B
Chapter 1 Introduction (as ordered). Make sure any spare parts or accessories are not dis- carded with the packing material. Do not return any equipment to the factory without first contacting one of Sierra’s Technical Sup- port Centers: Email Customer Service: service@sierrainstruments.com... -
Page 10: The Smart-Trak Flow Sensing Principle
Chapter 1 Introduction Series 100 Instruction Manual LFE—Laminar Flow Element (LFE) or bypass generates pressure drop forcing a small fraction of the total flow to pass through the sensor capillary tube. THE SMART-TRAK FLOW SENSING PRINCIPLE The operating principle of the Smart-Trak instruments is based on heat transfer and the first law of thermodynamics. - Page 11 Series 100 Instruction Manual Chapter 1 Introduction Figure 1-2. Flow Measuring Principle Figure 1-3. Sensor Temperature Distribution Figures 1-2 and 1-3 show the mass flow through the sensor tube as inversely proportional to the temperature difference of the coils. The coils are legs of a bridge circuit with an output voltage in direct pro- portion to the difference in the coils’...
- Page 12 Chapter 1 Introduction Series 100 Instruction Manual Figure 1-4. Linear Range of the Transducer’s Output Signal In the Smart-Trak mass flow controllers, the gas which flows through the monitoring section is precisely regulated by the built-in electromagnetic valve. The normally closed valve is similar to an on/off solenoid valve, except that the current to the valve coil, and hence the magnetic field, is modulated so that the ferromagnetic valve armature, or valve plug, assumes the exact height above the...
- Page 14 See Appendix A for a table of elastomer compatibility with a wide variety of gases. 2. Sierra strongly recommends you install an in-line filter up- stream of the instrument. Recommended filter size: 10 micron. Smart-Trak is supplied with a 10 micron filter installed inside the instrument.
- Page 15 Series 100 Instruction Manual Chapter 2 Installation Installing the Instrument—Plumbing ® ® Smart-Trak instruments are supplied with compression, VCO , VCR , or female NPT process connections. To ensure a successful installation, inlet and outlet tubing should be in a clean state prior to plumbing the instru- ment into the system.
- Page 16 Chapter 2 Installation Series 100 Instruction Manual Check the system’s entire flow path thoroughly for leaks. Do not use liquid leak detectors. Instead, monitor pressure decay. Ex- posing the instrument to leak detector fluid may damage the unit. VCO Fittings Position the instrument with the flow direction arrow pointing in the direction of flow.
- Page 17 Series 100 Instruction Manual Chapter 2 Installation Tighten each fitting by hand. Then, tighten no more than one (1) turn. Do not over-tighten. Check the system’s entire flow path thoroughly for leaks. Do not use liquid leak detectors. Instead, monitor pressure decay. Ex- posing the instrument to leak detector fluid may damage the unit.
- Page 19 (5 VDC External Setpoint & Valve Purge) Black Valve Override (shut) Brown/white RS-232 Receive (in) Red/white 4-20 mA Output Red/Black Chassis (Earth) Ground Note: Pins 1, 3, 5, and 10 are connected together inside the instrument. Sierra recommends individual wires. IM-100-B...
- Page 20 • Instrument Power: The Smart-Trak requires a 12-30 VDC power supply. If you are using the power supply supplied by Sierra, connect it to the 15-pin HD DB-15 connector on the side of the instrument. If you are supplying your own power source, it must be a regulated 12-30 VDC with ripple not to exceed 100 mV peak-to-peak.
- Page 21 For your convenience, the RS-232 communication may also be accessed using the mini-RCA jack located on the side of the instrument below the D-connector. Use Sierra Instruments’ cable number “CRS.” This cable may be purchased sepa- rately from Sierra or its agents.
- Page 22 Chapter 2 Installation Series 100 Instruction Manual CAUTION: The CAT-5 connector on the side of the Smart-Trak is NOT an Ethernet connector. It is for use with the optional Remote Pilot Module. Do not plug an Ethernet cable here as damage may re- sult.
- Page 23 Series 100 Instruction Manual Chapter 3 Analog Operation CHAPTER 3: ANALOG OPERATION Your Smart-Trak instrument may be operated in three different ways: THREE CONTROL OPTIONS A. Analog Input/Output Operation (This Chapter): Using analog in- put/output signals at the 15-pin mini-D connector. B .
- Page 24 Chapter 2, you are ready to supply power. Power Up Your Instrument: See Chapter 2, Figure 2-5: Power Supply Requirements. Apply power using Sierra’s power supply or your own power source. The green LED at the top of the left side will light to confirm Caution! power.
-
Page 25: Smart-Trak Data Labels
Series 100 Instruction Manual Chapter 3 Analog Operation der. Smart-Trak will immediately begin accurately monitoring and controlling the gas mass flow rate. Let the instrument warm up for at least 15 minutes for optimal performance. Your Smart-Trak instrument is now ready for use! Smart-Trak Features Setpoint Adjustment The setpoint (command) input signal you supply to Smart-Trak must be a di-... - Page 27 Material Safety Data Sheet (MSDS) must be enclosed & at- tached to the outside of the box to alert Sierra per- sonnel of the potential hazard. Also, make sure the inlet & outlet are solidly plugged off.
- Page 28 Series 100 Instruction Manual Chapter 4 Operation with Pilot Module CHAPTER 4: Digital Operation with Pilot Module Your Smart-Trak instrument may be operated in three different ways: THREE CONTROL OPTIONS A. Analog Input/Output Operation (Chapter 3): Using analog in- put/output signals at the HD DB-15 connector. B .
-
Page 32: Power Supply Requirements
Chapter 4 Operation with Pilot Module 2 . Power Up Your Instrument: Apply power to your instrument using Sierra’s power supply or your own input power source. See Chapter 2, Figure 2-5: Power Supply Requirements. When power is first applied, the... - Page 33 Chapter 4 Operation with Pilot Module Series 100 Instruction Manual 2 Lower Level Screens: permit changes to instrument operation. They are password protected. These include: v Setpoint value v Engineering units v Gas v Valve operation v Source of the setpoint signal v Form of the output signals v Full scale of the instrument v Password...
-
Page 35: Setpoint Screen
Chapter 4 Operation with Pilot Module Series 100 Instruction Manual Upper Level Screens (Display Information Only) The four Upper Level Screens display a variety of information. You are able to move between the screens by pressing the left or right arrows. No password is required for the Upper Level Screens. - Page 37 When you press any button, you will return to the Mass Flow Screen in the Upper Level. Press the “enter” key to try again. LOST PASSWORDS & GENERAL CUSTOMER SERVICE: If you lose your password, it will be necessary to contact one of Sierra’s Technical Support Centers. Email Customer Service: service@sierrainstruments.com...
- Page 38 Series 100 Instruction Manual Chapter 4 Operation with Pilot Module European Customer Service: PHONE: +31 72 5071400 FAX: +31 72 5071401 EMAIL: service@sierra-instruments.nl Asia Customer Service: PHONE: + 86 203435 4870 FAX: +86 203435 4872 IM-100-B 4-11...
- Page 40 Series 100 Instruction Manual Chapter 4 Operation with Pilot Module Change Setpoint Value 10.00 sl/m Next, press the “right” arrow so that the second digit blinks. Push the up arrow twice. You will now see: Change Setpoint Value 12.00 sl/m Press the right arrow again.
- Page 41 Chapter 4 Operation with Pilot Module Series 100 Instruction Manual Note: If you enter a Setpoint that exceeds the full scale value (displayed in the “Full Scale” screen in the Upper Level), the Smart-Trak will automati- cally modify this value to equal the current full scale value. For example, if Caution! the current full scale value of your instrument is 10 slpm and you have en- The Smart-Trak will not...
- Page 42 Series 100 Instruction Manual Chapter 4 Operation with Pilot Module Units Change to XXX/x And the “Yes” will blink. You may now press the enter key to implement your changes. You can make additional changes by using the left and right arrow keys to move to other Lower Level Screens.
- Page 43 Chapter 4 Operation with Pilot Module Series 100 Instruction Manual programmed in your instrument by using this screen and simply scrolling up or down. Change Valve Operation-Close, Purge If you are already in the Lower Level Screens, push the right or left arrow until you reach the Change Valve Operation screen.
- Page 44 WARNING: If an instrument used with a toxic or corrosive gas is re- turned to the factory, a Material Safety Data Sheet (MSDS) must be enclosed & attached to the outside of the box to alert Sierra person- nel of the potential hazard. Also, make sure the inlet & outlet are solidly plugged off.
- Page 45 Chapter 4 Operation with Pilot Module Series 100 Instruction Manual When you are satisfied, press enter. You will see: Setpoint Source Change to X X X X X The “No” will blink. If you do not want to make the displayed change, press enter.
-
Page 46: Full Scale Screen
Series 100 Instruction Manual Chapter 4 Operation with Pilot Module Output Change to X X X X X The “No” will blink. If you do not want to make the displayed change, press enter. You will return to the Change Output Signals screen. If you want to make the displayed change, press any arrow. -
Page 47: Change Password Screen
Chapter 4 Operation with Pilot Module Series 100 Instruction Manual If you choose to change the full-scale value, press the enter key. The first digit will blink. Use the up and down arrows to adjust the value of the digit or the left and right arrows to choose another digit. - Page 48 Lower Level without it. Be certain the new pass- word is recorded. Lost Passwords and General Customer Service If you lose your password, it will be necessary to contact one of Sierra’s Technical Support Centers. Email Customer Service: service@sierrainstruments.com...
- Page 49 Chapter 4 Operation with Pilot Module Series 100 Instruction Manual Maintenance Functions Your Smart-Trak instrument has some additional functions that can be con- trolled via the Pilot Module. LCD backlight with adjustable brightness. To activate the LCD backlight, return the Smart-Trak to any of the Top Level Screens by pressing escape.
- Page 50 Technical Support we can extend. Please see your Sierra Instruments Representative for information or contact Sierra Instruments directly. Go to Sierra’s corporate website to locate a representative or distributor in you area. www.sierrainstruments.com IM-100-B...
- Page 51 Source of the setpoint signal v Form of the output signals v Full scale of the instrument v Password 3. Additional Features include: v Re-boot the Smart-Trak microprocessor v Change the Communication Port v Links to Sierra Instruments’ Web Site v Specifications IM-100-B...
-
Page 52: Power Up Your Instrument
After your instrument is installed and the system has undergone a complete leak check (discussed in detail in Chapter 2), apply power using Sierra’s power supply or your own input power source. See Chapter 2, for power supply requirements. The green LED at the top of the left side will light. -
Page 53: Loading The Smart-Trak Software
(analog ground) on the instrument’s 15-pin mini- D Connector to an appropriate serial port using a standard DB-9 connector (see Chapter 2 for wiring instructions.) Alternatively, you may purchase the Sierra Instruments RS-232 communication cable part number CRS (See Appendix B for Parts and Accessories ordering information). - Page 55 Open a separate software window for each meter and you can monitor all of them at one time. If connecting your computer to the Smart-Trak creates any confusion, please contact Sierra Instruments or your IT person for assistance. IM-100-B...
-
Page 59: Using The Smart-Trak Software
Chapter 5 Operation with RS-232 and Smart-Trak Software Series 100 Instruction Manual box for a few seconds and then values will fill all the boxes on the screen. Communication has been established. Your computer is now able to control your Smart-Trak instrument. See page 5-12 for additional instructions on the “Read Controller Parameters”... -
Page 60: Password Section
Series 100 Instruction Manual Chapter 5 Operation with RS-232 and Smart-Trak Software Valve State If you have a Mass Flow Meter, this box can be bypassed. For normal operation of the flow controller, this box should display: Automatic If this is visible, the instrument will automatically control flow as soon as a setpoint is given to it. -
Page 61: Lower Section Of Software Window
Chapter 5 Operation with RS-232 and Smart-Trak Software Series 100 Instruction Manual C. Lower Section of Software Window– Changing Parameters Across the bottom half of the screen you will find a section titled “Change Meter Parameters” and you will see a number of white boxes. Each box allows you to adjust one or more meter functions. -
Page 63: Change Output Signal
Chapter 5 Operation with RS-232 and Smart-Trak Software Series 100 Instruction Manual your computer using the RS-232 link or from the Pilot Module, the display in this box should read: Pilot Module/RS-232 If, instead of using the RS-232 link or the Pilot Module, you prefer to supply an analog setpoint signal to the Smart-Trak, activate the pull-down menu. -
Page 64: Change Password
Series 100 Instruction Manual Chapter 5 Operation with RS-232 and Smart-Trak Software The instrument’s maximum flow rate is also recorded on the data label (at the back of the instrument) and on the calibration certificate. CAUTION: You may select any full-scale value between 100% and 50% of the maximum full-scale value. - Page 65 Caution: Once you change the Password, you will not be able to enter the Lower Level without it. Be certain the new password is recorded. Lost Passwords and General Customer Service If you lose your password, it will be necessary to contact one of Sierra’s Technical Support Centers. Email Customer Service: service@sierrainstruments.com...
-
Page 66: Pdf Information
Calibration Certificate. Web Links This feature allows you easy access to Sierra Instrument’s corporate web site and to the dedicated Smart-Trak website. Here you can find technical information such as specification sheets, instruction manuals, application notes, new product developments and Technical Support. -
Page 67: Technical Support
Verify that your settings and adjustments are consistent with factory recommendations. If the problem persists, Sierra is eager to help you. You may contact us at any of the following Technical Support Centers. It may also help to call your Sierra Sales Agent, who is also well trained in the operation of the product. - Page 68 Chapter 6 Technical Support Sierra 100 Instruction Manual Sierra Websites www.sierrasmarttrak.com Smart-Trak Website: www.sierrainstruments.com Corporate Website: www.innovamass.com Vortex Multivariable Mass Flow Meter Website: www.sierraemissions.com Engine Emissions Testing Systems Website: IM-100-B...
-
Page 69: Returning Equipment To The Factory
Prices may vary depending on the flow range, type of gas and operating pressure of your unit. To request detailed pricing con- tact your local Sierra Instruments distributor or contact one of our offices directly. Our expedite fees are: three-day turnaround 25%, two-day turn- around 40%. - Page 72 Appendix A Series 100 Instruction Manual Gas Tables and K-factors Chemical K-factor Density Elastomer* Actual Gas Symbol Relative (Cal/g) (g/l) @ O-ring to Air 0°C Valve Seat Acetylene .4036 1.162 1.000 .240 1.293 Allene (Propadiene) .352 1.787 Ammonia .492 .760 Argon 1.398 .1244...
- Page 73 Series 100 Instruction Manual Appendix A Chemical K-factor Density Elastomer* Actual Gas Symbol Relative (Cal/g) (g/l) @ O-ring 0°C Valve Seat Dichloromethylsilane .1882 5.758 SiCl Dichlorosilane .150 4.506 Dichlorotetrafluoroethane .1604 7.626 (Freon-114) 1,1-Difluoroethylene .224 2.857 (Freon-1132A) Dimethylamine .366 2.011 Dimethyl Ether .3414 2.055 2,2-Dimethylpropane...
- Page 74 Appendix A Series 100 Instruction Manual Chemical K-factor Density Elastomer* Actual Gas Symbol Relative (Cal/g) (g/l) @ O-ring 0°C Valve Seat Methyl Mercaptan .2459 2.146 Methyl Trichlorosilane ) SiCl .164 6.669 Molybdenum Hexafluoride .1373 9.366 Monoethylamine .387 2.011 Monomethylamine .4343 1.386 Neon 1.46...
-
Page 75: Performance Specifications
Series 100 Instruction Manual Appendix B Appendix B: Product Specifications Performance Specifications: Accuracy Standard Calibration: ±1.0% of full scale at operating conditions High Accuracy Calibration: ±0.7% of reading plus 0.3% of full scale at operating conditions. Dial-A-Gas: ±1.0% of full scale in all 10 gases Repeatability ±... - Page 76 Appendix B Series 100 Instruction Manual Mass Flow Rates 0 to 10 sccm to 0 to 50slpm of nitrogen at 760 mm Hg and 21°C (70°F) or for an equivalent; many engineering units are available (e.g., scfh or nm Gas Pressure 500 psig (34 barg) maximum.
-
Page 77: Physical Specifications
Series 100 Instruction Manual Appendix B Control Range 2–100% of full scale flow; automatic shut-off at 1.9%. Output Signals--Analog: Linear 4–20 mA, 500 ohms maximum loop resistance plus one of the following (user selectable): Linear 0–5 VDC, 1000 ohms minimum load resistance Linear 0-10 VDC, 1000 ohms minimum load resistance Linear 1-5 VDC, 1000 ohms minimum load resistance Output Signals--Digital:... - Page 78 Series 100 Instruction Manual Optional Parts & Accessories: The following optional accessories are available from your Authorized Sierra In- struments Representative or directly from Sierra Instruments. They are provided to improve your experience with the Smart-Trak Series 100 Mass Flow Meters and Controllers.
- Page 80 (5 VDC External Setpoint & Valve Purge) Black Valve Override (shut) Brown/white RS-232 Receive (in) Red/white 4-20 mA Output Red/Black Chassis (Earth) Ground Note: Pins 1, 3, 5, and 10 are connected together inside the instrument. Sierra recommends individual wires. IM-100-B...
- Page 81 Series 100 Instruction Manual Appendix E Appendix E: Product Dimensions and Mounting All dimensions are in inches with millimeters in [brackets]. Smart-Trak C100L Meters & Controllers Front View L dimension ranges from 4.6” (117 mm) to 5.2” (132 mm) depending on fittings. IM-100-B...
- Page 82 Appendix E Series 100 Instruction Manual Smart-Trak C100L Meters & Controllers Side View IM-100-B...
- Page 83 Series 100 Instruction Manual Appendix E Smart-Trak C100L Meters & Controllers Bottom View Notice that 2 of the mounting holes on the bottom of Smart-Trak are SAE and 2 of the holes are metric IM-100-B...
- Page 84 Appendix E Series 100 Instruction Manual Smart-Trak M100M Front View L Dimension ranges from 5.9” (150mm) to 6.9” (175mm) depending on fittings used IM-100-B...
- Page 85 Series 100 Instruction Manual Appendix E Smart-Trak M100M Side View IM-100-B...
- Page 86 Appendix E Series 100 Instruction Manual Smart-Trak M100M & C100M Bottom View IM-100-B...
- Page 87 Series 100 Instruction Manual Appendix E Smart-Trak C100M Front View L Dimension ranges from 5.9” (150mm) to 6.9” (175mm) depending on fittings used IM-100-B...
- Page 88 Appendix E Series 100 Instruction Manual Smart-Trak C100M Side View IM-100-B...
Need help?
Do you have a question about the Smart-Trak 100 series and is the answer not in the manual?
Questions and answers