Table of Contents
Advertisement
Quick Links
INSTALLATION INSTRUCTIONS AND USER GUIDE
Please read these instructions before installing or using this appliance for the first time. These instructions must be followed for the safe installation of the radiator. Any
problem, fault or damage caused by the non-observance of these instructions will not be covered under the manufacturer's warranty. This manual should be retained with the
WIFI THERMAL RADIATORS
appliance by the user for future reference.
INGENIUM
RD4W
RD6W
RD8W
RD10W
RD12W
RD14W
Advertisement
Table of Contents

Related Manuals for Gabarron INGENIUM RD4W


Summary of Contents for Gabarron INGENIUM RD4W
- Page 1 INSTALLATION INSTRUCTIONS AND USER GUIDE INGENIUM WIFI THERMAL RADIATORS RD4W RD10W RD6W RD12W RD8W RD14W Please read these instructions before installing or using this appliance for the first time. These instructions must be followed for the safe installation of the radiator. Any problem, fault or damage caused by the non-observance of these instructions will not be covered under the manufacturer’s warranty.
- Page 2 1. WARNING Please read these instructions before installing or using this appliance for the first time. • The warranty of the heater will not cover any damage caused by non-observance of any of these instructions. • The instructions should be retained for future reference. This guide must be kept and given to any new owner. •...
-
Page 3: Installation Instructions
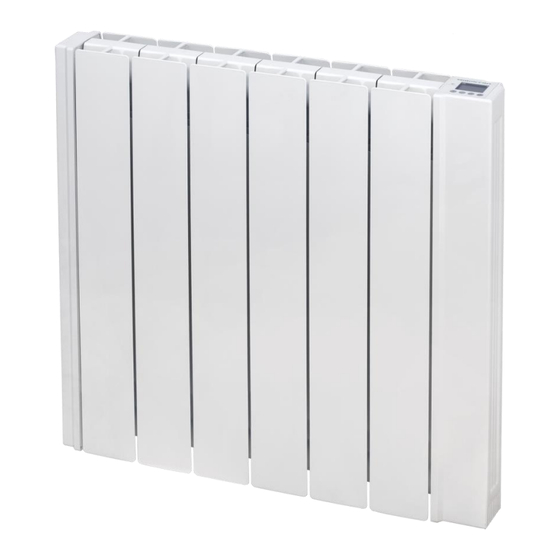
2. - INSTALLATION INSTRUCTIONS - Open the package and check that it is the correct model and it is in good condition. - To obtain optimum performances it is necessary to maintain a Shelf minimum clearance of 15 cm between the radiator and any inflammable material as Minimum 15cm furniture, curtains etc. -
Page 4: Operating Modes
3. - USING THE THERMAL RADIATOR Main switch. All models are equipped with one switch on the back surface allowing the heater disconnection. Daily Programming: Temperature level for each time interval (1h) of the day. G-Control Hub connection indicator. Temperature setpoint. Heating on indicator. - Page 5 3.2. SETTING THE TIME We start by first setting the Day and Time. 3.2.1 You can do this by Press & Holding the 3.2.2. When pressing Config/Prog button when the 7 Config/Prog. button until the following is shown. programming is displayed, you enter in the Time Setting. The day of the Press &...
- Page 6 3.4. TEMPERATURE LEVELS In the AUTO mode, you can temporary change the set temperature for the time period. You can increase or decrease this temperature simply by pressing the "+" or "-" buttons. Once the time period finishes, the temperature will revert back to the programmed set temperature.
-
Page 7: Adaptive Start Control
3.8. ADAPTIVE START CONTROL Ingenium electronic control analyses the heating requirements of the room where the radiator is installed using this information to turn on the heating element in advance in order to reach the set point temperature at the desired time. It will be shown in the display as follows: Note: To activate the adaptive start control please refer to C6 in 3.10. -
Page 8: Unit Reset
4.- REMOTE OPERATION USING THE WIFI G-CONTROL HUB It is possible to control the full operation of the unit remotely with Gabarron-Elnur app or app-web. The unit must be connected to a Wifi G-Control Hub connected to the internet to use this feature. -
Page 9: Cleaning And Maintenance
7.- CLEANING AND MAINTENANCE The radiators do not precise any special maintenance providing thermal comfort during large periods. Clean dust with a dry, soft cloth only when the unit is disconnected and cold. Do not use solvents or abrasive products for cleaning. After the heating season disconnect the radiator with the switch located on the back surface of the radiator. - Page 10 WIRING...
-
Page 11: Technical Specifications
Triac Triac Triac Triac Relay Electronic Control All models are equipped with control function trough G-Control Hub connected to the network. PRODUCT FICHE MODEL(S): GABARRON RD4W, RD6W, RD8W, RD10W, RD12W, RD14W Value Item Symbol Unit RD4W RD6W RD8W RD10W RD12W RD14W... - Page 12 WARNING: In order to avoid overheating do not cover the heater The symbol on the product or in its packaging indicates that this product may not be treated as household waste. Instead it shall be handed over to the applicable collection point for the recycling of electrical and electronic equipment.
Need help?
Do you have a question about the INGENIUM RD4W and is the answer not in the manual?
Questions and answers