Table of Contents
Advertisement
Quick Links
2753 Michigan Road • Madison, Indiana 47250 • 855-743-3427
F
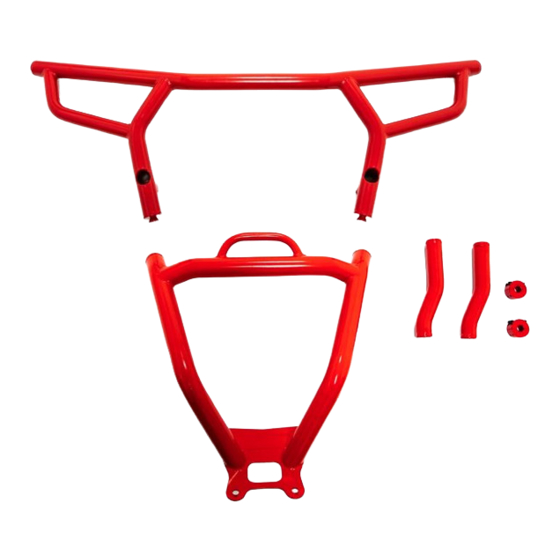
Item Description
A
Upper
B
Lower
C
Mount x 2
D
Clamp x 2
E
End Cap x 2
F
Alignment Washer x 2
Need help with your installation?
sales@superatv.com
1-855-743-3427
© 2018 SuperATV.com. All Rights Reserved.
C
D
www.superatv.com
8:00am - 9:00pm EST M-Th
8:00am - 7:00pm EST Friday
9:00am - 2:00pm EST Saturday
INSTALLATION INSTRUCTIONS
Rear Brush Guard:
A
F
C
B
(kit contents on following pages)
Read instructions and view illustrations before beginning.
IN-RBG-P-RZRXPTS / IN-RBG-P-RZR1K-004 10/5/2018
Polaris RZR XP
®
Polaris RZR XP
®
D
E
Thank You
For Choosing
Turbo S
1000 (2019)
Advertisement
Table of Contents

Subscribe to Our Youtube Channel
Related Manuals for SuperATV RBG-P-RZRXPTS


Summary of Contents for SuperATV RBG-P-RZRXPTS
- Page 1 Need help with your installation? Read instructions and view illustrations before beginning. Thank You sales@superatv.com www.superatv.com For Choosing 8:00am - 9:00pm EST M-Th 1-855-743-3427 8:00am - 7:00pm EST Friday 9:00am - 2:00pm EST Saturday © 2018 SuperATV.com. All Rights Reserved. IN-RBG-P-RZRXPTS / IN-RBG-P-RZR1K-004 10/5/2018...
- Page 2 The Buyer is also responsible to obey all ® applicable federal, state, and local laws and ordinances when operating his/her vehicle while using this product, and the Buyer agrees to hold SuperATV harmless from any ®...
- Page 3 Keep all components removed from machine. - Remove stock Facia. Fascia - Remove Plate and Radius Arms hardware. Plate and Radius Arms hardware (SuperATV RSL’s installed) (Passenger Side) IN-RBG-P-RZRXPTS/ IN-RBG-P-RZR1K-004...
- Page 4 - insert drill bit into Drill Guide and drill through Frame - hole must be large enought to accept Ø10mm bolt - remove Drill Guide and reinstall stock bolt - repeat for opposite side Drill Guide stock bolt (Driver Side) IN-RBG-P-RZRXPTS/ IN-RBG-P-RZR1K-004...
- Page 5 - Secure Lower (B) to Frame with hardware shown. M12 x 80mm 4 each (Passenger Side) (SuperATV RSL’s installed; do not install Spacers) M12 Nut If stock RSL’s are installed, Spacers must be installed so they are against Frame. RSL’s install against...
- Page 6 - Install Mounts (C) to Upper (A) with hardware shown. - Install End Caps (E) to Upper (A) with hardware shown. M12 x 30mm (Passenger Side) M10 Lock M10 x 30mm Washer IN-RBG-P-RZRXPTS/ IN-RBG-P-RZR1K-004...
- Page 7 - Reinstall Fascia. - Secure Upper (A) and Alignment Washer (F) to Frame with hardware shown. M10 x 80mm (Passenger Side) M10 Lock Washer - Join Upper (A) and Lower (B) with Clamps (D). IN-RBG-P-RZRXPTS/ IN-RBG-P-RZR1K-004...
- Page 8 - Align to machine and tighten all hardware completely. IN-RBG-P-RZRXPTS/ IN-RBG-P-RZR1K-004...
Need help?
Do you have a question about the RBG-P-RZRXPTS and is the answer not in the manual?
Questions and answers