Western Digital HGST Ultrastar Serv60+8 Recommended Rack Configurations
Hide thumbs
Also See for HGST Ultrastar Serv60+8:
- User manual (406 pages) ,
- Manual (51 pages) ,
- User manual (356 pages)

Related Manuals for Western Digital HGST Ultrastar Serv60+8


Summary of Contents for Western Digital HGST Ultrastar Serv60+8
- Page 1 Recommended Rack Configurations Ultrastar Serv60+8 Regulatory Model: H4060-S February 2019 Rev. 1.0 1ET1640 ™ Long Live Data | www.hgst.com...
-
Page 2: Table Of Contents
Contents Recommended Rack Configurations Contents Revision History....................3 Points of Contact.....................4 Copyright......................5 Chapter 1 Overview..................6 Ultrastar Serv60+8 Rack Requirements..........6 1.2 Rack Safety..................7 1.3 CMA Standard Recommended Racks..........8 1.4 CMA Lite Recommended Racks............9 1.5 Vertical Rack Rail Settings...............11 1.6 Recommended PDUs and Available Installation Space....12 Chapter 2 CMA Standard Rack Specifications........14 CRENLO/EMCOR................14 AFCO/Legrand.................14... -
Page 3: Revision History
Revision History Recommended Rack Configurations Revision History Date Revision Comment January 2019 Revision 1.0 Initial Release... -
Page 4: Points Of Contact
Points of Contact Recommended Rack Configurations Points of Contact For further assistance with an HGST product, contact Platform Engineering technical support. Please be prepared to provide the following information: Serial Number (S/N), product name, model number, and a brief description of the issue. Email: support@wdc.com Website:... -
Page 5: Copyright
The following paragraph does not apply to the United Kingdom or any country where such provisions are inconsistent with local law: HGST a Western Digital company PROVIDES THIS PUBLICATION "AS IS" WITHOUT WARRANTY OF ANY KIND, EITHER EXPRESS OR IMPLIED, INCLUDING, BUT NOT LIMITED TO, THE IMPLIED WARRANTIES OF MERCHANTABILITY OR FITNESS FOR A PARTICULAR PURPOSE. -
Page 6: Chapter 1 Overview
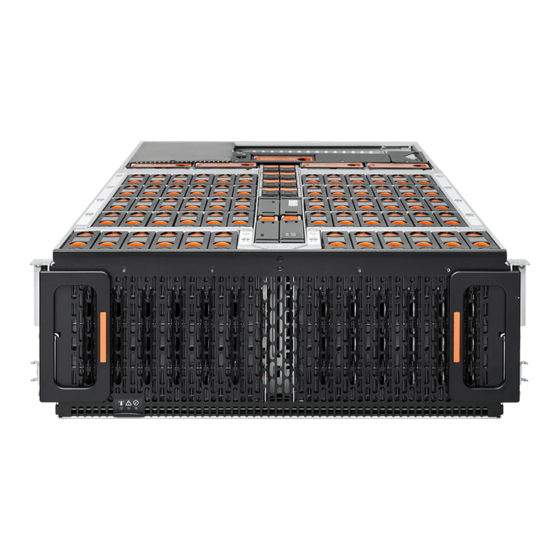
Overview Recommended Rack Configurations Ultrastar Serv60+8 Rack Requirements Chapter 1 Overview This section provides an overview of rack requirements and recommendations. 1.1 Ultrastar Serv60+8 Rack Requirements The Ultrastar Serv60+8 is designed to be installed into a rack that meets the EIA-310 standard at a minimum 1200 mm (47.24in.) of usable rack space, frame to frame. -
Page 7: Rack Safety
Overview Recommended Rack Configurations Rack Safety handling the unit. Always team lift the chassis by gripping the underside of the unit, and never try to lift a chassis that is filled with drives. Figure 1: Installation, Servicing, and Removal Attention: Do not install or remove the enclosure while it is populated with drives. The fully populated enclosure exceeds the amount of weight that a team of two should lift. -
Page 8: Cma Standard Recommended Racks
Overview Recommended Rack Configurations CMA Standard Recommended Racks following locations. These screws should be tightened to 3.38-3.61 Nm / 30-32 in-lbf using a Long T15 Torx Screwdriver. Figure 2: Shipping Bracket Screw Locations Screw Location 1.3 CMA Standard Recommended Racks The following is a list of racks that are recommended for the Ultrastar Serv60+8 using CMA Standard. -
Page 9: Cma Lite Recommended Racks
Overview Recommended Rack Configurations CMA Lite Recommended Racks Vendor Part Number Rack Dimensions Notes Units WEDIT603 H: 2311.4mm x W: 609.6mm x D: 1317.6mm/ H: 91in. x W: 24in. x D: 51.9in. WEDIT604 H: 2178.1mm x W: 609.6mm x D: 1317.6mm/ H: 85.75in. - Page 10 Overview Recommended Rack Configurations CMA Lite Recommended Racks Vendor Part Number Rack Dimensions Notes Units WEDIT603 H: 2311.4mm x W: 609.6mm x D: The enclosure 1317.6mm/ cannot be installed H: 91in. x W: 24in. x D: 51.9in. into the U spaces that are in line with the front door stiffeners or the...
-
Page 11: Vertical Rack Rail Settings
Overview Recommended Rack Configurations Vertical Rack Rail Settings 1.5 Vertical Rack Rail Settings The vertical rack rails should be adjusted to the specified measurements in all of the recommended rack configurations to ensure the enclosure and cable management fit properly. After the front and rear vertical rack rails have been adjusted the enclosure rails can be extended or retracted to best fit these adjustments. -
Page 12: Recommended Pdus And Available Installation Space
Overview Recommended Rack Configurations Recommended PDUs and Available Installation Space 1.6 Recommended PDUs and Available Installation Space The following is a list of available PDU space that is recommended for use in each rack. Table 4: Available PDU Space Rack Model PDU Orientation Space Available... - Page 13 Overview Recommended Rack Configurations Recommended PDUs and Available Installation Space The following image displays the available zero space for mounting the PDU into the rack. This can be used to size the PDU and related installation hardware outside of the hardware that is specified within this document. Figure 5: PDU in the Zero Space...
-
Page 14: Chapter 2 Cma Standard Rack Specifications
CMA Standard Rack Specifications Recommended Rack Configurations CRENLO/EMCOR Chapter 2 CMA Standard Rack Specifications This section provides information related to the recommended rack models, compatible PDUs, and required accessories and hardware using CMA Standard. Each rack recommendation comes with information specific to what PDUs are approved and what hardware is required to mount them. -
Page 15: Tripp Lite
CMA Standard Rack Specifications Recommended Rack Configurations TRIPP LITE Model Number Rack Units Dimensions WEDIT604 H: 2178.1mm x W: 609.6mm x D: 1317.6mm / H: 85.75in. x W: 24in. x D: 51.8in. WEDIT605 H:2044.7mm x W: 609.6mm x D: 1317.6mm / H: 80.5in. -
Page 16: Apc/Schneider
CMA Standard Rack Specifications Recommended Rack Configurations APC/Schneider Model Number Rack Units Dimensions H: 2133.6mm x W: 601.98mm x D: 200.66mm / H: 84in. x W: 47.5in. x D: 7.9in. Note: Installation instructions for the Tripp Lite SREXTENDER, may be acquired from the manufacturers website. - Page 17 CMA Standard Rack Specifications Recommended Rack Configurations APC/Schneider Supplier Part Number Description M6 Hex Nut with Nylon Lock...
-
Page 18: Chapter 3 Cma Lite Rack Specifications
CMA Lite Rack Specifications Recommended Rack Configurations CRENLO/EMCOR Chapter 3 CMA Lite Rack Specifications This section provides information related to the recommended rack models, compatible PDUs, and required accessories and hardware using CMA Lite. Each rack recommendation comes with information specific to what PDUs are approved and what hardware is required to mount them. -
Page 19: Tripp Lite
CMA Lite Rack Specifications Recommended Rack Configurations TRIPP LITE Model Number Rack Units Dimensions WEDIT604 H: 2178.1mm x W: 609.6mm x D: 1317.6mm / H: 85.75in. x W: 24in. x D: 51.8in. WEDIT605 H:2044.7mm x W: 609.6mm x D: 1317.6mm / H: 80.5in. -
Page 20: Apc/Schneider
CMA Lite Rack Specifications Recommended Rack Configurations APC/Schneider Model Number Rack Units Dimensions H: 2133.6mm x W: 601.98mm x D: 200.66mm / H: 84in. x W: 47.5in. x D: 7.9in. Note: Installation instructions for the Tripp Lite SREXTENDER, may be acquired from the manufacturers website. - Page 21 CMA Lite Rack Specifications Recommended Rack Configurations APC/Schneider Supplier Part Number Description M6 Hex Nut with Nylon Lock...
-
Page 22: Chapter 4 Installation
Installation Recommended Rack Configurations PDU Mounting Bracket Installation (KIT-MBVPT-1B) Chapter 4 Installation 4.1 PDU Mounting Bracket Installation (KIT-MBVPT-1B) The installation of PDU mounting bracket kit (KIT-MBVPT-1B) for the AFCO, TRIPPLITE, and CRENLO racks extends the PDUs farther back in the rack to allow for more room for the CMA and enclosure. Note: For recommended vertical rack rail settings, see: Vertical Rack Rail Settings page 11. - Page 23 Installation Recommended Rack Configurations PDU Mounting Bracket Installation (KIT-MBVPT-1B) c) Secure the flat bracket to the PDU by using the screws provided in the PDU mounting kit as shown in the image below. Figure 7: Flat Bracket Installation (bottom) d) Align the right-angle bracket behind the flat bracket over the holes on the left-hand side of the flat bracket.
- Page 24 Installation Recommended Rack Configurations PDU Mounting Bracket Installation (KIT-MBVPT-1B) e) Slide the washers onto the mounting bolts and secure the right-angle bracket to the backer plate through the flat bracket. Before fully tightening the bolts, ensure that the right-angle bracket is flush with the edge of the PDU before tightening.
- Page 25 Installation Recommended Rack Configurations PDU Mounting Bracket Installation (KIT-MBVPT-1B) 2. Install the top side bracket using the provided hardware. a) Locate the two screw holes at the top of the back side of the PDU. b) Align the flat bracket with the two top PDU screw holes as shown. Figure 11: Flat Bracket (top)
- Page 26 Installation Recommended Rack Configurations PDU Mounting Bracket Installation (KIT-MBVPT-1B) c) Secure the flat bracket to the PDU by using the screws provided in the PDU mounting kit as shown in the image below. Figure 12: Flat Bracket Installation (top) d) Align the right-angle bracket behind the flat bracket over the holes on the left-hand side of the flat bracket.
- Page 27 Installation Recommended Rack Configurations PDU Mounting Bracket Installation (KIT-MBVPT-1B) e) Slide the washers onto the mounting bolts and secure the right-angle bracket to the backer plate through the flat bracket. Before fully tightening the bolts, ensure that the right-angle bracket is flush with the edge of the PDU before tightening.
- Page 28 Installation Recommended Rack Configurations PDU Mounting Bracket Installation (KIT-MBVPT-1B) 3. Install the PDU into the rear of the rack. a) Locate the top row of holes on the top vertical rail. b) Secure the right-angle bracket on the top vertical rail with the provided bolts and nuts. Before fully tightening the bolts, ensure that the plug side of the PDU is 145mm / 5.7in away from the rear rack rail.
-
Page 29: Pdu Mounting Bracket Installation (Kit-Mb-40)
Installation Recommended Rack Configurations PDU Mounting Bracket Installation (KIT-MB-40) d) Secure the right-angle bracket on the top vertical rail with the provided bolts and nuts. Before fully tightening the bolts, ensure that the plug side of the PDU is 145mm / 5.7in away from the rear rack rail. Figure 17: PDU Installation (bottom) Figure 18: PDU Distance from Rack Rear Rail 4.2 PDU Mounting Bracket Installation (KIT-MB-40) - Page 30 Installation Recommended Rack Configurations PDU Mounting Bracket Installation (KIT-MB-40) Note: For recommended vertical rack rail settings, see: Vertical Rack Rail Settings page 11. Table 32: Procedure Info Required Tools Required Parts # of People Required • # 2 Philips Screwdriver •...
- Page 31 Installation Recommended Rack Configurations PDU Mounting Bracket Installation (KIT-MB-40) a) Secure the PDU mounting button to the center hole of the long side of the angle-bracket. Figure 20: Install the PDU Mounting Button onto the Angle Bracket b) Repeat the previous step to install the PDU mounting button on the remaining angle-bracket. 3.
- Page 32 Installation Recommended Rack Configurations PDU Mounting Bracket Installation (KIT-MB-40) b) Align the short side of the angle-bracket over the two top PDU mounting holes on the rear of the PDU. The long side of the right angle bracket should be on the left (back) side of the PDU. c) Secure the angle-bracket to the PDU by using the screws provided in the PDU mounting kit as shown in the image below.
- Page 33 Installation Recommended Rack Configurations PDU Mounting Bracket Installation (KIT-MB-40) b) Align the PDU mounting buttons with the keyholes on the rear vertical rack rails and slide down until the PDU is secure. Figure 23: Align PDU with Keyholes Figure 24: PDU Installed into Keyholes c) Verify that the PDU is secure by pressing on the front of the PDU.
Need help?
Do you have a question about the HGST Ultrastar Serv60+8 and is the answer not in the manual?
Questions and answers