Vacon NXP Series System Hardware Manual
Ac drives system drive hardware manual
Hide thumbs
Also See for NXP Series:
- User manual (102 pages) ,
- Installation quick manual (10 pages) ,
- Applications manual (392 pages)
Table of Contents
Advertisement
Quick Links
Advertisement
Table of Contents

Subscribe to Our Youtube Channel
Related Manuals for Vacon NXP Series


Summary of Contents for Vacon NXP Series
- Page 1 ® ac drives system drive hardware manual...
-
Page 3: Table Of Contents
• 3 TABLE OF CONTENTS Document ID: DPD01365 Revision: C Revision release date: 23.06.2020 1. Introduction ........................ 5 Revision history ........................5 Scope of supply ........................5 Related brochures and manuals................... 5 Definitions and abbreviations....................6 Project specifications ......................7 1.5.1... - Page 4 ) for constant power load............71 base 6.2.5 ) < OL( ) for constant power load............72 base ® Technical specifications for VACON drives ..............73 6.3.1 NXN - Non-regenerative front end units.............. 73 6.3.2 NXA - Active front-end units................. 75 6.3.3 NXI - Inverter units ....................
-
Page 5: Introduction
Introduction vacon • 5 NTRODUCTION ® The VACON NXP System Drive is a comprehensive configured common DC bus drive line up for heavy-industry needs where round-the-clock activity is required leaving little time for maintenance. All sections are grouped depending on their functionality, making it possible to plan each installation phase according to your requirements. -
Page 6: Definitions And Abbreviations
• 6 Introduction Definitions and abbreviations Auxiliary Device Section Active Front-end Section Dynamic Brake Section Drive List Inverter Unit Section Low Voltage Main Incoming Section Non-regenerative Front-end Section Single Line Diagram Transport Split Unit Local contacts: https://www.danfoss.com/en/contact-us/contacts-list/... -
Page 7: Project Specifications
Introduction vacon • 7 Project specifications 1.5.1 Parameters Project parameters are selected with the line-up configuration tool. Table 2 shows an example of parameters selected with the configuration tool. Table 2. Example of parameters selected from the configuration tool Parameter... -
Page 8: Sections And Options
• 8 Introduction 1.5.2 Sections and options Sections and options are selected using the line-up configuration tool. The available sections and options are introduced in Chapter 3. Table 3. Example of selected sections and options from the configuration tool... -
Page 9: Storage
Introduction vacon • 9 Storage If the system drive is to be kept in store before use, make sure that the ambient conditions are acceptable: • Storing temperature –40…+70 °C • Relative humidity <95%, no condensation The environment should also be free from dust. If there is dust in the air, the drive should be well protected to make sure dust does not get into the drive. -
Page 10: Lifting And Moving The Cabinet Sections
• 10 Introduction Lifting and moving the cabinet sections For transport, the system drive is split into smaller sections. The cabinet sections are delivered either in a wooden box or a wooden cage. The cabinets are transported vertically. Always refer to shipping marks for more detailed information. -
Page 11: Safety
Safety vacon • 11 AFETY NOTE! You can download the English and French product manuals with applicable safety, warning and caution information from https://www.danfoss.com/en/service-and-support/. REMARQUE Vous pouvez télécharger les versions anglaise et française des manuels produit contenant l’ensemble des informations de sécurité, avertissements et mises en garde applicables sur le site https://www.danfoss.com/en/service-and-support/. -
Page 12: Warnings
• 12 Safety Warnings The components of the power unit and all cabinet mounted devices are live when the drive is connected to mains potential. Coming into contact with this voltage is extremely dangerous and may cause death or severe injury. -
Page 13: Cautions
13006.emf Do not perform any measurements when the AC drive is connected to mains. 13006.emf ® The touch current of VACON AC drives exceeds 3.5 mA . According to standard EN61800-5-1, a reinforced protective ground connection must be ensured. See Chapter 2.3. -
Page 14: Grounding And Ground Fault Protection
• 14 Safety Grounding and ground fault protection CAUTION! 13006.emf The AC drive must always be grounded with a grounding conductor connected to the grounding ter- minal marked with: The touch current of the AC drive exceeds 3.5 mA AC. According to EN61800-5-1, one or more of the... -
Page 15: Available Sections
Available sections vacon • 15 VAILABLE SECTIONS Auxiliary device section The auxiliary device section (ADS) includes the common line-up controls. This section can be customized for all application and segment needs. There are three ADS sizes available. Table 6. ADS section size... -
Page 16: Main Incoming Section
• 16 Available sections Main incoming section The main incoming section (MIS) includes the main incoming device. The main incoming device and size is dependent on the required current of the complete line-up. Table 7. Available MIS sizes MIS type... - Page 17 Available sections vacon • 17 13849_00 Figure 3. Example of main incoming section MIS_1600 Local contacts: https://www.danfoss.com/en/contact-us/contacts-list/...
-
Page 18: Non-Regenerative Front-End Section
Non-regenerative front-end section ® The non-regenerative front-end section (NFS) includes one or multiple NXN units from the VACON NXP product series. The NXN is a non-regenerative supply unit that can be utilized in 6-pulse, 12- pulse, 18-pulse and 24-pulse systems. - Page 19 Available sections vacon • 19 13850_00 Figure 4. Example of non-regenerative front-end section NFS_2x Local contacts: https://www.danfoss.com/en/contact-us/contacts-list/...
-
Page 20: Active Front-End Section
Active front-end section ® The active front-end section (AFS) includes an LCL-filter and an NXA unit from the VACON product series. The active front-end provides low THD(I) and several units can be connected in parallel providing full or reduced redundancy. - Page 21 Available sections vacon • 21 13851_00 Figure 5. Example of active front-end section AFS_9 Local contacts: https://www.danfoss.com/en/contact-us/contacts-list/...
-
Page 22: Inverter Unit Section
Inverter unit section 3.5.1 Drive sizes FR4-FR8 ® The inverter unit section (IUS) includes one or several smaller NXI drives from the VACON ® product series. The inverter units are all VACON NXP premium drives. Table 10. Available IUS section sizes FR4-FR8... - Page 23 Available sections vacon • 23 +ACL +ODU 13852_00 Figure 6. Example of inverter unit IUS_4 +ACL +ODU 13853_00 Figure 7. Example of inverter unit IUS_6 Local contacts: https://www.danfoss.com/en/contact-us/contacts-list/...
- Page 24 • 24 Available sections +ODU 13854_00 Figure 8. Example of inverter unit IUS_8 Local contacts: https://www.danfoss.com/en/contact-us/contacts-list/...
-
Page 25: Drive Sizes Fi9-Fi14
Available sections vacon • 25 3.5.2 Drive sizes FI9-FI14 ® The inverter unit section (IUS) includes the largest NXI drives from the VACON product series. The ® inverter units are all VACON NXP premium drives. Table 11. Available IUS section sizes FI9-FI14... - Page 26 • 26 Available sections +ISC +ODU 13855_00 Figure 9. Example of inverter unit IUS_9 +ISC +ODU 13856_00 Figure 10. Example of inverter unit IUS_12 Local contacts: https://www.danfoss.com/en/contact-us/contacts-list/...
- Page 27 Available sections vacon • 27 +ISC +ODU 13857_00 Figure 11. Example of inverter unit IUS_13 Local contacts: https://www.danfoss.com/en/contact-us/contacts-list/...
-
Page 28: Dynamic Brake Section
• 28 Available sections Dynamic brake section ® The dynamic brake section (DBS) includes the largest NXI drives from the VACON NXP product ® series. The brake units are all VACON NXP premium drives. As standard the DBS section includes the following: 1. -
Page 29: Transport Split Unit
Available sections vacon • 29 Transport split unit Transport Split Units are available for easy access to main bus joints between sections. Table 12. Available TSU section sizes TSU type Width x Height x Depth (mm) TSU_200 200 x 2000 x 605... -
Page 30: Installation
• 30 Installation NSTALLATION Installation procedure ® Each VACON NXP System Drive delivery is project specific. The following installation sequence is a general description of the process of connecting the cabinet sections and installing the system drive. As each installation is project specific, the instructions and illustrations in the following chapters are general examples. -
Page 31: Preparing The Installation Site
Installation vacon • 31 Preparing the installation site Before starting the installation work make sure that the level of the floor is within acceptable limits. The maximum deviation from the basic level can be no more than 5 mm over a 3 m distance. The maximum acceptable height difference between cabinet front and rear edges should be within +2/-0 mm limit. -
Page 32: Mounting The Cabinets
• 32 Installation Mounting the cabinets The cabinet should always be fixed to the floor or to the wall. Depending on installation conditions, the cabinet sections can be fixed in different ways. There are holes in the front and back corners which can be used for fixing. -
Page 33: Back-To-Back Installation
Installation vacon • 33 4.3.2 Back-to-back installation The sections can also be installed back-to-back. In this case, fix the top parts of the cabinets together (1) and the front corners to the floor (2) with bolts. Leave a gap between the backs of the cabinets. Check the correct dimensions from the documents included in the delivery. -
Page 34: Connecting The Busbars
• 34 Installation Connecting the busbars The busbars are located in the back of the cabinets. To access them, it might be necessary to take out the drives. See the instructions in Chapter 5.3. Join together the DC, AC and PE busbars by bolting them together with baying brackets. The mounting bolts, nuts and washers are delivered in place. -
Page 35: Back-To-Back Connection
Installation vacon • 35 Figure 16. Connecting the common AC busbars in UL cabinets 4.4.2 Back-to-back connection 15600_00 Figure 17. Connecting the common DC and PE busbars in back-to-back cabinet installation Local contacts: https://www.danfoss.com/en/contact-us/contacts-list/... -
Page 36: Fixing The Cabinet Frames To Each Other
• 36 Installation Fixing the cabinet frames to each other All the necessary parts for fixing the cabinet frames to each other are included in the delivery. To join two cabinet sections to each other you need six quick-fit baying clamps (1 in figure below) and four angular baying brackets (2 in figure). -
Page 37: Cabling
Installation vacon • 37 Cabling Before connecting any cables, use a multimeter to check that the cables to be connected are not live. 9000.emf 4.6.1 Grounding PE conductors are connected to the PE busbar. The PE busbars in each section are connected (see Figure 15 on page 34) and the PE busbars must be connected to ground. - Page 38 • 38 Installation 13865_00 Figure 19. Cabling of the main incoming section (MIS) U3, V3, W3 U2, V2, W2 U1, V1, W1 13866_00 Figure 20. Cabling of inverter section IUS_4 Local contacts: https://www.danfoss.com/en/contact-us/contacts-list/...
- Page 39 Installation vacon • 39 U2, V2, W2 U1, V1, W1 13867_00 Figure 21. Cabling of inverter section IUS_6 13868_00 Figure 22. Cabling of inverter section IUS_8 Local contacts: https://www.danfoss.com/en/contact-us/contacts-list/...
- Page 40 • 40 Installation 13869_00 Figure 23. Cabling of inverter sections IUS_9 and IUS_10 PU1 PU2 13870_00 Figure 24. Cabling of inverter section IUS_12 Local contacts: https://www.danfoss.com/en/contact-us/contacts-list/...
- Page 41 Installation vacon • 41 13871_00 Figure 25. Cabling of inverter section IUS_13 Local contacts: https://www.danfoss.com/en/contact-us/contacts-list/...
-
Page 42: Emc Grounding
• 42 Installation 4.6.3 EMC grounding For the EMC levels C1 and C2, it is necessary to have a 360º grounding of the shield on both ends of the motor cable. The EMC grounding clamps must be suited to the output cable diameter to give a 360º... -
Page 43: Control Connections
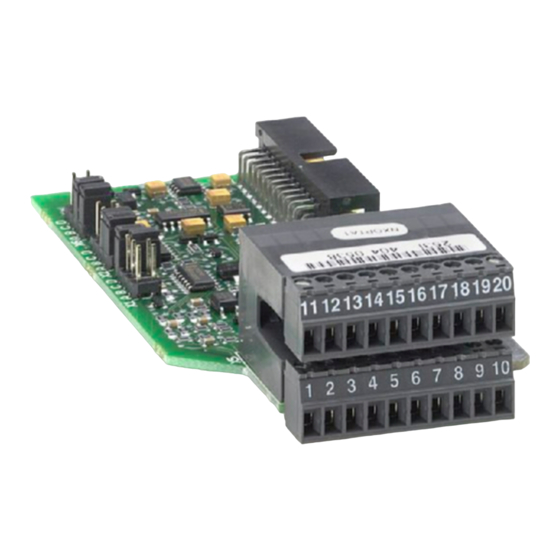
Installation vacon • 43 4.6.5 Control connections The control unit of the AC drive consists roughly of the control board and additional boards connected to the five slot connectors (A to E) of the control board. The control board is connected to the power unit through a D-connector or fibre optic cables. -
Page 44: Auxiliary Low-Voltage Connections
• 44 Installation 4.6.6 Auxiliary low-voltage connections The auxiliary low-voltage connections between cabinets can be done with wiring or with busbars. For transport, the wires between two separately transported cabinets are disconnected from the terminals. The wiring diagrams for the connections are delivered with the system drive. -
Page 45: Screw Tightening Torques
Installation vacon • 45 Screw tightening torques Table 14. Tightening torques Tightening torque Detail Part Size (Nm), ±15% 1 Plain washer, DIN 125 Rittal door 2 Spring washer, DIN 128 3 Nut, DIN 934 Grounding braid Rittal frame Rittal Rittal tapered thread form-... - Page 46 • 46 Installation Table 14. Tightening torques Tightening torque Detail Part Size (Nm), ±15% 1 Plain washer, DIN 125 Grounding braid 2 Hex head bolt, DIN 933 3 Toothed washer, DIN 6797 4 Spring washer, DIN 128 Rittal Rittal...
- Page 47 Installation vacon • 47 Table 14. Tightening torques Tightening torque Detail Part Size (Nm), ±15% Self-tapping screw, DIN 7500 UPGM Self-tapping screw, DIN 7500 Fe (holder) 1 Screw, DIN 7045 2 Plain washer, DIN 125 3 Spring washer, DIN 128 Fe (holder)
- Page 48 • 48 Installation Table 14. Tightening torques Tightening torque Detail Part Size (Nm), ±15% 1 Hex head bolt, DIN 933 2 Nut, DIN 934 3 Plain washer, DIN 125 4 Spring washer, DIN 128 1 Hex head bolt, DIN 933...
- Page 49 Installation vacon • 49 Table 14. Tightening torques Tightening torque Detail Part Size (Nm), ±15% Socomec SB205 1 Hex head bolt, DIN 933 1 Hex head bolt, DIN 933 Socomec SB205 2 Nut, DIN 934 Conical spring washer, DIN 6796 IS40-8S...
- Page 50 • 50 Installation Table 14. Tightening torques Tightening torque Detail Part Size (Nm), ±15% IC20 1 Hex head bolt, DIN 933 2 Spring washer, DIN 128 1 Hex head bolt, DIN 933 2 Nut, DIN 934 Conical spring washer, DIN 6796...
- Page 51 Installation vacon • 51 Table 14. Tightening torques Tightening torque Detail Part Size (Nm), ±15% Flexibar 1 Hex head bolt, DIN 933 2 Nut, DIN 934 Plain washer large, DIN 9021 Conical spring washer, DIN 6796 Flexibar 1 Hex head bolt, DIN 933...
- Page 52 • 52 Installation Table 14. Tightening torques Tightening torque Detail Part Size (Nm), ±15% 44 TTQF 1 Stud, DIN 913 13.5 2 Nut, DIN 934 Conical spring washer, DIN 6796 83 TTQ 1 Stud, DIN 913 13.5 2 Nut, DIN 934 Conical spring washer, DIN 6796...
- Page 53 Installation vacon • 53 Table 14. Tightening torques Tightening torque Detail Part Size (Nm), ±15% Cup square neck bolt, DIN 603 Plain washer large, DIN 9021 3 Nut, DIN 934 Conical spring washer, DIN 6796 Cup square neck bolt, DIN 603 2 Nut, DIN 934 Conical spring washer, DIN 6796...
- Page 54 • 54 Installation Table 14. Tightening torques Tightening torque Detail Part Size (Nm), ±15% Cup square neck bolt, Flexibar DIN 603 Plain washer large, DIN 9021 (1 size bigger) Plain washer large, DIN 9021 4 Nut, DIN 934 Conical spring washer, Flexibar DIN 6796...
-
Page 55: Service
All technical devices, drives as well, need a certain amount of care-taking and failure preventive ® maintenance. To maintain trouble-free operation of the VACON drives, environmental conditions, as well as load, line power, process control, etc. have to be within specifications, determined by manufacturer. -
Page 56: Removing The Drives From The Cabinet
• 56 Service Removing the drives from the cabinet Servicing is only permitted to be carried out by Danfoss-trained service personnel! 13006.emf 5.3.1 IUS_4 / IUS_6 Open the cabinet door. Disconnect all cables from the drive. See Chapter 4.6. -
Page 57: Ius_7 / Ius_8
Service vacon • 57 5.3.2 IUS_7 / IUS_8 Open the cabinet door. Release the drive assembly. Remove the five M8x20 bolts (tightening torque 20 Nm). Figure 32. Drive assembly mounting bolts (X) Pull out the drive assembly. 13932_00 Figure 33. Pulling the drive assembly out of the cabinet Disconnect all cables from the drive. -
Page 58: Ius_9 / Ius_10
• 58 Service 5.3.3 IUS_9 / IUS_10 Open the cabinet door. Release the service ramp and turn it down in front of the drive. NOTE! The height of the surface in front of the cabinet should not differ more than 5 mm from the level of the cabinet installation. - Page 59 Service vacon • 59 Release the input busbar assemblies. Remove: 1. two M10 nuts and M10x30 bolts (torque 40 Nm) from the upper busbars, 2. two M12 nuts and M12x40 bolts (torque 70 Nm) from the lower busbars, 3. two M8x20 screws (torque 20 Nm) from the back plate.
- Page 60 • 60 Service Pull the drive out on the service ramp. 13880_00 Figure 38. Pulling the drive out of the cabinet Local contacts: https://www.danfoss.com/en/contact-us/contacts-list/...
-
Page 61: Ius_12
Service vacon • 61 5.3.4 IUS_12 Open the cabinet door. Release the service ramp and turn it down in front of the drive. NOTE! The height of the surface in front of the cabinet should not differ more than 5 mm from the level of the cabinet installation. - Page 62 • 62 Service Release the input busbar assembly. Remove: 1. four M10 nuts and M10x30 bolts (torque 40 Nm) from the upper busbars, 2. four M12 nuts and M12x40 bolts (torque 70 Nm) from the lower busbars, 3. two M8x20 screws (torque 20 Nm) from the back plate.
- Page 63 Service vacon • 63 Pull the drive out on the service ramp. 13937_00 Figure 43. Pulling the drive out of the cabinet Local contacts: https://www.danfoss.com/en/contact-us/contacts-list/...
-
Page 64: Ius_13 / Ius_14
• 64 Service 5.3.5 IUS_13 / IUS_14 Open the cabinet door. Release the service ramp and turn it down in front of the drive. NOTE! The height of the surface in front of the cabinet should not differ more than 5mm from the level of the cabinet installation. - Page 65 Service vacon • 65 Release the input busbar assembly. Remove: 1. six M10 nuts and M10x30 bolts (torque 40 Nm) from the upper busbars, 2. six M12 nuts and M12x40 bolts (torque 70 Nm) from the lower busbars, 3. two M8x20 screws (torque 20 Nm) from the back plate.
- Page 66 • 66 Service Pull the drive out on the service ramp. 13942_00 Figure 48. Pulling the drive out of the cabinet Local contacts: https://www.danfoss.com/en/contact-us/contacts-list/...
-
Page 67: Technical Information
0.5% or full torque control at all speeds is required, motor control based on feedback ® from an encoder is a necessity. This capability is incorporated into the VACON NXP drive. In addition to the current measurement system used, the NXP drive utilizes feedback values from the encoder to determine the motor state. -
Page 68: Pump And Fan Load
• 68 Technical information 6.2.1 Pump and fan load Set all speeds to the same value ( ) to have the typical pump and fan curve, i.e. base quadratically increasing load. The overload is now set as starting torque and as OL at maximum speed (the overload is now defined as percent of torque at maximum speed). -
Page 69: Ol( N Base ) > Ol
Technical information vacon • 69 6.2.2 ) > OL( ) for constant torque load base It is possible to set the overload at base speed smaller than the overload at maximum speed, i.e. ) < OL( base This can be useful when selecting the correct AC drive for constant torque drives where the overload demand at low speeds is higher than at high speeds. -
Page 70: Starting Torque >> Ol( N Max ) For Constant Torque Load
• 70 Technical information 6.2.3 Starting torque >> OL( ) for constant torque load It is possible to set the starting torque higher than the overload at maximum speed, i.e. OL( ) < base This can be useful when selecting the correct AC drive for constant torque drives where the starting torque requirement is much higher than the maximum load requirement at maximum speed. -
Page 71: Ol( N Base ) > Ol( N Max ) For Constant Power Load
Technical information vacon • 71 6.2.4 ) > OL( ) for constant power load base Some constant power drives require less overload at max speed than at lower speeds. It is therefore possible to set the relative overload at base speed higher than the relative overload at maximum speed, i.e. -
Page 72: Max ) For Constant Power Load
• 72 Technical information 6.2.5 ) < OL( ) for constant power load base It is possible to set the overload at base speed smaller than the overload at max speed, i.e. OL( base < OL( This can be useful when selecting the correct motor and AC drive for constant power drives where the relative OL requirement is higher at maximum speed than the relative OL requirement at base speed. -
Page 73: Technical Specifications For Vacon ® Drives
Technical information vacon • 73 ® Technical specifications for VACON drives 6.3.1 NXN - Non-regenerative front end units Table 16. Technical specifications for non-regenerative front-end (NFE) drives Input voltage U 380-690 V AC; -15%...+10%, EN 60204-1 Input frequency f 45-66 Hz : Ambient temperature max. - Page 74 • 74 Technical information Table 16. Technical specifications for non-regenerative front-end (NFE) drives CE, UL, CUL EN 61800-5-1 (2003) Safety (see unit nameplate for more detailed approvals) Display 7-segment (optional) Control connections Trip information Relay I/O (optional) Unit over temperature...
-
Page 75: Nxa - Active Front-End Units
Technical information vacon • 75 6.3.2 NXA - Active front-end units Table 17. Technical specifications for active front-end (AFE) drives Input voltage U 380-500 V AC; 525-690 V AC; -10%...+10% AC input Input frequency f 48-63 Hz connection Starting delay FI9-FI13: 5 s 1.35 x U... - Page 76 • 76 Technical information Table 17. Technical specifications for active front-end (AFE) drives 0…+10 V, R = 200 kΩ. Analogue input voltage Resolution 0.1%, accuracy ±1% 0(4)…20 mA, R = 250 Ω differential Analogue input current Digital inputs (6) Positive or negative logic;...
-
Page 77: Nxi - Inverter Units
Technical information vacon • 77 6.3.3 NXI - Inverter units 6.3.3.1 Drive sizes FR4-FR8 Table 18. Technical specifications for size FR4-FR8 inverter units (INU) 465-800 V DC; 640-1100 V DC; –0%…+0% , The ripple voltage of the inverter supply voltage gen-... - Page 78 • 78 Technical information Table 18. Technical specifications for size FR4-FR8 inverter units (INU) –10°C (no frost)…+50°C: I Ambient operating temperature –10°C (no frost)…+40°C: I Storage temperature –40°C…+70°C 0 to 95% RH, non-condensing, non-corrosive, Relative humidity no dripping water...
- Page 79 Technical information vacon • 79 Table 18. Technical specifications for size FR4-FR8 inverter units (INU) Overvoltage protection NXI_5: 911 V DC; NXI_6: 1200 V DC Undervoltage protection NXI_5: 333 V DC; NXI_6: 460 V DC In case of an ground fault in the motor or motor...
- Page 80 • 80 Technical information 6.3.3.2 Drive sizes FI9-FI14 Table 19. Technical specifications for size FI9-FI14 inverter units (INU) 465-800 V DC (380-500 V AC) 640-1100 V DC (525-690 V AC) The ripple voltage of the inverter supply voltage gen-...
- Page 81 Technical information vacon • 81 Table 19. Technical specifications for size FI9-FI14 inverter units (INU) Ambient operating –10°C (no frost)…+40°C temperature Storage temperature –40°C…+70°C 0 to 95% RH, non-condensing, non-corrosive, Relative humidity no dripping water Air quality: - chemical vapours...
-
Page 82: Nxb - Brake Chopper Units
• 82 Technical information Table 19. Technical specifications for size FI9-FI14 inverter units (INU) Overvoltage protection NXI_5: 911 V DC; NXI_6: 1200 V DC Undervoltage protection NXI_5: 333 V DC; NXI_6: 460 V DC In case of an ground fault in the motor or motor... - Page 83 Document ID: Vacon Ltd DPD01365C Member of the Danfoss Group Rev. C Runsorintie 7 65380 Vaasa Sales code: DOC-INSNXPSD+DLUK Finland...
Need help?
Do you have a question about the NXP Series and is the answer not in the manual?
Questions and answers