
Related Manuals for X-Rite Macbeth Lighting SpectraLight QC


Summary of Contents for X-Rite Macbeth Lighting SpectraLight QC
- Page 1 Operation Manual Register your product and get access to important product updates, exclusive content, service support, and other tools to help you get the most of your product. www.xrite.com/registration...
- Page 3 This symbol is used to inform you of any potential HAZARD or actions that may require your attention. CE Declaration Hereby, X-Rite, Incorporated, declares that this Spectralight QC is in compliance with the essential requirements and other relevant provisions of Directive(s) 2014/30/EU (EMC), 2014/35/EU (LVD), and RoHS EU 2015/863.
- Page 4 X-Rite, Incorporated. Patents: www.xrite.com/ip “© 2019, X-Rite, Incorporated. All rights reserved” X-Rite® and SpectraLight® are registered trademarks of X-Rite, Incorporated. All other logos, brand names, and product names mentioned are the properties of their respective holders. Warranty Information X-Rite warrants this Product against defects in material and workmanship for a period of twelve (12) months from the date of shipment from X-Rite’s facility, unless mandatory law provides for longer periods.
- Page 5 Customer shall be responsible for packaging and shipping the defective product to the service center designated by X-Rite. X-Rite shall pay for the return of the product to Customer if the shipment is to a location within the region in which the X-Rite service center is located. Customer shall be responsible for paying all shipping charges, duties, taxes, and any other charges for products returned to any other locations.
-
Page 6: Table Of Contents
S p e c t r a L i g h t Q C Table of Contents Introduction and Installation Key Features Unpacking Recommendations for Placement Viewing Booth Assembly Installing Luminaire Into Light Booth Overhead Luminaire Installation Powering Up Navigating the Screen SpectraLight QC Software Utility System Requirements Software Installation... -
Page 7: Introduction And Installation
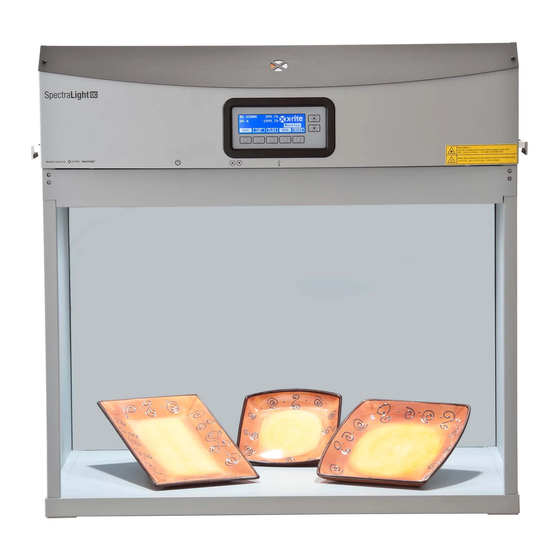
S p e c t r a L i g h t Q C INTRODUCTION AND INSTALLATION The X-Rite SpectraLight QC (SPLQC) is a visual color evaluation system which provides selectable light sources. Display and touchpad Luminaire handles/hangers (4) Power switch, fuse,... -
Page 8: Recommendations For Placement
S p e c t r a L i g h t Q C Recommendations for Placement X-Rite SpectraLight QC is designed for critical color evaluation. Therefore, it is important that precautions be taken to ensure the best environment for this purpose. - Page 9 S p e c t r a L i g h t Q C 1. Place the bottom panel (1) on a clean, smooth surface. Refer to Figure 1. Slot Slot Figure 1. Bottom panel 2. Position the rear panel (2) bottom tabs into the bottom panel (1) rear slots. Fasten the rear panel to the bottom panel by securing it with three screws as shown in Figure 2.
- Page 10 S p e c t r a L i g h t Q C 5. Position the right panel (4) with the smooth side out over the top edge of the rear panel (2). 6. Slide the right panel (4) downward along the interlocking channel until the right panel (4) front tab inserts into the bottom panel (1).
-
Page 11: Installing Luminaire Into Light Booth
S p e c t r a L i g h t Q C Installing Luminaire Into Light Booth NOTE: The table or bench height should be determined by the average height of the observer and whether observations will be made from a standing or sitting position. 1. - Page 12 CAUTION: Before plugging in the unit, verify the voltage indicated on the SpectraLight QC back label complies with the AC line voltage in your area. If not, contact X-Rite or an authorized representative. 12. Plug the SpectraLight QC into an AC wall outlet.
-
Page 13: Overhead Luminaire Installation
S p e c t r a L i g h t Q C Overhead Luminaire Installation The following describes a single and multiple overhead luminaire installation. NOTE: Luminaires do not ship with attenuators. It is recommended attenuators are removed from overhead luminaires to maximize daylight illuminance. - Page 14 CAUTION: Before plugging in the unit, verify the voltage indicated on the SpectraLight QC back label complies with the AC line voltage in your area. If not, contact X-Rite or an authorized representative. 10. Plug the SpectraLight QC into an AC wall outlet.
-
Page 15: Powering Up
S p e c t r a L i g h t Q C NOTE: Always switch the power “ON” of the ‘Slave’ units first and the ‘Master’ unit last. Units configured as ‘Slaves’ cannot be addressed independently. Powering Up Toggle the main power switch under the front edge of the panel to the left to turn on the unit. -
Page 16: Spectralight Qc Software Utility
S p e c t r a L i g h t Q C SpectraLight QC Software Utility The SpectraLight QC comes with a software utility that allows you to perform configuration setup and operate the unit from a computer. The application can also be used to create customer performance reports. System Requirements Windows XP SP3 (32 bit), RAM 1 GB •... -
Page 17: System Setup (Admin)
USB port under the edge of the front panel. Launch the SpectraLight QC application utility (Programs->X-Rite->SPL QC). Select the “Configuration” check box and click the MORE switch. Selecting the “Configuration” check box simulates holding the button to access the Setup screen. -
Page 18: Primary System Settings (Sys)
S p e c t r a L i g h t Q C 2. Use the up (▲) and down (▼) arrow switches to highlight the desired option. 3. After the option is highlighted, press the EDIT switch to access the editing screen. 4. - Page 19 S p e c t r a L i g h t Q C Sensor Enabled, Disabled Disabled When enabled it displays lamp, input, temp., etc. Monitor sensor data in main menu. Use the up (▲) and down (▼) arrow switches to view the data. Switch Name Generic, Lamp Type Lamp Type...
-
Page 20: Reset Lamp Hour Counter And Lifetime (Rlamp)
S p e c t r a L i g h t Q C Reset Lamp Hour Counter and Lifetime (RLAMP) The Relamp screen displays the hours and cycles remaining for each lamp in the system. From this screen, the user can reset hours/cycles, select type of lamp, change EOL (End Of Life) parameters and add lamp serial numbers. - Page 21 S p e c t r a L i g h t Q C • F1, F2, F3, and UV select the front or rear lamp location. HZ select front 1, front 2, rear 1, or rear 2 lamp location. •...
-
Page 22: Create Operator Profiles (Profl)
S p e c t r a L i g h t Q C Create Operator Profiles (PROFL) The profile screen is used to create up to 16 profiles. Once created, you can customize the switches and setup an auto sequence. Individual profiles are then selected through the User Settings screen. 1. - Page 23 S p e c t r a L i g h t Q C Entering text using the software application: • Make sure the editing window is displayed and use the Backspace key to delete one character at a time. Enter required name (15 characters maximum).
-
Page 24: Moving Lamp Switch Order And Auto-Sequencing The Light Sources (Sel)
S p e c t r a L i g h t Q C 1. Use the up (▲) and down (▼) arrow switches to highlight the switch you want to disable or enable. Press the TOG switch to enable or disable the switch. (NOTE: Disabled switches appear grayed out in this screen and do not appear on the main menus). -
Page 25: Edit Operator Profiles (Oper)
S p e c t r a L i g h t Q C 7. Repeat steps 2 through 6 to add additional lamps to the sequence. A total of 10 steps can be added to the sequence. 8. Steps not required can be selected and deleted by pressing the DEL switch and then the YES switch. When finished, press the EXIT switch to exit the auto sequence program screen. -
Page 26: Date And Time Setup (Time)
S p e c t r a L i g h t Q C 3. Use the up (▲) and down (▼) arrow switches to highlight the desired option. 4. After the option is highlighted, press the EDIT switch to access the editing screen. 5. -
Page 27: User Settings (User)
USB port under the edge of the front panel. Launch the SpectraLight QC application utility (Programs/X-Rite/SPL QC). Select the “Configuration” check box and click the MORE switch. 1. From the main menu of the SpectraLight QC, press and hold the MORE switch until Setup appears in the display screen. -
Page 28: Display System Information (Info)
S p e c t r a L i g h t Q C 5. Select desired option or value for the user setting. To select option or value: • Use the up (▲) and down (▼) arrow switches to highlight the option or select a value. Press the OK switch to save the selected option/value. -
Page 29: Daisy Chain Configuration Setup (Chain)
S p e c t r a L i g h t Q C Daisy Chain Configuration Setup (CHAIN) The daisy chain screen is used to configure the luminaires that are connected together. A maximum of 64 luminaires can be daisy chained. If an optional control box will be used to operate the daisy chained units, refer to the Optional Control Box section later in this manual for the installation procedure. - Page 30 S p e c t r a L i g h t Q C Group Screen This option is used to assign devices (luminaires) to specific groups. 1. To assign a group to devices, press the GROUP switch. 2. Use the up (▲) and down (▼) arrow switches to select a device. 3.
-
Page 31: Operation
S p e c t r a L i g h t Q C OPERATION Selecting a Lamp Source NOTE: Disable the “auto-off” feature by pressing and holding the DL, A, or HZ light source switch for 2 seconds. You will hear a second click and see Nonstop appear in the display screen. The main menu consists of two screens for selecting lamp sources. -
Page 32: Auto Sequence
S p e c t r a L i g h t Q C Description of the switches located on the two main menus Turns on/off Daylight source DL (held): Turns on Daylight in nonstop mode (disables auto-off) Turn on/off Incandescent A Lamp A (held): Turns on Incandescent A Lamp in nonstop mode (disables auto-off) Turns on/off UV Lamp... -
Page 33: Display Adjustment
S p e c t r a L i g h t Q C 5. Press the TIME switch to access the Change Time screen. Use the up (▲) and down (▼) arrow switches to select the amount of time in seconds that the first lamp will remain on. -
Page 34: Sensor Display (For Service Only)
The SpectraLight QC application can produce a conformance report and lamp report on the system. Refer to the pages that follow for detail information of the reports. 1. Launch the SpectaLight QC application (Programs->X-Rite->SPL QC). System Report Before viewing a new system report, you must run a test on the lamps. The lamp test will take up to 10 minutes to complete. - Page 35 S p e c t r a L i g h t Q C Conformance Report Select the required operator and profile before running the conformance report. 3. Click the Conformance Report button to create and view a conformation report. Sample System Report...
- Page 36 S p e c t r a L i g h t Q C Sample Conformance Report...
-
Page 37: Remote Control Operation
S p e c t r a L i g h t Q C REMOTE CONTROL OPERATION The remote control (optional accessory) can be used to turn on light sources on the unit from a distance of 10 meters. If more than one remote is used with multiple units, the address code for the remote and the unit will need to be changed. -
Page 38: Optional Control Box
S p e c t r a L i g h t Q C OPTIONAL CONTROL BOX The optional control box is used to operate up to eight banks (groups) of luminaires. The display on the control panel emulates the same controls as the luminaire for easy operation. Each group can simultaneously operate the group luminaires at one time. -
Page 39: Appendices
X-Rite Technical Service. X-Rite provides repair service to their customers. All warranty and non-warranty repairs should be referred to an authorized service center. For non-warranty repairs, the customer shall pay shipping and repair cost to the authorized service center, and the instrument shall be submitted in the original carton, as a complete unaltered unit, along with all the supplied accessories. - Page 40 S p e c t r a L i g h t Q C Cleaning the Diffuser 1. Remove the front panel if the luminaire is installed on a booth. 2. Wash the exterior of the diffuser glass with water containing a mild detergent; rinse thoroughly, and air dry. CAUTION: Make sure there are no objects in the way of the diffuser before opening.
- Page 41 S p e c t r a L i g h t Q C Cleaning the Daylight Filters 1. Unscrew the thumbscrews from the two daylight filters and carefully remove the attenuators. 2. Holding the filter pack, push in the fastener button and lower the daylight filter pack. Repeat the procedure for the other filter pack.
-
Page 42: Replacing The Lamps
S p e c t r a L i g h t Q C Replacing the Lamps Replace burned out lamps immediately in order to maintain the overall performance standards of the unit. We recommend replacing lamps in complete sets. For example, if one daylight lamp burns out, replace both of them. Lamp Type Rated Life Lamp Type... -
Page 43: Replacing The Fuse
S p e c t r a L i g h t Q C Replacing the Fuse 1. Turn off the main power switch and unplug AC line cord before proceeding. 2. Using a flat blade screwdriver, push in on fuse holder and rotate counterclockwise 1/4 turn. Fuse location 3. -
Page 44: Troubleshooting
S p e c t r a L i g h t Q C Troubleshooting Prior to contacting X-Rite support department for system problems, try the applicable solution(s) described below. If the condition persists, contact us using one of the methods listed in the Service Information section. -
Page 45: Specifications
S p e c t r a L i g h t Q C Specifications OVERHEAD LUMINAIRE VIEWING BOOTH D 685 x H 250 x W 945 mm D 610 x H 700 x W 945 mm DIMENSIONS (D 27 x H 9.84 x W 37.20 in) (D 24.01 x H 27.55 x W 37.20 in) 40.5 kg (89.3 lbs)/ 53.0 kg (116.8 lbs) 10.0 kg (22.0 lbs)/ 16.0 kg (35.2 lbs) -
Page 46: Menu Screen Flowchart
S p e c t r a L i g h t Q C Menu Screen Flowchart DL on/off* * Press and hold (<2 seconds) to disables auto shutoff A on/off* UV on/off HZ on/off* MORE Long Short FL1 on/off FL2 on/off FL3 on/off PAUSE... - Page 47 S p e c t r a L i g h t Q C ▲ Prev. Step ▼ Next Step AUTO Select Light Source Long TIME Set Lamp on Time in Seconds Delete a Step EXIT MORE Long Edit User Settings: Short USER Dim Control, Language, …...
- Page 48 S p e c t r a L i g h t Q C ▲ Prev. item INFO ▼ Next item Display System Log TEST Start lamp test EXIT Advanced Setup (Password Protected) OWNER Edit owner information Edit System Settings: Filter, Attenuator, …...
- Page 49 S p e c t r a L i g h t Q C MORE ▲ Prev. profile ▼ Next profile EDIT Edit a profile PROFL COPY Copy a profile PASTE Paste a profile Delete a profile EXIT ▲ Prev. operator OPER ▼...
-
Page 50: Parts And Accessories
S p e c t r a L i g h t Q C Parts and Accessories Consult your X-Rite Price List for additional Lamp Kit Options or call your local X-Rite office Refer to the back page of the document for contact information. - Page 52 8105 Regensdorf Switzerland Phone (+41) 44 842 24 00 Fax (+41) 44 842 22 22 Asia Pacific Headquarters X-Rite Asia Pacific Limited Suite 2801, 28th Floor, AXA Tower Landmark East, 100 How Ming Street Kwun Tong, Kowloon, Hong Kong Phone (852)2568-6283...
Need help?
Do you have a question about the Macbeth Lighting SpectraLight QC and is the answer not in the manual?
Questions and answers