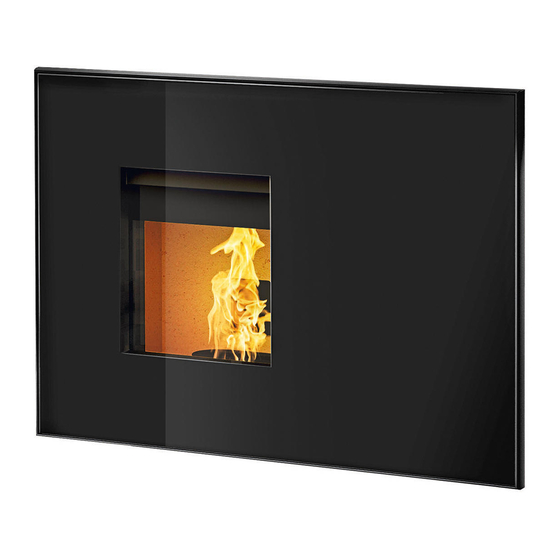
RIKA INTERNO Assembly Instructions Manual
Hide thumbs
Also See for INTERNO:
- Assembly instructions manual (45 pages) ,
- Operating manual (20 pages) ,
- Gsm operating manual (40 pages)
Table of Contents
Advertisement
Available languages
Available languages
Quick Links
Advertisement
Table of Contents

Related Manuals for RIKA INTERNO


Summary of Contents for RIKA INTERNO
- Page 1 INTERNO Montageanleitung Option für raumluft- unabhängigen Betrieb E15621...
-
Page 2: Allgemeine Hinweise
Bei Pelletgeräten mit längerer Anschlussleitung sollte nach ca. 1 m der R - Ø Durchmesser [mm] Durchmesser auf etwa 100mm vergrößert werden. (siehe RIKA Sortiment). RO - H Original Winkelrohr Anschlusshöhe [cm] Um ausreichend Luftzufuhr zu gewährleisten, soll die Leitung nicht länger als... - Page 3 Öffnen Sie die Dekortür. Schrauben Sie den Adapter auf der Bodenplatte fest. Entfernen Sie die Abdeckung hinter der Schlüsselhalterung und trennen Sie den Ziehen Sie den vormontierten Flexschlauch vorsichtig so weit wie nötig heraus. Netzstecker vom Ofen. Verbinden Sie den Flexschlauch mit dem Zuluftrohr. Schließen Sie die Dekorglastüre wieder.
- Page 4 RIKA Innovative Ofentechnik GmbH Müllerviertel 20 4563 Micheldorf / AUSTRIA Technische und optische Änderungen, sowie Satz- und Tel.: +43 (0)7582/686 - 41, Fax: -43 Druckfehler vorbehalten verkauf@rika.at www.rika.at © 2020 | RIKA Innovative Ofentechnik GmbH...
- Page 5 INTERNO Instructions de montage Option pour le fonctionnement indépendant de l‘air ambiante E15621...
-
Page 6: Explication Des Symboles
[mm] avec une sortie plus longue, au-delà d‘un mètre environ, le diamètre doit être RO - H Hauteur de raccordement avec tuyau augmenté à environ 100 mm. (Cf gamme RIKA) [cm] d’angle d’origine Afin de garantir une amenée d‘air suffisante, la conduite ne doit pas dépasser RO - T1 Profondeur avec tuyau d’angle d’origine... - Page 7 Ouvrez la porte vitrée décorative. Vissez le boîtier sur le socle. Sortez avec précaution le tuyau flexible prémonté aussi loin que nécessaire. Retirez le cache derrière le support de clef et débranchez la prise du poêle. Emboîtez le tuyau flexible avec le tuyau d’air frais. Refermez la porte vitrée décorative.
- Page 8 Sous réserve de 4563 Micheldorf / AUSTRIA modifications techniques et visuelles et d´erreurs de composition Tel.: +43 (0)7582/686 - 41, Fax: -43 et d´impression. verkauf@rika.at www.rika.at © 2020 | RIKA Innovative Ofentechnik GmbH...
- Page 9 INTERNO Istruzioni di montaggio Opzione per funzionamento indipendente dall’aria ambiente E15621...
-
Page 10: Spiegazione Dei Simboli
[mm] di condotta di raccordo più lunga, dopo circa 1 m il diametro dovrebbe RO - H Altezza di collegamento con tubo essere aumentato a circa Ø100mm. (Vedere la gamma RIKA). [cm] angolare originale RO - T1 Profondità con tubo angolare originale... - Page 11 Aprire la porta decorativa. Avvitare l’adattatore sulla piastra di base. Estrarre la parte necessaria del tubo flessibile premontato con cautela. Togliere il coperchio che si trova dietro al supporto della chiave e staccare la spina dalla corrente. Collegare il tubo flessibile con il tubo aria esterna. Chiudere la porta decorativa.
- Page 12 Con 4563 Micheldorf / AUSTRIA riserva di modifiche tecniche e visive, come anche di errori di stampa Tel.: +43 (0)7582/686 - 41, Fax: -43 e composizione. verkauf@rika.at www.rika.at © 2020 | RIKA Innovative Ofentechnik GmbH...
- Page 13 INTERNO Assembly instructions Option for room-air independent Operation E15621...
-
Page 14: Explanations To Symbols
Delivered Parts E 15621 1x B17497 air intake pipe 1x B17498 air intake adapter 1x N111293 hose clamp 4x N108313 hex screws Dimensions Explanations to symbols ...Allen key #2 ...Allen key #5 ...Hex #7 ...Hex #8 Variante I Variante II ...manually Dimensions Important Information... - Page 15 Open the decorative door. Screw the air intake adapter firmly to the bottom plate. Pull out the flexible pipe carefully as far as necessary. Remove the cover behind the key holder and disconnect the power plug of the stove. Connect the flex hose to the air intake pipe. Close the decorative door again.
- Page 16 German version is the only valid one. 4563 Micheldorf / AUSTRIA Subject to technical and visual changes as well as Tel.: +43 (0)7582/686 - 41, Fax: -43 layout and printing errors.. verkauf@rika.at www.rika.at © 2020 | RIKA Innovative Ofentechnik GmbH...
- Page 17 INTERNO Montagehandleiding Optie ruimtelucht-onafhankelijk Werking E15621...
-
Page 18: Verklaring Symbolen
Verbind het voorziene adapter met een kanaal van Ø50mm. Bevestig deze met een aansluitklem (niet bijgeleverd!). Als de toevoerleiding langer R - Ø diameter [mm] wordt dan 1 m, dan wordt de diameter vergroot naar 100mm. (zie RIKA RO - H aansluithoogte met originele bocht [cm] assortiment). - Page 19 Open het grote front-decorglas. Maak de adapter vast op de bodemplaat. Trek de voorgemonteerde flexibel naar buiten, zo ver als nodig is. Verwijder het afdekplaatje dat zich achter de sleutelhouder bevindt en maak de netstekker los van de kachel. Verbind de flexibel met het luchttoevoerkanaal. Sluit het grote front-decorglas.
- Page 20 Müllerviertel 20 vertalingen is de Duitstalige handleiding de enige juiste 4563 Micheldorf / AUSTRIA handleiding. Technische en optische wijzigingen, zoals Tel.: +43 (0)7582/686 - 41, Fax: -43 spelling- of drukfouten voorbehouden. verkauf@rika.at www.rika.at © 2020 | RIKA Innovative Ofentechnik GmbH...
Need help?
Do you have a question about the INTERNO and is the answer not in the manual?
Questions and answers