RIKA INTERNO Assembly Instructions Manual
Hide thumbs
Also See for INTERNO:
- Assembly instructions manual (20 pages) ,
- Operating manual (20 pages) ,
- Gsm operating manual (40 pages)
Table of Contents
Advertisement
Available languages
Available languages
Quick Links
Advertisement
Table of Contents

Subscribe to Our Youtube Channel
Related Manuals for RIKA INTERNO


Summary of Contents for RIKA INTERNO
- Page 1 INTERNO Montageanleitung...
-
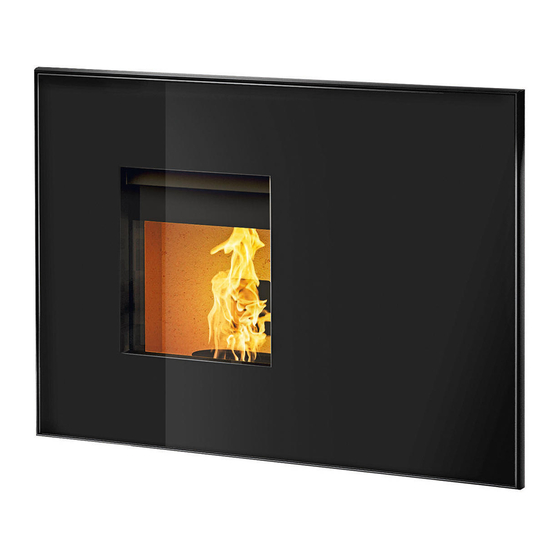
Page 2: Technische Daten
Abmessungen, Gewicht und Anschluss Technische Daten Technische Daten Heizleistungsbereich [kW] 2,5 - 7 Raumheizvermögen abhängig von der [m³] 50 - 160 Hausisolierung Brennstoffverbrauch [kg/h] bis zu 1,6 Pelletbehälterkapazität* [l/kg] 36/~20 Netzanschluss [V]/[Hz] 230/50 durchschnittliche elektrische Leistungsaufnahme Sicherung 2,5 AT Wirkungsgrad 90,1 CO2-Gehalt 12,2... - Page 3 Leitung die Verbrennungsluft von außen zugeführt werden. Lt. EnEV sollte Zum fachgerechten Anschließen empfehlen wir original Rauchrohre aus dem die Verbrennungsluftleitung absperrbar sein. Die Stellung auf/zu muss RIKA Rauchrohrsortiment. eindeutig erkennbar sein. Anschluss an den Schornstein (Kamin) Schließen Sie an den Ansaugstutzen ein Rohr mit Ø 125 mm für Scheitholz- u.
-
Page 4: Allgemeine Warn- Und Sicherheitshinweise
Hinweis Ihr Kaminofen wird sich während der Aufheiz- und Abkühlphase ausdehnen RIKA Öfen dürfen nur in Wohnräumen mit normaler Luftfeuchtigkeit (trockene und zusammenziehen. Das kann unter Umständen zu leichten Dehn- bzw. Räume nach VDE 0100 Teil 200) aufgestellt werden. Die Öfen sind nicht Knackgeräuschen führen. - Page 5 Sicherheitsabstände (Mindestabstände) Vor dem Aufstellen Bodentragfähigkeit Hinweis Überzeugen Sie sich vor dem Aufstellen, ob die Tragfähigkeit der Abstand zu nicht brennbaren Gegenständen: Unterkonstruktion dem Gewicht des Ofens standhält. a > 40cm b / c ≥ Einbauabmessungen Hinweis d ≥ 20cm wenn Vorsprung e = 0 bis 20cm Veränderungen an der Feuerstätte dürfen nicht vorgenommen werden.
- Page 6 Zeichenerklärung ...Innensechskant ...Innensechskant ...Innensechskant ...Gabelschlüssel ...waagrecht ...Sechskant #7 ...Sechskant #10 ...per Hand ausrichten Hinweis Lesen Sie vor der Installation und Inbetriebnahme des Ofens das gesamte Handbuch gründlich durch. Beachten Sie unbedingt die nationalen Bestimmungen und Gesetze, sowie die örtlich gültigen Vorschriften und Regeln. Lieferumfang B17419 4x N110586 Senkschraube M05x20...
- Page 7 Vormontage Befestigen Sie den Rauchrohr-Adapter auf der Bodenplatte. Nachdem Sie eine waagrechte Position sichergestellt haben, befestigen Sie die Bodenplatte. Tipp Für einen optionalen Rauchrohranschluss nach oben tauschen Sie Rauchrohrstutzen und Kochdeckel gegeneinander aus. N112133 N112132 N112131 N110586 Abb.: Montagebeispiel Hinweis Achten Sie auf eine sichere Befestigung! Da die Einbausituation je nach baulicher Gegebenheit vor Ort unterschiedlich ist, liegt die Verantwortung dafür auf Seiten des Aufstellers.
- Page 8 Ofenmontage Verbinden Sie den Netzstecker mit Ihrer Stromleitung. Öffnen Sie die Dekortür. Entfernen Sie die Abdeckung hinter der Schlüsselhalterung und verbinden Sie Schieben Sie die Führungsschienen bis zum Anschlag aus dem Gehäuse. den Ofen mit dem Netzstecker. Heben Sie den Ofen zu zweit auf die Führungsschiene in die dafür vorgesehenen Montieren Sie die Teile wieder in umgekehrter Reihenfolge.
- Page 9 INTERNO Instructions de montage...
-
Page 10: Caractéristiques Techniques
Dimensions Caractéristiques techniques Caractéristiques techniques Plage de puissance de chauffage [kW] 2,5 - 7 Capacité de chauffage en fonction de l’isolation [m³] 50 - 160 du domicile Consommation en combustible [kg/h] jusqu‘à 1,6 Capacité du réservoir* [l/kg] 36/~20 Branchement réseau [V]/[Hz] 230/50 Consommation électrique moyenne... -
Page 11: Installation Du Poêle
à pellets et pour les poêles à bois selon le diamètre des tuyaux doit être augmenté à environ 100 mm. (Cf. gamme RIKA) gas fumées de 130 mm à 150 mm au minimum. - Page 12 Nous recommandons donc un remplissage du réservoir lorsque le poêle est que les directives et règlementations valables au niveau local. froid. Les poêles RIKA doivent uniquement être installés dans des pièces de vie Attention non humides. Les poêles ne sont pas protégés contre les projections d’eau N’obturez, et ne couvrez en aucun cas la grille de convection de votre poêle,...
-
Page 13: Distances De Sécurité
Distances de sécurité Avant la mise en place Force portante Attention Avant la mise en place du poêle, assurez-vous que la force portante du sol Distances par rapport aux objets non inflammables : résiste au poids du poêle. a > 40cm b / c ≥... -
Page 14: Explication Des Symboles
Explication des symboles ...Clef pour vis à ...Clef pour vis à ...Clef pour vis à ...Clef á la six pans creux #2 six pans creux #3 six pans creux #5 fourche #19 ...Tournevis ...Tournevis ...équilibrer à ...à la main hexagonal #7 hexagonal #10 l‘horizontale Attention... -
Page 15: Préparation Du Montage
Préparation du montage Vissez le boîtier de fumées sur le socle. Après avoir mis le socle en position parfaitement horizontale, fixez-le. Conseil Pour une sortie de fumées optionnelle vers le haut, inversez le raccord de sortie avec le bouchon. N112133 N112132 N112131 N110586... - Page 16 Montage du poêle Branchez la prise sur le secteur. Ouvrez la porte vitrée décorative. Glissez les rails coulissants, hors de la structure, jusqu’à la butée. Retirez le cache derrière le support de clef et connectez le poêle à la prise. Soulevez le poêle à...
- Page 17 INTERNO Istruzioni di montaggio...
-
Page 18: Dati Tecnici
Dimensioni Dati tecnici Dati tecnici Potenza calorica [kW] 2,5 - 7 Volume riscaldabile dipendente dallo stato di [m³] 50 - 160 isolamento dell’abitazione Consumo di combustibile [kg/h] fino a 1,6 Capienza serbatoio pellet* [l/kg] 36/~20 Alimentazione elettrica [V]/[Hz] 230/50 Potenza elettrica assorbita media Fusibile 2,5 AT Rendimento... -
Page 19: Installazione Della Stufa
(pellet), dopo circa 1 metro il diametro combustibili solidi. La canna deve avere un diametro di almeno 100 mm dovrebbe essere aumentato a circa Ø 100 mm. (Vedere la gamma RIKA). (stufa pellet) o Ø 130–150 mm (legna da ardere e forni Combi a base di diametro raccordo uscita fumi). -
Page 20: Prima Accensione
La temperatura massima dell’aria calda di convezione è di 180 C° all’uscita della stufa. L’installazione delle stufe RIKA è permessa soltanto in ambienti con umidità normale (ambienti secchi secondo VDE 0100 Parte 200). Le stufe non sono Attenzione protette contro gli spruzzi d’acqua e non vanno installate in ambienti di... -
Page 21: Prima Dell'installazione
Distanze di sicurezza (distanza minima) Prima dell ’ installazione Portata del pavimento Attenzione Prima di procedere con l’installazione assicurarsi che la capacità di carico della Distanze da oggetti non infiammabili: struttura sottostante sia in grado di reggere il peso della stufa. a >... -
Page 22: Spiegazione Dei Simboli
Spiegazione dei simboli ...Testa cava ...Testa cava ...Testa cava ...Chiave a bocca esagonale #2 esagonale #3 esagonale #5 ...Esagonale #7 ...Esagonale #10 ...mettere in bolla ...manuale Attenzione Prima dell’installazione e della messa in funzione della stufa, leggere attentamente e in maniera completa il presente manuale. È indispensabile rispettare le disposizioni e le leggi nazionali, come anche le norme e i regolamenti vigenti in loco. - Page 23 Premontaggio Fissare l’adattatore uscita fumi sulla base. Dopo aver provveduto ad assicurare la posizione perfettamente orrizontale, fissare la base. Per un raccordo opzionale superiore – invertire il raccordo uscita fumi e il tappo uscita fumi. N112133 N112132 N112131 N110586 Immagine: Esempio di montaggio (può variare in base alla situazione costruttiva) Attenzione Assicurarsi di aver fissato in modo sicuro l‘inserto! Visto che i parametri di installazione variano in base alle condizioni architettoniche in loco, la...
- Page 24 Rimontare tutti i pezzi in ordine inverso. N111945 Montare i frontalini opzionali. Il suo inserto può essere messo in funzione. Reinserire l’inserto all’interno del muro. Mettere in sicurezza l’inserto fissandolo bene da sotto per evitare un’eventuale fuoriuscita involontaria. N108572...
- Page 25 INTERNO Assembly instructions...
-
Page 26: Technical Specifications
Dimensions Technical specif ications Technical data Heating power range [kW] 2,5 - 7 Room heating capacity (depending on house [m³] 50 - 160 insulation) Fuel consumption [kg/h] up to 1,6 Pellet container capacity* [l/kg] 36/~20 Electric supply [V]/[Hz] 230/50 Average electrical input Fuse 2,5 AT Efficiency... -
Page 27: Installing The Stove
Ø 50 mm or Ø 60 mm for pellet stoves. Fix it with a hose clamp We recommend original flue pipes from RIKA for proper connection. (not included!). At pellet stoves with longer intake pipes than 1 m the diameter should be increased to 100 mm. -
Page 28: General Warning And Safety Information
Note RIKA stoves should only be installed in rooms with normal humidity (dry The max. temperature of the convection air is 180° C at the air outlet. areas according to VDE 0100 Part 200). The furnaces are not splash water protected and may not be installed in wet areas. -
Page 29: Safety Distances
Safety distances Prior to set up Floor bearing capacity Note Ensure that the substructure is capable of bearing the weight of the stove prior Distance to non-combustible objects: to set-up. a > 40cm b / c ≥ mounting dimensions Note d ≥... -
Page 30: Explanations To Symbols
Explanations to symbols ...open-end ...Allen key #2 ...Allen key #3 ...Allen key #5 wrench #19 ...hex #7 ...hex #10 ...align horizontally ...manually Note Read the entire manual thoroughly before installing and putting the stove into service. Observe the national provisions and laws as well as the regulations and rules applicable locally. -
Page 31: Pre-Assembly
Pre-assembly After ensuring a horizontal position, secure the bottom plate. Attach the flue pipe adapter on the base plate. Tipp For an optional flue pipe connection to the top - replace flue outlet and cover N112133 against each other. N112132 N112131 N110586 Fig .: Installation example (may vary depending on the building situation) -
Page 32: Stove Assembly
Stove assembly Connect the power cord to your power line. Open the decorative door. Slide the rails until it stops out of the housing. Remove the cover behind the key holder and connect the stove to the mains plug. Raise in the stove with a second person to the rail and the appropriate pins and secure them immediately. - Page 33 INTERNO Montagehandleiding...
-
Page 34: Elektrische Aansluiting
Afmetingen Technische gegevens Technische gegevens Vermogensbereik [kW] 2,5 - 7 Ruimteverwarmingsvermogen afhankelijk van de [m³] 50 - 160 isolatie Brandstofverbruik [kg/uur] tot 1,6 Pelletvoorraad* [l/kg] 36/~20 Elektrische aansluiting [V]/[Hz] 230/50 Gemiddeld elektrisch verbruik Zekering 2,5 AT Rendement 90,1 CO2 - gehalte 12,2 Afmeting CO - emissie bij 13% O... - Page 35 Ø 50 mm of Ø 60 mm bij een pelletkachel. Bevestig rookgasaansluiting. deze met een aansluitklem (niet bijgeleverd!). Als de toevoerleiding langer wordt dan 1 meter, dan wordt de diameter vergroot naar 100 mm. (zie RIKA assortiment). De horizontale verbinding tussen kachel en rookgasafvoerkanaal mag niet langer zijn dan 1,5 meters.
-
Page 36: Belangrijke Informatie
Aanwijzing RIKA kachels mogen enkel in woonruimtes geplaatst worden met normale De maximale temperatuur van de verwarmde lucht op de uitlaat van de kachel luchtvochtigheid (droge ruimtes volgens VDE 0100 Teil 200). De kachels is 180°C. - Page 37 Waarschuw bij twijfel het schoorsteenveegbedrijf, want slecht werkende trek kan met de schoorsteen te maken hebben. Kachel type 1 (BA1): RIKA kachels laten het toe om meerdere kachels op 1 rookgasafvoerkanaal aan te sluiten. Neem a.u.b. de respectieve plaatselijke regels en regelgeving in acht.
-
Page 38: Verklaring Symbolen
Verklaring symbolen ...Binnenzeskant ...Binnenzeskant ...Binnenzeskant ...Steeksleutel ...waterpas ...Zeskant #7 ...Zeskant #10 ...manueel monteren Aanwijzing Lees de instructies voor installatie en bediening. Neem de nationale regelgeving en wetgeving in acht, evenals de plaatselijke regels en regelgeving. Inhoud levering B17419 4x N110586 verzonken vijs M05x20 4x L02614 Niveleringsplaat 3mm 4x N111945 zekeringsmoer M06 4x L02615 Niveleringsplaat 4mm... - Page 39 Voor de montage Bevestig de rookgasadapter op de bodemplaat. Bent u zeker dat de bodemplaat waterpas staat, bevestig dan de bodemplaat. Voor een optionele rookgasaansluiting naar boven, wissel de rookgasaansluiting met het afsluitdeksel. N112133 N112132 N112131 N110586 Afb.: Montagevoorbeeld (kan wijzigen in functie van de situatie) Aanwijzing Let u op de bevestiging! Aangezien de installatie afhankelijk is van de situatie ter plekke, ligt de verantwoordelijkheid bij de installateur.
-
Page 40: Montage
Montage Verbind de stekker met de stroomvoorziening. Open de grote sierdeur. Schuif de geleiders naar buiten tot aan de aanslag. Verwijder de afdekplaat achter de sleutelhouder en sluit de kachel met de netstekker aan. Hef de kachel op en plaats deze op de geleiders op de daarvoor voorziene tappen. - Page 42 Notizen:...
- Page 44 Sous réserve de modifications techniques et visuelles et d´erreurs de composition et d´impression. © 2020 | RIKA Innovative Ofentechnik GmbH In caso di dubbio oppure in caso di traduzioni mancanti oppure errate l’unico documento valido rimane quello in versione tedesca. Con riserva di modifiche tecniche e visive, come anche di errori di stampa e composizione.
Need help?
Do you have a question about the INTERNO and is the answer not in the manual?
Questions and answers