Table of Contents
Advertisement
ITALIANO
Manuale istruzioni per l'installazione, l'uso
e la manutenzione
Instruction manual for
installation, use and maintenance
Installations-, Gebrauchs- und
Wartungshandbuch
ISTRUZIONI ORIGINALI (IT)
ORIGINAL INSTRUCTIONS (IT)
ORIGINALANLEITUNG (IT)
IT
EN
DE
BRUCIATORE PREMIX
PREMIX BURNERS
PREMIX BRENNER
BPM 90 E 50kW
BPM 90 E 75kW
BPM 90 E 85kW
BPM 140 E 105kW
BPM 140 E 142kW
0006160278_201804
Advertisement
Table of Contents

Related Manuals for baltur BPM 90 E 50kW


Summary of Contents for baltur BPM 90 E 50kW
- Page 1 BRUCIATORE PREMIX PREMIX BURNERS PREMIX BRENNER ITALIANO BPM 90 E 50kW Manuale istruzioni per l'installazione, l'uso e la manutenzione BPM 90 E 75kW Instruction manual for installation, use and maintenance BPM 90 E 85kW Installations-, Gebrauchs- und Wartungshandbuch BPM 140 E 105kW...
-
Page 3: Table Of Contents
ENGLISH ENGLISH SUMMARY Warnings for use in safety conditions ..............................4 Overall dimensions ....................................8 Component description ..................................9 BURNER CONNECTION TO THE BOILER ............................10 Gas train description for gas pressure adjustment .......................... 11 Gas train description for gas pressure adjustment ..........................12 Electrical connections ....................................13 Operating description ....................................14 Conversion from natural gas to LPG ..............................15 Control and command equipment LME... - Page 4 ENGLISH DECLARATION OF CONFORMITY CE0085: DVGW CERT GmbH, Josef-Wirmer Strasse 1-3-53123 Bonn (D) We hereby declare under our own responsibility, that our blown air burners fired by gas and dual fuel, series: BPM...; BGN…; BTG…; TBML...; Comist…; GI…; GI…Mist; Minicomist…; Sparkgas...; TBG..; IB..; TBR... (Variant: …...
-
Page 5: Warnings For Use In Safety Conditions
ENGLISH WARNINGS FOR USE IN SAFETY have access to, through a responsible person, the information concerning their safety, surveillance and instructions concerning CONDITIONS equipment use. • Children must be watched over to prevent them from playing PURPOSE OF THIS MANUAL with the equipment. - Page 6 Contact only qualified personnel. accordance with the law in force. • Any product repairs must only be carried out by BALTUR - Check the adjustment and safety devices are working authorised assistance centres or by its local distributor using properly.
- Page 7 ENGLISH Special precautions when using gas. main gas feed tap to the burner. • Check that the feed line and the train comply with current law • The use of any electrically fed components entails complying and regulations. with certain fundamental rules, including the following: •...
- Page 8 ENGLISH BPM 140 E BPM 140 E MODEL BPM 90 E 50kW BPM 90 E 75kW BPM 90 E 85kW 105kW 142kW Maximum natural gas heat power Minimum natural gas heat power Operation Two-stage Two-stage Two-stage Two-stage Two-stage 50 Hz natural gas transformer...
-
Page 9: Overall Dimensions
ENGLISH OVERALL DIMENSIONS BPM 90 BPM 140 BPM 90 68.5 BPM 140 16.5 Model BPM 90 E 50kW 81.5 BPM 90 E 75kW 81.5 BPM 90 E 85kW 81.5 BPM 140 E 105kW BPM 140 E 142kW Model E Ø... -
Page 10: Component Description
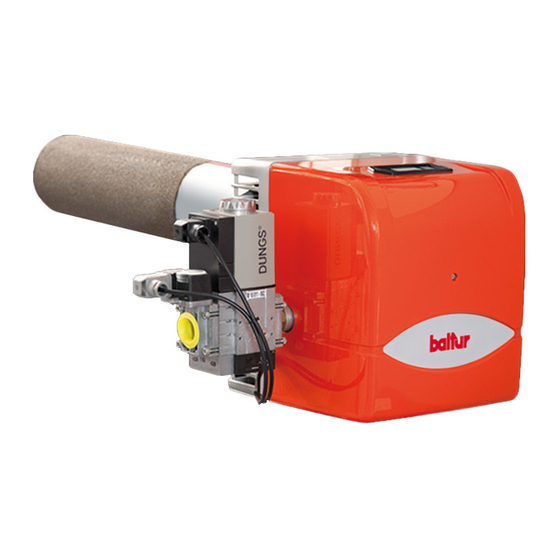
ENGLISH COMPONENT DESCRIPTION Burner Ignition electrode Ionisation electrode Electric blower Control box Ignition transformer Gas solenoid valve PC-LME control unit interface 8 / 42 0006160278_201804... -
Page 11: Burner Connection To The Boiler
ENGLISH BURNER CONNECTION TO THE BOILER Insert the burner head (1) into the furnace Be very careful not to damage the ceramic of electrodes (2; 3), since a microcrack would cause boiler malfunctions. Lock the flange (6) to the boiler door inserting the gaskets (4 ;... -
Page 12: Gas Train Description For Gas Pressure Adjustment
ENGLISH GAS TRAIN DESCRIPTION FOR GAS PRESSURE ADJUSTMENT The burners are combined with monobloc pneumatic proportional A pressure signal, detected in the air circuit, is sent to the gas valves that allow the quantity of gas supplied and therefore pneumatic gas valve, which delivers a quantity of gas proportional the power output, to be adjusted. -
Page 13: Gas Train Description For Gas Pressure Adjustment
ENGLISH GAS TRAIN DESCRIPTION FOR GAS PRESSURE ADJUSTMENT BPM 140 E Gas solenoid valve Gas inlet Minimum pressure adjustment screw (clockwise to Gas inlet pressure port increase, counter-clockwise to decrease) (A) Max. pressure adjustment (clockwise to increase) Bring the burner at the minimum output and adjust the gas valve so that the flame appears equally spread on the combustion head, without any dark spot. -
Page 14: Electrical Connections
ENGLISH ELECTRICAL CONNECTIONS • It is advisable to make all connections with flexible electric wire. • The conductor minimum section must be 1,5 mm2. • The power lines must be distanced from the hot parts. • The burner installation is allowed only in environments with pollution degree 2 as indicated in annex M of the EN 60335- 1:2008-07 regulation. -
Page 15: Operating Description
ENGLISH OPERATING DESCRIPTION By turning off the main switch, if the thermostats are closed, the voltage reaches the control box. Then the speed decreases to the value P2 and the ignition takes place. If, instead, the fan starts but the flame does not appear at the end of the safety time, the burner locks out. -
Page 16: Conversion From Natural Gas To Lpg
ENGLISH CONVERSION FROM NATURAL GAS TO LPG To fit the nozzle, proceed as follows: Upon ignition, carry out a leak test of the gas circuit and make sure • close the gas valve; that oxygen values (O2%) at max. and min. power are within the •... -
Page 17: Control And Command Equipment Lme
ENGLISH CONTROL AND COMMAND EQUIPMENT LME... OPERATION. The reset button «EK...» is the main element to access all diagnostics functions (activation and deactivation) and serves to unlock the command YELLOW and control device. GREEN Both «LED» and «EK...» are positioned under the transparent button. Pressing this button, you reset the command and control equipment. There are two diagnostics choices: 1. - Page 18 ENGLISH OPERATION WITH LME INTERNAL CONTROL UNIT DISPLAY AND PUSH BUTTON DESCRIPTION Push button A: It displays the preset output In lockout position: it displays the power value at the moment of lockout DisplayLME71_001A Info and Enter push button In case of fault, it resets and displays the fault cause diagnostics (see chapter FAULT CAUSE DIAGNOSTICS) DisplayLME_001B Push button “-”...
- Page 19 ENGLISH STANDARD DISPLAY STANDARD DISPLAY IN NORMAL OPERATION DISPLAY IN STAND-BY MODE The unit is in stand-by DisplayLME71_002 15.2.22 DISPLAY DURING START-UP/SHUT-OFF 15.2.2.1 DISPLAY OF PROGRAM PHASES The unit is in phase 21. The individual program phases are displayed according to the programming sequence.
- Page 20 ENGLISH QUICK GUIDE FOR ADJUSTING THE RPM VALUE FOR IGNITION LOAD (P0), MINIMUM LOAD (P1) AND NOMINAL LOAD (P2) ADJUSTMENTS DISPLAY Press and hold button together with button for more than 5 seconds (flashing OFF is displayed) Activate heat request (switch on the furnace by increasing the temperature) within 30 seconds Activate heat request by powering, only and exclusively, T1 contact of X1S 7-pole connector through TC boiler thermostat...
- Page 21 ENGLISH (Stabilisation of ignition rpm) DisplayLME71_017 LME71 continues the start-up sequence (Pre-ignition time) DisplayLME71_018 (Post-ignition time) DisplayLME71_019 If the burner does not start, LME71 automatically repeats the start- up sequence and after three repetitions it locks out. DisplayLME71_020 DisplayLME71_021 (Flame detection) DisplayLME71_022 If the burner starts (End of safety time)
- Page 22 ENGLISH ADJUSTMENTS DISPLAY The program continues in the minimum load position P1 (Rpm x 10) DisplayLME71_025 DisplayLME71_024 To reduce the rpm value press To increase the rpm value press To confirm the modification in the internal memory and/or continue the adjustment sequence press (Operation) LME71 continues the sequence DisplayLME71_026...
- Page 23 ENGLISH DISPLAY OF OPERATING POSITION SPECIAL FUNCTIONS MANUAL LOCKOUT oP1 display means stage 1. Subsequent displays are specific to the unit. The warning light flashes green DisplayLME71_004 15.3 SPECIAL FUNCTIONS 15.3.1 MANUAL LOCKOUT Press “info” and any push button at the same time. The base unit switches directly from any operating position to lockout position.
- Page 24 ENGLISH ERROR MESSAGES, ERROR DISPLAY ERROR (FAULT) DISPLAY WITH LOCKOUT The Display shows Loc and 4 alternating. The unit is in lockout position The current error code is displayed and the warning light flashes red. Example: Error code 4 DisplayLME71_006 Press “+”...
- Page 25 ENGLISH CAUTION / WARNINGS This display is only shown in operating or stand-by mode. Press “+” to display the flame signal amplifier. The warning light flashes green. The Display shows FL.1. DisplayLME71_008 Press “+” (1...3seconds) to display the current flame signal. The warning light flashes green.
- Page 26 ENGLISH ADJUSTING RPM OPERATING POINTS FOR MINIMUM LOAD (P1), IGNITION LOAD (P0) AND NOMINAL LOAD (P2) FOR THE TECHNICIAN. REQUIREMENTS • The first PWM basic parameter setting was carried out in OEM level. • Equipment wiring in conformity with application recommendation. •...
- Page 27 ENGLISH Press A push button and + or - push button to modify the rpm value of 10 rpm within OEM predefined limits (P1 max, P1min). Display: P1 and rpm value appear alternately. Press the info push button to confirm the value in the internal memory. THE BURNER GOES TO NOMINAL LOAD POSITION P2.
- Page 28 ENGLISH PME71.901 PROGRAMMING SEQUENCE → For fuel trains G without/with valve proving 26 / 42 0006160278_201804...
- Page 29 ENGLISH LIST OF PHASES Phase number Operation Lockout phase Stand-by Stand-by, wait for heat request Voltage on/phase test (e.g. detection test) Startup Safety valve ON, air pressure switch in rest Yellow position. POC closing check (Time-out/lockout after 5 seconds) Yellow Fan motor rpm reduced to zero.
- Page 30 ENGLISH TIME INTERVALS AND SETTINGS Reference Times in seconds (sec) P244 t1 T225 t3 P226 t4 P230 t8 P234 P243 t2 PME71.901 P257 P224 t11 ac t12 ac 4) min 5) min P245 P242 Requirements Factory t3n+0.45 19,404+2,1 3,087 2,205+0,3 15,582 4,851 13,818 58,212 58,212 10,29...
- Page 31 ENGLISH LEGEND Alarm device Terminal bridge Release button (“info” push button) i/reset (EK1) Remote release button Flame signal amplifier Ionisation probe K... Relay contact Three-colour warning light Air pressure switch Load controller LR-OPEN Load controller OPEN position LR-CLOSED Load controller CLOSED position Fan motor Power supply unit P LT...
- Page 32 ENGLISH ERROR CODE LIST Error code Description Possible cause - Faulty or dirty fuel valves - Faulty or dirty flame Loc 2 Flame failure at the end of the safety time detector - Non-optimal burner setting, lack of fuel - Faulty ignition device Air pressure error (air pressure switch stuck Air pressure switch error - Air pressure drop after Loc 3...
- Page 33 ENGLISH MANUAL SAVING PROCEDURE FOR COPYING LME71 CONTROL UNIT PARAMETERS TO PME71 BOARD Press (>1 second) - and + push buttons at the same time to start a manual parameter saving procedure. PrC parameter Display: PrC Press - and + push buttons to access bAC parameter. Display: bAC run is displayed during the download (saving process) of the programming sequence End and bAC are displayed alternately.
- Page 34 ENGLISH ERROR DURING THE SAVING PROCESS bAC and Er3 are displayed alternately. For the meaning of a possible cause, refer to the error code list chapter. CAUTION / WARNINGS During the saving process, all settings and parameters are transferred from the base unit’s memory (LME71 control unit) to the memory device of the program module (PME71 board) 32 / 42 0006160278_201804...
- Page 35 ENGLISH MANUAL RESET OF PARAMETERS FROM PME71 BOARD TO LME71 CONTROL UNIT Press (>1 second) - and + push buttons at the same time to start a manual parameter saving procedure. PrC parameter Display: PrC Press - and + push buttons to access rSt parameter. Display: rSt run is displayed during the download (saving process) of the programming sequence End and rSt are displayed alternately.
- Page 36 ENGLISH ERROR DURING THE RESTORE PROCESS rSt and Er1, Er2 or Er3 are displayed alternately. For the meaning of a possible cause, refer to the chapter. Error code list with operation through internal LED. CAUTION / WARNINGS During the manual restore process, all settings and parameters are written from the program module (PME71 board) to the base unit memory device (LME71 control unit).
- Page 37 ENGLISH MALFUNCTION AND LOCK CAUSE DIAGNOSTICS. In the event of a burner lock-out, the red light on the reset button will be fixed. To activate the diagnosis phase (red light blinking fast) press the button for more than 3 seconds. The table below indicates the meaning of the block or fault cause according to the number of flashings (always red).
-
Page 38: Position Of Electrodes
ENGLISH POSITION OF ELECTRODES Ignition electrode Ionisation electrode Model BPM40 E 3.5 / 5 03-apr BPM90 E 3.5 / 5 03-apr 36 / 42 0006160278_201804... -
Page 39: Maintenance Time
ENGLISH MAINTENANCE TIME COMBUSTION HEAD VISUAL CHECK, CERAMIC INTEGRITY. END GRINDING, CHECK DISTANCE, ELECTRODES YEARLY CHECK ELECTRICAL CONNECTION FLAME DISC INTEGRITY VISUAL CHECK FOR ANY DEFORMATIONS, CLEANING YEARLY VISUAL CHECK, CERAMIC INTEGRITY. END GRINDING, CHECK DISTANCE, IONISATION PROBE YEARLY CHECK ELECTRICAL CONNECTION COMBUSTION HEAD COMPONENTS INTEGRITY VISUAL CHECK FOR ANY DEFORMATIONS, CLEANING YEARLY... -
Page 40: Expected Lifespan
ENGLISH EXPECTED LIFESPAN The expected lifespan of burners and relevant components depends very much from the type of application on which the burner is installed, from cycles of delivered power, from the conditions of the environment in which it is located, from maintenance frequency and mode, etc. -
Page 41: Instructions For Determining The Cause Leading To Irregularities In The Operation And Their Elimination
ENGLISH INSTRUCTIONS FOR DETERMINING THE CAUSE LEADING TO IRREGULARITIES IN THE OPERATION AND THEIR ELIMINATION POSSIBLE CAUSE REMEDY IRREGULARITY Invert the ignition transformer power supply (230V side) and check using an Disturbance to ionization current analogue micro-ammeter. from the ignition transformer. Replace the flame sensor. -
Page 42: Instructions For Determining The Cause Leading To Irregularities In The Operation And Their Elimination
ENGLISH INSTRUCTIONS FOR DETERMINING THE CAUSE LEADING TO IRREGULARITIES IN THE OPERATION AND THEIR ELIMINATION Fault Solution Check the supply voltage. Check the regulation thermostat (TC) Check that the connectors are properly inserted. Check that the network fuse is intact. Check the gas inlet pressure (2). -
Page 43: Wiring Diagrams
ENGLISH WIRING DIAGRAMS 41 / 42 0006160278_201804... - Page 44 ENGLISH APPARECCHIATURA Wire series colour BLUE PHOTORESISTOR / IONISATION ELECTRODE / UV PHOTOCELL BROWN EXTERNAL LOCK INDICATOR LIGHT/ AUXILIARY BLACK HEATING ELEMENT OPERATION LAMP BLACK CONNECTOR WITH OVERPRINT FAN MOTOR L1 - L2- L3 Phases ELECTRONIC REGULATOR N - Neutral Minimum ionisation current 1 μA SAFETY PRESSURE SWITCH --------- = To be carried out by the installer...
- Page 46 BALTUR S.P.A. Via Ferrarese, 10 44042 Cento (Fe) - Italy Tel. +39 051-6843711 Fax. +39 051-6857527/28 www.baltur.it info@baltur.it Il presente catalogo riveste carattere puramente indicativo. La casa, pertanto, si riserva ogni possibilità di modifica dei dati tecnici e di quant'altro in esso riportato.
Need help?
Do you have a question about the BPM 90 E 50kW and is the answer not in the manual?
Questions and answers