
Related Manuals for Primex OneVue 72MHz Levo Series

Summary of Contents for Primex OneVue 72MHz Levo Series
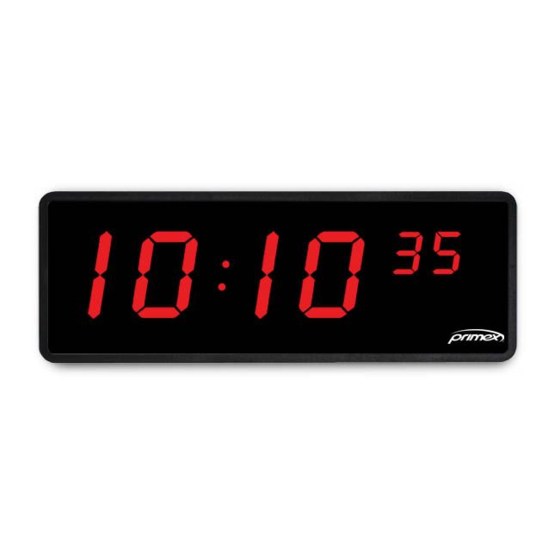
- Page 1 72MHz Levo Series Digital Clock/Timer Install Guide OneVue Sync 72MHz Publication date July 20, 2020...
- Page 2 The Bluetooth® word mark and logos are registered trademarks owned by the Bluetooth SIG, Inc. and any use of such marks by Primex, Inc. is under license. Primex is the leading provider of solutions to automate and maintain facility compliance, increase efficiencies, enhance safety and reduce risk for enterprise organizations in the healthcare, education, manufacturing and government vertical markets. Primex delivers solutions that utilize a facility’s existing network infrastructure to automate, monitor, document and report essential activities...
-
Page 3: Table Of Contents
Table of Contents Specifications: 72MHz Digital Clocks and Timers .................. 5 120 VAC wiring and power requirements ..................6 24 VAC wiring and power specifications ..................7 Tilt bracket and surface mounting dimensions ................8 Dual-sided mounting dimensions ....................9 Set display settings ........................ - Page 4 Regulatory Compliance Statements ....................37 FCC Statement ........................37 RADIO STANDARDS SPECIFICATION (RSS) ................38 5 YEAR LIMITED WARRANTY ......................39 Technical Support ......................... 40 Support through Primex Certified Sales and Service Partners ............40 Primex Technical Support ...................... 40 Page 4...
-
Page 5: Specifications: 72Mhz Digital Clocks And Timers
Specifications: 72MHz Digital Clocks and Timers Parameter Specification LED Display Highly visible 7-segment LED digits 2.5" model: 2.5” (6.4 cm) diagonal (hours and minutes), 1.4" (3.6 cm) diagonal (seconds) 4" model: 4.6” (11.7 cm) diagonal (hours and minutes), 2.5” (6.4 cm) diagonal (seconds) LED Display Dimmer 100%, 75%, 50%, 25%... -
Page 6: 120 Vac Wiring And Power Requirements
Components specifications The backside of a Levo Digital Clock/Timer houses the mounting, power, connection inputs, and setting panel. A. Key-Hole Mount (2) B. AC power supply and power cord with 2-prong plug (AC model). Power cord strain relief assembly with supplied washer and screw. -
Page 7: 24 Vac Wiring And Power Specifications
Clock Type Weight Max. Current Height (A) Width (B) Depth (C) Draw 4" (10.16 cm), 6- 4.6 lbs (2.1 kg) 260 mA 8.0" (20.3 cm) 23.3" (59.3 2.4" (6.1 cm) digit 24 VAC wiring and power specifications Follow all National and Local Building Codes when installing clocks. All clocks should be connected to a single power source. -
Page 8: Tilt Bracket And Surface Mounting Dimensions
Clock Type Weight Maximum Average Height (A) Width (B) Depth (C) Current* Current** 2.5" (6.4 cm), 1.8 lbs (0.8 0.7A 5.0" (12.7 10.8" (27.4 2.8" (5.6 4-digit 2.5" (6.4 cm), 2.0 lbs (0.9 1.2A 0.8A 5.0" (12.7 13.8" (34.9 2.2" (5.6 6-digit 4"... -
Page 9: Dual-Sided Mounting Dimensions
Single Digital Clock/Timer mounting dimension Clock/Model 2.5” 4-digit - 4° bracket 4.8” 10.6” 2.1” 6.0” 0.38” – 0.63” 8.0” 2.5” 2.5” 6-digit - 4° bracket 4.8” 13.6” 2.1" 6.0” 0.38” – 0.63” 8.0” 2.5” 2.5” 4-digit - 18° bracket 4.6" 10.6"... - Page 10 Page 10...
-
Page 11: Set Display Settings
Set display settings Levo Digital Clocks and Timers have a dip switch control panel that sets its display settings. To change the factory default settings, from the back side of the clock remove the small rectangular access panel. Setting changes can be made while the clock/timer is ON and changes will take effect within a few seconds. -
Page 12: Set Alternating Time/Date
To dim the LED by 75%, set the OPTIONS, DIM switch 1 to the ON position and DIM switch 2 to the ON position, as illustrated below. Set alternating time/date To set the display of a to alternate between the current time and date, set the HR OFFSET- Time/Date switch (1) to the ON position, as illustrated below. -
Page 13: Set Display To 24-Hour Time
Set display to 24-hour time To display 24-hour time, set the HR Offset - 12/24 HR switch (2) to the ON position, as illustrated below. Set PM indicator To enable the PM dot indicator, set the OPTIONS - PM DP switch (6) to the ON position, as illustrated below. Set offset hours The Clock/Timer displays the time received from the Transmitter. -
Page 14: Set Audible Buzzer (Timer Models Only)
Set Programmable Timer mode (programmable timer only) For Programmable Timer models, the timer schedule is configured in the Primex Event Scheduler Pro software to the schedule ID controller 24. The schedule is downloaded from the Event Scheduler Pro to the system Transmitter, allowing the Transmitter to broadcast the schedule. - Page 15 Page 15...
-
Page 16: Installation Requirements
Transmitter will set it into an 8 hour continuous transmit schedule. • Any damage to the clock due to improper wiring voids the warranty. It is at Primex discretion as to whether damage to the clock was caused by improper wiring. -
Page 17: Surface Mount
Surface mount Complete the instructions below to mount a Levo Digital Clock/Timer directly to the surface of a wall; either by a keyhole or tilt bracket mounting method. NOTE Most building codes prohibit the use of hardwired power connections for devices that can be removed without tools. - Page 18 (A) optional 4" x 4" junction box (B) 4 #10 screws and anchors. Refer to Dimension G/H Tilt bracket and surface mounting dimensions [8]. (C) Position top of device on the top two brackets posts and slide down and snap to bottom bracket (D). (E) Wire dressing exit (top and bottom) Apply power to the clock.
-
Page 19: Dual-Sided Mount
Dual-sided mount A dual-sided clock consists of two single clocks and a Dual Mount Kit. The kit contains a flange (piece that mounts to ceiling or wall), a bracket (piece that bolts to flange and to which two clocks are mounted), and the hardware necessary to complete the installation. - Page 20 NOTE If wall mounting to location outside of the junction box, break off or cut openings in flange to route power cords. Attach the bracket (B) to the flange (A) using the supplied shorter machine screws, nuts, and washers. Apply power to clocks (C); use cord retaining clips to dress wires. Align the clock to the bracket hooks and hinges (D) and snap into place.
-
Page 21: Flush Mount
Flush mount Complete the steps below to install a flush mount digital clock/timer to either a new or existing wall surface. Supplied components Flush Mount Junction Box. Material: ABS plastic, Color: black; UL listed (UL 50E 1st Ed; listing number E469550 Bezel. - Page 22 Existing Wall Surface: cut a 14.4 in. (36.5 cm) wide x 5.8 in.(14.7 cm) high wall opening between two wall studs. Securely mount the junction box to all studs using four common drywall screws (not supplied) at each of the corner locations.
- Page 23 Connect conduit connection(s) to the junction box. NOTE For timer models only, AC wiring is required to be located to the right side of the junction box divider and the timer input to the left side. New Wall Surface only: cut out a 14 in. (35.5 cm) wide x 5.25 in. (13.3 cm) high wall opening for placement of the clock assembly.
- Page 24 All LED segments display dashes and then dashes with a colon between the hours and minutes. Once the clock/timer receives a signal from the Transmitter, the LED segments display the time received from the Transmitter’s time source and a flashing red dot appears at the bottom right of the second hour digit for three minutes.
-
Page 25: Digital Clock/Timer With Remote Antenna Installation
Digital Clock/Timer with remote antenna installation Digital Clocks and Timers with a remote antenna are shipped from the factory with a BNC cable attached to the clock/ timer assembly. The remote antenna components are required to be assembled and mounted. Remote antenna components (1) Antenna (1) Mounting bracket... -
Page 26: Assemble Remote Antenna
Assemble remote antenna For vertical mount, connect the BNC cable adapter to the straight connector. For horizontal mount, remove the straight connector and connect the BNC cable adapter to right-angle connector. Push the adapter onto the connector and turn connector 1/4 turn to lock into place. NOTE Antenna is required to be in a vertical position. -
Page 27: Timer Control Switch Installation (Elapsed And Code Blue Timer)
Timer Control Switch installation (elapsed and code blue timer) Digital Elapsed Timers and Code Blue Timers include a three-button timer control switch that controls the timer functions. Supplied components • Timer control switch • 20 ft. (6.0 m) RJ11 cable (connects switch to timer). Cable length can be extended up to 100 ft. (30.4 m). Not supplied: single-gang junction box. - Page 28 NOTE The timer control switch membrane and wall plate may be cleaned with water or most common disinfectants. Be sure to test any cleaning solutions on a small area. Page 28...
-
Page 29: Operate An Elapsed Timer
Operate an Elapsed Timer An Elapsed Timer is a multi-function device that can operate as a digital clock displaying its synchronized time and as a timer with both count up and count down options. The three-button Timer Control Switch allows a user to start, stop, pause and reset the timer, and set its start time. -
Page 30: Manage Count Events
Clock Mode Count Up Mode Count Down Mode 10:45 02 0.0:00 00 99:59 59. Displays current time Decimal lit after the 10 hr digit Decimal lit after the 1 sec digit When power is first applied Count Up event can count from Count Down event can count down and when not in a count 00:00:00 up to a maximum of 99:59:59... -
Page 31: Set Count Event To Begin At A Specific Time Increment
To automatically stop the current count event and reset the count to its start time, press and release the RESET button once. To return to Clock Mode, which displays its synchronized time, press and release the DISPLAY button until the current time is displayed. - Page 32 Set to Count Down mode, press and release the DISPLAY button until 99:59 59 or its previously set start time is displayed, indicating it is in Count Down mode. Press and hold the SET/CHANGE button for 3 seconds to enter Set state, which is initially indicated by “ _ _:_ _ _ _” on the display and then the timer displays the last start time set or the default start time of 99:59 59.
-
Page 33: Operate A Code Blue Timer
Operate a Code Blue Timer Code Blue Timer operation overview • Code Blue Timer function is triggered by the input of the wired connection to a code blue system and the use of the three-button Timer Control Switch allows a user to halt a code blue count event. •... -
Page 34: Remove From Tilt Bracket
Remove from tilt bracket • 2.5” x 4 and 2.5” x 6: from the top of the bracket, using a screwdriver press each hook down to release the clock. Then pull out to unsnap bottom hinges. • 4” x 4 and 4” x 6: from the top of the bracket, insert a thin screwdriver into each notch and gently move the screwdriver sideways to unlock the clock. -
Page 35: Remove From Dual Mount Bracket
Remove from dual mount bracket • 2.5” x 4 and 2.5” x 6: from the top of the bracket, using a screwdriver press each hook down to release the clock. Then pull out to unsnap bottom hinges. • 4” x 4 and 4” x 6: from the top of the bracket, insert a thin screwdriver into each notch and gently move the screwdriver sideways to unlock the clock. -
Page 36: Important Safety Instructions
IMPORTANT SAFETY INSTRUCTIONS READ ALL INSTRUCTIONS BEFORE INSTALLATION, OPERATION, OR MAINTENANCE OF PRODUCT. Some of the following information may not apply to your particular product model; however, as with any electronic product, precautions should be observed during installation, operation, and maintenance. •... -
Page 37: Regulatory Compliance Statements
Regulatory Compliance Statements This device complies with Part 15 of the FCC rules and with RSS-GEN of Industry Canada. FCC Statement This equipment has been tested and found to comply with the limits for a Class B digital device, pursuant to part 15 of the FCC Rules. -
Page 38: Radio Standards Specification (Rss)
RADIO STANDARDS SPECIFICATION (RSS) This device complies with Industry Canada licence-exempt RSSs. Operation is subject to the following two conditions: (1) This device may not cause interference, and (2) This device must accept any interference, including interference that may cause undesired operation of the device. Le présent appareil est conforme aux CNR d'Industrie Canada applicables aux appareils radio exempts de licence. -
Page 39: Year Limited Warranty
All merchandise returned must be shipped to Primex, Inc. Attn: Returns Dept., N3211 County Road H, Lake Geneva, WI 53147. Primex, Inc. retains the exclusive right to repair or replace the unit at its sole discretion. -
Page 40: Technical Support
Ensuring our customers experience excellent service is of utmost importance to Primex. Our network of Certified Sales and Service Partners offers technical support services for Primex products. If you have purchased Primex products or have a service agreement with a Primex Partner, they are your primary contact for all Technical Support inquires.
Need help?
Do you have a question about the OneVue 72MHz Levo Series and is the answer not in the manual?
Questions and answers