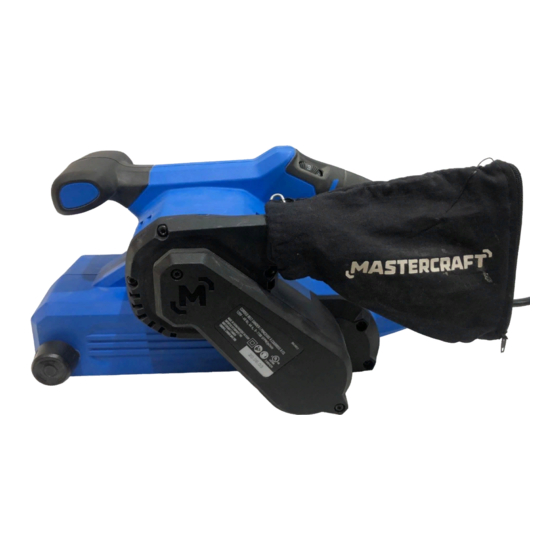
Summary of Contents for MasterCraft 054-2437-2
- Page 1 BELT SANDER 054-2437-2 INSTRUCTION IMPORTANT: Read and understand this instruction manual thoroughly MANUAL before using the product.
- Page 2 headline bars headline bars headline bars continuation tabs continuation tabs continuation tabs notes notes notes warnings warnings warnings...
-
Page 3: Table Of Contents
TABLE OF CONTENTS Technical Specifications Safety Guidelines Key Parts Diagram Operating Instructions Maintenance Troubleshooting Parts List Warranty NOTE: If any parts are missing or damaged, or if you have any questions, please call our toll-free helpline at 1-800-689-9928. SAVE THESE INSTRUCTIONS •... -
Page 4: Technical Specifications
054-2437-2 | contact us 1-800-689-9928 TECHNICAL SPECIFICATIONS Rated voltage 120 V~, 60 Hz Rated power input Variable speed 0-1100 SFPM Belt size 3 x 21” (7.6 x 53.3 cm) continuation tabs continuation tabs... -
Page 5: Safety Guidelines
SAFETY GUIDELINES: WARNING! Safety symbols in this Instruction Manual are used to flag possible dangers. The safety symbols and their explanations require your full understanding. The safety warnings do not, by themselves, eliminate any danger, nor are they substitutes for proper accident prevention measures. - Page 6 054-2437-2 | contact us 1-800-689-9928 ELECTRICAL SAFETY • Power tool plugs must match the outlet. Never modify the plug in any way. Do not use any adaptor plugs with earthed (grounded) power tools. Unmodified plugs and matching outlets will reduce risk of electric shock.
- Page 7 POWER TOOL USE AND CARE • Do not force the power tool. Use the correct power tool for your application. The correct power tool will do the job better and safer at the rate for which it was designed. • Do not use the power tool if the switch does not turn it on and off.
- Page 8 054-2437-2 | contact us 1-800-689-9928 W ....Watts min ....Minutes ....Alternating current or d.c ..Direct current ....No-load speed ....Class II Construction...
-
Page 9: Key Parts Diagram
PACKAGE CONTENTS: Belt sander, dust bag, 1 sanding belt (80 grit) and instruction manual KEY PARTS DIAGRAM Description No. Description Auxiliary handle Dust bag Belt adjustment knob On/off switch Variable-speed dial Quick release tension lever Lock-on button Sanding belt WARNING! •... -
Page 10: Operating Instructions
054-2437-2 | contact us 1-800-689-9928 OPERATING INSTRUCTIONS INSTALL THE SANDING BELT (fig 1) fig 1 1. Place sander on its side and pull the quick release tension lever out, as shown in fig 1. - Page 11 CLEAN THE DUST BAG (fig 3) fig 3 Check bag frequently and empty it before it gets full. Zipper To empty the dust bag, remove it from the tool. Open the zipper on back side of bag and empty the dust into waste container.
- Page 12 054-2437-2 | contact us 1-800-689-9928 TURN THE SANDER ON AND OFF (fig 6) fig 6 Lock-on button The tool can be turned on or off by squeezing or releasing the on/off switch.
-
Page 13: Maintenance
MAINTENANCE BEFORE EACH USE Before cleaning or performing any maintenance, make sure the sander has been disconnected from the power supply. Keep all ventilation openings clean. Avoid using solvents when cleaning plastic parts. Most plastics are susceptible to damage from various types of commercial solvents and may be damaged by their use. -
Page 14: Troubleshooting
054-2437-2 | contact us 1-800-689-9928 TROUBLESHOOTING Problem Possible Causes Solution Be sure the cooling vents are Clean and clear the vents. Do The motor is overheating. free from dust and obstacles. not cover the vents with your hand during operation. -
Page 15: Parts List
EXPLODED VIEW... - Page 16 054-2437-2 | contact us 1-800-689-9928 Part No. Description Part No. Description 5610248000 Self-Tapping Screw 5610024000 Self-Tapping Screw 3900304000 Handle Set 4870407000 Trigger Switch 3129725000 Right Fan Baffle...
-
Page 17: Warranty
This Mastercraft product is guaranteed for three (3) years from the date of original retail purchase against defects in materials and workmanship, except for the following components: a) Component A: Batteries, chargers and carrying case, which are guaranteed for a period of 2 years from the date of original retail purchase against defects in workmanship and materials;... - Page 18 054-2437-2 | contact us 1-800-689-9928 Additional Limitations This warranty applies only to the original purchaser and may not be transferred. Neither the retailer nor the manufacturer shall be liable for any other expense, loss or damage, including, without limitation, any indirect, incidental, consequential or exemplary damages arising in connection with the sale, use or inability to use this product.


Need help?
Do you have a question about the 054-2437-2 and is the answer not in the manual?
Questions and answers