Juniper JSA3800 Hardware Manual
Hide thumbs
Also See for JSA3800:
- How to set up (8 pages) ,
- Hardware manual (154 pages) ,
- Secure analytics hardware manual (127 pages)

Related Manuals for Juniper JSA3800


Summary of Contents for Juniper JSA3800
- Page 1 Juniper Secure Analytics 3800 Hardware Guide Modified: 2019-01-21 Copyright © 2019, Juniper Networks, Inc.
- Page 2 END USER LICENSE AGREEMENT The Juniper Networks product that is the subject of this technical documentation consists of (or is intended for use with) Juniper Networks software. Use of such software is subject to the terms and conditions of the End User License Agreement (“EULA”) posted at https://support.juniper.net/support/eula/.
-
Page 3: Table Of Contents
JSA3800 Appliance Description ........17... - Page 4 Maintaining JSA3800 Power System ........50...
- Page 5 TN Power Warning ..........88 Agency Approvals for the JSA3800 Appliance ......89 Compliance Statements for EMC Requirements for the JSA3800 Appliance .
- Page 6 Juniper Secure Analytics 3800 Hardware Guide Copyright © 2019, Juniper Networks, Inc.
- Page 7 Figure 4: JSA3800 Ethernet Port LEDs ........
- Page 8 Juniper Secure Analytics 3800 Hardware Guide viii Copyright © 2019, Juniper Networks, Inc.
- Page 9 Table 8: JSA3800 Appliance Physical Specifications ..... . 26 Table 9: Rack Requirements for JSA3800 ....... . 27 Table 10: Required JSA Ports .
- Page 10 Juniper Secure Analytics 3800 Hardware Guide Copyright © 2019, Juniper Networks, Inc.
-
Page 11: About The Documentation
® To obtain the most current version of all Juniper Networks technical documentation, see the product documentation page on the Juniper Networks website at https://www.juniper.net/documentation/ If the information in the latest release notes differs from the information in the documentation, follow the product Release Notes. -
Page 12: Table 1: Notice Icons
Juniper Secure Analytics 3800 Hardware Guide Table 1: Notice Icons Icon Meaning Description Informational note Indicates important features or instructions. Caution Indicates a situation that might result in loss of data or hardware damage. Warning Alerts you to the risk of personal injury or death. -
Page 13: Documentation Feedback
We encourage you to provide feedback so that we can improve our documentation. You can use either of the following methods: Online feedback system—Click TechLibrary Feedback, on the lower right of any page on the Juniper Networks TechLibrary site, and do one of the following: Copyright © 2019, Juniper Networks, Inc. xiii... -
Page 14: Requesting Technical Support
7 days a week, 365 days a year. Self-Help Online Tools and Resources For quick and easy problem resolution, Juniper Networks has designed an online self-service portal called the Customer Support Center (CSC) that provides you with the following features: Find CSC offerings: https://www.juniper.net/customers/support/... -
Page 15: Creating A Service Request With Jtac
About the Documentation Join and participate in the Juniper Networks Community Forum: https://www.juniper.net/company/communities/ Create a service request online: https://myjuniper.juniper.net To verify service entitlement by product serial number, use our Serial Number Entitlement (SNE) Tool: https://entitlementsearch.juniper.net/entitlementsearch/ Creating a Service Request with JTAC You can create a service request with JTAC on the Web or by telephone. - Page 16 Juniper Secure Analytics 3800 Hardware Guide Copyright © 2019, Juniper Networks, Inc.
-
Page 17: Overview
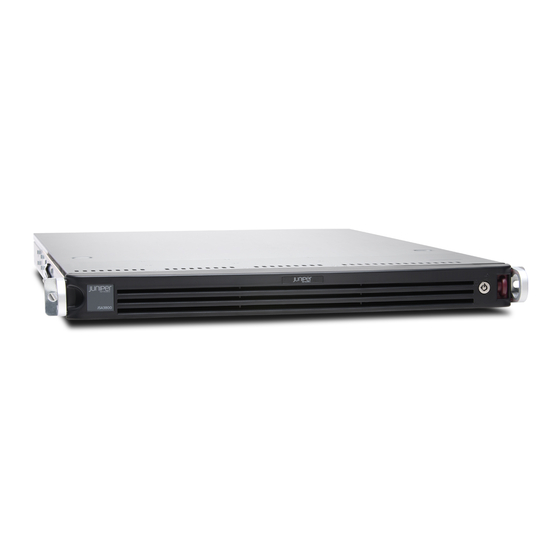
The JSA3800 appliance is a 1-U, rack-mountable chassis with AC power supplies (or optional DC power supplies), six hot-swappable hard drives, 64 GB memory, and two 10 Gigabit and four Gigabit Ethernet interfaces. -
Page 18: Jsa3800 Appliance Transceiver Interface
Hot-swappable FRUs are the components that you can remove and replace without powering off the device or disrupting the functions of the device. Hot-swappable FRUs supported by the JSA3800 appliance are the raid array and power supply. See Also... -
Page 19: Jsa3800 Chassis
Chapter 1: Overview Replacing DC Power Supply Cables on the JSA3800 Appliance on page 53 Replacing a DC Power Supply on the JSA3800 Appliance on page 52 Related JSA3800 Installation Overview on page 31 Documentation Configuring the JSA3800 on page 44... -
Page 20: Figure 2: Jsa3800 Front Panel Leds
Empty slots Empty hard drive slots. Figure 2 on page 20 shows the front panel LEDs of the JSA3800 appliance. Figure 2: JSA3800 Front Panel LEDs Table 5 on page 21 lists the JSA3800 front panel LEDs. -
Page 21: Jsa3800 Appliance Back Panel Description
JSA3800 Appliance Back Panel Description on page 21 JSA3800 Appliance Back Panel Description Figure 3 on page 21 shows the back panel components of the JSA3800 appliance. Figure 3: JSA3800 Back Panel Table 6 on page 22 provides information about the back panel components of the JSA3800 appliance. -
Page 22: Figure 4: Jsa3800 Ethernet Port Leds
4 USB ports. COM port 1 DB-9 COM port. Figure 4 on page 22 shows the back panel Ethernet port LEDs of the JSA3800 appliance. Figure 4: JSA3800 Ethernet Port LEDs Table 7 on page 22 lists the JSA3800 Ethernet port LEDs. -
Page 23: Overview
Chapter 1: Overview See Also JSA3800 Appliance Description on page 17 JSA3800 Appliance Front Panel Description on page 19 Related JSA3800 Appliance Transceiver Interface on page 18 Documentation JSA3800 System Overview on page 17 Copyright © 2019, Juniper Networks, Inc. - Page 24 Juniper Secure Analytics 3800 Hardware Guide Copyright © 2019, Juniper Networks, Inc.
-
Page 25: Site Planning, Preparation, And Specifications
Specifications JSA3800 Site Guidelines and Requirements on page 25 JSA3800 Site Guidelines and Requirements General Site Installation Guidelines for the JSA3800 Appliance on page 25 JSA3800 Appliance Physical Specifications on page 26 JSA3800 Appliance Rack Requirements on page 27 Additional Hardware Requirements for JSA3800 Appliance on page 28... -
Page 26: Jsa3800 Appliance Physical Specifications
Juniper Secure Analytics 3800 Hardware Guide JSA3800 Appliance Physical Specifications Table 8 on page 26 lists the specifications for the JSA3800 appliance. Table 8: JSA3800 Appliance Physical Specifications Specification JSA3800 Dimensions (D x W x H) 437 mm x 43 mm x 597 mm (17.2 in. x 1.7 in. x 23.5 in.) Weight 27.9 lb... -
Page 27: Jsa3800 Appliance Rack Requirements
Additional Hardware Requirements for JSA3800 Appliance on page 28 JSA3800 Appliance Rack Requirements The JSA3800 appliance can be installed in a four-post or two-post rack. Table 9 on page 27 provides the details of requirements for rack size, clearance, airflow, spacing of mounting brackets and flange holes, and connecting to the building structure. -
Page 28: Additional Hardware Requirements For Jsa3800 Appliance
JSA3800 Appliance Physical Specifications on page 26 General Site Installation Guidelines for the JSA3800 Appliance on page 25 Additional Hardware Requirements for JSA3800 Appliance Before installing your JSA3800 appliances, ensure that you have access to the following additional hardware components: A serial console. - Page 29 Chapter 2: Site Planning, Preparation, and Specifications Related JSA3800 System Overview on page 17 Documentation JSA3800 Chassis on page 19 JSA3800 Installation Overview on page 31 Copyright © 2019, Juniper Networks, Inc.
- Page 30 Juniper Secure Analytics 3800 Hardware Guide Copyright © 2019, Juniper Networks, Inc.
-
Page 31: Initial Installation And Configuration
Configuring the JSA3800 on page 44 JSA3800 Installation Overview Overview of Installing the JSA3800 Appliance in a Rack on page 31 Tools and Parts Required for Installing the JSA3800 Appliance on page 31 Overview of Installing the JSA3800 Appliance in a Rack The rack-mount system is flexible and offers several options for rack-mounting the hardware. -
Page 32: Installing The Jsa3800 In A Rack
ESD grounding wrist strap See Also Overview of Installing the JSA3800 Appliance in a Rack on page 31 Installing the JSA3800 Appliance Using Front-and-Rear-Mounting Flush in a Four-Post Rack on page 34 Mid-Mounting the JSA3800 Appliance in a Two-Post Rack on page 37... -
Page 33: Initial Installation And Configuration
Plug an RS-232 (DB-9 F/F) cable into the console port. Table 12 on page 33 describes the details of the DB-9 console port pinouts for the JSA3800 appliance. Table 12: DB-9 Console Connector Pinouts for the JSA3800 Appliance Signal Description Data Carrier Detect Receive Data Copyright ©... -
Page 34: Four-Post Rack
Connecting the JSA3800 Appliance to a DC Power Source on page 41 Installing the JSA3800 Appliance Using Front-and-Rear-Mounting Flush in a Four-Post Rack The JSA3800 appliance uses this mounting option as its default configuration. The rack mounting kit includes two rack rail assemblies. Each assembly consists of an inner fixed chassis rail that is secured to the server chassis and an outer fixed rack rail that is secured to the rack. -
Page 35: Figure 7: Attaching The Inner Rail Extension
To mount the JSA3800 appliance on a four-post rack: Install the inner rail extensions (optional). NOTE: The JSA3800 appliance includes a set of inner rails that are preattached to the chassis. You can attach optional inner rail extensions to stabilize the chassis within the rack. -
Page 36: Figure 8: Installing The Outer Rails In A Rack
Juniper Secure Analytics 3800 Hardware Guide Figure 8: Installing the Outer Rails in a Rack Align the rear of the chassis inner rails with the front of the rack rails as shown in Figure 9 on page Figure 9: Aligning the Chassis in a Rack... -
Page 37: Mid-Mounting The Jsa3800 Appliance In A Two-Post Rack
Chapter 3: Initial Installation and Configuration Figure 10: Installing the JSA3800 Appliance Front-Rear Mounting Flush in a Four-Post Rack (Optional) Insert and tighten the thumbscrews that secure the front of the server to the rack. See Also Overview of Installing the JSA3800 Appliance in a Rack on page 31... -
Page 38: Figure 11: Securing The Brackets To The Rack
Juniper Secure Analytics 3800 Hardware Guide Figure 11: Securing the Brackets to the Rack Mount the outer rails on the rack by securing the racks to the brackets using M5 screws as shown in Figure 12 on page Copyright © 2019, Juniper Networks, Inc. -
Page 39: Figure 12: Mounting The Outer Rails To The Rack
Figure 12: Mounting the Outer Rails to the Rack Secure an additional bracket to the front of each outer rail using two M5 screws as shown in Figure 13 on page Figure 13: Securing Brackets to the Outer Rail Copyright © 2019, Juniper Networks, Inc. -
Page 40: Figure 14: Attaching The Inner Rail Extension
Figure 15: Aligning and Installing the Chassis in a Two-Post Rack See Also Overview of Installing the JSA3800 Appliance in a Rack on page 31 Tools and Parts Required for Installing the JSA3800 Appliance on page 31 Installing the JSA3800 Appliance Using Front-and-Rear-Mounting Flush in a Four-Post Rack on page 34 Copyright ©... -
Page 41: Connecting The Jsa3800 To Power
Connecting the JSA3800 to Power Connecting the JSA3800 Appliance to Ground on page 41 Connecting the JSA3800 Appliance to a DC Power Source on page 41 Connecting the JSA3800 Appliance to Ground To meet safety and electromagnetic interference (EMI) requirements and to ensure proper operation, you must adequately ground the JSA3800 appliance before connecting it to the power source. - Page 42 One or both of the chassis ground terminal(s) located to the left of the power supply modules Both power supply ground terminals You connect DC source power to the JSA3800 appliance by attaching power cables from the external DC power sources to the terminal studs on the DC power feed faceplates. WARNING: DC-powered JSA3800 appliances are intended for installation only in restricted access locations.
-
Page 43: Connecting The Jsa3800 Appliance To A Management Device
Use the console port to connect your laptop as shown in Figure 16 on page Figure 16: Connecting the Management Device For the location of the ports, refer to the JSA3800 Back Panel Components table in “JSA3800 Appliance Back Panel Description” on page NOTE: You can choose any GB ports as the management port. -
Page 44: Configuring The Jsa3800
Related Connecting the JSA3800 Appliance to Ground on page 41 Documentation Connecting the JSA3800 Appliance to a DC Power Source on page 41 Installing the JSA3800 Appliance on page 32 Configuring the JSA3800 Configuring the Basic Settings on the JSA3800 Appliance on page 44... - Page 45 Email Server—Specify the e-mail server. If you do not have an e-mail server, specify the local host in this field. Use Tab to select Next . Press Enter. The New Root Password window appears. Copyright © 2019, Juniper Networks, Inc.
-
Page 46: Accessing The Jsa Interface
See Also Accessing the JSA Interface on page 46 JSA3800 Appliance Physical Specifications on page 26 Connecting the JSA3800 Appliance to a Management Device on page 43 Accessing the JSA Interface Purpose To access a Juniper Secure Analytics (JSA) interface: Action Open your Web browser. - Page 47 See Also Configuring the Basic Settings on the JSA3800 Appliance on page 44 JSA3800 Appliance Physical Specifications on page 26 Connecting the JSA3800 Appliance to a Management Device on page 43...
- Page 48 Juniper Secure Analytics 3800 Hardware Guide Copyright © 2019, Juniper Networks, Inc.
-
Page 49: Maintaining Components
Striping—Split data across more than one disk Error correction—Redundant data storage to detect and resolve problems The JSA3800 appliance ships with hot-swappable hard disks to offer component redundancy. The JSA3800 appliance uses the RAID10 configuration. In RAID10, drives are duplicated for fault tolerance. -
Page 50: Maintaining Jsa3800 Power System
Replacing DC Power Supply Cables on the JSA3800 Appliance on page 53 Maintaining the JSA3800 Power Supply The JSA3800 appliance ships with two AC power supply modules. If one power supply fails, the second power supply takes over the entire power load. -
Page 51: Replacing An Ac Power Supply On The Jsa3800 Appliance
See Also Replacing AC Power Supply Cables on the JSA3800 Appliance on page 51 Replacing DC Power Supply Cables on the JSA3800 Appliance on page 53 Replacing a DC Power Supply on the JSA3800 Appliance on page 52... -
Page 52: Replacing A Dc Power Supply On The Jsa3800 Appliance
See Also Replacing an AC Power Supply on the JSA3800 Appliance on page 51 Replacing DC Power Supply Cables on the JSA3800 Appliance on page 53 Replacing a DC Power Supply on the JSA3800 Appliance on page 52... -
Page 53: Replacing Dc Power Supply Cables On The Jsa3800 Appliance
JSA3800 Appliance to a DC Power Source” on page See Also Connecting the JSA3800 Appliance to a DC Power Source on page 41 Replacing AC Power Supply Cables on the JSA3800 Appliance on page 51 Replacing an AC Power Supply on the JSA3800 Appliance on page 51... - Page 54 Juniper Secure Analytics 3800 Hardware Guide Connecting the JSA3800 Appliance to a DC Power Source on page 41 Related Connecting the JSA3800 Appliance to a DC Power Source on page 41 Documentation JSA3800 Chassis on page 19 Copyright © 2019, Juniper Networks, Inc.
-
Page 55: Troubleshooting Hardware
Contacting Juniper Networks Technical Assistance Center on page 55 Contacting Juniper Networks Technical Assistance Center You can contact Juniper Networks Technical Assistance Center (JTAC) 24 hours a day, 7 days a week in one of the following ways: On the Web, using the Case Manager link at: https://www.juniper.net/support/... - Page 56 Juniper Secure Analytics 3800 Hardware Guide Copyright © 2019, Juniper Networks, Inc.
-
Page 57: Safety And Compliance Information
Warning Statement for Norway and Sweden on page 64 Fire Safety Requirements on page 64 Installation Instructions Warning on page 65 Chassis Lifting Guidelines for the JSA3800 Appliance on page 65 Ramp Warning on page 66 Rack-Mounting and Cabinet-Mounting Warnings on page 66... -
Page 58: Definitions Of Safety Warning Levels
Juniper Secure Analytics 3800 Hardware Guide Compliance Statements for EMC Requirements for the JSA3800 Appliance on page 90 Compliance Statements for Acoustic Noise for the JSA3800 Appliance on page 92 Definitions of Safety Warning Levels The documentation uses the following levels of safety warnings (there are two Warning... -
Page 59: General Safety Guidelines And Warnings
Keep tools away from areas where people could trip over them while walking. Do not wear loose clothing or jewelry, such as rings, bracelets, or chains, which could become caught in the device. Copyright © 2019, Juniper Networks, Inc. -
Page 60: Restricted Access Warning
Juniper Secure Analytics 3800 Hardware Guide Wear safety glasses if you are working under any conditions that could be hazardous to your eyes. Do not perform any actions that create a potential hazard to people or make the equipment unsafe. - Page 61 Varning! Denna enhet är avsedd för installation i områden med begränsat tillträde. Ett område med begränsat tillträde får endast tillträdas av servicepersonal med ett speciellt verktyg, lås och nyckel, eller annan Copyright © 2019, Juniper Networks, Inc.
-
Page 62: Qualified Personnel Warning
Juniper Secure Analytics 3800 Hardware Guide säkerhetsanordning, och kontrolleras av den auktoritet som ansvarar för området. Qualified Personnel Warning WARNING: Only trained and qualified personnel should install or replace the device. Waarschuwing Installatie en reparaties mogen uitsluitend door getraind en bevoegd personeel uitgevoerd worden. -
Page 63: Figure 17: Placing A Component Into An Antistatic Bag
ANSI/TIA/EIA-568 cables such as Category 5e and Category 6 can get electrostatically charged. To dissipate this charge, always ground the cables to a suitable and safe earth ground before connecting them to the system. Copyright © 2019, Juniper Networks, Inc. -
Page 64: Warning Statement For Norway And Sweden
In addition, you should establish procedures to protect your equipment in the event of a fire emergency. Juniper Networks products should be installed in an environment suitable for electronic equipment. We recommend that fire suppression equipment be available in the event of a fire in the vicinity of the equipment and that all local fire, safety, and electrical codes and ordinances be observed when you install and operate your equipment. -
Page 65: Installation Instructions Warning
To keep warranties effective, do not use a dry chemical fire extinguisher to control a fire at or near a Juniper Networks device. If a dry chemical fire extinguisher is used, the unit is no longer eligible for coverage under a service agreement. -
Page 66: Ramp Warning
“General Safety Guidelines and Warnings” on page Before lifting or moving the JSA3800 appliance, disconnect all external cables. As when lifting any heavy object, lift most of the weight with your legs rather than your back. Keep your knees bent and your back relatively straight and avoid twisting your body as you lift. - Page 67 De onderstaande richtlijnen worden verstrekt om uw veiligheid te verzekeren: De Juniper Networks switch moet in een stellage worden geïnstalleerd die aan een bouwsel is verankerd. Dit toestel dient onderaan in het rek gemonteerd te worden als het toestel het enige in het rek is.
- Page 68 Les directives ci-dessous sont destinées à assurer la protection du personnel: Le rack sur lequel est monté le Juniper Networks switch doit être fixé à la structure du bâtiment. Si cette unité constitue la seule unité montée en casier, elle doit être placée dans le bas.
- Page 69 Vær nøye med at systemet er stabilt. Følgende retningslinjer er gitt for å verne om sikkerheten: Juniper Networks switch må installeres i et stativ som er forankret til bygningsstrukturen. Denne enheten bør monteres nederst i kabinettet hvis dette er den eneste enheten i kabinettet.
-
Page 70: Grounded Equipment Warning
Följande riktlinjer ges för att trygga din säkerhet: Juniper Networks switch måste installeras i en ställning som är förankrad i byggnadens struktur. Om denna enhet är den enda enheten på ställningen skall den installeras längst ned på... -
Page 71: Laser And Led Safety Guidelines And Warnings
Chapter 6: Safety and Compliance Information Laser and LED Safety Guidelines and Warnings Juniper Networks devices are equipped with laser transmitters, which are considered a Class 1 Laser Product by the U.S. Food and Drug Administration and are evaluated as a Class 1 Laser Product per EN 60825-1 requirements. -
Page 72: Class 1 Led Product Warning
Juniper Secure Analytics 3800 Hardware Guide Varning! Laserprodukt av klass 1. Class 1 LED Product Warning WARNING: Class 1 LED product. Waarschuwing Klasse 1 LED-product. Varoitus Luokan 1 valodiodituote. Attention Alarme de produit LED Class I. Warnung Class 1 LED-Produktwarnung. -
Page 73: Radiation From Open Port Apertures Warning
Varning! Osynlig strålning kan avges från en portöppning utan ansluten fiberkabel och du bör därför undvika att bli utsatt för strålning genom att inte stirra in i oskyddade öppningar. Copyright © 2019, Juniper Networks, Inc. -
Page 74: Maintenance And Operational Safety Guidelines And Warnings
Juniper Secure Analytics 3800 Hardware Guide Maintenance and Operational Safety Guidelines and Warnings While performing the maintenance activities for devices, observe the following guidelines and warnings: Battery Handling Warning on page 74 Jewelry Removal Warning on page 75 Lightning Activity Warning on page 76... -
Page 75: Jewelry Removal Warning
(inclusi anelli, collane, braccialetti ed orologi). Gli oggetti metallici si riscaldano quando sono collegati tra punti di alimentazione e massa: possono causare ustioni gravi oppure il metallo può saldarsi ai terminali. Copyright © 2019, Juniper Networks, Inc. -
Page 76: Lightning Activity Warning
Juniper Secure Analytics 3800 Hardware Guide Advarsel Fjern alle smykker (inkludert ringer, halskjeder og klokker) før du skal arbeide på utstyr som er koblet til kraftledninger. Metallgjenstander som er koblet til kraftledninger og jord blir svært varme og kan forårsake alvorlige brannskader eller smelte fast til polene. -
Page 77: Operating Temperature Warning
6 in. (15.2 cm) of clearance around the ventilation openings. Waarschuwing Om te voorkomen dat welke switch van de Juniper Networks router dan ook oververhit raakt, dient u deze niet te bedienen op een plaats waar de maximale aanbevolen omgevingstemperatuur van 40°... -
Page 78: Product Disposal Warning
15,2 cm à volta das aberturas de ventilação. ¡Atención! Para impedir que un encaminador de la serie Juniper Networks switch se recaliente, no lo haga funcionar en un área en la que se supere la temperatura ambiente máxima recomendada de 40°... -
Page 79: Action To Take After An Electrical Accident
Canada—Canadian Electrical Code, Part 1, CSA C22.1. Locate the emergency power-off switch for the room in which you are working so that if an electrical accident occurs, you can quickly turn off the power. Copyright © 2019, Juniper Networks, Inc. -
Page 80: Ac Power Electrical Safety Guidelines
Juniper Secure Analytics 3800 Hardware Guide Make sure that grounding surfaces are cleaned and brought to a bright finish before grounding connections are made. Do not work alone if potentially hazardous conditions exist anywhere in your workspace. Never assume that power is disconnected from a circuit. Always check the circuit before starting to work. -
Page 81: Dc Power Electrical Safety Guidelines
For personal safety, connect the green and yellow wire to safety (earth) ground at both the device and the supply side of the DC wiring. Copyright © 2019, Juniper Networks, Inc. -
Page 82: Ac Power Disconnection Warning
Juniper Secure Analytics 3800 Hardware Guide The marked input voltage of –38 VDC for a DC-powered device is the nominal voltage associated with the battery circuit, and any higher voltages are only to be associated with float voltages for the charging function. -
Page 83: Dc Power Disconnection Warning
Advarsel Før noen av disse prosedyrene utføres, kontroller at strømmen er frakoblet likestrømkretsen. Sørg for at all strøm er slått AV. Dette gjøres ved å lokalisere strømbryteren på brytertavlen som betjener likestrømkretsen, slå strømbryteren AV og teipe bryterhåndtaket på strømbryteren i AV-stilling. Copyright © 2019, Juniper Networks, Inc. -
Page 84: Dc Power Grounding Requirements And Warning
Juniper Secure Analytics 3800 Hardware Guide Aviso Antes de executar um dos seguintes procedimentos, certifique-se que desligou a fonte de alimentação de energia do circuito de corrente contínua. Para se assegurar que toda a corrente foi DESLIGADA, localize o disjuntor no painel que serve o circuito de corrente contínua e coloque-o na posição OFF... -
Page 85: Dc Power Wiring Sequence Warning
è da massa a massa, da positivo a positivo (da linea ad L) e da negativo a negativo (da neutro a N). Tenere presente che il filo di massa deve sempre venire collegato per primo e scollegato per ultimo. Copyright © 2019, Juniper Networks, Inc. -
Page 86: Dc Power Wiring Terminations Warning
Juniper Secure Analytics 3800 Hardware Guide Advarsel Riktig tilkoples tilkoplingssekvens er jord til jord, +RTN til +RTN, –48 V til – 48 V. Riktig frakoples tilkoplingssekvens er –48 V til – 48 V, +RTN til +RTN, jord til jord. Aviso Ate con alambre la fuente de potencia cc Usando los terminales apropiados en el extremo del cableado. -
Page 87: Multiple Power Supplies Disconnection Warning
All connections must be removed completely to remove power from the unit completely. Waarschuwing Deze eenheid heeft meer dan één stroomtoevoerverbinding; alle verbindingen moeten volledig worden verwijderd om de stroom van deze eenheid volledig te verwijderen. Copyright © 2019, Juniper Networks, Inc. -
Page 88: Tn Power Warning
Juniper Secure Analytics 3800 Hardware Guide Varoitus Tässä laitteessa on useampia virtalähdekytkentöjä. Kaikki kytkennät on irrotettava kokonaan, jotta virta poistettaisiin täysin laitteesta. Attention Cette unité est équipée de plusieurs raccordements d'alimentation. Pour supprimer tout courant électrique de l'unité, tous les cordons d'alimentation doivent être débranchés. -
Page 89: Agency Approvals For The Jsa3800 Appliance
BSMI CNS 13438 and NCC C6357 Taiwan Radiated Emissions Environmental Reduction of Hazardous Substances (ROHS) 6 Related Compliance Statements for EMC Requirements for the JSA3800 Appliance on page 90 Documentation Compliance Statements for Acoustic Noise for the JSA3800 Appliance on page 92 Installation Instructions Warning on page 65... -
Page 90: Compliance Statements For Emc Requirements For The Jsa3800 Appliance
Juniper Secure Analytics 3800 Hardware Guide Compliance Statements for EMC Requirements for the JSA3800 Appliance This topic describes the EMC requirements for the JSA3800 appliance: Canada on page 90 European Community on page 90 Japan on page 91 Korea on page 91... -
Page 91: Japan
However, there is no guarantee that interference will not occur in a particular installation. Copyright © 2019, Juniper Networks, Inc. -
Page 92: Compliance Statements For Acoustic Noise For The Jsa3800 Appliance
Consult the dealer or an experienced radio or TV technician for help. Related Compliance Statements for Acoustic Noise for the JSA3800 Appliance on page 92 Documentation Agency Approvals for the JSA3800 Appliance on page 89 Installation Instructions Warning on page 65 Compliance Statements for Acoustic Noise for the JSA3800 Appliance Maschinenlärminformations-Verordnung - 3.
Need help?
Do you have a question about the JSA3800 and is the answer not in the manual?
Questions and answers