Juniper Junos Space JA1500 Installation Manual
Hide thumbs
Also See for Junos Space JA1500:
- Appliance installation manual (84 pages) ,
- Unpacking manual (2 pages) ,
- Hardware manual (210 pages)

Related Manuals for Juniper Junos Space JA1500


Summary of Contents for Juniper Junos Space JA1500
- Page 1 Junos Space JA1500 Appliance Installation Guide Release 1.0 Juniper Networks, Inc. 1194 North Mathilda Avenue Sunnyvale, California 94089 408-745-2000 www.juniper.net Published: 2009-12-01...
- Page 2 University of California. All rights reserved. Portions of the GateD software copyright © 1991, D. L. S. Associates. This product includes software developed by Maker Communications, Inc., copyright © 1996, 1997, Maker Communications, Inc. Junos Space JA1500 Appliance Installation Guide Release 1.0 Copyright ©...
- Page 3 (g) distribute any key for the Software provided by Juniper to any third party; (h) use the Software in any manner that extends or is broader than the uses purchased by Customer from Juniper or an authorized Juniper reseller;...
- Page 4 (or services are accessed by) the Software shall be a third party beneficiary with respect to this Agreement, and such licensor or vendor shall have the right to enforce this Agreement in its own name as if it were Juniper. In addition, certain third party software may be provided with the Software and is subject to the accompanying license(s), if any, of its respective owner(s).
- Page 5 Software, whether oral or written (including any inconsistent terms contained in a purchase order), except that the terms of a separate written agreement executed by an authorized Juniper representative and Customer shall govern to the extent such terms are inconsistent or conflict with terms contained herein.
-
Page 7: Table Of Contents
Power Supply ...................14 Part 2 Planning for the Junos Space JA1500 Appliance Chapter 3 JA1500 Appliance Rack Requirements Rack Requirements and Specifications for a Junos Space JA1500 Appliance ....................17 Environmental Requirements for the Junos Space JA1500 Appliance ....18 Table of Contents... - Page 8 Installing the Junos Space JA1500 Appliance Unpacking the Junos Space JA1500 Appliance ..........27 Attaching Mounting Brackets to a Junos Space JA1500 Appliance ....28 Installing the Junos Space JA1500 Appliance in a Rack and Connecting the Cables .....................29 Chapter 6 Configuring the JA1500 Appliance Software Booting and Configuring the Junos Space JA1500 Appliance ......31...
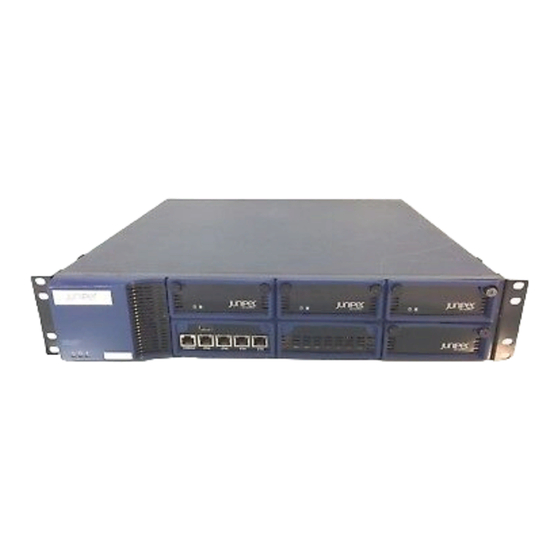
- Page 9 Junos Space JA1500 Appliance Overview Figure 1: Junos Space Appliance JA1500 ............3 Chapter 2 Understanding the Junos Space JA1500 Appliance Figure 2: Parts of the JA1500 Appliance Front Panel ........11 Figure 3: JA1500 Appliance LEDs ..............13 Figure 4: Parts of the JA1500 Rear Panel ............14...
- Page 10 Junos Space JA1500 Appliance Installation Guide List of Figures...
- Page 11 Chapter 2 Understanding the Junos Space JA1500 Appliance Table 1: JA1500 Appliance Front Panel LEDs ..........13 Part 2 Planning for the Junos Space JA1500 Appliance Chapter 3 JA1500 Appliance Rack Requirements Table 2: JA1500 Appliance Rack Requirements ..........17 Table 3: Environmental Requirements for Appliance Operation ....18 Table 4: Environmental Requirements for Appliance Storage ......19...
- Page 12 Junos Space JA1500 Appliance Installation Guide List of Tables...
-
Page 13: Part 1 Overview
Part 1 Overview Junos Space JA1500 Appliance Overview on page 3 Understanding the Junos Space JA1500 Appliance on page 11 Overview... - Page 14 Junos Space JA1500 Appliance Installation Guide Overview...
-
Page 15: Junos Space Ja1500 Appliance Overview
VPNs and provide services. The appliance makes it easy to manage networks of multiple families of Juniper Networks devices. The following Juniper routers are supported: Customer Premise Equipment (CPE)-based routers—J Series routers Service provider edge routers—MX Series and M series routers... - Page 16 When you configure each Junos Space JA1500 appliance with an NTP server, you ensure that, if the first node (which is used to synchronize time for all nodes in the fabric) goes down, all...
- Page 17 A Junos Space fabric comprises one or more IP-connected nodes. A node is a logical object that represents a single Junos Space JA1500 appliance or Junos Space virtual appliance, its operating system, and the Junos Space software that runs on the operating system.
-
Page 18: Single Node Functionality
Junos Space JA1500 Appliance Installation Guide Single Node Functionality When the fabric comprises a single appliance, all devices in the managed network connect to the appliance. When you install and configure the first appliance, Junos Space automatically creates a fabric with one node. By default, a fabric that consists... - Page 19 Chapter 1: Junos Space JA1500 Appliance Overview each additional appliance you install and configure, you must add a node to logically represent the appliance in the fabric. Each node that you add to the fabric increases the resource pool for the node functions to meet the scalability and availability requirements of your network.
- Page 20 Junos Space JA1500 Appliance Installation Guide high availability only. The following illustration shows the functions enabled on a fabric comprising two nodes. Add third node: Only the application logic functionality is enabled on the third node to provide equal distribution of device connections and user requests across all nodes, and route device-related operations to the node to which the device is connected.
-
Page 21: Node Function Availability
Chapter 1: Junos Space JA1500 Appliance Overview Node Function Availability In a fabric comprising two or more nodes, Junos Space provides failover when a node functioning as the active server (load balancer server or database server) goes down. By default, Junos Space marks a particular node down and routes failover requests to the node that Junos Space designates as standby server. - Page 22 Junos Space JA1500 Appliance Installation Guide Fabric Management Overview...
-
Page 23: Understanding The Junos Space Ja1500 Appliance
Parts of the Junos Space JA1500 Appliance on page 11 Parts of the Junos Space JA1500 Appliance The Junos Space JA1500 Appliance front panel, rear panel, and LEDs are described in the sections that follow. Parts of the JA1500 Appliance Front Panel Figure 2 on page 11 shows the parts of the JA1500 Appliance. -
Page 24: Mounting Brackets
One optional single input/output card (IOC) slot available for expansion I/O ports. The JA1500 ships with a dummy tray, located at the bottom right most slot, that can be removed and replaced with an upgrade I/O card. Parts of the Junos Space JA1500 Appliance... -
Page 25: Raid Controller
Chapter 2: Understanding the Junos Space JA1500 Appliance RAID Controller The JA1500 Appliance Redundant Array of Inexpensive Disks (RAID) controller manages the physical disk drives and presents them to the computer as logical units. Status LEDs The JA1500 Appliance LEDs are shown in Figure 3 on page 13. -
Page 26: Parts Of The Ja 1500 Rear Panel
If the JA1500 Appliance includes two power supplies, plug each power cord into a separate power circuit to ensure that the device continues to receive power if one of the power circuits fails. Parts of the Junos Space JA1500 Appliance... -
Page 27: Planning For The Junos Space Ja1500 Appliance
Part 2 Planning for the Junos Space JA1500 Appliance JA1500 Appliance Rack Requirements on page 17 JA1500 Appliance Safety Requirements on page 21 Planning for the Junos Space JA1500 Appliance... - Page 28 Junos Space JA1500 Appliance Installation Guide Planning for the Junos Space JA1500 Appliance...
-
Page 29: Ja1500 Appliance Rack Requirements
Power Requirements for a Junos Space JA1500 Appliance on page 19 Rack Requirements and Specifications for a Junos Space JA1500 Appliance The Junos Space JA1500 appliance has a 2U rackmountable chassis. It ships with 2-post and 4-post mounting hardware. The appliance can be installed in many types of racks, including four-post (telco) racks and open-frame racks. -
Page 30: Table 3: Environmental Requirements For Appliance Operation
The spacing of rails and adjacent racks must also allow for the clearances around the appliance and rack. Environmental Requirements for the Junos Space JA1500 Appliance The appliance must be installed in a rack or cabinet housed in a dry, clean, well-ventilated, and temperature-controlled environment. -
Page 31: Table 4: Environmental Requirements For Appliance Storage
The appliance can be stored safely in temperature range of –40° F to 158° F (-40° C to 70° C) Power Requirements for a Junos Space JA1500 Appliance A JA1500 Appliance can be powered by an AC electrical supply. Table 5 on page 19 shows the electrical power requirements for a JA1500 Appliance with AC power supplies. - Page 32 Junos Space JA1500 Appliance Installation Guide Power Requirements for a Junos Space JA1500 Appliance...
-
Page 33: Chapter 4 Ja1500 Appliance Safety Requirements
General Safety Guidelines and Warnings for the Junos Space JA1500 Appliance on page 21 Fire Safety Requirements for the Junos Space JA1500 Appliance on page 22 General Safety Guidelines and Warnings for the Junos Space JA1500 Appliance The following guidelines help ensure your safety and protect the appliance from damage. -
Page 34: Fire Safety Requirements For The Junos Space Ja1500 Appliance
In addition, you should establish procedures to protect your equipment in the event of a fire emergency. Juniper Networks products should be installed in an environment suitable for electronic equipment. We recommend that fire suppression equipment... - Page 35 NOTE: To keep warranties effective, do not use a dry chemical fire extinguisher to control a fire at or near a Juniper Networks appliance. If a dry chemical fire extinguisher is used, the unit is no longer eligible for coverage under a service agreement.
- Page 36 Junos Space JA1500 Appliance Installation Guide Fire Safety Requirements for the Junos Space JA1500 Appliance...
-
Page 37: Installing The Junos Space Ja1500 Appliance
Part 3 Installing the Junos Space JA1500 Appliance Installing the Junos Space JA1500 Appliance on page 27 Configuring the JA1500 Appliance Software on page 31 Changing Junos Space JA1500 Appliance Settings on page 37 Managing Nodes on page 41 Installing the Junos Space JA1500 Appliance... - Page 38 Junos Space JA1500 Appliance Installation Guide Installing the Junos Space JA1500 Appliance...
-
Page 39: Unpacking The Junos Space Ja1500 Appliance
Cables on page 29 Unpacking the Junos Space JA1500 Appliance The Junos Space JA1500 Appliance is shipped in a cardboard shipping container and is secured with foam packing material. The container also includes an accessory box. The following items, listed in Table 6 on page 27are included in the JA1500 appliance... - Page 40 Save the shipping container and packing materials in case you need to move or ship the appliance later. Attaching Mounting Brackets to a Junos Space JA1500 Appliance To install your physical appliance in a rack, you must attach mounting brackets to the appliance.
- Page 41 Phillips screwdriver. Installing the Junos Space JA1500 Appliance in a Rack and Connecting the Cables Before installing the physical appliance in a rack: Unpack the appliance, as described in “Unpacking the Junos Space JA1500 Appliance”...
- Page 42 This cable was shipped with your appliance. If you do not have this cable, use any other null modem serial cable. The basic hardware installation is now complete. The next step is to connect the physical appliance to a console. Installing the Junos Space JA1500 Appliance in a Rack and Connecting the Cables...
-
Page 43: Chapter 6 Configuring The Ja1500 Appliance Software
Configuring Basic Settings for a Junos Space JA1500 Appliance on page 32 Booting and Configuring the Junos Space JA1500 Appliance Follow these steps to start up the Junos Space JA1500 Appliance and install the Junos Space application and operating system. -
Page 44: Configuring Basic Settings For A Junos Space Ja1500 Appliance
All passwords are case sensitive. You see passwd: all authentication tokens updated successfully. This procedure allows you to configure the basic settings for your Junos Space JA1500 Appliance from the serial console. Configuring Basic Settings for a Junos Space JA1500 Appliance You must configure basic network and machine information to make your appliance accessible to the network. - Page 45 Starting httpd: httpd: Could not reliably determine the server's fully qualified domain name, using 10.155.65.191 for ServerName [ OK ] Starting MySQL.. SUCCESS! Welcome to the Junos Space Network Settings Utility. Configuring Basic Settings for a Junos Space JA1500 Appliance...
- Page 46 4> Change Time Options 5> Retrieve logs 6> (Debug) run shell Q> Quit R> Redraw menu Choice [1-6,QR]: Type Q to quit. The configuration of the JA1500 Appliance is now complete. Configuring Basic Settings for a Junos Space JA1500 Appliance...
- Page 47 Chapter 6: Configuring the JA1500 Appliance Software NOTE: To log in to the Junos Space user interface from a Web browser, Logging In To the System. Configuring Basic Settings for a Junos Space JA1500 Appliance...
- Page 48 Junos Space JA1500 Appliance Installation Guide Configuring Basic Settings for a Junos Space JA1500 Appliance...
-
Page 49: Changing Junos Space Ja1500 Appliance Settings
Chapter 7 Changing Junos Space JA1500 Appliance Settings Changing Network and System Settings for a Junos Space Appliance on page 37 Changing Network and System Settings for a Junos Space Appliance You can change some of the basic settings that you configured when you first installed and set up your Junos Space appliance. - Page 50 NTP server. NOTE: Juniper strongly recommends that you do not change the time zone for any node. Setting Routing Options...
-
Page 51: Retrieve Logs
Chapter 7: Changing Junos Space JA1500 Appliance Settings To change time options for an appliance: From the Junos Space Appliance Settings menu, enter 4 at the prompt. Enter 2 to set NTP servers. NTP servers automatically set the system clock based on external time sources. - Page 52 Junos Space JA1500 Appliance Installation Guide (Debug) Run Shell...
-
Page 53: Managing Nodes
Chapter 8 Managing Nodes Managing Nodes in the Fabric on page 41 Managing Nodes in the Fabric You can deploy one or more Junos Space appliances or virtual appliances to create a scalable fabric. As the number of devices on your network expands, you can add nodes to the fabric to manage the increased workload. - Page 54 Junos Space JA1500 Appliance Installation Guide In the Name field, enter a name for the node. In the IP address field, enter the IP address of the Junos Space appliance or virtual appliance. Schedule the Add Fabric Node operation: Clear the...
-
Page 55: Part 4 Index
Part 4 Index Index on page 45 Index... - Page 56 Junos Space JA1500 Appliance Installation Guide Index...
- Page 57 RAID controller.............13 hard disks.............12 rear panel.............14 LEDs..............13 safety warnings.............21 parts of..............11 system settings, changing........37 ports..............12 unpacking.............27 RAID controller.............13 Juniper Networks devices, supported......3 Index...
- Page 58 Junos Space JA1500 Appliance Installation Guide status logs, retrieving..........39 time, changing............38 LEDs, status..............13 unpacking JA1500 Appliance........27 mounting brackets............12 attaching...............28 warnings, general safety..........21 node overview..............5 redundancy.............9 nodes adding..............41 how connected in Junos Space fabric......4 managing in fabric..........41 NTP server guidelines...............5 overview..............4 to synchronize time..........38...
Need help?
Do you have a question about the Junos Space JA1500 and is the answer not in the manual?
Questions and answers