Juniper JSA7800 Quick Start Manual
Hide thumbs
Also See for JSA7800:
- Hardware manual (111 pages) ,
- Manual (18 pages) ,
- How to set up (11 pages)
Table of Contents
Advertisement
Quick Links
Quick Start Guide
How to Set Up Your JSA7800 Appliance
IN THIS GUIDE
Overview | 1
Package Contents | 2
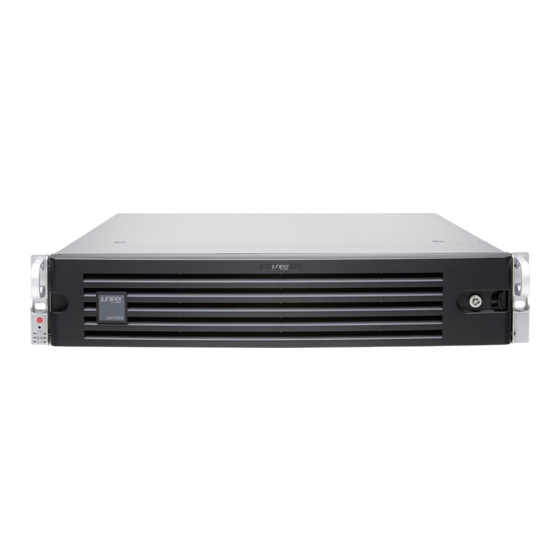
Front Panel | 2
Back Panel | 3
References | 13
Overview
Juniper Secure Analytics 7800 (JSA7800) is an enterprise and carrier-class appliance that provides a scalable network
security management solution for medium-sized companies up to large global organizations.
The JSA7800 appliance is a 2-rack-unit (2-U), rack-mountable chassis with AC power supplies (or optional DC power
supplies), sixteen hot-swappable hard drives, 128-GB memory, and two 10-Gigabit Ethernet SFP+ interfaces and four
1-Gigabit Ethernet interfaces.
Advertisement
Table of Contents

Related Manuals for Juniper JSA7800


Summary of Contents for Juniper JSA7800
-
Page 1: Table Of Contents
The JSA7800 appliance is a 2-rack-unit (2-U), rack-mountable chassis with AC power supplies (or optional DC power supplies), sixteen hot-swappable hard drives, 128-GB memory, and two 10-Gigabit Ethernet SFP+ interfaces and four... -
Page 2: Package Contents
Package Contents Following are the items available in the package: JSA7800 appliance End-User License Agreement Warranty and Registration Information Quick-Start Guide Power cords Rail adapters DB9 adapter Rail kit Rail kit screws Front Panel Front bezel Lock Power button Hard drives 0-15... -
Page 3: Back Panel
465 W Maximum thermal output 1699 BTU/hour Noise level Full operation 1M to Front: 68.4 dB Full operation 1M to Rear: 70.8 dB Initial Configuration Process Connecting the Configuring a Powering On Verifying the Management JSA7800 the Device Settings Device Appliance... -
Page 4: Step 1: Powering On The Appliance
Step 1: Powering On the Appliance CAUTION: Before connecting the appliance to the power supply, attach an ESD strap to an ESD point and place the other end of the strap around your bare wrist. 1. Plug the power cord into the AC receptacle on the rear panel. If your appliance contains two power supplies, plug a power cord into each AC receptacle. -
Page 5: Step 2: Connecting The Management Device
State LAN1— Indicates eno1 interface activity when blinking. LAN2— Indicates eno2 interface activity when blinking. Information Red (blinking)— Indicates a fan failure. Solid red— Indicates an overheat condition, which might be caused by cables obstructing the airflow in the system or the ambient room temperature being too warm. Red (slowly blinking)—... -
Page 6: Step 3: Configuring A Jsa7800 Appliance
If your laptop or PC does not have a DB-9 plug connector pin and you want to connect your laptop or PC directly to the JSA7800 appliance, use a combination of a USB to DB-9 plug adapter and a DB-9 F/F cable. - Page 7 NOTE: Use the up/down arrow keys to highlight another option and press the spacebar to make the selection. Use the left/right arrow keys to select Next, Back or Cancel, then press Enter. Selecting an Appliance ID and Tuning Your Appliance 1.
- Page 8 Configuring Date and Time for Your Appliance 1. Select the method you want to use to set the date and time. Manual— Allows you to manually input the date and time. Select Next. Server— Allows you to specify your time server. Select Next. 2.
- Page 9 3. Select your time zone region, and then select Next.
- Page 10 Selecting the Internet Protocol and Configuring Your Appliance 1. Select one of the Internet protocols, IPv6 or IPv4. 2. Select Next. The Management Interface window appears. 3. Select the management interface, and then select Next. 4. Enter the values for the following parameters: Hostname—...
- Page 11 Optional— Secondary DNS and Public IP. Email server— E-mail server name. If you do not have an e-mail server, specify the local host in this field. 5. Enter the new admin password. Re-enter your new admin password to confirm. NOTE: The Admin Password Setup screen appears only in case of TA/LA All-In-One or Console installation.
-
Page 12: Step 4: Verifying The Settings
<admin password> is the new admin password that you set during the configuration process. 3. Click Login. With this step, you have successfully completed the configuration, and your JSA7800 appliance is ready for use. Powering Off the Appliance You can power off the appliance in one of the following ways:... -
Page 13: References
Safety Guide https://www.juniper.net/documentation/hardware/safety-guide/translated/index.html Juniper Networks, the Juniper Networks logo, Juniper, and Junos are registered trademarks of Juniper Networks, Inc. in the United States and other countries. All other trademarks, service marks, registered marks, or registered service marks are the property of their respective owners. Juniper Networks assumes no responsibility for any inaccuracies in this document. Juniper Networks reserves the right to change, modify, transfer, or otherwise revise this publication without notice.
Need help?
Do you have a question about the JSA7800 and is the answer not in the manual?
Questions and answers